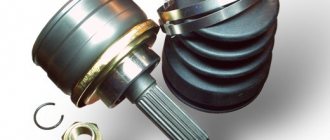
One of the typical components, exclusively for front-wheel drive models, is the CV joint. Its full name is a constant velocity joint. Well, among car enthusiasts, CV joints are often called grenades, due to their external resemblance. The task of this unit is to transmit torque from the gearbox to the wheel hub. Each wheel has two CV joints: internal and external;
The inner CV joint goes into the gearbox, and the outer one goes directly into the wheel hub. Both of these CV joints are connected to each other and in this way transmit torque from the box to the wheels. Now we will look at the main symptoms of a CV joint failure.
How to determine a CV joint failure
The first sign of a malfunction in the constant velocity joint is a slight crunch that appears when you back up and turn the steering wheel to its extreme position. If this situation repeats, then with a high probability, the CV joint has begun to die. Then knocking noises will begin during normal turns, and even during small steering maneuvers. But with this problem, you can still drive, and even for quite a long time. But when shocks appear during acceleration, and later, specific slippage, then the CV joint needs to be changed.
Why do you need a CV joint?
Kit for replacing external grenade VAZ 2110
CV joint is a shortened name for the angular velocity joint, designed to transmit torque or torque directly to the wheel. But, whatever one may say, sooner or later there comes a time when a grenade needs to be replaced, because it is a mechanism. As a rule, the price of high-quality CV joints for vases, especially external ones, is not low, but it is better to buy expensive ones right away, so that you will remember about replacing them again after a long time. The wheel drive, to be precise, is not only an external grenade. It consists of an inner and outer grenade connected to each other by a drive shaft.
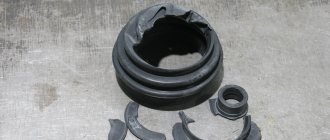
VAZ 2110 external grenade torn
If the inner CV joint is very susceptible to sand and dust and you should constantly monitor its boot (see How to replace the boot), which should not remain in a torn state for a long time, then the situation with the outer grenade is not so bad.
Note. This does not mean that the external grenade requires less attention. It’s just that both CV joints are structurally different from each other.
- Replacement of both CV joints is usually carried out after certain symptoms appear. The most common is a noise or knocking noise that comes from the side of the bridge when the car is moving. The knocking noise is especially noticeable when cornering. And at such a moment, even among the people it is customary to say: “a grenade crunched on the car.”
- You can finally check the version of a failed grenade as follows: drive into the sand and turn the steering wheel to the side. After this, you will need to start moving with slipping. And if at this moment a crunch is clearly heard, it means that the grenade no longer works.
- The external grenade, as well as the internal one, should be replaced immediately. The fact is that if you do not change the CV joint for a long time, the drive mechanism may jam and the car will not be able to start moving. And this can happen anywhere. For example, on a highway where a motorist stops to refuel or rest. You will have to call a tow truck or change the grenade on the spot, which is very inconvenient.
- The CV joint can be regular or tripoidal. The design of the second grenade is fundamentally different from the first, but it’s still the same, and many people install it on the drive of their car.
Causes of CV joint failure
The service life of a CV joint is influenced by many factors, but the main ones are:
- boot damage;
- driving at high speed on uneven roads;
- play on ball joints;
- incorrect installation;
If the boot is damaged, moisture gets inside, which gradually washes away the lubricant. In addition, dust, sand, and dirt get on the rubbing parts of the grenade. All this contributes to accelerated wear of the CV joint. If you find the slightest damage to the boot, it should be replaced, and do not forget to stuff lubricants under the boot. By the way, in this case, a special lubricant is needed. It's called a CV joint. Regular inspection of the lower part of the car and checking the condition of the boots can significantly extend the life of grenades.
As for driving on uneven roads, it is not only the CV joints that kill it. Generally speaking, it’s easier to say that driving in a car doesn’t suffer from such driving. Therefore, if you want to repair your car as rarely as possible, try to drive as carefully as possible.
Distortions and other errors when replacing a CV joint also significantly shorten its life. Therefore, if you are not sure that you can replace this part yourself, it is better not to try. It will be cheaper to pay a specialist for the work than to buy a new CV joint after several thousand kilometers. And of course, you shouldn’t buy low-quality products, since, although they cost little, they last virtually the same amount.
Let's talk more about play in ball joints. The play resulting from wear of the support will also negatively affect the condition of the CV joint. And if, while driving at speed, the ball joint pin is torn out of the mount, the inner CV joint may even be broken. By the way, all the main blows of fate are taken by external grenades. And this is due to the fact that they are connected through the hub to the wheel. It is from the wheel that the constant velocity joint receives powerful blows and shocks. And water and dirt from under the wheels get faster and more onto the outer CV joints. Therefore, in order to damage the CV joint that connects to the box, you need to try. The exception is the situation when the ball joint pin is pulled out.
Causes of malfunctions
In theory, the CV joint is made of durable metal, since a large load is expected on this part. According to manufacturers, the service life of the grenade is quite long, but in practice, this is not always the case. There are several reasons for the accelerated failure of mechanics:
- Counterfeit or defective parts;
- Poor lubrication;
- Abrasive debris getting into the CV joint after damage to the boot;
- Bad roads;
- Aggressive driving style.
All this can lead to breakdowns, often quite unexpected.
Replacing a faulty CV joint
Since repairing a worn CV joint, apart from replacing the boot and lubricant, is practically impossible, we are almost always talking about replacing it. And as we have already said, replacing a grenade is a rather complex and time-consuming task, and therefore it is better to entrust it to a professional. This requires special pullers, keys, as well as skills and abilities. You will have to remove the hub, which in itself is not an easy task. As for replacing the inner CV joint, it is even more difficult. Therefore, amateur activity in such matters is absolutely not welcome. It will be better if you check the condition of the anthers more often. In general, even replacing the boot is not a five-minute procedure.
Replacing grenades
Replacing internal grenades of a VAZ 2110
The cause of this noise is the appearance of a small depression in the metal base. The ball located inside the grenade begins to move freely along this recess. Due to the constant movements of the grenade, this recess often remains on the other side of the mechanism, and the noise stops appearing, and the car can please its owner for some time. The only black spot in this set of circumstances will be driving in reverse. With this movement of the vehicle, the noise will appear again and again. There are several standard ways to replace a part of a VAZ 2110 car. One of the repair options is to replace the internal grenade with complete dismantling of the car drive. The next method of removing a grenade from a car is the one that involves the presence of a drive on the hub (see VAZ 2110: replacing the hub using a proven method). In this case, only the grenade is dismantled. This method is labor-intensive, but there are times when the nut cannot be removed and its damage is unacceptable. In this case, the second method is much more practical. The main difference between the first method is convenience, which is missing in the second example. All work, when using the second method, is carried out under the car, which is extremely inconvenient for a person making repairs at home.
Video on the topic
1200 rub. for the photo report
We pay for photo reports on car repairs. Earnings from 10,000 rubles/month.
Write:
When joint (constant velocity joint) crunches when turning The most important thing in this case is to find out which CV joint is crunching , because front-wheel drive cars have as many as four “grenades,” as this unit is popularly called. It is also important to understand whether it is the CV joint that is the source of the unpleasant sounds or another part of the car’s suspension. Next, we will try to systematize the information and shed light on the issue of diagnosing and repairing the constant velocity joint of a machine.
Replacing the CV joint on a VAZ 2110
A CV joint is an angular velocity joint. An alternative name is considered to be grenade due to its visual similarity. The main purpose is to transmit rotational movements between the axle shafts. The angle, due to rotation, constantly changes in relation to each other.
Periodic breakdowns are associated with the influence of constant loads; the issue remains during the period of operation. In the manufacturing process of the part, strong carbon steel is used, which can withstand heavy loads for a long period of time.
Over time, the VAZ 2110 CV joint still needs to be replaced. Among the main reasons for failure is contamination with sand getting inside the mechanisms, loss of lubricant, torn boots or mechanical damage to the structure.
Types and design of CV joints
Before we move on directly to describing the signs and causes that indicate problems with CV joints, we need to find out what they are for and what they are. This will make it easier for you to understand how to diagnose and repair them in the future.
Types and location of CV joints
The job of any constant velocity joint is to transmit torque between the axle shafts when they are at different angles at different times. CV joints are used in front-wheel drive and all-wheel drive vehicles to allow the front wheel to turn and rotate under load. There are several types of hinges, but we will not dwell on this in detail. It is important to know that, basically, they are divided into internal and external . Any front-wheel drive car has only four CV joints - two internal and two external, in pairs on each front wheel. The task of the internal one is to transmit torque from the gearbox to the shaft. The task of the external one is to transmit torque from the internal joint directly to the wheel.
a tripod inserted into it - a set of needle bearings operating in three planes. The main shaft (from the “glass” side) is inserted into the gearbox, and another axle shaft is inserted into the tripod, to which torque is transmitted. That is, the design of the internal CV joint is simple, and, as a rule, problems with it arise infrequently. The only mandatory condition for the normal operation of the hinge (this also applies to the external “grenade”) is the presence of lubricant inside it and the integrity of the boot. You can read about choosing a lubricant in a separate article.
Inner and outer CV joints paired
The outer CV joint is a more complex and fragile structure. On one side it is connected to the internal hinge through the axle shaft, and on the other - directly to the hub through its own splined shaft. The design of the outer hinge is based on a ball cage . It can rotate within the angular ranges specified by the design. It is the ball mechanism that is most often the reason why the CV joint crunches. A boot is placed on the body of the external “grenade”, which reliably protects the insides from dust and dirt. The normal operation of the device directly depends on this, and according to statistics, it is a torn boot that is the root cause of the complete or partial failure of this mechanism.
Operation of the outer CV joint
Remember that any constant velocity joint experiences greater loads the greater the angle at which its two axle shafts operate. If they are parallel to each other, then the load on the node is minimal; accordingly, at a maximum angle, the load will be maximum. It is thanks to this property that a faulty hinge can be identified, which we will talk about next.
Device
Installation of internal and external CV joints
The drive system consists of the following joints:
- two internal ones, which are installed directly in the gearbox, drive the axle shaft (one on each side);
- two external ones are located on the hubs and serve to transmit torque to the wheels.
It may seem that they have the same service life. But in reality, everything is not quite like that, the internal ones work longer, while the external ones fail much more often. The reason for this is that the loads that arise when the car moves on the wheel hub are too high, as well as the fact that the outer CV joint rotates at a much larger angle than the inner one. External differences can also be noted - the size of internal grenades is much larger than external ones.
How to identify a crisp CV joint
Finding out which “grenade” crunches is quite simple. First of all, you need to understand that the characteristic crunching or creaking noise when turning is produced by the outer CV joint. The inner joint may make a clicking noise on a straight road. We will touch on diagnostic algorithms below.
The crunching sound of the outer CV joint usually occurs when the driver turns with the wheels fully or strongly turned (in their direction). This is especially audible if you also “give on the gas” at this time. At this moment, the hinge experiences maximum or close to this load, and if it is faulty, then the mentioned sounds occur. Externally, this may manifest itself in the fact that you will feel “kickback” in the steering wheel when turning.
As for internal CV joints , their failure is more difficult to diagnose. Usually a similar sound comes from them when driving on an uneven road, and the deeper the holes the wheel gets into, the greater the load the joint experiences, and accordingly, the more it crunches. In some cases, a malfunction of the internal CV joint is diagnosed by vibration and “twitching” of the car during acceleration and at high speeds (about 100 km/h or more). Even when driving on a straight and level road (symptoms resemble a situation when the wheels are not balanced).
Next, let's move on to answering the question of how to determine which CV joint is crunching, internal or external. There are several verification algorithms. Let's start with the outer hinges.
Symptoms of a problem
Since the part will break in any case, you need to find out in time and begin repairs. If this is not done, the hinge may collapse while driving, which will lock the drive shaft, abruptly immobilize the car, and may lead to an accident. For safe travel, you will need to find out whether the CV joint has one of the signs of failure:
- Crunching sound when turning a moving car.
- Backlash (dips) in joints.
- A crunching sound when starting to move, which intensifies during sudden acceleration.
- Jerks while accelerating.
All of the above factors can indicate problems not only with the grenade, but also with other components of the car.
Important! At the first suspicious sounds or deterioration in controllability, the car should be sent to a car service center to carry out a full diagnosis and identify the problem.
Definition of a crunching sound from an outer CV joint
Outer CV joint design
It is necessary to choose a flat area on which you can drive a car. Turn the wheels to one side as far as they will go and drive off quickly. This will put more stress on the hinge, and if it is faulty, you will hear a familiar sound. By the way, you can listen to it yourself (with the windows open) or with an assistant so that he is near the wheel while the car is moving. The second case is especially good for diagnosing right CV joints, since the sound from there reaches the driver worse. However, similar procedures can be carried out on the road or in the field, so as not to bother and look for an additional place for tests.
Diagnosis of damage
It is not enough to know the signs to determine a malfunction of the internal or external CV joint. Noise can also occur due to other defects in suspension parts. You should identify the symptoms to find out about a CV joint failure. Defects in internal and external hinges are diagnosed differently. What they have in common is working under increased loads and in extreme positions. This is the only way to determine critical wear without removing the hinges from the car.
Checking the internal hinge
To check the internal grenade and determine the faulty CV joint, you need to load these parts. When driving a car, drivers use two diagnostic methods: driving over obstacles and overloading the car. In the first case, they drive along an uneven road with potholes and bumps. To do this, select a section of the canvas so that the obstacles are located on one side. Alternately drive at a speed of 15-20 km/h over uneven surfaces with the right and left wheels. If there are defects, when you hit potholes there will be a characteristic knock in the area where the hinges are attached.
The second method is to overload the car so that the front of the car lifts slightly. In this case, the internal hinges will work at critical angles, which will provoke the appearance of more obvious noise. To make the car heavier, drivers place passengers in the back seat and load heavy objects into the trunk. When the front of the car is slightly raised, drive through a flat section of the road, preferably with an upward slope. Under increased load, the joint should knock more.
For your information!
It's not just the drive that can make noise when the car is moving. To accurately determine the failure of the internal CV joint, you need to diagnose the unit at a service station or service workshop.
Outdoor
Once the signs appear, it will not be difficult to identify a malfunction of the outer CV joint. The driver needs to choose a flat area where he can freely drive in different directions without disturbing anyone. To diagnose, you need to alternately turn the wheels to the right and left, and quickly move away. The joint with the groove will make a crunching noise. Due to the large distance between the parts, it will be easy to determine the side where the defective CV joint is located.
It is better to listen to the sound coming from the transmission with the windows open. You can choose a site next to the wall. In this case, the effect will be amplification of sound waves when they are reflected from an obstacle and reach the driver. You can also ask an assistant to listen to the noise coming from the transmission parts. As a rule, when turning right, the left CV joint will make noise, and vice versa. This is explained by the forces of inertia acting on the car and the redistribution of the load.
Universal joint test
The diagnostic algorithm allows you to more accurately determine which parts are damaged. Sequencing:
- Place the car on a level surface, secure the rear wheels with the hand brake, and place wheel chocks.
- Use a jack to jack up the front right and left wheels one by one. For safety, it is better to install supports under the body.
- Start the engine and engage first gear. At this time, the hanging wheel will begin to rotate.
- To diagnose the internal joint, smoothly press the brake pedal, loading the drive. The appearance of noise near the gearbox indicates wear of the part.
- To check the outer CV joint, turn the steering wheel completely, alternately to the right and to the left. If only the inner joint is faulty, the sound will not change. When the external one wears out, tapping will also be added to the general noise.
How the inner CV joint crunches
Inner CV joint design
Internal hinges are diagnosed differently. To determine which CV joint is faulty, left or right, you need to find a straight road with significant potholes and drive along it. If the hinge is broken, it will “knock.”
Let us describe another interesting method for determining how the inner CV joint crunches, which consists in not hanging the wheels, but significantly making the rear part of the car heavier (put a lot of people in, load the trunk), that is, make the front of the car rise and the axle of the inner CV joint curved as much as possible. If in this position you hear a crunching sound while moving, then this is one of the signs of a malfunction of the mentioned unit.
Tuning and repair of VAZ 2110
In this article we will look at how to remove and reinstall the front wheel drives of a VAZ 2110.
It is more convenient to carry out this type of repair on an inspection hole or overpass.
- Transmission oil needs to be drained
- Now you should remove the mudguard from the engine.
- Unscrew the bearing nut from the front hub.
- Unscrew the bolts on the ball joint (2 pcs.)
5. Move the steering knuckle and the strut slightly to the side and remove the drive from the hub.
6. Place the drive on the stretcher.
7. Use a mounting spatula to rest against the clutch housing and pull the inner joint housing out of the gearbox. Be careful not to damage the protective ring on the inner hinge.
8. We remove the right drive.
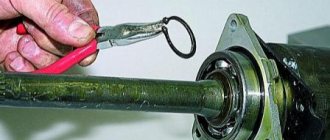
9. Use a knife or screwdriver to pry up the retaining ring on the splined end of the inner hinge housing and remove it.
10. To dismantle the second drive or to remove the gearbox, you will need to insert a plug into the hole. The plug should fit in shape, similar to the shank on the inner joint body. Such a plug can be made of wood.
11. Dismantling the left drive is similar to the right one. For convenience, the mounting blade rests on the bolt for fastening the wheel.
12. In the same way, we pull out the internal hinge housing and remove the left drive of the VAZ 2110.
It will be better if you install a new snap ring on the inner joint shank.
13. To install the drive in place, insert the inner joint housing into the gearbox and lightly tap the end of the outer joint with a copper hammer.
14. Now we insert the drive into the hub.
15. That's all, replacing the front wheel drive of the VAZ 2110 is completed.
Source
Universal diagnostic method
Diagnosis of a malfunction of the internal CV joint
We present to you an algorithm for another, universal option, how to find out which “grenade” is crunchy. You need to act in the following sequence:
- Place the car wheels level.
- Raise one of the front wheels using a jack.
- Put the car on the handbrake and neutral gear.
- Start the engine, depress the clutch, engage first gear and slowly release the clutch, that is, “move off” (as a result, the suspended wheel will begin to rotate).
- Slowly press the brake pedal, creating a natural load on the joint. If one of the internal “grenades” is faulty, then at this time you will hear familiar knocking sounds on the left or right side. If the internal CV joints are in order, then the car will simply start to stall.
- Turn the steering wheel all the way to the left. Slowly press the brake pedal. If the internal “grenade” is faulty, it will continue to knock. If the outer left CV joint is also faulty, then sound will also be added from it.
- Turn the steering wheel all the way to the right. Carry out similar procedures. If a knocking noise occurs when the steering wheel is turned to the right, it means that the right outer joint is faulty.
- Be sure to put the gear in neutral, turn off the engine, and wait until the wheel comes to a complete stop before lowering it to the ground.
Diagnostics
To ensure that you avoid problems with a CV joint that pops out while driving, it is necessary to carry out diagnostic work in a timely manner. At least once a month, inspect the condition of the boot; if it is damaged, be sure to correct this problem. Failure detection is carried out as follows:
- A common method is to start with the wheels turned out
. To carry out such diagnostics, you will need to turn the wheels and start sharply from a place. The presence of a specific crunch will mean problems with the CV joints; - Raise the wheel on a jack, ideally you should use a lift, but garages usually don't have them. Then we inspect the CV joint; there should be no visible damage on it. Also try moving the wheel. The hinge should not have any play;
- This method is more complicated, but quite reliable. The front of the car is hanging out. First gear is engaged, if you have an automatic transmission, select mode
– D. Start the engine and listen to the wheels. They should not make even the slightest crunch.
Actually, this is all that can be done for diagnosis. It should be noted that this process at service stations is completely identical to the methods described.
Why does the CV joint start to crunch?
Constant velocity joints, both internal and external, are quite reliable mechanisms, and with proper care their service life can be calculated in years. In some cases, it is even comparable to the service life of the entire car. However, this circumstance directly depends on the care and operating conditions of CV joints.
One of the reasons why joints fail prematurely is an aggressive driving style and/or poor road surface on which the car is driven. As mentioned above, CV joints experience maximum load during sharp turns and high torque from the engine (in other words, when the driver enters a turn “with gas”). As for bad roads, they can damage not only the car’s suspension, but also the CV joint, since a similar situation is created here. For example, the driver accelerates the car through the CV joint, and at this time the wheel oscillates significantly in the vertical plane. Accordingly, under such conditions the hinge also experiences increased load.
Torn CV boot and lubricant splashed from it
The second reason why the CV joint begins to crunch is damage to its boot . This is especially true for the outer CV joint, since it is located in close proximity to the wheel, and accordingly, a significant amount of dust and dirt gets on its body. Under the boot there is a lubricant, which, when moisture and dirt gets into it, immediately turns into an abrasive compound that begins to destroy the surfaces of the internal joint components. This should under no circumstances be allowed. It is necessary to regularly check the condition of the boot in the inspection hole, as well as the presence of lubricant in it. Also check if there is any grease on the wheel rims and parts close to it, because often when the boot is torn, it simply splashes onto the mentioned surfaces.
The third reason why the “grenade” crunches when turning is the natural wear of its internal components under normal operating conditions. This is especially true for cheap Chinese or domestic CV joints. If the mechanism is made of “raw” or low-quality metal, then the service life of such a unit will be short. In the outer hinge, at the point of contact between the balls and the cage, a groove gradually begins to appear. As a result, the designated balls roll very freely, along grooves having a larger diameter than the balls themselves. This rolling is perceived by the human ear as a kind of crunch.
Detecting play on the CV joint
An additional sign of partial failure of the CV joint is the appearance of play on the shaft or axle shaft. It is quite easy to detect it by driving the car into the inspection hole and tugging at the corresponding parts with your hand.
Possible causes of crunching
An experienced driver can by ear determine the location of a car malfunction. This quality comes with age. However, it is very difficult to confuse the crunch of a grenade with another sound. Let's figure out what a CV joint is. On the outside it is made in the form of a bowl, and on the inside the body has semicircular grooves. There are six of them.
In the internal space there is a spherical fist (clip) with 6 grooves and a splined connection for the axle shaft. Rotation occurs through the force that the cage transmits to the body through the balls located in the separator. The balls, moving along the grooves, change the angle between the axes.
- low-quality or defective products, including counterfeit ones, have been identified;
- low-quality lubricants are used or they are absent;
- boot damage;
- driving on bad roads or aggressive driving style.
Each part has its own production resource. And over time, play appears in the hinges. The rolling of the balls, now more free, produces a sound reminiscent of crunching. It may appear when turning, sharp acceleration, or overcoming obstacles.
There are 2 grenades installed on the drive wheels (internal and external): the first transmits rotation from the gearbox, the second - from the axle shaft to the wheel hub. Therefore, if an extraneous sound occurs, you need to determine which CV joint is making the sound (located on the left or right, inside or outside).
The design of these grenades is the same, they differ only in size (the outer one is smaller). Outer CV joints wear out more intensively because the loads and turning angles are greater. Knowing the design and difference of grenades, which ones wear out, how quickly and why, the car owner will more carefully monitor the condition of the CV joints.
How to repair a CV joint
Damage to the internal parts of the hinge most often leads to a complete replacement of the mechanism. However, this only happens with significant wear. In most cases, it is recommended to simply replace the CV joint grease and boot. This is often enough to get rid of the annoying sound and make it easier for the parts to interact.
Therefore, if knocking or clicking sounds appear on one of the four CV joints (we will assume that you have already found out which one), you must perform the following steps:
New inner CV joint
- Drive the car into the inspection pit in order to check the integrity of the boots and the presence of lubricant splashes from under them on nearby surfaces.
- If traces of grease are visible on the boot or other parts, it is necessary to remove the CV joint. Next, disassemble it, remove the boot, wash the internal parts and surfaces, change the lubricant and boot.
- If during the inspection process you find significant play and/or damage to the working surfaces of the parts, you can try to polish them. However, as practice shows, this procedure is ineffective, since you cannot eliminate significant waste with anything. Therefore, the best recommendation would be to completely replace the CV joint .
You can replace the lubricant and boot yourself, as the procedure is simple. The main thing is, when disassembling, do not forget to wash all internal parts and surfaces with gasoline, thinner or other cleaning liquid. And only then apply new lubricant. However, if you are dismantling and replacing the lubricant for the first time, then it is better to have a more experienced car owner or technician with you. Or have him perform the procedure and show you its algorithm. In the future, you can easily cope with such work.
Conclusion
Constant velocity joints are reliable and durable mechanisms. However, during operation, it is necessary to constantly monitor their condition in order to determine in time which CV joint is crunching or making other unpleasant sounds. After all, this indicates a malfunction in its operation. Hinge failure at the initial stage is not critical . You can drive hundreds or even a thousand kilometers with a crunch. However, you should remember that the sooner you repair or replace the CV joint, the cheaper it will cost you. In addition, do not forget about safety. Do not bring the condition of the hinge to a critical state , as this threatens you with a serious emergency situation, especially at high speed. We hope that the above information helped you figure out what to do when the CV joint crunches and accurately determine which one is faulty.
View Queue
Queue
- delete everything
- Disable
Reasons causing breakdown
CV joint malfunctions can occur for a variety of reasons, for example, when hitting a curb, falling into a hole, etc. However, most often this unit fails due to banal damage to the boot.
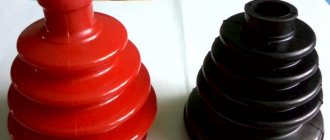
The boot (corrugated rubber or silicone cover) protects the CV joint parts from dust, dirt, moisture, etc. In addition, to increase service life, the CV joint boot is filled with a special liquid lubricant made on the basis of barium. The lubricant envelops the surfaces of parts and must maintain its properties in the temperature range from -30 to 160°C.
Structurally, a CV joint is the same bearing, only a little more complex, and the ingress of abrasive particles or moisture has a negative impact on the external surfaces of friction parts. When exposed to negative factors, the parts of friction pairs wear out faster, traces of wear appear on them and backlash occurs. If abrasive particles get into the lubricant, the latter can be pressed between the rubbing parts, which also contributes to their accelerated wear.
When the boot ruptures, the tightness of the space in which the CV joint operates is broken and, under the influence of the environment, the unit very quickly fails. As a rule, a malfunction of the grenade does not lead to a catastrophic accident, but it may well create a situation where the trip will be continued on a tow truck.
The only way to avoid a “grenade” breaking due to a torn boot is a preventive inspection of their locations. If even slight damage is detected, it is necessary to replace the boot as quickly as possible. After all, even through a minor puncture, the lubricant will be displaced, which will lead to a decrease in its quantity and, ultimately, to increased wear of the CV joint parts.
Troubleshooting
The appearance of a “crunch” that is unusual for the ear while the car is moving indicates a malfunction of one or more “grenades”. In this case, a characteristic “crunch” can be heard:
- while turning the car;
- at the moment when the car starts moving. It can be heard especially well during a sharp start;
In addition, jerking may be felt when accelerating the vehicle.
Having heard a “crunch”, the car owner must at least approximately determine which of the components is damaged. Any driver can do this.
There are several ways to determine a faulty CV joint:
- On a stationary car, you need to “tug” the drive shaft between the CV joints. When manufacturing a CV joint, the parts are adjusted so precisely that there is no shaft play. Therefore, the detection of even a slight play indicates the presence of wear and you need to prepare to replace the unit.
- While driving - performing various maneuvers, listen carefully to the sounds that appear:
— outer CV joints are checked when the car is moving on a flat section of the road, turning the steering wheel sequentially to the left and then to the right. On which side the “crunch” is heard, on that side the faulty CV joint is located;
Video text
How to determine a CV joint failure using simple methods. How to check which CV joint is crunching and what will happen if the outer or inner grenade wears out. The video shows diagnostics of an Audi A6 C5 axle shaft with characteristic signs of a malfunction of the outer CV joint.
Useful videos: Replacing the outer CV joint of the Audi A6 C5 without removing the arms https://www.youtube.com/watch?v=wcSrg. Replacing CV joints from A to Z https://www.youtube.com/watch?v=Sp3V0. How to replace the CV joint and boot of an Audi A6 / Passat B5 https://www.youtube.com/watch?v=TszC-.
If you want to keep up to date with the latest repairs of Audi, Volkswagen, Skoda, I recommend subscribing to the channel. **************************************** ***********************
Thanks to everyone who LIKES the video)))))
Removing and replacing front wheel drives on a VAZ 2110
Front wheel drives are the parts that literally allow the car to move. The drives are removed when replacing CV joints (“grenades”) and when dismantling the gearbox. The wheel drive can be damaged, bent, as a result of driving into a deep hole at high speed or any similar physical impact. Next, we will look at how to remove and replace front wheel drives on a VAZ 2110 and its modifications.
1. First, drain the gearbox oil. To do this, use a 17 key to unscrew the plug shown in the photo.
The box contains approximately 4 liters of oil. Prepare a clean container of this volume in advance. Then tighten the cap.
2. The second step is to unscrew the front wheel bearing nut (Replacing the front wheel bearing)
3. Then remove a couple of ball joint bolts. (Replacement of ball joint VAZ 2110)
4. Move the steering knuckle to the side and remove the drive from the hub and place it on the stretcher.
5. Using a spatula as a lever, push the inner joint housing out of the gearbox. Do not damage the inner joint protective ring.
6. Now you can completely remove the right drive. 7. Pry up the retaining ring that secures the drive in the gearbox and remove it. 9. If you need to remove the left drive or gearbox, you need to put a plug in the hole in shape and size, similar to the shank of the internal joint housing. 10. The left drive is removed in the same way as the right one.
Useful : For convenience, the mounting blade can be rested on the wheel mounting bolt, which is inserted into the recess of the gearbox housing.
11. Press out the inner joint housing and remove the left drive.
IMPORTANT : When installing the front wheel drive, the retaining ring on the shank of the inner joint housing must be replaced with a new one.
12. Insert the shank of the inner joint housing into the hole in the gearbox and push it into place by pushing the entire drive, or by hitting the end of the outer joint with a copper hammer.
Source
Grenade device
Front-wheel drive and CV joint
What is a CV joint? This is a kind of hinge, which is responsible for equal angular velocities. The VAZ CV joint, or as this part of the grenade is called, serves to transmit torque directly to the wheels of the car. The design of this part, although responsible for important running parameters, is a fairly simple design. Thus, a car grenade consists only of a ball-type bearing, rotating not along its axis, as is customary, but across it.
Note. In other words, a hinge or grenade connects axle shafts that are at an angle to each other. At the same time, we should not forget that this angle is constantly changing, and the grenade or CV joint is the part that normalizes all this.
The principle of operation of the grenade is as follows: the hinge allows the drive front wheel to make turns in different directions without difficulty. And it is noteworthy that the design of all grenade joints in different cars, including the VAZ 2110, is the same.
Design Features
It is worth noting that although all grenades are the same in design, their sizes may be different. In particular, you should know that in the same car, two grenades of different sizes are intended for each wheel. These hinges are as follows:
- an internal joint that transmits rotation from the gearbox gear to the shaft;
- an external joint designed to transmit rotation from the shaft to the hub.
Since the CV joint is a hinge, it is not surprising that its design must have independent elements, simply called balls. It is they who transmit the rotational motion from the leading to the driven part.
Note. There are as many as six balls in a grenade. They don’t sit in the CV joint just like that, but are placed in a special holder. The clip itself is located between the body and the inner cage. It seems to sit on a driven shaft, which is a bowl.
Replacing the external grenade of a VAZ 2110
The body itself and the holder are equipped with special grooves, which allows the balls to move along them. As for the joints of the structure, it is reliably protected by a boot, which is a rubber elastic cap.
Correct replacement of anthers
Very often, when inspecting a car, cracks in the boot of the outer grenade are discovered. Typically, such gusts cause dirt to get inside the housing. All this ultimately leads to the need to change the entire grenade. But this is very expensive and unprofitable. In order not to lead the situation to such repairs, you just need to replace the boot on time. For this purpose you must have:
- set of wrenches;
- wheel wrench;
- mount.
Chocks are placed under the rear wheels, and the car is set on the handbrake. The sequence of further work is as follows.
- The wheel bolts are unscrewed.
- The car is jacked up.
- Additional support is provided.
- The wheel is removed.
- Use a screwdriver to remove the protective cap.
- The mudguard covering the engine is unscrewed.
- The oil is drained from the gearbox.
- The bolts holding the ball joint are unscrewed. If they have turned sour, they need to be sprayed with a special liquid.
- The assistant must apply the brake and hold it. This way, it will be possible to unscrew the nut that holds the drive shaft and wheel hub.
- The thrust washer is removed.
- The wheels need to be turned towards the wheel where the axle is removed.
- The outer grenade is pulled out. To prevent the shaft from falling, it is tied to a suspension. A thorough inspection of the boot is carried out.
- The inner grenade of the VAZ 2110 is pressed out using a pry bar.
You need to remove all the drive shafts before pressing out the second shaft. Insert the old housing from the internal grenade into the gearbox. This must be done, as the installation of the semi-axial gears will be disrupted. As a result, it will become almost impossible to reinstall the drive shafts.
Types of clamps on the CV joint boot
Now it’s time to talk about what kinds of clamps there are, how to deal with them, and which clamps for the CV joint boot are better?
First type
Let's start with the most popular. This is the so-called “Ford” clamp. Recently, it can increasingly be found in kits from various manufacturers of grenades for the VAZ 2110 and other domestic cars. Among its advantages, of course, is the full connector, that is, if you accidentally forget to put it on in advance, you can do it at any time. Besides, you can’t “pull him over.”
Among the disadvantages, of course, is its disposability; you can use it a maximum of 2 times. Many may think that there is always a new one in the kit, but they would be extremely mistaken. It also happens that he is not there. Anything can happen.
To install it, you will need pliers or regular bokoser-nippers. We just tighten it as much as we can with our hands, then squeeze it.
Second type
These are purebred Chinese clamps. As soon as you see them, you will immediately understand why there is such an opinion about them. These clamps are simply made almost from foil. That is why they are tightened in two turns. To install, simply place a screwdriver into the plastic to avoid turning, then tighten, bend, bend the antennae, and cut off the excess.
The advantages include ease of installation; absolutely no tools are needed except a screwdriver. Well, the downside, as with the previous option, is that it is disposable, since after installation you will have to cut off the extra tail of the clamp with scissors.
Consequences of a CV joint crunch
Is it possible to drive with a CV joint crunching? It all depends on the degree of wear and tear. At the initial stage of the breakdown, you can drive, but it is not advisable , since the operation of the unit leads to even greater damage. Therefore, the sooner you try to repair the hinge, the, firstly, it will cost you less (perhaps everything will cost you by replacing the lubricant), and secondly, you will not put the life and health of you and your passengers in the car at risk.
So, the consequences of a CV joint crunching can be:
- Jamming . That is, the CV joint will stop rotating. This is especially dangerous at speed, as you risk losing control of the car, which can be fatal. You can try to wedge the hinge, but the best solution is to replace it.
- Clip break . If we talk specifically about an external grenade, then when it comes to the wedge, the clip simply breaks, the balls scatter, and then the consequences are unpredictable.
- Shaft or axle shaft rupture . In this case, the gearbox will turn only the designated parts, but for obvious reasons the torque will not be transmitted to the drive wheel. This is the most extreme case, and further movement of the car is possible only with a tow truck or tow truck. Naturally, the only correct solution in this case will be to replace the CV joint. And you will be lucky if you only have to change the hinge itself. After all, there is a risk that other parts nearby will be damaged during this accident.
Recommendations for replacement
First you need to purchase the latest part of the appropriate properties. With all this, it is important not to confuse the CV joint for the Niva with a similar one from the VAZ 2114 or another model of the “tenth” family. The units suitable for the VAZ 21213 have 24 splines and are designated by the following catalog numbers:
The products are sold complete with anthers; new clamps must be purchased separately. To carry out the replacement, you will have to devote a sufficient amount of time, since the Niva box is more difficult and takes longer to disassemble than that of the VAZ 2110 . There you will need to unscrew 2 ball joints instead of one and press out the steering rod ball pin.
Before installation on the car, it is necessary to remove the elastic covers from new products and check for the presence of lubricant. If necessary, add the required amount, and put the covers back and securely tighten them with clamps. After installing new CV joints and assembling the car, it is recommended to go out and check it while driving around corners, making sure that all extraneous sounds have disappeared.
Correct replacement of anthers
Very often, when inspecting a car, cracks in the boot of the outer grenade are discovered. Typically, such gusts cause dirt to get inside the housing. All this ultimately leads to the need to change the entire grenade. But this is very expensive and unprofitable. In order not to lead the situation to such repairs, you just need to replace the boot on time. For this purpose you must have:
- set of wrenches;
- wheel wrench;
- mount.
Chocks are placed under the rear wheels, and the car is set on the handbrake. The sequence of further work is as follows.
- The wheel bolts are unscrewed.
- The car is jacked up.
- Additional support is provided.
- The wheel is removed.
- Use a screwdriver to remove the protective cap.
- The mudguard covering the engine is unscrewed.
- The oil is drained from the gearbox.
- The bolts holding the ball joint are unscrewed. If they have turned sour, they need to be sprayed with a special liquid.
- The assistant must apply the brake and hold it. This way, it will be possible to unscrew the nut that holds the drive shaft and wheel hub.
- The thrust washer is removed.
- The wheels need to be turned towards the wheel where the axle is removed.
- The outer grenade is pulled out. To prevent the shaft from falling, it is tied to a suspension. A thorough inspection of the boot is carried out.
- The internal grenade of a VAZ is pressed out using a pry bar 2110.
You need to remove all the drive shafts before pressing out the second shaft. Insert the old housing from the internal grenade into the gearbox. This must be done, as the installation of the semi-axial gears will be disrupted. As a result, it will become almost impossible to reinstall the drive shafts.
Replacing the outer CV joint with a 2110
Replacing an external grenade on a VAZ 2110 can be a serious problem if you don’t have some special tools at hand. However, for every non-standard situation there is a non-standard way out. How to change a grenade on a VAZ 2110 quickly and without difficulty is in the article.
To begin with, what is a CV joint? This is the correct name for the grenade, the second is a popular name, due to the specific shape of the part. There are 6 bearings installed inside it, on which the inner race rotates. Therefore, torque can be transmitted to the hub at any angle.
