Imagine the situation: when you turn the steering wheel again, suddenly a frightening metallic crunch is heard and the car does not move - the inner part of the outer CV joint has been destroyed due to the ingress of water and sand. And the culprit is a ruptured boot of the constant velocity joint. Ask yourself, when was the last time you inspected it for integrity? But automakers recommend periodic inspections of protective covers to prevent expensive repairs.
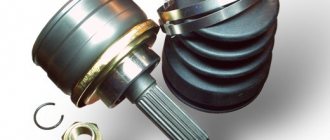
The CV joint boot is an inexpensive, quickly replaced in a car service and very important part, which, if damaged, can lead to expensive repairs and immobilization of the car. You just need to tear it slightly, and dust, salt, dirt and water immediately get inside, onto the rubbing pairs of the constant velocity joint, which lead to very rapid destruction of the moving parts. Usually the separator is destroyed, and scuffing also occurs on the cage and balls.
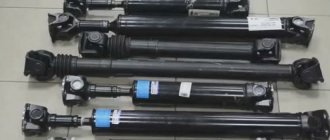
We decided to conduct a small test, for which we purchased 16 outer CV joint boots for front-wheel drive VAZ 2108-2170 models - two of each brand. And also, for comparison, we purchased a set of boots from a world manufacturer for a fairly common foreign car Nissan Pathfinder/Navara, similar in size to boots for Lada cars.
When purchasing, by the way, I had to deal with the peculiarities of business in Russian: almost all products do not have packaging, some manufacturers do not bother assigning company numbers or providing at least some information about the product and its manufacturer. Added to all this are incomprehensible storage conditions and transportation of these components in potato bags. And this is not a metaphor! Apparently, one of the factors in this attitude towards spare parts is their waste price. In our case, prices for outer CV joint covers for most Lada cars range from 150 to 300 rubles.
Tests
Anthers of all brands, one piece at a time, were placed in a freezer at a temperature of –40 ºС and kept for 24 hours. The anthers were then tested for fragility. All presented CV joint covers were able to pass this stage.
The second stage was lowering the temperature to –50 ºС and repeating the exposure of the products for one day. Then the anthers were taken out again and checked for fragility by attempting a sharp compression.
The corrugations of the Weber and ATP anthers crumbled at this temperature into small rubber fragments like glass. The Hofer and Trek cases, although they became very hard, did not receive any damage. The remaining samples passed the tests without consequences.
The second stage was checking the samples we purchased for resource.
The boots were lubricated with CV joint grease and installed on a special stand for accelerated life tests. The main parameter of the boot life is, in fact, the number of compression-extension cycles sustained. Therefore, the installation consists of two shafts rotating on bearings, one of which is driven by electric motors located at an angle of 45º relative to each other (requirement GOST R52924-2008). The rotation speed of the drive shaft is 1500 rpm, and knowing the wheel size for the VAZ 2108 (185/60R14), it is quite easy to calculate the expected speed of the car.
The linear speed of the wheel is determined by the formula:
ϑ=ωR, where ω – angular velocity,
which is determined by ω=2πν, where ν is the rotation frequency.
The wheel diameter size is easily calculated:
185/60R14=0.185x0.6x2+14x2.54/100=0.5776 m
The speed of linear motion will be equal to:
ϑ=3.14x1500x0.5776=45.34 m/s (163.2 km/h)
Thus, the warranty mileage of 50 thousand km on the boot stand is completed in 306 hours.
Only the BRT, ATR, Trek, Trialli anthers, as well as the NTN-SNR case, withstood the endurance tests without consequences. The rest exploded in the area of the upper corrugation.
The TSN dust bag lasted only 5 hours. Weber lasted a day. "Horse" - two. The Hofer ruptured after 91 hours of testing.
Which CV joint boot is better?
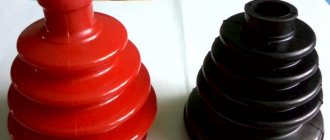
There are several options for the material from which the boot is made. These are rubber, silicone, polyurethane or plastic.
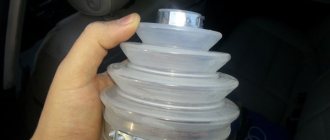
Plastic (thermoplastic)
Plastic boot
Most often, original anthers are plastic (thermoplastic). With them, operation will last longer - which means such anther will last longer. At least many drivers prefer a plastic boot because of its durability. Service life 10-20-30 years
The only problem with them is the band clamps, which can come loose if not installed correctly. But there are sets of boots from branded manufacturers, which already include clamps and lubricant.
Plus, when replacing it yourself, you can use wire cutters or special tools for clamps.
Silicone
Silicone boot
Next, the best and longest-lasting anthers are silicone ones. But they are so soft that they can tear when driving a car through fields, forests, along country roads - where there is no asphalt. In an urban environment they feel quite worthy. Such anthers last 5-10-15 years.
Good to know: Dimexide in the engine is a useful thing, but you need to see its consequences!
Polyurethane
Polyurethane boot
I dare to put polyurethane boots in third place in my ranking of the best boots for protecting CV joints. Why are silicone ones better than polyurethane ones?
No, polyurethane is approximately comparable to silicone in terms of the service life of anthers, but polyurethane ones are very popular with rodents - mice gnaw them everywhere - both on store shelves and directly installed on the car.
Rubber
Rubber boot
In last place are rubber boots. Their service life is very short - 2-3 months, with good conditions and a quality manufacturer - up to a year. Cracks on rubber boots appear noticeably more often than on others. And in the cold they “dumb” - they survive frosts very poorly.
So it turns out that I (!) plastic, silicone and polyurethane ones are better than rubber ones...
This is interesting: A guy made a clever device to pull out a car if it sits on its belly.
And now it’s time to ask you which CV joint boots you prefer based on experience. And I will say again that this is only my independent opinion.
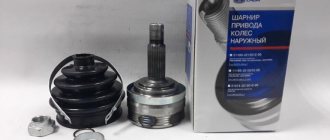
Types of CV joints
Before you begin repairs, you need to find out exactly how the unit is designed.
The pair of drives on the VAZ 2109 is equipped with a total of 4 CV joints.
| CV joint type | Peculiarities |
| Interior | There are 2 of them. They transmit torque to the axle shaft from the gearbox |
| Outer | There are also two of them. Installed on the ends of the axle shafts and transmit torque directly to the wheels |
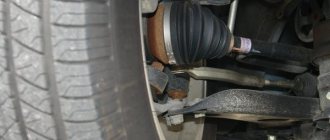
External
This arrangement of grenades ensures the possibility of wheel rotation during turns and constant operation of the suspension system. To put it simply, the outer CV joints are responsible for transmitting torque when cornering, and the inner ones are responsible for the vertical movement of the wheels. These are collisions with bumps, holes, roll in turns, etc.
Interior
This is interesting: How much does 1 liter of gasoline 92 weigh?
How to properly change the lubricant in CV joints
Correct lubricant replacement. Replacing the lubricant in CV joints is done due to its contamination after the boot ruptures or its service life expires when it contains a lot of wear products. It is necessary to completely remove the old grease from the joint to eliminate the possibility of increased wear of the CV joint. To do this, it should be disassembled and thoroughly wiped with a clean rag. It will not be possible to wash it without disassembling it, because the grease is extremely difficult to wash off.
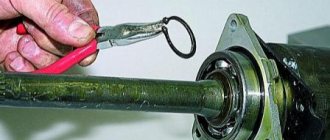
Retaining ring
There are usually no difficulties with disassembling the internal hinge, so we will describe disassembling the external one. If you do not have a special tool for removing the outer hinge, then remove the drive assembly and clamp it in a vice. Remove the clamps from the boot. When removing, try not to damage them; the factory ones are usually better than those that come with the new boot. If the cover is torn, cut it off with a knife; if not, slide it onto the drive rod. Use a hammer to knock the joint off the drive using a drift on the inner ring. Turn the inner ring with the separator so that the holes in the separator are visible, and the symmetry axes of the separator and the housing will be perpendicular. Using a flathead screwdriver, remove all the balls from the separator. In the separator, two of the six holes are longer than the others. Turn the separator so that they are pressed against the walls of the housing and remove the separator with the inner ring from the housing. After adjusting the position of the inner ring, remove it from the separator. Remove any remaining grease from the parts as best you can, and the hinge can be assembled.
Article on the topic: Engine oil additive - panacea or deception?
Insert the inner ring into the cage. Orient the cage so that the long holes in it are pressed against the hinge body, and insert the cage and ring into the body. Insert the balls into the holes of the separator and rotate the inner ring so that the hole for the drive is located along the axis of the housing. The unit requires from 120 to 150 g of lubricant. How much will fit in your case depends on the size of the hinge.
To properly fill the joint with lubricant, clamp it in a vice with the drive hole facing up. If you bought the lubricant for it in tubes, then press it into the hole under the drive, pressing the tube more tightly to the ring, until it appears between the separator and the housing. If you have it in a different package, then put it on with a spoon and press it into the hole for the drive with a cylindrical object of suitable diameter; The filling criterion is the same.
When installing the boot, do not put a lot of grease into it, otherwise it will tear it apart while the boot is working. Before tightening the boot clamps, lubricate the grooves for them with lithol.
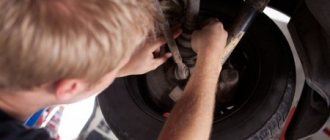
Shall we get started?
Before replacing the mechanism, you need to drain all the oil from the gearbox. Let's not touch the jack yet! You need to place a brick under the rear wheel of the car, after this procedure we take the 30 socket and, accordingly, loosen the nut. Don't be alarmed, you may need about a half meter long piece of pipe half a meter long as a lever. Remember, we only need to loosen the nut, not remove it yet!- Everything worked out? Go ahead! We lift the car with a jack, and only now completely remove the hub nut along with the washer. Now you can safely remove the wheel from the hub.
- Take the 13mm head and remove the two bolts that secure the ball to the hub. After this, we move the hub and remove the outer grenade from it. Then we attach a pry bar to the internal grenade and, using hammer blows, knock it out of the gearbox. By the way, if you still don’t have a pry bar at hand, a piece of pipe can replace it.
- When the grenade is removed, we clamp its shaft in a vice.
- We remove the clamps from the unusable boot. After that, we shoot down the outer grenade. Attention! In order not to damage it, you need to hit it along the edge. When this operation is completed, remove all old grease from the mechanism, wash it in gasoline or kerosene and wipe it well again, this way you can better remove traces of grease.
- Now we put a new boot on the drive shaft, and using a hammer we hammer the outer CV joint back, after thoroughly lubricating all the parts of the product. After that, we put it on and tighten it with a collar.
- Then we insert the grenade into the gearbox, driving it there. We place it in the hub and return the ball to its place. We put on the hub nut.
Attention! The hub nut does not need to be tightened with great force. After installing the wheels, tighten the bolts without applying much physical force.
- We remove the car from the jack, place a brick under the front wheel and tighten the nuts tightly.
- Well, now pour oil into the gearbox.
That's all. Congratulations! Replacing the boot on the VAZ-2109 is complete!