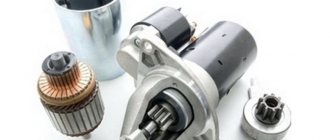
In a car, the starter is a very important component. It ensures that the engine starts by rotating the crankshaft for the first few revolutions. This is necessary to begin the process of ignition of the mixture in the chambers.
Today we will consider this unit applicable to the popular Russian model Lada Kalina. We'll tell you where it is and how to remove it.
What is the operating principle of the starter?
By turning the key in the lock of the Lada Kalina ignition unit, power is supplied to the terminals of the electromagnetic relay. This element, by means of a lever, moves the overrunning clutch to a position where the starter shaft gear meshes directly with the flywheel. In addition, voltage is supplied to the electric motor, the shaft of which begins to rotate, driving the engine. When the motor starts, the plunger moves back, bringing the assembly to its original position. Starter power is currently being cut off.
How to check it yourself
Without removing the starter from the car, you can only reliably check for poor contact and the fact that the retractor relay control circuit is faulty. If the starter does not respond to turning the key to the Start position, directly jumper the power terminals of the solenoid relay with a screwdriver. Triggering of the starter will indicate a malfunction in the control circuit or the traction relay itself.
If you know how to use a multimeter, in DC mode, check whether voltage comes to the control terminal after turning the ignition key to the Start position. If voltage is supplied, but the retractor does not operate (there is no characteristic click), the traction relay needs to be repaired or replaced.
Typical breakdowns
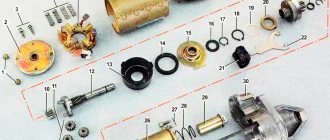
- Abrasion of brushes that wear out due to tight pressing against the rotating armature. The degree of wear can be assessed visually or using a caliper. It is enough to compare the thickness of new brushes with worn elements.
- Wear of collector plates. Brushes wear out much faster than armature contact plates, but even after several hundred thousand kilometers they can become unusable. The degree of wear is determined by the depth of the groove, which is formed from friction with the brushes. If the brushes do not fit tightly at the moment of rotation of the armature, a spark discharge may occur, causing burnout and further detachment of parts of the lamellas. Among other defects that arise due to runout and axial play of the armature shaft are ovality and displacement of the friction zone of the brushes.
- Violation of the insulation of the commutator contacts, leading to breakdown of the armature housing to ground; interturn closure.
- Wear of the bushings securing the armature shaft. Critical depletion of bronze or copper-graphite bushings leads to runout of the armature shaft, as a result of which copper-graphite brushes fail much faster, and uneven wear of the commutator is observed. Also, wear of the bushings can cause displacement of the armature plates, which leads to an interturn short circuit.
- Wear or incorrect selection of spacer washers that prevent axial play of the armature shaft.
- Burning of the contact plate of the solenoid relay. Winding burnout, turn-to-turn short circuit of the solenoid coil.
- Worn armature shaft gear.
- Peeling off the magnets from the starter housing.
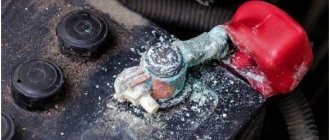
- Breaking the terminal of the positive wire coming from the power terminal retracting to the brush. Sometimes the terminals become severely corroded due to their location in an aggressive environment.
Repair or replace
Operations that in most cases are limited to manual repair of the starter:
- replacing the brush assembly. We have already looked at how to replace starter brushes with your own hands, so we will not dwell on this;
- cleaning the working area of the collector with fine-grained sandpaper;
- lubrication of the planetary gearbox, armature shaft in the place where the retractor relay fork moves;
- complete cleaning of all parts from wear products of graphite brushes and commutator, dirt.
Many manufacturers do not provide for repair and maintenance of the solenoid relay, so to disassemble it, flare it. This can be done only for the purpose of cleaning the contact areas of the terminal bolts and plates with sandpaper or a file. If an inter-turn short circuit or a breakdown in the housing is detected, we recommend replacing it instead of doing it yourself. We also find the idea of repairing the commutator lamellas and rewinding the starter armature very dubious. For widespread starter models, such repairs are simply unprofitable, since it is often easier to find a working used part at a disassembly site or buy a new starter altogether.
When is a starter check required?
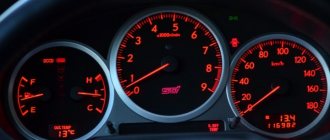
During operation, the device may malfunction, and therefore the engine will be unable to start. The Lada Kalina car unit is characterized by the following signs of malfunction, suggesting the need for removal and diagnostics for the purpose of further repair or replacement:
- turning on the starter is accompanied by the shutdown of other devices operating at that time;
- when the device starts, reduced crankshaft speeds are observed, which is not enough to fully start the engine;
- turning the ignition key does not activate the starter;
- the unit shows signs of “viability”, but the motor flywheel does not rotate.
Next we will tell you how to remove and replace.
Repair of a branded BOSCH starter, instructions on video
The car starter is an important component, as it is responsible for starting the power unit. In this case, it is the starter that consumes the largest amount of electric current coming from the battery. Of course, in order to avoid problems with the battery, as well as with the process of starting the internal combustion engine, it is necessary to periodically check and inspect the starter.
However, most often breakdowns occur on budget foreign cars and domestic cars. Next, we will look at what to do if the Kalina starter does not work, as well as how to check the starter relay, power circuit, etc. on a VAZ Kalina.
Replacing the starter on an 8-valve Kalina
Having found out where the required unit is located, we proceed to replacement. To perform the work (removal, repair and installation), you will need the following tools and accessories:
- keys with dimensions of “8”, “10” and “13”;
- wrench with nozzles 13 and 15 mm;
- screwdrivers, both flat and cross-shaped;
- hammer, vice and pliers;
- drift (made of wood or soft metal);
- ohmmeter;
- a little lubricant of the “CV joint-4” type;
- two metal plates, a block of wood and a fine-grained sandpaper sheet.
After the preparatory work, we’ll figure out how to remove the device.
To make the replacement convenient, we place the LADA Kalina above the inspection ditch.
- We de-energize the on-board network (remove the terminals from the battery terminals).
- We dismantle the air filter housing along with the element.
- Using a wrench (socket) set to “13”, unscrew the nut holding the wire tip to the positive terminal of the battery. Remove the tip.
- Using a key set to “15” we unscrew the nuts securing the starter to the engine block. We remove the node.
The device is installed and connected to the LADA Kalina on-board network in the reverse order.
Fog lights Kalina
Lada Kalina wiper size
Kalina cooling system gets airy
How to get rid of unnecessary details
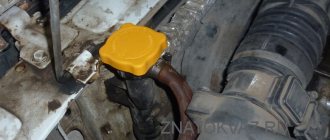
Under the hood of the Kalina-2 it is easy to find an air filter module that prevents access to the unit we need. This module must be moved to the side, but first the air intake sleeve must be disconnected.
Black box – filter module
The sleeve itself, attached to the bottom of the module, is simply pulled in the “left” direction. The whole process looks like this:
Remove the sleeve from the pipe
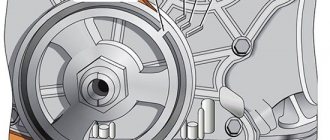
Just in case, here is a drawing of the node in question:
Filter module design
The figure shows the connector installed on the top of the module. The plug from this connector is also first disconnected, but first, the negative terminal is removed from the battery. Why do this, we discussed earlier. It turns out that there will be three preparatory steps: disconnecting the battery terminal, removing the sleeve from the filter side, disconnecting the plug.
Theoretically, replacing the starter looks easier if the air duct sleeve is disconnected on both sides (on Kalina 2 it covers the caps of the mounting screws). This statement is illustrated by the figure:
Engine starter for Kalina-2/Granta
We will have access to nuts “2”, but we will have to reach for the screw heads. However, there is nothing special here. Now, let’s remove the plastic module from the clamps:
Three rubber clips hold the filter module in place
After completing all the steps discussed, the module can be moved to the side.
Last step before dismantling the starter
Starter repair in a Lada Kalina car
In most situations, disassembling a unit in the Lada Kalina model for the purpose of repair is carried out to replace such elements as:
- brush holder in combination with brushes;
- traction relay;
- drive components.
Naturally, repair procedures are carried out on a removed device. How to remove it correctly?
Let's sort it out.
- We take the spike at “13” and unscrew the nut that secures the lower contact bolt of the traction relay, after which we remove the wire tip.
- Using a screwdriver (Phillips), we “defeat” a pair of screws holding the retractor relay block. We remove the element.
- We remove the spring along with the armature from the front cover of the relay.
- Disconnect the housing from the front cover. Here you will need to unscrew a couple of tightening bolts (key set to “8”).
- From the released housing we remove the armature together with the brush holder and the end cover.
- This cover is removed by unscrewing two screws with a screwdriver. The bearing seat contains a wavy spring washer.
- The brush holder itself must also be dismantled, after which the brushes are removed.
- We move on to the planetary gearbox, from which we remove the cover.
- Now we remove the three satellites and the rubber plug.
- We press the end of the drive shaft with our finger, and then remove the drive assembly located in the front cover.
- We arm ourselves with two screwdrivers, with which we open the eyelet present on the support, and then remove the drive lever.
- We use a wooden block against which we rest the end of the ring gear.
- We apply the grips of the open-end wrench (size - “13”) to the ring that limits the travel of the drive gear. We hit it with a hammer, forcing the ring to compress in this way.
- The locking ring must also be removed. We use a flat screwdriver.
- Next, we dismantle the gear travel limit washer.
- We remove the overrunning clutch assembly with the drive gear.
- Using a screwdriver, remove the retaining ring from the corresponding groove on the shaft.
- We also remove the washer.
- We pay attention to the ring gear in the planetary gearbox, which we pull off the drive shaft.
- We proceed to dismantling the bearing. To do this, we use the previously designated metal plates. We insert them between the bearing itself and the armature commutator, and then rest it on a vice. Use a hammer to carefully impact the end of the shaft (a drift will be required) until the bearing is completely pressed.
This completes the disassembly procedure.
Next, we inspect the commutator and armature winding. There should be no charring here. If it is present, then use fine sandpaper to “correct the situation.” When the burning is intense, there is no alternative to changing the anchor.
If we find scratches or material coating on the shaft journal, we also use “all-conquering” sandpaper, after which we polish the treated areas.
We arm ourselves with an ohmmeter to check the short circuit between the core and the windings. We pay attention to the ends of the windings - their soldering to the lamellas must not be damaged. Blackening of the winding or separation of varnish insulation from its surface is not allowed.
If the brushes are worn out, then replace the holder assembly.
The assembly of the starter assembly is carried out according to the reverse algorithm of actions.
Price:
| Type of work | Job | Spare parts |
| Replacement | from 1200 rub. | from 3500 rub. |
| Diagnostics | 800 rub. | No |
| Cleaning | from 200 rub. | No |
| Testing at the stand | 300 rub. | No |
| Bendix | from 400 rub. | from 250 rub. |
| Brush unit | from 200 rub. | from 300 rub. |
| Starter repair | from 500 rub. | from 400 rub. |
| Solenoid relay | from 200 rub. | from 500 rub. |
| Bushings | from 400 rub. | from 450 rub. |
| Anchor | from 350 rub. | from 700 rub. |
| Gearbox | from 450 rub. | from 500 rub. |
Where are Lada Kalina starters made in St. Petersburg:
ATTENTION.
We do not repair units removed from the vehicle. We do our own diagnostics, make a diagnosis and provide a guarantee.
When to do it:
— the car does not start, the starter shows no signs of life; — when trying to start the car, a noise is heard, the car does not start; — after starting the engine, the relay does not turn off;
Warranty for replacement - 360 days, for repair - 180 days.
If necessary, we can help with the evacuation of the car to our service stations.
What is an engine starter
Any gasoline internal combustion engine is equipped with a part called a “starter”. This unit, that is, the starter, is a conventional electric motor. The voltage “+12 Volts” is supplied to it via one electrical cord. The body acts as the second wire.
A relay is mounted inside the starter, the contacts of which conduct the supply current. When you need to start the internal combustion engine, the contacts close. Let us immediately note: the voltage on the power wire always remains as long as the battery is charged. Therefore, before dismantling, be sure to remove the negative terminal from the battery.
If the battery is charged, but the starter does not turn, then first you need to check whether there is voltage at the contacts of the Ka-3 relay. This element is fixed in a single mounting block, and it is called: “Additional starter relay.”
Lada Granta, Kalina, Priora
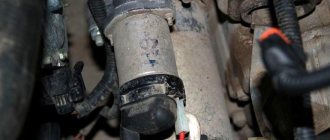
Remove the protective cap (No. 3), unscrew the nut securing the wire to the starter solenoid relay (No. 4) and disconnect the wire from the relay (head “13”). Disconnect the block with wires (No. 2) from the starter solenoid relay.
For cars with a manual transmission with a traction drive: unscrew the 3 nuts securing the starter (No. 5) and remove it (head “13”).
For cars with automatic transmission and manual transmission with cable drive: unscrew three bolts (No. 5) and remove the starter (No. 3) (head “13” or Torx E14).
How to remove and replace the starter assembly
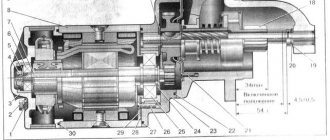
Replacing the starter on a Lada Kalina is done as quickly as replacing other parts that are “consumables”. At the same time, changing the cabin filter will be even more difficult. And the durability of the unit called “starter” is actually unlimited. Its drawing is given below:
Starter Lada Kalina-2
There are three mounting holes here that accept “M8” screws (you need a “13” key). Dismantling is carried out in the following order:
- Unscrew the nut “3” (a “13” wrench will do);
- Remove the terminal from the contact screw;
- The built-in relay plug is disconnected;
- Using a 13mm wrench, unscrew two or three fastening nuts.
All of the above actions are illustrated in the photo:
Installing a new starter is done in the reverse order. And we provide instructions for its repair in the video.
It is important to know: in order to avoid electrical injuries, the negative terminal of the battery is connected last. Before this, all parts and assemblies must be assembled, and protective covers must be installed in place.