How does the speedometer work?
The VAZ-2109 has a speedometer with a mechanical drive, consisting of a cable and two gears. Torque is transmitted from the transmission shaft to the gears and then to a cable connected to a dial on the dashboard.
If this mechanism stops working, then the following breakdown options are possible:
- unreliable speed readings on the dashboard;
- drive failure - the arrow does not move;
- cable rupture or damage.
The most common reason for speedometer failure is chafing of the cable leading from the gears to the needle. To replace this part, you must purchase it correctly. You need to focus on the height of the dashboard. If it is high, the cable should be longer.
Speedometer does not work on VAZ 2109
When the speedometer arrow jumps on a VAZ 2109, this is a consequence of a breakdown. You should immediately seek help or try to fix everything yourself. In the article you can find detailed instructions on actions for such situations.
Purpose of the speedometer and fault recognition
Before you deal with car problems, you need to learn more about the speedometer.
Understand where it is located and what functions it is intended for. A speedometer is needed to convert the rotation speed coming from the drive shafts to the speedometer sensors and indicate the speed of movement of the car, as well as indicate the path that the car has traveled. When the speedometer needle jumps, stops or constantly turns (any “independent” actions), you need to pay attention to the problem, for which there can be many reasons.
- Problems in the speedometer mechanism itself;
- Breakage (damage) of the cable of a part;
- The speedometer drive is broken.
Next, you need to understand why the speedometer on the VAZ 2109 still does not work. To find the reason, you need to carry out an inspection under the car (in the inspection hole or using a lift). Then unscrew the nut that secures the speedometer cable. You need to call someone to help, so that when you twist the cable in different directions, the assistant follows the arrow.
In the case when the speedometer arrow jumps, it means that the mechanism is working properly and the drive needs to be checked. But you should be more careful, as it happens that the needle jumps, but the problem is still in the cable (it fluffs up and touches the braid), which is why car owners get confused and do not understand what the problem is.
Next you need to figure out how to remove the drive if the speedometer on the VAZ 2109 fails. First, let's release the cross member that secures the gearbox and pry off the drive housing using a flat-head screwdriver. Then we’ll press the gearbox away from the drive and pull it out. Next, you need to check the serviceability of the drive mechanism. To do this, you need to turn the gear and check whether the groove under the speedometer cable turns. In the case when the groove does not turn, the drive needs to be replaced.
When purchasing a new drive, you should take the faulty one as a sample so as not to purchase the wrong one. After all, if you install the wrong part, it will fail literally immediately and completely ruin the entire gearbox mechanism. In order to be able to use the gearbox in the future, you should change the rear cover and change the oil. But if the old one is not poured out enough, pieces of the housing still remain in it and after a while they can get on the “teeth” of the gears and spoil them, and this can also clog the oil channel.
Now you are familiar with the instructions for identifying and eliminating problems and breakdowns if the speedometer needle begins to “jump”.
Replacing the speedometer cable
Most car owners may encounter a problem such as a broken speedometer. This is often due to a faulty cable. And to replace the speedometer cable, you don’t need to immediately go to a service station, because the replacement can be easily done with your own hands using detailed instructions.
- We go down under the car (for example, in a viewing hole or overpass), then unscrew the cable from the drive, which is located on the engine side, and slide the rubber boot up, unscrewing the cable nut.
- Then we disconnect the cable.
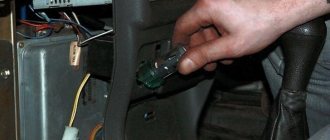
- In order for you to be able to disconnect the cable from the speedometer, you must first remove the unit from the dashboard.
- But if your car has a low dashboard, then you should unscrew two bolts and carefully remove the visor, squeezing the spring clips with your fingers.
- And after all the machinations have been done, we calmly take out all the devices.
- But in a situation where the panel in the car is placed too high, then you first remove the trim and only then unscrew the “instrument block”.
- Next, from the rear side, you unscrew the cable nut from the speedometer and pull out the faulty part through the engine compartment, remembering how it passes through it.
- The next step is to thread a new cable. To do this, insert the plug into the compartment (to simplify the task, lubricate it with oil. For example, “Litol”). Remember! When buying a new cable, you must have the old one with you or know exactly its length. Otherwise, the size will not fit and the new part will be unusable. This is due to the fact that in different cars the dashboards are installed differently and therefore there are longer and shorter cables. It is recommended to be guided by this during purchase and repair!
- Then we remove the instrument cluster and easily remove the speedometer, replacing it.
- And finally, we put all the instruments in place, first screwing the cable nut back to the speedometer. We put the panel back and enjoy the work done by hand!
How to check the device
To check the condition of the speedometer, you will need to drive the car onto an overpass or into a garage with a pit. You must have access to the bottom of the VAZ-2109 so that you can unscrew the cable fastening. Also invite an assistant who will turn the cable in different directions or monitor the instruments. The car enthusiast himself cannot simultaneously read the readings and be under the bottom of the car.
The results could be like this:
- the arrow moves - the cable is intact, the problem should be looked for in the device drive;
- the pointer twitches - the flexible shaft is worn out and needs to be replaced.
Replacing the speed sensor
The speed sensor cannot be repaired, so only its replacement is possible:
- Use two wrenches 21 and 10.
- Disconnect the car battery to disconnect the speed sensor from electricity.
- Disconnect the connector that relates to the speed sensor.
- Unscrew the sensor itself. Please note that the rod may break. Because of this, then you will also have to unscrew the device drive.
- Be careful when removing the actuator as there is a chance that a broken rod will get caught in the gearbox.
- Change the speed sensor and, if the drive is in a faulty state, then that too.
- The drive rod must be installed in the speed sensor bushing. The rubber seal ring must be treated with oil.
After completing the work, you need to remove the error from the car’s on-board computer that was issued by the control unit. Otherwise, the VAZ 21099 system will perceive the new sensor as faulty.
Domestic cars, as everyone knows, are not famous for their reliability. But fortunately for the owners of cars of the Sputnik family, all the problems that arise with the units have long been studied, and each car owner can cope with them independently. Replacing a flexible shaft, speed sensor or its drive does not pose much difficulty on a VAZ 21099 for any car enthusiast.
How to repair the speedometer drive
Now we will talk in more detail about dismantling and repairing the drive. It often needs to be repaired if the O-ring begins to leak oil. To repair this unit, follow the instructions:
- Using a socket wrench, unscrew the bolt holding the speedometer drive housing.
- Then pry it up with a screwdriver and remove the drive.
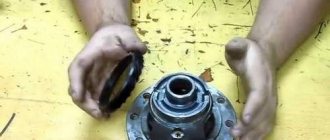
- Inspect the driven gear; it is made of plastic and may show signs of wear. In this case, it is best to replace the part.
- Check the rubber seal. If signs of wear are visible on it, replace it.
- Then evaluate the quality of the seat for the cable end. It should also not be worn or damaged.
- Look at the drive mounting location on the gearbox; if there are oil leaks there, the O-rings must be replaced. They are located on the body.
- If you decide to replace these rings, you will need to first remove the driven gear and then push out the seal.
- Soak these parts in kerosene. If they are not worn out, replace them. Also wipe the remaining parts with kerosene and put them in place.
The total time for repair and dismantling of this VAZ-2109 unit will take about 30 minutes.
We fix speedometer breakdowns on a VAZ 2109: we repair the drive ourselves and change the cable
A malfunction of the speedometer makes it impossible to monitor the speed, so you can break the speed limit. The article discusses the causes of device breakdowns, checking for serviceability, and provides instructions on how to repair and replace the VAZ 2109 speedometer drive.
Causes of speedometer malfunction
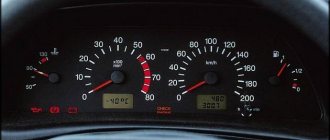
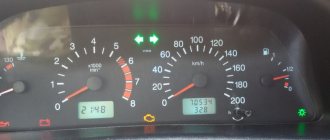
The mechanism that measures the speed on the VAZ 2109 is simple: on the gearbox shaft there is a gear that rotates a cable, which is connected to the speed indicator located on the dashboard. The arrow on the scale shows the speed at which the car is moving and the kilometers traveled are shown.
Instrument cluster VAZ 2109
If the speedometer on a VAZ 2109 does not work, then you need to find out what the reason is:
- The VAZ 2109 speedometer drive does not work;
- the cable broke;
- The device is faulty.
Checking the mechanism for functionality
- The numbers on the dial are uneven or do not move;
- when the speed changes, the meter displays incorrect readings;
- the arrow on the scale stays in place when the car moves.
To determine the exact cause of a non-functioning meter, it is better to install the car on a lifting device or inspection groove. You can carry out diagnostics with the help of an assistant. To check, you need to unscrew the nut holding the speedometer cable. Then one person turns the cable while under the car, and a second person in the cabin watches the scale. If the arrow twitches when the cable rotates, then it and the meter are working properly.
Speedometer Troubleshooting Instructions
Having figured out what exactly is not working, you need to remove the faulty part and replace it or repair it.
Drive repair and replacement
The cause of drive failure is gear wear. It is convenient to carry out repair work on an inspection groove or a lift.
Replacing the VAZ 2109 speedometer drive is carried out according to the following scheme:
- To unscrew the bolt securing the gearbox and drive housing, you can use a socket wrench.
- After unscrewing the bolt and prying the housing with a screwdriver, remove it.
- Then the old gears are dismantled and new ones are installed.
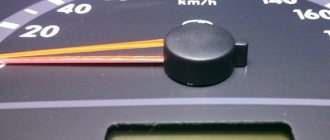
Device drive with gear
When changing gears, you should count the teeth. There should be the same number of them as on old products, otherwise incorrect information will be displayed on the dashboard. When removing, the housing should be inspected. If oil leaks are detected, the seal rings must be replaced. Before reinstalling, it is recommended to wash all parts with kerosene. Assembly is carried out in reverse order (video author - Vladimir Solokhin).
Replacing the cable
Replacing the VAZ speedometer cable is a simple procedure.
It consists of a sequence of actions:
- To get to the meters, you need to remove the tidy by unscrewing the corresponding fasteners.
- When replacing a mechanism, you need to disconnect the wiring from the old device and connect it to the new one. Using pliers, unscrew the nut securing the cable and screw it to the new pointer.
- Next, the meter is installed in place and the dashboard is assembled.
- When replacing a cable, it must first be disconnected from the gearbox. To do this, you need to unscrew the clamping nut and you can disconnect it.
- Likewise, it unscrews from the speed indicator. The nut in this case is on the reverse side.
- The nut has an eye; a strong thread or soft wire should be tied to it.
- Then the cable must be pulled out with the expectation that the end of the thread will remain in the cabin.
- Next, we untie the thread from the old cable, tie it to the new one and pull it into the cabin. Now you need to connect it. If there is no eyelet, tie the thread directly to the nut.
- When installing a new product, it is advisable to lubricate it, starting from the gearbox and up to half, with a lubricant such as Litol or CV joint. This will extend the service life of the product; it will not fray at the bends.
If the speed indicator breaks down, it is advisable to replace the complete device assembly.
Photo gallery “Replacing the cable”
Even a novice car enthusiast can change the drive and speedometer cable. This will give you the opportunity to save on visiting a service station and gain experience in auto repair work.
Video “Replacing the speed indicator cable”
This video shows how to remove the low tidy and replace the cable on a VAZ 2109 (the author of the video is Engine Repair! And interesting!).
Replacing the flexible shaft
If during the inspection process you find out that the problem is in the flexible shaft (cable), then you need to work according to different instructions:
- On the engine side, find the cable leading to the speedometer needle. Move the protective cover, remove the nut and unscrew the shaft from its drive.
- Inspect the places where the cable is attached to the drive. If the fastener is not square, the problem is that when the gear rotates, the flexible shaft will remain in place. In this case, replacement will solve the problem.
- To accurately transmit rotation, install a gasket cut from a plastic bottle at the entry point of the flexible shaft.
- Next you need to disassemble the dashboard. The work is carried out differently, depending on the type of structure. If the instrument panel is high, remove the trim and then remove the instrument cluster mount. If it is of a low type, unscrew the two bolts at the edges, and then, squeezing the clamps, remove the visor. Remove the instrument panel.
- Unscrew the cable securing nut and remove it through the engine compartment. Note the path of this shaft so that you can install the new one correctly.
- Mount the new part. Lubricate the plug with Litol and insert it into the partition of the engine compartment.
- Replace the speedometer if necessary. After this, you can reassemble.
VAZ 2109 speedometer does not work
To begin, remove the tidy, lift up any front wheel, put it in 5th gear with the engine running and look at the end of the cable to see whether it is spinning or not.
It may also be a matter of the cable drive itself; there is a helical gear in the box that rotates the cable. It's usually plastic, God knows, maybe a couple of teeth broke and that's a glitch.
leon-x, how do you solve this problem with the speedometer?
brothers! I had the same thing. It turned out that the drive rod gear is out of mesh. If you lower it a little, it doesn’t turn, if you raise it a little, it turns. or vice versa, I don’t remember. put a puck - all hockey!
sugamak
, sorry for the long quote from myself
.
On Friday I noticed the symptoms described above - the needle was twitching, I walked from 0 to 100 km/h as I wanted, and after 50 km it finally went down. When I ran home, I went to the forum and immediately found this topic. REPORT: I immediately bought a cable - 96 rubles, and, according to the advice given above in the topic, a rubber seal and a cardboard gasket, without even knowing where to put them.
I removed the panel (low) without any problems, it was not the clutch torso that tightened it, but the econometer tube - well, it’s very short.
I checked the operation of the speedometer by twisting a match inserted into the drive on the panel. The speedometer is working - the needle is twitching, I've clocked up 2 km.
I checked the integrity of the cable (without removing it) by pushing-pulling-twisting it in the sheath from different sides, observing the other end in this process, tugging at the sheath itself for rupture. The torso seems normal and the shell too, everything rotates without jamming. I poured 10 grams of silicone grease into the shell through a syringe from both ends, it won’t hurt, I think.
I installed the panel and connected the speedometer cable. I twisted the end of the cable that goes into the drive, put a cocktail straw on it, twisted it with my fingers - it turned out conveniently. Using a complex system of mirrors (I did it alone), I managed to see from under the hood how the speedometer needle in the cabin was twitching. This means that the cable and the speedometer are in order and are connected normally.
I inserted the cable into the box - the speedometer does not work.
I decided that the drive was broken. I went to the spare parts store, held this pair in my hands, listened to the seller’s opinion about the fact that often these plastic teeth are cut off, and not necessarily on the worm, but to change the gear, you have to disassemble the box, in addition, you need to know which main pair is in the box, etc. d. In short, it puzzled me.
Raised the hood and disconnected the drive cable. He inserted a thin screwdriver into the drive and carefully, so as not to break it, tried to twist it. I think if it’s cut off, it will scroll. Doesn't spin.
I inserted a match into the drive to prevent it from dangling, and used a second match to wedge it. I secured the thread to a match (pulled it out of the lining). I drove about 10 meters in gear, the hood was up, and with satisfaction I saw a thread wound around a match. I conclude that the drive is working.
On the way home I stopped about 10 times and re-threaded the cable into the box. It doesn't turn, that's all.
I decided that the seat of the cable in the worm was broken and the cable drive did not engage; the tetrahedron of the cable itself looked normal, like a new one. By inserting a square-shaped stick into the drive, I tried to find out how broken everything was there.
Then I put a piece of PVC insulation of suitable diameter on the end of the cable and pressed it tightly.
Connected the cable to the drive. I didn’t make any effort, that is, the end with the tube on easily fit into the hole on the drive. Damn, it works. I drove 10 km and it runs fine.
Total: now my cable is connected to the drive through a PVC tube as a seal. On the snot. When the structure falls apart - I won’t change the cable and worm - using the technology described above in the topic, using solder and a needle file, I will increase the size of the tetrahedron.
I wrote this in 2006. I still drive like this
News
It is very difficult for a fashionable and successful person to imagine modern life without the presence of “smart little things” from the world of digital technology. Everyone always has a tablet with them,
A fascinating hike in Crimea
The nature of our country has always been majestic and beautiful. This can be understood and seen with your own eyes only when you walk around your country. Traveling on foot has always been one of the attractions.
Where to buy phone accessories
In the modern world, the Internet has become so developed that the scientific technologies that it uses will allow it to offer various services much more rationally and more promisingly than before. Now
Niva urban bumper
Do you know how much time was allotted to the VAZ-2121 SUV? Until 2006. Shortly before its 30th anniversary, the legendary Niva was supposed to retire. But I didn't go
It will be useful: The new Ford ecosport has all-wheel drive with an automatic transmission
VAZ 12
Production of the model began in 1999 with a five-door hatchback body shortened (compared to the VAZ-2110) to 4170 mm (trunk volume 400 l), due to which the car has clearer reactions to
Front bumper Kia Sportage 3
Disconnecting the bottom cover fastening clamps (A), remove the headlights, turn signals and fog lights; Disconnecting the LEFT fog light (A) and turn signal (B) Disconnecting the RIGHT fog light
Rear bumper Lancer 9
On the Japanese car Mitsubishi Lancer 9 and 10, the bumper is not only functional protection, but also a continuation of the body and even a tuning element. It absorbs some of the energy during a collision, in it
Bumper Lancer 10
If you bought a car, even on credit, you can afford to embellish and improve it a little. An inexpensive spoiler and sills of original quality will turn your car from a copy of a thousand
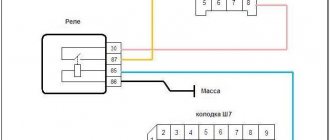
Wiring fault
As noted above, the wires oxidize over time, become bent and simply dry out. Ultimately, this leads to the complete loss of contact, which previously appeared and disappeared, which led to the incorrect operation of the speedometer.
This problem can be solved in several ways. The simplest is to re-solder the wires and heat-shrink them. The problem may arise somewhere else, but it may not happen. The second method is to replace the entire braid. A more labor-intensive and complex method, but the result is normal wiring operation for a long time. You also need to understand that if the wire is exposed, it can short to ground. There is nothing good about this either, so if you notice this, then you should try to fix the problem as soon as possible.
What devices are used to wind up electronic speedometers?
Considering the variety of cars available and methods for processing data from the speedometer, several different options have been created that allow you to correct the distance traveled. The circuit of such a device can be made both on discrete elements and on microprocessor systems, but all finished products are divided into the following types:
CAN twister
This device is designed for use on modern machines. Here you need to know that CAN is a special bus through which data is exchanged between car electronics units. And its design implies the presence of a diagnostic connector, through which, knowing the exchange protocol, you can gain access to individual devices.
Accordingly, thanks to this, you can adjust the contents of the necessary memory cells, achieving the desired result. It is impossible to detect with diagnostic equipment that memory cells have been changed.
You can buy a high-quality spinner on the website https://can-podmotka.ru
Pulse twister for OBDII
This device is intended for use with foreign cars that do not have a CAN bus. This device is connected via a special OBDII diagnostic connector. In this case, the speedometer receives a sequence of pulses simulating signals from the speed sensor, as a result of which the readings of the distance traveled change.
Speed generator
This circuit simulates a speed sensor. Instead, the generator turns on and produces a sequence of pulses that arrive at the speedometer and cause its readings to change. Mostly suitable for electromechanical devices and domestic cars - VAZ, UAZ and others manufactured before 2006.
ABS speedometer knob
Suitable for cars equipped with ABS. Its work is based on controlling the speed and rotation of the wheel. A spinner connected to the corresponding connector simulates the operation of the wheels, and the controller, receiving this information, begins to change the speedometer readings.
You can make a winding device yourself or buy a ready-made one, but the most important thing is to determine whether it can be used on a given machine. If used incorrectly, you can simply burn the electronics.
As strange as it may seem, sometimes it becomes more important not to twist the speedometer, but, on the contrary, to wind it up. There are a number of reasons, both objective and subjective, that force one to do this. More than one device has been created that allows you to solve the problem, and you can choose a device that takes into account the production date of a particular car and allows you to carry out this procedure without consequences.
» alt=»»>
Replacing the cable and speedometer if necessary
Replacing the speedometer with your own hands is very simple, you just need to disconnect the electrical connectors from the old device and switch them to the new device. For this:
- Use pliers to unscrew the cable nut and screw it to the new speedometer
- Then we install the device in place and then assemble the panel
- To replace the speedometer cable on a VAZ 2109, you must first unscrew it from the gearbox
- The connection is located under the bottom of the car, near the gearbox
Unscrew the cable from the gearbox along the bottom of the car near the box
- Using pliers (pliers), unscrew the clamping nut and disconnect the cable
- After this, unscrew the speedometer cable in the same way
- A cable nut is screwed to the device on the back side; you need to unscrew it
A cable nut screwed to the device, which we need to unscrew
- The nut has a special eye, to which you need to tie a strong soft wire or strong thread
- Then we pull the cable towards ourselves from under the bottom on the gearbox side so that the end (of the wire) or thread remains in the cabin
- Untie the thread or wire (depending on what you tied) from the old cable
- We tie it to a new cable, then pull it into the cabin, then connect
- If there is no such eye (this sometimes happens on non-original speedometer drive cables), then we use a nut as a thread stopper
- Before installing a new cable, it is advisable to lubricate it from the inside with a thick lubricant such as “Litol” or “CV joint”, more than half the length that starts from the gearbox
- This way the cable will work longer and will not rub against the sheath at the bends.
- Why is it necessary to replace the entire speedometer if it is quite possible to identify and eliminate the breakdown of its mechanism?
- This is easier because speedometer repairs are not provided and spare parts are not produced; they are sold assembled
- In addition, if one part breaks, then the next one may break in the near future.
- And long and painstaking work to identify and fix the problem will take a lot of time, it’s faster and easier for you to find, buy and install a new device in order to forget about the malfunction for a long time
It will be useful Fuse block VAZ 2109 carburetor
The simplicity and ease of diagnosis and replacement are simply amazing; any driver can handle it without any difficulties. A video is not required here, but no one is stopping you from watching it.
Functionality check
Dashboard supervision in Hyundai Solaris
There are several options for diagnosing DS.
The first way to check is with a multimeter:
- First you need to dismantle the DS.
- Then, using a tester, you should determine what each contact on the connector is responsible for; you need to find exactly the pulse one.
- After this, the positive probe of the tester must be connected to this contact, and the negative probe to the power unit or car body.
- Next, you should install a piece of tube on the controller axis and start rotating it at low speed. At the same time, monitor the controller readings - the higher the rotation speed of the DS tube, the higher the values on the tester display and the voltage parameter will be (the author of the video is the REMONTYCA channel).
Second method, without removing the controller:
Using a jack, you will need to lift the front wheel of the car
Which one - right or left - does not matter. Then the tester should be connected to the DC wiring. After this, you begin to rotate the car wheel with your hands and monitor the readings on the tester display. If there are impulses, then this indicates that the DS is operating in normal mode.
If you don’t have a multimeter, you can diagnose the DC using a test light or any other 12-volt lamp.
The verification procedure is similar to the method described above:
- First, you need to disconnect the pulse cable from the DC.
- With the ignition on, using a tester, you need to find the positive and negative contacts.
- Then the front wheel of the car is raised on a jack.
- Next, the control must be connected to the signal wire. The wheel must be rotated - if at this moment the minus light on the control panel lights up, this indicates that the DS is working (the author of the video is the PivovarovNikolay channel).
As for a 12-volt light bulb, it must be connected to a battery, as well as a signal contact. If a working DS is used, the light source will blink. If the diagnostics showed that the DS is working, then it is necessary to check the functionality of its drive. To do this, jack up the front wheel, feel for the DS drive, then rotate the suspended wheel with your foot and control with your hand whether the device rotates or not.
Comments
- Hmuryi
edited April 2009
Most likely the cloves were eaten. It’s good if you change it quickly on a shaft, but if you change it on a gear, you’ll have to learn how to do it. Share on Facebook Share on Twitter
- avia348
edited April 2009
Only the cloves, nothing else, they are second-layer. Share on Facebook Share on Twitter
- kan207ch
edited April 2009
how to change it (shaft)? remove the box and sort it out? and you also take the cable out of the box and stick the speedometer in for a while, then it doesn’t work again, and once I barely pulled the cable out tightly, the couple was holding it there, please can you describe the entire procedure for replacing the shaft and gear, I would be very grateful Share on Facebook Share on Twitter
- avia348
edited April 2009
Replacing the shaft is very simple, but the gear is more difficult; you will have to climb into the box. But I think it's a shaft. Good luck! Share on Facebook Share on Twitter
- Hmuryi
edited April 2009
If it's a shaft it's a big +. The main thing is to count the number of teeth, otherwise if there is the wrong pair, the speedometer will lie. Share on Facebook Share on Twitter
- kan207ch
edited April 2009
Hooray, I figured it out, I changed the shaft and the cable on the shaft was ground off and the cable pulled out while I was tearing it out of the box and changed this and that, everything works, although in the store they tried to give me the shaft along with the gear, like, anyway, you can change everything in another store, I bought the shaft for 50 rubles and it worked for me happiness, thank you very much Share on Facebook Share on Twitter
- iflyn
edited December 2009
I recently bought a VAZ-21093 (export version) 1998. The speedometer does not work. When I went to look into it, there was no cable drive shaft at all, and in stores they say that there are two types, 11 teeth and 12 teeth. Can you tell me which one I need? Share on Facebook Share on Twitter
- 111SLAVA111
edited November 2010
hi all . I have this problem. The speedometer doesn't work. I took the cables out of the box and tried to turn the speedometer, it worked, I concluded that both the speedometer and the cable were intact, then I took the cables out of the speedometer and tried to turn it, it did not turn, I concluded that it sits well on the shaft. I took the shaft out of the box and put it back and looked at the teeth as intact, but when you insert the shaft into the place where you insert the cable on the shaft, you first turn it, only tighten it with a nut (10 there), this thing stops turning, as if everything had fallen into place, maybe put a gasket under the shaft. and also at the ends of the cable that goes into the speedometer, you can see that it was eaten, but the edges are all intact, can this tip play lol, there is only a millimeter Share on Facebook Share on Twitter
- maximus69
edited June 2011
this is all nonsense... now I've already broken my head(((a week ago the speedometer needle twitched... and in the dying convulsions it still fell after a few seconds... I wasn't particularly upset, assuming that all I needed to do was change the speedometer cable and everything was fine I'll have a free evening... but when I saw the clear number 666 on the lower odometer, where it shows hundreds, I dropped everything and rushed to the service center... the service center sent me away and said that there were a lot of hemorrhoids, I needed to remove the panel and all that (high)... I rolled up my sleeves and changed the clutch cable without removing it myself... just put my hand under the panel and that’s it))) but the speedometer didn’t work (((((((in general, I won’t write for a long time... the speedometer is in working condition, the cable is also new, I changed the drive on the box.....and the speed and the mileage still doesn’t show(((((((some kind of devilry(((so don’t believe in the unclean((( Share on Facebook Share on Twitter
- Stef_1985
edited October 2011
I disassembled the gearbox, how to replace the speedometer ring? Share on Facebook Share on Twitter