nick-086 › Blog › Speed sensor 2114. Connection
I often get asked questions about connecting the speed sensor to the Europanel.
I myself began to understand the circuits recently, but a detailed article with pictures will not harm anyone. In short, we screw the sensor into the box, connect it with power and ground, and output its signal to X7-7. If in detail. We find a suitable electrical circuit diagram for the car. For example, circuit 21099 in a deluxe configuration - with a panel, wiring and an installer from four:
What to pay attention to!
If you install a 2114 instrument panel on a chisel, use 2114 sub-dash wiring and a 2114 fuse block, then the speedometer connection is made only
under the hood
.
You just need to connect three wires to the sensor. Then, through the block and wiring, everything will go where it needs to go. But
if you use under-torpedo wiring from 2109/2108 or left the old fuse box, then this article will help you only in general terms understand the essence of the connection, because the numbers of contacts and blocks will be different.
And so, connection. We take the diagram and look for the sensor itself on it. Position 27, found!
Now we follow the pattern where they lead. Orange
the wire goes down and connects to the brake fluid level sensor.
This is a common plus along one wire from the mounting block ( not a signal!
).
Power through this wire does not come constantly, but from the ignition. Now black
.
This is mass, minus, body - call it what you want. Connects locally or from any ground wire under the hood nearby. And the most interesting thing is the gray
wire.
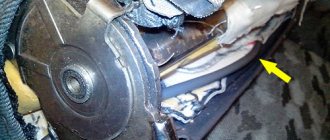
It sends a signal to the speedometer needle, which shows our speed. The mileage of the electronic odometer also rotates based on this signal. As you can see from the diagram, the gray wire turns into white - this is the wiring harness. To understand where it will now come out of this harness, simply run your finger along it until you see a wire of the same color. The direction of movement along the harness is shown by the outgoing wire at an angle of 45. Our gray wire goes up at this angle. That's right, let's go up! We protrude the sausage and slowly walk up the white rope:
VAZ speed sensor pinout and DS connection diagram
The speed sensor is an element of the vehicle's electronic control system. It depends on its readings how much fuel will be supplied, how much air will bypass the throttle valve when idling, and what the speedometer readings will be.
The speed sensor of a VAZ car is based on the use of the Hall effect, that is, a stream of pulses is transmitted from the device to the car's ECU, the frequency of which is proportional to the speed of the car. Auto electronics, analyzing incoming data, selects the required idle speed and sends a signal to a device that regulates the engine idle speed, which optimizes the composition of the air-droplet mixture entering the combustion chamber, bypassing the throttle valve.
During a distance of one kilometer, the speed sensor transmits over 6000 pulses to the ECU. Based on the parameters of the time analysis of inter-pulse signals, the on-board computer transmits data to the dashboard, thereby determining the speedometer readings.
As in many other cars, the VAZ speed sensor is located in the upper part of the gearbox housing, not far from the engine oil level dipstick. You can get to it from two sides: from above, by opening the hood and disconnecting the adsorber, and from below, using the inspection hole for convenience.
How to check the VAZ speed sensor
A failed speedometer sensor in a VAZ car is easily determined - in this case, the speedometer stops working, and it may also show some signs of life, but display incorrect information.
Using a tube, pliers or other available tools, rotate the sensor axis. In this case, you should see the voltmeter readings changing: the higher the speed, the higher the voltage (from 0.5 to 10 V). If this does not happen, the sensor requires replacement.
The VAZ 2109 speedometer drive is a common cause of its breakdown
The VAZ 2109 has a mechanical drive. Its driven and drive gears are mounted on the (secondary) shaft of the gearbox. From them, the torque is supplied through a flexible shaft to the car’s speedometer, which is located on the instrument panel.
Since the VAZ 2109 is produced with a high and low front panel, the specified flexible shaft can have different lengths (longer when the panel is high, shorter when low).
It is the break of this shaft that most often becomes the reason that the speedometer stops working, and this already leads to difficulties with cornering (changing gears correctly can be quite difficult) and unpleasant meetings with traffic police officers (the likelihood of a fine for speeding is high). As a rule, the shaft breaks near the entrance to the checkpoint. You can check for a break like this:
Replacing a car speed sensor
As for its location, look for the DS in the engine compartment in close proximity to the exhaust manifold. To be honest, the place where it is installed cannot be called ideal. While the car is running, the manifold heats up. The sensor wires rub against it, which over time leads to malfunctions and short circuits. Therefore, experts recommend that the first step is to properly insulate the wiring, and also use some kind of clamps so that the wires do not come into contact with the collector. This significantly extends its service life.
If the check shows that the DS is faulty, it needs to be replaced. Repairing sensors and similar small electronic devices is a thankless task. In a garage environment, this is unlikely to be possible, and the only thing that can be done is to clean the contacts from oxidation (this can be a problem).
It doesn’t matter whether you have an injection car or a carburetor with a Europanel - the connection of the speed sensor to the instrument cluster is identical.
PROCEDURE
Now let's figure out how to remove the drive when the speedometer on a VAZ 2109 does not work:
- To do this, release the cross member that secures the gearbox to the body, give back the nut that secures the drive
- Pry off the drive housing with a flat screwdriver (as in the photo below)
- By pressing the gearbox to the side (for example, with a piece of pipe) from the drive, we pull the drive out of it
- Then we check its serviceability
- To do this, twist the gear and see whether the groove for the speedometer cable begins to turn or not
- If the groove does not turn, then replace the speedometer drive
- When going to the store for a new drive, it’s better to take the old one with you as a sample just in case (you can confuse the number of teeth on its gear)
- And if you install a “foreign” (not the one you need) drive, then in no more than 100 meters it will break the box cover, because a mismatched gear pitch will simply turn the entire drive outward and result in serious damage to the gearbox
- To be able to use this gearbox in the future, it will be necessary to replace its rear cover and completely change the oil
- If the old one suddenly pours out, there will still be fragments and crumbs of the housing left in it, which can subsequently fall on a gear tooth or clog the oil channel
Now that you know how to determine what the reason is if the speedometer needle suddenly starts jumping and fix it with your own hands.
Drive repair
We only considered replacing the drive, if the speedometer does not work in the VAZ 21093, sometimes this is easier and cheaper to do:
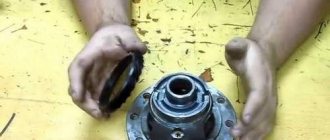
- The speedometer drive is removed, as a rule, to replace its housing, or the sealing ring from under which lubricant flows, or the drive gear itself
- It can be removed without dismantling the gearbox assembly; for this purpose it is better to drive the car onto an overpass, inspection hole or lift
The repair procedure will look like this:
- Using a socket wrench, unscrew the bolt that secures the drive housing, pry it off with a screwdriver, then remove it
Unscrew the drive nut, remove it, then pry off the housing with a flat screwdriver and remove the drive
- Now we can remove the driven gear
- This gear is made of plastic, so it is important to carefully inspect it and if signs of wear are found, replace it immediately
We inspect the condition of the rubber seal (shown by the arrow), then remove and inspect the plastic gear
- In addition, it is important to pay attention to the condition of the mounting socket, where the tip of the flexible rod (cable) of the speedometer enters
- The socket should not have licked corners or be broken, otherwise such defects are the reason for replacing the gear
- It is also worth paying attention to the condition of the box body in the place where our drive is installed
- If traces of lubricant leaks are visible, then it will be necessary to replace the rubber ring of the drive seal, which is located on its body
- To remove it, you will need to remove the driven gear, then push the o-ring out of the groove
- All parts are then washed in clean kerosene
Of course, no one has canceled the service station services, if you are too lazy to tinker, although tinkering is probably not an applicable expression here (it only takes 10-20 minutes), and the price of their services suits you, then decide for yourself.
Replacing the cable
Almost everywhere, car owners are faced with the problem of speedometer failure, which is often caused by a faulty cable. To replace the cable, it is not at all necessary to go to a car service center, because you can easily cope with this task yourself, our instructions will help with this. So:
- Go down the car (on a pit or overpass), then you need to unscrew the cable from the drive of your speedometer, located on the side of the engine compartment, move the rubber cap up, and unscrew the nut on the cable
- After this, disconnect the cable
- To disconnect the cable from the speedometer, you must first remove the instrument panel from the dashboard
- At the same time, if your car has a low dashboard, then unscrew two bolts and carefully remove the visor, squeezing the spring-loaded clamps with your fingers
- Then you can remove the instrument cluster
- If the car has a high dashboard, then first you will need to remove the trim, then unscrew the instrument panel
- Then you should unscrew the cable nut from the speedometer from the back side and pull out the old cable through the engine compartment, remembering how it went through
- Because the next step will be laying (pulling) a new cable
- It will be much easier to insert the plug into the compartment bulkhead if you first lubricate it with oil, for example Lithol
Important: Since there are high and low instrument panels, there are two types of cables, shorter and longer, for different panels, respectively. When purchasing a new cable, you should either have a sample or know its length, otherwise it will either not fit (too short will not reach) or will dangle and snag.
- Having removed the instrument cluster, it will not be difficult for you to remove the speedometer and replace it
- Then we return the instruments to their place, having first screwed the cable nut to the speedometer, and insert the panel into its original place
