Principle of operation
VAZ-2114, a car with fuel injection. There are 3 types of speed counters installed on these machines. The first 2 are from Russian manufacturers and are equipped with a plastic speed sensor.
The last one from Germany with a sensor in a metal case. The speedometer system includes the following components:
- Speed sensor or EMF.
- Idle speed sensor.
- Fuel supply sensor.
- On-board computer
- Electrical wiring.
- Safety fuse.
- Pulse controller on the speedometer.
The system is designed in such a way that the amount of fuel mixture supplied to the engine depends on the speed readings. The speedometer works according to the following principle:
- On the gearbox, on the right side, next to the CV joint, there is an EMF.
- The rotation of the secondary shaft of the gearbox closes the magnetic contact of the sensor.
- These pulses are transmitted to the electronic control unit (ECU).
- The on-board computer calculates the data and transmits it to the pulse controller.
- The controller moves the speedometer needle based on the received voltage.
On fourteenth models, 2 types of speed sensor are installed: mechanical, with a rod and gears, and electronic, with a magnetic rod. It is the rods that cause the speedometer failure on the VAZ-2114.
Other Troubleshooting Methods
A malfunction of the mechanical drive of the VAZ-2114 speedometer occurs quite rarely and its elimination requires knowledge and qualifications.
After purchasing a drive cable, you need to do the following:
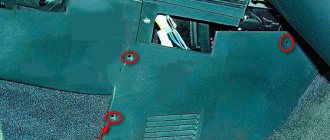
- Carefully unscrew and remove the dashboard. You need to be very careful, since the instrument panel has many screws and decorative overlays.
- Remove the connectors from the low beam switches, side lights and hazard lights.
- Remove the radio by first disconnecting it from the cigarette lighter and unscrewing the screws.
- Having pulled out one of the ends of the flexible shaft located in the speedometer block, unscrew the other end of the shaft from the gearbox.
It is important to know. VAZ-2114 cars can be equipped with speed sensors from different manufacturers. Bosch speed sensors have square connectors, while General Motors connectors have round connectors.
Symptoms of a problem
On a VAZ-2114, the injector speedometer does not work due to the failure of one or more elements of the entire system. Initially, you can determine the malfunction by the error code that the computer sends to the machine’s bot panel.
- P0500 indicates an open circuit between the EMF and the ECU.
- P0503 indicates unstable reception of pulse signals from the EMF.
You can understand that the speedometer on a VAZ-2114 does not work visually:
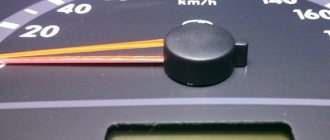
- The needle is constantly near zero.
- The needle vibrates or shakes.
- The car's tachometer does not work.
- The arrow drops sharply from any value to zero.
You can also determine the malfunction by engine operation.
- The motor runs intermittently.
- The power unit stalls during acceleration.
- Deterioration in power is detected.
- The engine does not respond well to sudden pressure on the gas pedal.
If the speedometer on a VAZ-2114 does not work, the causes of the breakdown must be sought from the EMF to the speed control device itself.
Fault repair
In fact, no one is repairing the speed sensor on these VAZ models, since it is much easier and faster to replace this entire unit - it costs around 400 rubles, which is not that expensive.
In order to begin the replacement process, it is recommended to drive the car into a pit and prepare screwdrivers, pliers and a set of wrenches. If there is no hole nearby, you first need to remove the terminals from the battery, then remove the air filter and intake pipe, and then remove the terminal from the DS itself (if the car uses a cable drive for the speedometer, you need to remove that too).
Next, use a rag to clean the work area of debris, oil or dust, and then proceed directly to the replacement:
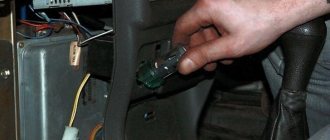
- Remove the terminal block using the button that deactivates the spring retainer.
- Using a 21mm wrench, remove the speed sensor from its socket.
- Install the new device so that its rod precisely fits into the fixing sleeve to transmit rotation.
- Tighten the thread back with a 21mm wrench, without pinching it, so as not to damage the integrity of the plastic housing of the DS.
Replacing DS VAZ 2114
The result can be assessed immediately - if the sensor does not fit into the socket, it means that its rod has not moved into the bushing, so the procedure will have to be repeated until success is achieved. After this, you need to return the removed units to their place, connect the power and check the operation of the new sensor while the car is moving. Or, if the replacement was carried out in a pit and with a jack, you can evaluate the performance of the DS using the same multimeter and rotating the hung left wheel.
Examination
Checking the speed calculation system must begin with its most important component, the speed sensor. Further along the chain you need to go through the entire chain until the problem is completely identified.
EMF
On 8 valve injection models of the VAZ-2114, the installation of a metal speed sensor is not provided. To check the device you need to:
- Remove the “+” terminal from the battery.
- Remove the air purification filter with the pipe connected to it.
- Disconnect the plug and the EMF voltage supply socket.
- Wash the place where it is installed on the manual transmission.
- Using the “22” key, turn the part counterclockwise. Caution must be exercised. The sensor is made of plastic. Using a key can damage the edges or break the device itself.
After dismantling, inspection and cleaning must be carried out.
- Clean and rinse the socket with contact terminals with solvent.
- Inspect the rod tip. The gears are also made of plastic. If abrasion or breakage of the teeth is detected, the entire part requires urgent replacement.
If there is no visual damage, you need to check the device using a multimeter.
- Set the multimeter to DC voltage measurement mode.
- The test probe “+” is connected to the “2” contact of the detachable socket.
- Connect the control probe “−” to the vehicle ground (to the body).
- Turn the rod as quickly as possible.
During rotation, the EMF should produce from 0.5 to 12 volts of direct voltage. If there is no data at all, the part is considered faulty. The rotation test can be carried out using a hand-held electric drill. You need to clamp the rod into the carabiner of the device and turn on the rotation. Diagnostics can be carried out without dismantling. To do this, the car is jacked up and the EMF readings are measured at first speed.
If the test does not give a negative result, you need to look for the cause in other elements.
Wiring
The wiring is checked by a simple test. To do this, you must first check all 3 wires coming from the EMF connector to the ECU. The tester is set to diagnostic mode with a sound alert. The wires are checked at both ends at once. A sound signal will confirm the integrity of the circuit.
Next, you need to ring the cable from the ECU to the speedometer. To do this, you need to dismantle the speedometer and disconnect its electrical connector. The wiring is checked in a similar way from 2 sides of one wire. An audible warning indicates the integrity of the cable. If the circuit does not ring, the reason may lie in the fuse, which also needs to be checked.
Fuse
The fuse responsible for protecting the speedometer from electrical overloads is located in the block under serial number “9”. This element is marked with the corresponding icon on the block cover. It's very easy to find. He is responsible for the operation of the heating system and speedometer. Checking the node is not difficult; to do this you need to:
- Set the multimeter to dialing mode with a sound signal.
- Remove the fuse from its socket.
- Connect each multimeter probe to the contacts of the part.
No sound will indicate a faulty fuse element. It will have to be replaced. The operating current of the factory fuse is 7.5 A. It is imperative to replace the damaged element with exactly the same marking. It is prohibited to insert metal objects or thick wire into the connector. Such jumpers will not protect the speedometer during a short circuit or voltage drop. The fuse socket itself may burn out, the insulation of the wires may melt, and a fire may occur.
If the fuse is in a transparent case, then you will not need a tester for checking. You only need to visually assess the condition of the part. Both contacts must have a whole jumper between them.
After installing a new fuse, you need to test it for a short to ground. You just need to connect one tester probe to the car body, and the other to the fuse contact. The presence of an audible signal will indicate a short circuit to the housing. You will need to disconnect all the speedometer plug sockets and repeat the test. If the short circuit does not disappear, the problem must be looked for in the electrical circuit of the heating system.
Speedometer
If all previous checks have shown that the speedometer elements are in good condition, this device must be checked. To do this you will need a wire up to 2 meters long. Further:
- Connect one end of the wire to the “+” of the battery.
- Use the other end to touch contact “2” on the speed meter plug. You cannot keep the wire in contact for a long time. If the speedometer needle does not respond to the voltage supply, then the problem lies under the device body.
If, after applying voltage, the needle drops or trembles, the problem may be poor contact.
Domestic speedometers suffer from poor contact soldering. To check, you need to disassemble the device and check the integrity of all current-carrying paths. If melts or breaks are detected, they need to be soldered. After soldering, the speedometer needle still does not work, the problem is in the impulse relay. This part cannot be repaired, so it will have to be replaced.
Speedometer device for VAZ 2114 injector
The speedometer performs the functions of displaying the speed of the vehicle.
Mechanical speedometer models
- Initially, VAZ cars were equipped with a mechanical type device. The driver saw the speed arrow on the digital scale on the panel.
- A counting mechanism, consisting of plastic gears with different gear ratios, accumulated the distance traveled. The meter mechanism was rotated by a drive, which was a flexible shaft.
- A protective casing that contains an elastic, rigid cable inside, one end of which engages a worm mechanism mounted on the output shaft of the gearbox (on all-wheel drive models - the transfer case), the other - into the socket on the back of the dashboard.
- The gearbox gears rotated faster - rather, the cable spun around its axis, rotating the magnet of the device. Under the influence of a magnetic flux, the metal plate rotated. The elasticity of the spiral spring was overcome and the needle was deflected.
- When the car stops, the circular movement of the magnet stops, the plate loses the influence of the field, and the spring returns the arrow to the zero mark. The gears of the counting mechanism stop counting.
Electronic speedometers
The mechanical principle of measurement has been replaced by electronic methods. The emphasis is on non-contact methods of retrieving information, eliminating wear of rubbing parts.
There are several options used in the automotive industry.
- Optoelectronic. The mechanical part is similar to the previously described device. The electronic circuit contains a light transmitter, a photodetector, and matching radio components. Electrical impulses are generated by a rotating disk, passing the light flux from the LED to the phototransistor through radial cuts. One revolution corresponds to a certain distance. The speed is determined by calculating the pulse repetition rate per unit time.
- No cable. Wearing parts are completely eliminated. A multi-pole magnet is attached to the drive axle connected to the secondary shaft of the gearbox. An integrated circuit containing a magnetoresistor using the Gaussian effect is installed on a fixed housing. The element's resistance changes when it enters a magnetic field, creating a pulse. The frequency of movement directly depends on the speed of turning, allowing you to calculate the speed of movement.
- On the Hall effect. A rectangular metal plate, powered through two opposite sides with a constant voltage, penetrated by magnetic field lines at an angle of 90 degrees, produces a Hall voltage on the remaining faces. A change in magnetic flux (appearance, disappearance) forms a sequence of pulses, converted into speedometer readings. This option is used in VAZ 2114 cars.
Replacement
Practice has shown that the weakest unit in the speedometer system is the EMF. The plastic parts of this unit are very fragile and quickly wear out from friction. A faulty sensor will have to be completely replaced. To do this you need:
- Disconnect the “+” terminal from the battery.
- Remove the air purification filter and its pipe.
- Disconnect the current-carrying EMF connection.
- Using the “22” key, unscrew the part.
- Wash the sensor installation area thoroughly with solvent.
- Replace the rubber seal ring.
- Install a new EMF analogue.
- Reinstall previously dismantled parts.
Attention! Devices with gears have different numbers of teeth. If you install a part that differs from the original, a problem may arise in the accuracy of the speed readings.
Instructions for replacing the VAZ-2114 speed sensor
Step-by-step replacement of the speed sensor with your own hands is not particularly difficult; to do this, prepare the following list of tools in advance:
- screwdriver with Phillips and flat tip;
- pliers;
- keys of different sizes.
Follow the step-by-step instructions for replacing the speedometer:
- Disconnect the terminals coming from the battery device.
- Remove the air filter and the intake pipe from the car.
- Remove the terminal from the sensor.
- If the wire on the speedometer is made in the form of a cable, then disconnect it from the meter.
- The area where the sensor is mounted must be cleaned of dirt and dust, only then proceed to remove the old product using tools.
- Remove the fixing nut; a wrench designed for 22 is ideal for working with it; if you don’t have a suitable tool at hand, you can use your fingers.
If the VAZ-2114 has a built-in speed sensor of the 3rd type, then the car manufacturer installed the speedometer directly in the gearbox. The device is first cleaned of oil; after removing the metering device, the seating area is closed. The new sensor is installed according to the same instructions, only in reverse order.
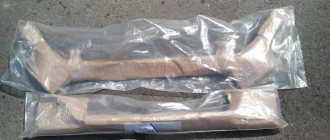
Analogs
Original speed sensors for injection VAZ-2114 are marked with article number 2111-3843010. This is a part in a plastic case, with a drive gear made of the same metal. The German analogue in a metal case is also suitable for this car model, but to install it you will have to redo the electrical contact socket.
Domestic EMFs are quite reliable. Their declared service life is up to 100–150 thousand kilometers. Rapid wear occurs due to dirt or damage to the housing itself during the repair of other components. You just need to monitor the condition of the part during operation.
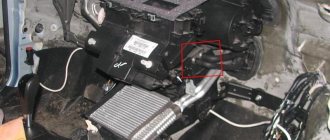
Tips for motorists
The main reason for the speedometer not working on a VAZ-2114 car is the speed sensor, which is installed on the gearbox. You need to look for it next to the right inner CV joint. This sensor is screwed onto the housing of a mechanical drive, consisting of two plastic gears.
Pulse signals from the speed sensor are sent to the electronic controller. Moreover, these signals are used by the controller not only to generate the car’s speedometer readings, but also to control the engine’s idle speed. Based on this, we can conclude that a malfunction of the speed sensor can be determined not only by the failure of the speedometer, but also by the unstable operation of the engine at idle. These faults are interrelated.
Repair of the VAZ 2114 dashboard (VDO)
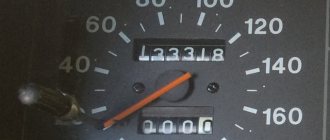
Hello! Quite often we encounter such a problem as a failure of the dashboard. Without a doubt, this is not pleasant, and costs about 3,500 rubles. And besides this, other problems arise, such as the mileage traveled, because when selling a car it will be difficult to prove what the mileage was before replacing the dashboard. Together with changing the odometer readings (they will adjust the kilometers traveled from the old PP to the new one) this pleasure will come out to about 4000. This amount is worth trying to revive. And so let’s look at the main malfunctions of the dashboard. First, let's understand the principle of operation.
The arrows are moved by so-called motors, their principle of operation is similar to the principle of operation of an engine temperature measuring device from the classics or any other Soviet automobile industry, except that in this dashboard the position of the arrow no longer depends on the readings of one or another sensor, on what it says to do her dashboard processor. Those. data from the sensors comes to the processor, and it gives an impulse to the motor, and it changes the position of the arrow.
Hand freezes, shakes and changes in zero value
And so the most common defect is the needle hanging and at the same time its trembling, i.e. the arrow is frozen in some position and you can see how it is trying to change position, but something is preventing it - 1) The decorative sticker with the scales has come off and is preventing the arrow from continuing to move. 2) Malfunction of the motor (geared motor)
A little background
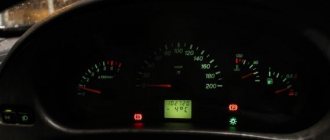
VAZ 21099 2000 arrived to me. with a 2114 interior. This surprised me, of course, because a friend had a 2109 injection model from 2002, and the panel and interior were 2109. The essence of the problem was as follows. The tachometer needle and the fuel gauge needle are stuck. These two arrows only trembled convulsively when the ignition was turned on. Unfortunately, I didn’t take a photo of this, but it looked something like this.
May Rayman24 forgive me, because I took the photo from his page, but the situation is similar.
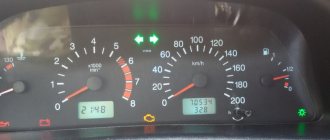
All the electricians in our city prophesied the death of the dashboard, and shouted with one voice, buy a new one, or look for the same one but used. Seeing that the odometer was alive and normally recording the kilometers traveled, it was clear that the processor was alive. You can verify that the processor is alive using a simple command: with the ignition off, press the reset button for the daily clock readings and turn on the ignition. If the arrows on the dashboard describe an arc, it means that the test mode has started, then press the odometer button again and see the firmware version, then press it a third time and see the error code. In self-diagnosis mode, the instrument panel displays the following error codes: 2 – Overvoltage 3 – Fuel level sensor error* 4 – Coolant temperature sensor error* 5 – Outside temperature sensor error** 6 – Engine overheating*** 7 – Emergency oil pressure* ** 8 – Brake defect*** 9 – Battery low*** E – Recognition of an error in the data packet stored in the EEPROM
This is what happens!
If the self-diagnosis mode has started, then the percent is alive, and let’s move on to disassembling the dashboard.
Let's disassemble it completely, we only need the board for work.
Next, we arm ourselves with a soldering iron and a “tin suction” and solder out the faulty motor.
The place where the gearmotor stood is circled.
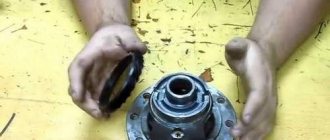
And here we are holding it in our hands.
We take a scalpel or something very strong and thin and carefully disassemble the motor into two halves.
The photo shows two of the three breakdowns, which can occur and which can be easily fixed. What is circled in blue is a spring that prevents the gearbox gear from going down, and keeps constant resistance for the mechanism to work; it should be in the form of an arch. But the breakdown that brought the wanderer to me is circled in red. You can see how the transmission shaft jumped off its groove, and thus could not set the gearbox in motion. This happened due to the old age of the plastic; over time, the plastic aged and a gap formed between the halves; it can also occur due to excessive force when installing the arrows. Once in the turboflight zone, the shaft jumped off. There are times when wedges are knocked out with wedges. Those. entering this zone again brings life back to the gear motor, but it is clear that this is temporary, and with our roads this will happen indefinitely. But the third reason is a malfunction of the left or right winding, but this cannot be repaired and requires a donor.
And so we carefully clean the grooves under the transmission shaft with an awl or a scriber, put a new lubricant (litol, CV joint) with a match, the main thing is not to overdo it, and in a small amount we coat the places shown in blue with super glue.
Now we start assembling, the main thing is that now, due to the glued elements, a gap will not form for a long time.
And we solder it back onto the board, but before that you can check the gearmotor with a 1.5V battery by placing the arrow in its rightful place and connecting the battery according to the diagram given in the picture. If everything is fine, then we solder the gearmotor to its rightful place.
When the instrument panel is assembled and the time has come to install the arrows, we will again need the test mode for proper calibration. We set the arrows, started the test mode, at the end of the test the arrows will drop to zero, you will only need to remove the arrow from the rod and put it in the zero position, and then make sure that it is correct by restarting the test mode, the arrow should make a full move, for example on the speedometer The needle in test mode should go from 0 to 200 km/h, the same applies to other instruments.
Make sure that all the legs of this stabilizer are well soldered so that there is no undercontact.
I hope my article will help you. And at the expense of your hands it will save money.