The latest VAZ 2110 models received fog lights, but most cars were left without this useful element. PTF significantly increases safety on the road, because the driver feels confident in foggy weather. As a result, there are fewer accidents. Installation of fog lights can be carried out either in a car workshop or on your own. Some motorists prefer to upgrade their optics with xenon, after installing which the glow becomes even more spectacular.
When choosing a set of PTFs, you need to start from the dashboard. If it is EURO model, then the kit for model 2115 will be suitable. For the old dashboard, the standard VAZ 2110 kit will be suitable.
So, fog lights have the following advantages:
- A flat luminous flux that spreads higher and spreads over the road surface;
- Improved visibility of markings and roadsides due to the width of the PTF;
- The light from the fog lights does not blind oncoming drivers, but the car is clearly visible to other road users.
Necessary tools and elements
Before purchasing everything you need, decide on the color. Today, white optics are most popular among VAZ 2110 owners, but you can also find classic yellow. Now to the purchase: some people prefer to take a ready-made kit, which includes wiring, while others choose the parts separately. The second option is not only cheaper, but also provides more installation options.
To work we will need:
- Headlight kit;
- Key as well as indication;
- Relay;
- Plastic pads;
- Headlight frames;
- Terminals called “male/female.” Recommended to be purchased separately, no wiring included;
- The terminal that will go to ground;
- Wiring.
The wires of the VAZ 2110 need to be given special attention. It is recommended to go to a specialized electronics store to get them. We need an option with two copper cores, as well as double insulation. As for the cross section, here you need to build on the power of the lamp. If the power indicator is high, then it is better to take 0.75 millimeters. At normal power, 0.5 mm wires are used.
Some information about xenon
Xenon lamps for car VAZ 2110
Where did xenon come from and what is it? This question might be asked by a person who has never heard of xenon lamps, but such people have become fewer and fewer lately. The first xenon lamp was invented back in 1940, and was presented to the public after the war. Xenon lamps became very popular after that, as they first found their application in the film industry, where they managed to retire the antediluvian carbon arc lamps. A characteristic feature of xenon lamps is their light - bluish-white and very bright. Today, xenon lamps have found application not only in the film industry, but also in automotive production. Without them, it is impossible to talk about progress or modernization of the automotive industry. Almost half of our domestic cars produced after the 90s are not equipped with xenon lamps. Owners often carry out this installation themselves when tuning the car. The result always exceeds expectations.
Connection process
The connection of fog lights begins with determining the area of their installation. If the car is quite old, then there will be no regular place on the body - it will have to be mounted under the bumper. The diagram should come with the kit - we will do the work according to it. If you have skills in working with electrical engineering, then the circuit can be changed, because you need to take care of the adjustment.
The installation proceeds as follows:
- First of all, we must lay the wiring to the fog lights. The process is carried out under the hood. You can make the laying parallel to the standard wires.
- Supplying power to the button on the dashboard. The factory diagram says that connections are made from the fuse on the side lights on the right.
As an alternative, you can take power from the terminal from the ignition switch or from the button responsible for the lighting. Using this method, the new headlights will only work when the ignition is on. If you wish, you can go according to the standard scheme, that is, take power for the PTF from the dimensions. Then you need to carefully monitor the fog lights turning on and off so as not to drain the battery.
- The final stage is connecting the optics to the plug.
If everything is done according to the diagram, then light should already appear. All that remains is to make the adjustment. Ideally, the PTFs should look slightly downward, while illuminating both the side of the road and the road. In this case, they will not blind other motorists.
Installation in a standard headlight unit
Preparing the wiring
This can be done by following a certain sequence of actions:
- The first step is to disconnect the negative cable from the battery;
- Prepare the wiring. The plus goes to a yellow wire, the minus goes to a brown wire. Two minuses and the same number of pluses are crimped one by one, after which they must be carefully insulated;
- Process the holes for the lamps with a simple handy tool - a file. Check periodically to see if the bulbs are included. If you overdo it with sharpening, it will be more difficult to return the sawn material to its place;
- Now install bi-xenon optics;
- The wiring from the light bulbs is pulled through the protective cover. You will have to drill a hole first. Therefore, having a drill at hand is a must;
- After installing the headlight in the base, fix it. Just don’t get too clever with polarity;
- Along with the lamp, instructions for connecting the ignition unit are provided. Follow it, there is nothing complicated in this scheme;
- Replace the headlights;
- Connect the negative terminal back to the battery;
- If the headlights function and turn on as expected, then the work can be considered completed early. There remains the last, but very important stage - adjustment.
Xenon installation
It is very important that the headlights themselves have the letter “D” - this is what indicates that xenon can be inserted into the headlights. If the letter “H” is written, then problems may arise with the authorities. Before installing xenon in the VAZ 2110, it is necessary to remove the standard block lamps. The xenon is dismantled and installed according to the following scheme:
- Remove the negative terminal from the battery.
- All connectors from the headlights must be disconnected.
- Carefully unscrew the bolts securing the optics unit.
- We dismantle the radiator grille.
- There will be a bolt at the bottom that secures the headlight from below. Pry up the cover and remove it completely.
- Using the 10th wrench, unscrew the nut securing the block to the bracket.
- The block can then be removed.
- The next step is to turn the lock, which belongs to the hydraulic corrector cylinder. Now we remove it completely.
- Before installation begins, it is necessary to remove the turn signal - it is held in place by several bolts.
To avoid problems with the law, it is better to install a legal xenon module. Alternatively, you can take headlights from Hella. Both the first and second generation models are suitable. They are designated by the name Lens G2; headlights are standardly installed on BMW E60, so there can be no questions about quality.
What to do if xenon headlights stop working?
If xenon bulbs stop functioning, the reasons may be as follows:
- damage to the contact on the connector for connecting to the power circuit;
- broken wiring;
- failure of the lighting source, the lamps cannot be restored;
- control module failure.
Why does the ignition unit break?
Reasons for failure of the ignition device:
- Lack of tightness on the module body, which leads to dirt and moisture getting inside the unit. The problem can be determined by disassembling the device and diagnosing its internal components. If dirt or water gets into the module, the lights will not light up or will begin to blink when turned on.
- Negative effects of corrosion. The solder joints of electronic components may oxidize, causing components to fall out of the solder. The problem is associated with assembly errors or regular exposure to moisture.
- The pulse signal from the controller has disappeared. There may be problems with the transistor elements, multiplier or transformer device.
How to repair a xenon ignition unit yourself?
Module repair is performed as follows:
- All electrical circuits are diagnosed for breaks or leaks. This refers to the wires that go to the module. The problem may be a pinched or damaged power line.
- The device is treated with an alcohol solution, this will remove rust and traces of condensation. You must act carefully so as not to damage the board. The sealant is removed from the back of the circuit and the contact elements are re-soldered with a soldering iron. Everything needs to be soldered, since leaky parts are difficult to visually identify.
- An opened ignition device is diagnosed on something that does not allow voltage to pass through. When diagnosing, there are no parts that light up nearby. The test is performed while the device is connected to a light source. The voltage of the multiplying element is 35 kV, so if the unit is not turned on, then it will not be touched until it is completely turned off.
- The next step will be to perform diagnostics on the transistor elements, there are a total of four on the board. A multimeter is used to check. If testing shows a device with a breakdown, it is soldered again. It is recommended to install 4N60 parts.
- Using a tester, it is not always possible to determine an element with a breakdown. It may be necessary to remove each transistor before the ignition device is activated. You can turn it on briefly, for a couple of seconds.
- If the transistor elements are intact, the resistor devices are checked. The burnt out part is replaced with a new one.
When assembling the block, it is not recommended to use silicone sealant.
After hardening, this product is as hard as possible. If the transient device needs to be replaced in the future, opening the module will be problematic.
Prerequisites
Including xenon in the fog lights of a VAZ-2110 vehicle is a fairly popular and practical tuning solution today. The operation can be attributed to the modernization of the optical elements of the car structure. When installing xenon in VAZ-2110 foglights, it is necessary to comply with all operating conditions established by the maintenance regulations. It will be necessary to keep the glass optics of the VAZ-2110 car clean; if this is not done, a “dazzler” effect may appear, which will become a noticeable obstacle to the safety of oncoming cars and will reduce the efficiency of the fog lights.
Legal connection
You should know that the PTF may already have bi-xenon lamps and corresponding lenses installed from the factory. This is a PTF of the so-called class D, such a light is absolutely legal, inspectors cannot “find fault” with it.
To install xenon on a VAZ 2110 in foglights, as well as conventional headlights, it is necessary that the entire kit, which uses bi-xenon lamps, be legal. That is, these are, for example, licensed headlights or PTF. There must be a letter D on the glass itself, it is this that indicates that bi-xenon lamps need to be connected to this headlight. In this case, xenon is legal and will not cause any complaints.
Note
When the owner of a VAZ-2110 car decides to carry out tuning and install xenon in the foglights, it is important to first understand the desired effect obtained from this operation. It should be warned that if you need to change both the high and low beams, it is important to take into account that these bi-xenon lamps are quite long and may not fit into the headlights of all vehicles, which in turn will require the selection of alternative solutions. As part of their design, the main element of lensed headlights has a special cap, through which the direct light of the lamp is covered. It is this cap that can interfere with the process of installing xenon in the fog lights of a VAZ-2110 car, making tuning the optics sometimes simply impossible.
Tuning and repair of VAZ 2110
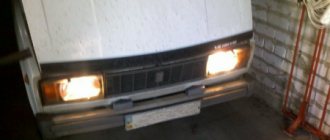
Very often, dozens of owners are not satisfied with the standard headlights. Firstly, it does not illuminate the road well enough, and secondly, visually it gives off a yellowish tint, which does not look very nice.
Therefore, in this article I will tell you how to install xenon in a VAZ 2110. Moreover, we will not consider here ordinary light bulbs that simply shine white (a kind of pseudo-xenon), but we will install real xenon with ignition units.
I’ll note right away that this type of modification is not complicated, so almost any car owner can do this kind of tuning of the VAZ 2110 optics.
Required Tools
When carrying out tuning, you need to use a special set of power tools, which includes pliers with a protective case that meet all safety requirements when working with electrical equipment. Also, the tool kit must include a screwdriver with attachments for various bolt connections, with which you can easily unscrew the element with a slight movement. It is first important to check that there is no power supply to the element, which will avoid electric shock.
Alternative to xenon
It is also important to note the fact that tuning using xenon and LED lamps should include a study of the individual characteristics of the vehicle’s headlights. For example, some optics glasses can be made corrugated, which in turn will require preliminary preparation of the structure for the subsequent installation of LED elements. The preparatory process includes preliminary polishing of the surface, or if it is not possible to perform this operation, you can choose an alternative solution, namely the search for a smooth structure, which is relevant in the case when the decision to install bi-xenon lamps is chosen.
Module installation
If you want the installation of xenon on a VAZ 2110 to be carried out within the law, buy a new approved module.
Kirzhach in analysis
Just be sure to take into account the fact that the “Bavarian” Hella Lens G2 . This is a second generation module with wider lenses. The first generation is not suitable for us.
Subtleties of installation and operation
In the same case, when installing conventional xenon or bi-xenon, in other words, installing a set of adaptive equipment, there is no need to change the glass or polish them. This is due to the fact that bi-xenon is simply not compatible with the corrugated type of optical elements. This condition is determined by the fact that when bi-xenon is installed in this type of structure, the light becomes diffused, and subsequently, when turned on while driving along the road, causes a kind of discomfort to drivers of vehicles in the oncoming lane. Consequently, incorrect selection of elements reduces the level of traffic safety on the road, thus increasing the likelihood of a car getting into an accident.
It should be noted that the installation of the element is relevant in the PTF, which also concerns the subsequent effectiveness of both high and low lighting modes. In this case, a budget option can be called the use of special lamps with an H1 type base. If necessary, a more modern, high-power product can be selected. The use of modern designs will ensure the safety of lighting for drivers of oncoming vehicles. It is recommended that lenses be installed in a specialized workshop, where professionals will select the optimal solution for a specific car model.
It is no secret that the quality of vehicle lighting has a direct impact on the level of safety. Both for the motorist and his passengers, and for other sections of the road.
Many believe that xenon on the VAZ 2110 is installed illegally, and any inspector can fine you a tidy sum of money. Today we will talk about the legality of xenon and the features of its installation on the domestic “ten”.
Legal equipment
Therefore, to install xenon as fog lights and main headlights, you will need to purchase a set of legal equipment. There must be an inscription in the form of the letter D on the headlight glass. It indicates that bi-xenon lights are connected to these headlights. Consequently, everything is legal, and therefore there is no need to fear the traffic police post.
If you have xenons but have an H on your headlight glass, you will have problems. This is because such an inscription indicates that halogen lamps must be located under the glass.
Bi-xenon does an excellent job of illuminating the roadway and adjacent areas. This applies to both headlights and fog lights. A characteristic feature of xenon is that it emits bright white light with a blue tint.
Xenon in headlights and PTF
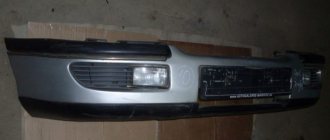
Fog lights from Bosch, which are installed on the VAZ 2110, do not have lenses. Instead, reflectors are provided here. This makes the beam of light not low enough.
Therefore, when installing xenon, it is very important to install focusing lenses so that the bi-xenon behaves appropriately. That is, it illuminated the road efficiently and did not blind oncoming cars.
Set
Of course, without dismantling the old headlights it will be impossible to install xenon devices. Dismantling is performed as follows.
- The vehicle is deprived of power by removing the negative terminal from the battery.
- The connectors going to the headlights are disconnected. All without exception.
- The fasteners are removed from the top mount. The bolts are located there.
- The radiator grille is dismantled.
- The bolt that holds the headlight unit in its lower part is removed. He's there alone.
- Next, pry up the cover using a flat-head screwdriver and remove it.
- Now take a 10 mm wrench and use it to remove the fixing nut to the bracket.
- All that remains is to remove the headlight unit.
- Do not forget to pry the hydraulic correction cylinder retainer using the same flat-head screwdriver to remove the unit.
- The direction indicators are removed. To do this, simply unscrew a couple of bolts.
If you want the installation of xenon on a VAZ 2110 to be carried out within the law, buy a new approved module.
Kirzhach in analysis
Just be sure to take into account the fact that the “Bavarian” Hella Lens G2 modules are suitable for the VAZ 2110. This is a second generation module with wider lenses. The first generation is not suitable for us.
Of course, the cars are structurally different, so the installation will have to be slightly adjusted.
To get started, purchase the necessary materials. Just two pieces:
If you take used lenses rather than new ones, purchasing the entire set will cost you about 3.5 thousand rubles. Since you will install them yourself, there should be no additional financial costs.
The revision process looks like this.
- Measure the size of the seat where the standard Kirzhach module is mounted. Now the Hella module will be located there. The place should be prepared in advance.
- The standard wiring is connected to the wiring from the bi-xenon optics. There are no problems here, since everything matches perfectly.
- Now the new bi-xenon module is put in place.
- You can fix the ignition unit in any way convenient for you, since there is more than enough space for installation in the VAZ 2110.
How to choose a good xenon kit?
The selection of a suitable xenon lighting source for a car should be based on two factors: the popularity and reliability of the manufacturer and the required brightness of the lamps.
What should a xenon kit consist of?
The complete set of gas-discharge bulbs for headlights or fog lights includes:
- lighting sources designed for a certain power and with specific markings;
- ignition device;
- a set of wires and elements for connecting and fixing lamps.
The ignition unit is a module designed to supply a certain amount of voltage required for activation to light sources. More expensive units have a more complex design, which allows them to control a larger number of processes. If the device is of high quality, it will be able to ensure long-term and uninterrupted operation of the light elements. This is due to the fact that when igniting the lamps, the basic technical parameters are observed within the required range.
Xenon marking
The marking of gas-discharge devices can be 5000K, 6000K, etc. This parameter determines the color temperature, that is, the brightness and shade of the light bulb. If the device marking is 4300K, then the light will be whiter and have a yellowish tint. The use of such sources is relevant in PTF and head optics. They are more effective when driving on wet roads.
Devices rated at 5000K have a white emission color. Their power is higher, and the light itself is more pleasant to perceive by the human eye. 6000K bulbs have a blue tint and, as a result of their low light output, are inferior in power to previous options. However, this type of device is more popular among our compatriots. As standard, when producing cars, companies install xenon lamps rated at 4200-5000K.
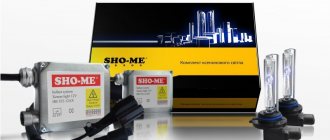
The AvtoGSM channel in the video unpacked and made a brief overview of the xenon equipment from the manufacturer Show-Mi.
Which xenon is better?
It is not a fact that an expensive set of gas-discharge light bulbs will function efficiently and effectively. When purchasing an ignition unit, it is also recommended to pay attention to the cost.
It is necessary to choose a device that matches the technical parameters of the machine. For example, if the car is not equipped with a module for monitoring the voltage of light bulbs, then it makes no sense to buy xenon with a “fake”. This will not affect the quality of his work in any way.
It is not advisable to purchase thin ignition units, called “slim”, if there is a lot of space in the engine compartment for installing a standard device. The cost of such “devices” is higher. And if the block is cheap, then, as a rule, it is made of low-quality materials, and the assembly also leaves much to be desired.
The most popular manufacturers of xenon lamps
Manufacturers of gas-discharge lighting sources that have positively proven themselves among consumers:
The Test Lab channel talked about the nuances that will allow you to distinguish the original Osram xenon from a fake.
What is the imperfection of the VAZ 2110 headlights
The stream of light yellow beams emitted by ordinary low and high beams deserves many-sided criticism in many respects. Quite often you can meet a "tens" driver who claims that it is impossible to adjust the direction of the beam, usually even in bench conditions.
It is worth noting that the headlights for the VAZ 2110 were manufactured by two companies
:
Bosch and Kirzhach
. The former show slightly better lighting, although not perfect. The Russian block has a lens in its composition, the beam of which is too narrow. In this case, it is recommended to use PTF to improve the situation a little.
Read:
By installing good halogen lamps in Bosch lighting elements, you can try to achieve an acceptable level of illumination. Kirzhach defects cannot fix even the upper halogen
. This is explained:
- poor headlight seal, resulting in the inside of the lens being dirty (lost efficiency up to 40%),
- non-functional optical design (focal length is quite large)
- no headlight washers.
Step-by-step guide for self-installation of xenon on a VAZ 2110
Due to the large number of cars on the roads with incorrectly converted “collective farm” headlights with xenon, which blind oncoming drivers, today you can hear more negative things than positive things about xenon. But it should still be recognized that xenon lamps in headlights are much brighter than conventional ones. They perfectly illuminate the road with daylight-like light, moreover, they have a longer service life and consume less energy. But installing xenon lamps yourself without thorough experience and knowledge is extremely undesirable. Incorrectly adjusted headlights will, at best, result in a fine, and in the worst case, a serious accident.
For those who are not put off by such a warning, and who are confident in their knowledge and ability to correctly adjust the headlights, read on to learn how to independently install xenon on a VAZ 2110. This manual should be used as an informational guide for a general understanding of the matter. There are a lot of small nuances that can ruin the whole thing. The installation of xenon on a VAZ 2110 should be accompanied by fine tuning of the light beam. If you see that the headlights are flashing, do not drive onto the road under any circumstances.
Further in the article, we describe a way to safely install xenon on the headlights of a VAZ 2110 using the least resistance. There is nothing complicated in the procedure, so with a sufficient level of desire and patience, you can complete the task without any problems. Go.
Diary of VAZ 2110 | Choice of fog lights. PTF Kirzhach
Enjoy watching everyone, I hope my video helped someone with their choice or technical questions) Spare parts
The discharge lamp has no filaments in its design. Here the luminescence process is based on the principle of a light arc. the inert gas glows. There is no field focusing feature for that matter. Thus, an additional element must be used. lens. But this minus is blocked by the light output, which increases several times compared to halogen lamps.
Read:
Thus
, it is not possible
to install an Xe bulb in a headlight using a simple reflector.
Due to improper scattering of the rays, the correct effect will not be obtained. However, this is not the most important thing. It is dangerous that ignoring an important requirement (the presence of a lens in the design) will lead to the appearance of other road users. Possibility of installing xenon in PTF. big question. The direct purpose of fog lights is to highlight the vehicle in low visibility conditions. This light is most fully encountered with light of a yellowish tint. Using these lamps at night serves as a minor addition to the headlight as it illuminates the area directly in front of the car.
In general, a significant increase in comfort and safety while driving will allow us to list the following manipulations with Kirzhakh headlights
:
- installation of gas discharge lamps;
- minor modification of optics design;
- cleaning the lens surface;
- installation of a headlight washing system.
Preparation. I'll remove the headlights.
- At the very beginning of this modification, you need to remove the headlight, for this:
- Remove the negative from the battery.
- Disconnect power from the headlight. (disconnecting the chip from the wires)
- We unscrew a couple of bolts on top of the headlight, which secure it to the body.
- Now you need to remove the plastic radiator grille, as it covers another bolt.
- Using a screwdriver, pry the decorative trim towards the center and pull it out.
- Here it is, the nut that secures the headlight to the bracket. Using a key set to “10”, unscrew it.
- Now turn off the hydraulic corrector. Using a screwdriver, pry up the retainer, turn the corrector and remove it from the headlight.
- At this stage you need to remove the turn signal; this is done simply by unscrewing a couple of bolts.
Preparations for installing xenon are completed, now we begin the process itself.
It is advisable to purchase 4 “mothers” (at the ends of the wires) for ease of connection, so as not to make twists.
How to install xenon in the fogs of a VAZ 2110 with your own hands?
Xenon in PTF To carry out an inspection, you must purchase a set of international H3 gas discharge lamps
. This is due to the compatibility of the element bases. In addition, the improved glow kit must have an ignition unit (energy converter). In practice, everything looks simple:
- disconnect the usual wire block;
- remove the base;
- replace the lamp;
- insert the base back;
- connect the wiring to the on-board power supply system through the ignition unit ;
- adjust the headlights.
Thus , since the wiring has been slightly changed, it is necessary to slightly correct the control line of the xenon fog lights in the VAZ 2110 interior. The energy converter (ignition unit) is connected in accordance with the instructions. This is a very dangerous component of the system, as it generates a voltage of about 25 kV, depending on the modification.
By correcting defects in the factory design of headlights, you can significantly improve driving comfort in the dark. Properly installed fog lights will help harmoniously complement the night lighting picture.