A cast iron bathtub, according to professionals who do professional renovation work, is the most durable accessory. However, there comes a time when it needs to be replaced. Many owners of old bathtubs try to delay this moment as long as possible by covering the product with new layers of enamel. Some take a radical approach to solving this issue. This category prefers to completely remove the old bathtub from the house rather than install a new one in its place. It can be dismantled with or without preservation. Having tried to remove this accessory intact, beginners encounter difficulties and wonder whether it is possible to break a cast-iron bathtub. Or will I have to take it out whole? In this case, you will have to hire a team or call someone for help.
How to break a cast iron bathtub in the bathroom? This question becomes very relevant for those who have decided not to use the old accessory anywhere else. Coping with this task will not be difficult. You will find information on how to quickly break a cast iron bathtub in this article.
About dismantling methods
There are two ways to replace an old bathtub:
- With saving. The bathtub is carefully disconnected from the rest of the communications in the house and taken out. It can be used in the future. Judging by the reviews, this method is complex and time-consuming.
- No saving. In this case, you can either break the cast iron bathtub or saw it using an angle grinder. The bath pieces are then taken out. Due to the fact that the product now weighs much less, one person can handle this work. According to experienced craftsmen, if it is necessary to dismantle the bathtub, they mainly resort to this method. The disadvantage of this method is that the procedure is accompanied by a very large roar.
How to dismantle an old bathtub
Dismantling is a simple matter and does not require special training. However, the process is labor-intensive and comes with some health risks. Therefore, before starting work, it is important to make a plan, study the instructions and stick to them. It is especially worth paying attention to safety rules. Most often, dismantling the bathtub is done with 4 hands. It's safer, more reliable and faster. The work will require cutting or impact tools.
Advice! Buying a new bathtub can be expensive.
Therefore, when dismantling, it is important to inspect the bathtub. Perhaps it can be restored. Cast iron bathtubs are reliable and durable; a little cosmetic repairs can save a lot of money. And the old bathtub can last for several more years. If the enamel has chipped, but the cast iron itself is intact, it is enough to buy a special overlay.
You can dismantle the bathtub yourself, or use the services of specialized companies. They will ask for a small payment for their services. In addition, they will not only dismantle the structure, but will also take care of its removal. This is a simple option. We will look at step-by-step instructions for do-it-yourself removal.
Preparatory work
First you need to prepare a workplace for comfortable dismantling of the bathtub. Typically, the bathroom is equipped with a washing machine, shelves, cabinets and plumbing elements. So that they do not interfere with the dismantling process, and also so that they are damaged, all excess must be removed. The bathroom sink and faucets are also removable. Moreover, if the bathtub and toilet are combined, then it is also better to remove the toilet. After all, the peculiarity of a cast-iron bathtub is that it is heavy and durable, so during dismantling you can damage everything in the bathroom.
This is optional, but it is recommended to remove the doors from their hinges. Firstly, there is no need to constantly open and close them, and secondly, by removing the cast-iron bathtub from the room, the possibility of damaging the canvas is reduced. If you don’t want to remove it, then an alternative option is to protect the door from external influences. Bubble wrap or soft cloth will do.
You should immediately consider ways to remove the bathtub if it is not to be restored. After all, it will not be possible to transfer it in a regular passenger car. You need to hire a special service or ask friends with a car that can support the weight of a cast iron product.
The preparatory stage for dismantling the bathtub also includes the preparation of tools and materials for work. They are as follows:
- Bulgarian;
- sledgehammer and chisel;
- scrap;
- trash bin;
- two adjustable wrenches;
- work gloves;
- respirator;
- protective glasses.
Now you can get to work. There are several options for dismantling a bathroom. One of them is gentle, thanks to which the bath remains intact. The other is destructive. Let's look at each of them.
Dismantling sequence
When the preparation is complete, we proceed to dismantling the cast iron bathtub. Sequence of work:
- The water in the apartment or house must be turned off. It's trivial, but some people forget about it.
- All work on dismantling the bathroom consists of disconnecting it from the system and removing the structure from the room. And if the first stage is more or less simple, then it will be difficult to remove the cast-iron bathtub alone.
- Each bath is connected to the sewerage system via a siphon. You need to disconnect it. And if the siphon is not old and not cast iron, then all you need to do is use adjustable wrenches and disconnect the bathtub from the siphon. Otherwise, over many years the cast iron siphon may rust. Then dismantling becomes more difficult. You can't do this without brute force and an angle grinder. The siphon is cut off and set aside.
Advice! If you live in an apartment building, it is better to warn your neighbors about the planned work to dismantle the bathtub. This way you can avoid conflicts with them and maintain good relationships.
- Further work depends on how exactly the cast iron bathtub is installed. Some are simply freestanding on legs. Then it’s enough to call your friends and take it out. But this is rare for cast iron products. Indeed, in this case, during the procedures, water from the bath will spill onto the floor and walls. Therefore, a cast-iron bathtub is usually installed close to the wall and lined with tiles so that water does not penetrate behind it.
- If there is tile, it will need to be removed. It can surround the bath on three or two sides. At the same time, it is tightly adjacent to the bathroom not only due to cement and sealant, but also due to salts. The seams got wet and deposited in that place over the years. It turns out that the bathtub is securely fixed in its place. To dismantle it, you will have to remove one row of tiles around the perimeter. That's why it's important to remember that dismantling a bathroom usually entails further renovation work. The tiles need to be beaten with a chisel and sledgehammer. You should work carefully, as fragments may fly in different directions. When all the tiles are knocked down, immediately collect them and take them out so that they do not interfere with further work.
- When everything that held the cast iron bathtub has been removed, you can proceed to the gentle method of dismantling. Typically a bathtub weighs about 100–150 kg. It will be impossible to remove the bathtub by hand. We need at least one more strong man. To begin with, the bathtub is moved away from the wall. If you can't do this, you can use a crowbar or pry bar. You just need to work carefully so as not to damage the cast iron. Another option is to try pulling the bathtub towards yourself with a partner. If it has moved, that's good. It is enough to move it 40–50 cm. This is enough for a person to fit behind the bathtub.
- One of you should stand behind the bathtub, in the resulting space. After which it should be installed in a vertical position. The product is taken from one side and simply lifted. It's not that hard to do. If it has legs, then this will be more convenient. They serve as some kind of handrails, which will make it easier to carry cast iron. It must be carried through the doors in a vertical position.
The first stage is completed, all that remains is to either restore the cast-iron bathtub and reuse it at the dacha, or simply take it away. We'll talk about this further.
The nuances of working with legs
Having legs in the bathtub that hold the product helps make things easier. They make transportation faster and easier. Most Soviet bathtubs have such legs, and new models are also equipped with them. However, one difficulty arises here, which concerns the method of installing the bathtub. Some outdated modifications of cast iron bathtubs were installed with capital integration into the floor. In this case, the structure stands firmly in place.
In this case, additional effort and time will be required to dismantle the bathroom. The main task is to remove this fastener. A gentle method is not enough here. The grinder and brute force are used. Each leg is cut off from the bathtub. To prevent them from sticking out from the floor, you need to cut them off at the very base. Even if they remain in the concrete screed, this will not damage the floor in any way or affect its strength.
There is a second option - complete dismantling of the bathtub legs, which are embedded in the floor. In this case, you will have to destroy the cement screed to remove the legs from it. True, after all the dismantling work, you need to seal all the resulting holes. Although, few people want to destroy the floor to remove the bathtub. Therefore, they resort to banal circumcision of the legs. Everyone decides for themselves which option to choose.
Dismantling a steel bath using a destructive method
If the bathtub will not be used in the future, it is old and cannot be restored, then dismantling work will be simplified in this case. It's easier, faster and easier to do this. Even one person can handle this task. To work you need a sledgehammer or grinder.
The main task is to destroy the bathtub into pieces and take the remaining cast iron to a landfill. If a whole bathtub weighs more than 100 kg, then breaking it into 5 pieces will divide the weight. The peculiarity of cast iron is that although it is heavy and durable, its mechanical strength is not the best. The material crumbles, so a sledgehammer will easily break the material. To simplify the task, you can cut off part of the bathroom with a grinder, or cut it in half and hit it several times to make the pieces even smaller.
Although the work is simple, it has its own characteristics. The fact is that a metal bathtub will crumble when broken, and the enamel of the bathtub will scatter around the room. In this case, safety comes first. The sequence of work is as follows:
- As usual, the water in the house or apartment is shut off. All communications are disconnected from it. The same thing is done with the siphon as in the first case (unscrew or cut off).
- The tiles are knocked off along the perimeter and the bath is freed. If you start to destroy a cast-iron bathtub without removing a row of tiles and disconnecting it from the wall, more than one row of tiles may fall off.
- The bathtub moves away from the wall by 10–25 cm. When working alone, you will have to use a pry bar or crowbar. At the same time, you don’t have to worry that the bath will be destroyed.
- Using a grinder, two cuts are made on the cast iron bathtub. After which several blows are carefully applied using a sledgehammer. It should be noted that the structure can be destroyed in chaotic pieces, or divided in half, and then the two halves can be destroyed into two parts. The second method is more interesting, since the even halves of the bathtub can be reused. They make excellent chairs or other interior elements. Fantasy can run wild here.
- To divide the bathtub into two equal parts, you will need to make two cuts on the sides exactly in the middle. The sides not only add beauty to the bathtub and make it comfortable, but also serve as stiffening ribs. Therefore, you should cut them completely with a grinder, reaching the wall. After that, all that remains is to hit the bottom of the container exactly in the middle with a sledgehammer. It should split in half.
- The weight of the products has been halved, making it even easier to carry the structure. All that remains is to remove it and decide what to do with it next.
- If you are not interested in using the bathtub in the future, you can simply randomly break the bathtub using a sledgehammer. To simplify the task, cuts are made, after which brute force is applied.
That's all, the main stages of dismantling the bathroom. However, do not assume that this is all. Let's look at some safety rules, as well as ways to dispose of the bathtub.
What is special about the method?
Based on reviews, we can conclude that the procedure for breaking a bathtub using a sledgehammer is the most proven dismantling method in practice. However, it requires considerable physical effort. Not everyone can afford to destroy a bathtub into several parts. The work must be performed by a physically trained person. In addition, the procedure itself should be performed during the day. Otherwise, a scandal with neighbors is inevitable.
Tools
Since the bathtub will first need to be disconnected from the pipes, the master will need to acquire the following:
- Adjustable and regular wrenches.
- Screwdrivers.
- With pliers.
- A hacksaw and a grinder.
- With a crowbar.
- With a sledgehammer.
Due to the fact that rough physical work will be carried out, the master should worry about protective equipment. It is necessary to prepare special gloves and safety glasses.
How to dismantle it correctly with your own hands?
Below, we have provided detailed instructions for carrying out the work with all the nuances.
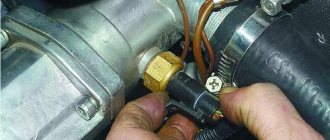
Remove the old siphon
The first step is to disconnect the siphon. As a rule, in old houses these siphons are made of cast iron, and under the influence of moisture and time, all connections sinter and corrode, so it is unlikely to be possible without special compounds that corrode rust. You can use, for example, WD-40 - popularly known as "Vedashka". You need to spray the connections and leave them in this state for 1 hour.
Then, using a wrench, you need to unscrew the nut, thereby disconnecting the siphon.
The diameter of the nut is most often very large, so for this work you will need a gas wrench.
If the nut does not give in and the “century-old layer” of rust is not corroded by any means, all that remains is to cut off part of the pipe with a grinder. Or not? There is one interesting life hack
:
- insert the chisel into the hammer drill chuck (this is a special blade-shaped attachment);
- switch it to the “impact without drilling” mode;
- Press the chisel against the end of the nut and press the start button.
Most likely the nut will give way. Do this procedure several times until you can unscrew it with a key or by hand.
Release the sides
Often tiles in the USSR were laid from the side of the bathroom, or even a corner was made from it along the entire perimeter of the wall. In this case, pulling out the bathtub is simply not possible; first you need to knock off the tiles from the sides. For this, an already familiar hammer drill with a chisel is suitable, in impact mode without drilling.
Just go over the edges one by one. If you don’t have a hammer drill, it doesn’t matter. A hammer and chisel can also handle this, but the work will take much longer.
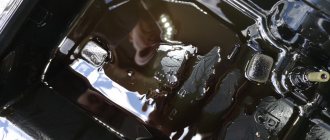
If it is built into the wall of a room?
It also happens that the font is built into the wall, for example, as in the photo. In this case, you will need to remove the legs from the side of this wall. If you can’t unscrew them with a key, or they are firmly embedded in the floor, you can cut them off with a grinder.
Then place wooden boards or a sheet of plywood
so as not to split the floor. All that remains is to press hard on the side of the bathtub; you may need the help of a second person, and it will fall down, falling onto the boards. If you can’t push through, you can try using a hammer drill to knock down the part of the wall on which the font rests.
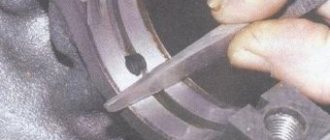
Is it worth cutting off the legs?
Sometimes the legs are dull and deeply embedded in the floor. In such cases, all that remains is to cut them off with a grinder
. Take a metal disc and carefully file the back legs first, and then the front ones. This is important because if the order is different, there is a chance that the font will fall on you. It is better to file the legs at the base (floor). In this case, you will have additional handles that are convenient for transportation. Of course, you should first check whether they are firmly attached to the font.
How to take it out of the apartment?
Once you have released the bowl, place it in an upright position - firmly grasp the upper legs. Then tilt it slightly to make it easier for your partner to grab the lower ones.
The doorway in the bathroom is usually quite narrow
. Therefore, it will not be possible to simply endure it. You must first place the front legs behind the doorway. Then move the font diagonally and only then insert the rear legs.
How do they carry it out if the legs are completely cut off? In this case, it will be easier to place the bowl on its long side on its side and gradually move it along the floor, pointing it diagonally into the doorway. After you have taken it out of the bathroom, you can grab one person by the front end, the other by the back (as if you were carrying a stretcher), this will make it easier to pull it out. Further removal is a matter of technology. What to do if there is no partner?
Is it possible to split or break it with a sledgehammer at home?
If you work alone and there is no one to help remove the whole building, a rational solution would be to remove it in parts. To do this you need to break the font. What is the best way to do this?
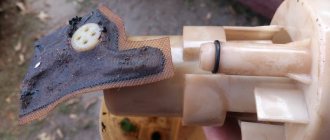
The fastest, but noisiest and messiest solution would be to use a sledgehammer:
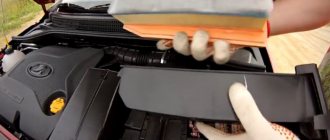
- cover the font with a damp sheet or other large piece of cloth. This will help avoid dust and scattering of fragments.
- Then hit the side of the tub hard with a sledgehammer.
- If the cast iron does not crack, you can use some kind of wedge, for example, a crowbar. And hit him already. The font will definitely split.
- You can cut cast iron into pieces of almost any size.
The main disadvantage of this method is that it will take a long time to clean the space from small fragments and dust. And the noise, of course, will be very loud, because the shape of the bath vaguely resembles a bell.
Is it really possible to break without noise?
Many people often ask this question, because not all neighbors are sympathetic to repairs. Of course, you won’t be able to get rid of the sound completely, but you can make the work a little less loud:
- make several cuts on the body with a grinder;
- insert a piece of ground scrap into them;
- hit the crowbar with a sledgehammer.
The tub should crack.
Is it better to cut it with a grinder and break it?
There is another way to divide the font. It was cut with a grinder. Here, of course, you will have to suffer longer than with a sledgehammer. But there will be much less dust and fragments:
While working, pieces of enamel and scale will fly around, be sure to wear safety glasses and a respirator.
- install a metal disc on the angle grinder (grinder) (it is better to use 230 mm models, with them the process will go much faster);
- start cutting in the middle, sequentially moving from the sides of the bathtub to the bottom;
- when the matter comes to an end, you are already going to go to the bottom and close 2 cutting lines from the front and rear sides - ALWAYS place wooden blocks under the bathtub
, otherwise the halves will come together and bite the disk. - When the cut closes, the work can be considered complete. If the halves do not open, just press lightly on the bottom
and it will immediately break.
During operation, the disc must be allowed to cool, so take a break every 1-2 minutes. The procedure can be carried out until the size of the parts satisfies you. What else can you saw and how to cut? It’s difficult to find an alternative to an angle grinder; you can, of course, make cuts along the sides using a hacksaw, but you won’t be able to cut further.
Where should I start?
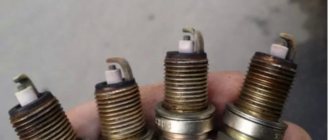
Before breaking a cast iron bathtub, it must first be disconnected from all communications. The first step is to disconnect the overflow. According to experts, cast iron pipes were installed in many old houses. Therefore, after many years, they become very rusty, covered with scale, and the master may have difficulties dismantling cast-iron plumbing fixtures. The situation is better if communications are represented by metal-plastic components. In this case, they simply unscrew. The master only needs to prepare the pliers. There are often cases when the overflow grate gets very stuck.
Before breaking a cast iron bathtub, you need to dismantle this element. Many craftsmen clamp it with pliers and turn it counterclockwise. If it is not possible to dismantle the overflow in this way, it is cut off with a grinder. Judging by the reviews, fasteners often have heavily rusted threads, which can only be dealt with after cutting them. First, several cuts are made on the grate, and then the overflow is knocked off with a chisel. Then the crosspiece under the grille is knocked out. As a result, the siphon should hang freely, connected to the rest of the sewer line. To remove it, the master needs to get rid of the coupling. Some beginners wonder if it is possible to break a cast iron bathtub with a sledgehammer. According to experts, this is quite possible to do. You just need to adhere to a clear sequence of actions.
Preparing to work with the bath
In order to cut a bathtub with a grinder, you should stock up on:
- Angle grinder - grinder.
- Several CDs for her.
- A respirator.
- Safety glasses.
- Dirty clothes that you can throw away later.
Everything should be taken out of the bathroom, because any surface after sawing will be covered with black dust. When dressing for this procedure, you should take into account that the clothes will most likely have to be thrown away afterwards.
Safety glasses and a respirator will prevent cast iron dust from entering the respiratory system and eyes. But this still will not protect completely, and it will take a long time to wash off the black metal dust. Before starting work, you should make sure that the doors are tightly closed, and if they are removed, the opening must be carefully covered with film.
Related article: Decorating the dacha: Autumn crafts for the garden
The grinder may come in handy during the dismantling process. If the bathtub has been in use for many years, the drain siphon could be quite rusty. It will have to be cut down, since it could have already “fused” with the pipe. First, near the sewer, and then, pulling out the vacated bathtub and turning it upside down, finally removing it, cutting it close to the wall.
Progress
Once the most vulnerable point in the product has been found, the following steps must be performed:
- The first step is to move the bathtub a little away from the wall. To complete this task, you will need a chisel and a hammer, with the help of which the plumbing product is removed from the cement mortar around the perimeter. The optimal distance of the bathtub to the wall will be from 100 to 150 mm.
- Using an angle grinder equipped with cutting wheels, make several cuts on the bathtub. The master’s task is to deprive the product of its strength. The cutting areas on the bathtub should be its curved edges on both sides. They are used as stiffeners. If the work is done correctly, then strong blows to the bottom of the cast iron product will cause it to collapse.
- Break through the drain hole. There is no need to turn the bath over at this stage. The master only applies very strong blows with a sledgehammer to the drain from the inside of the bathtub. Judging by the reviews, after these steps the bath is divided into two separate halves. If this does not happen, then you will have to deal with its sides.
- Turn the bathtub on its side and cover it with old rags. Burlap also works well. The blows are applied to the outer part of the cast iron product. As a result, the previously broken drain hole in the bathroom should become even wider. After several blows in the bathtub, a long strip forms along its entire bottom.
Non-standard options for recycling an old bathtub
They are based on the fact that the cast iron was not seriously damaged and remained in a tolerable condition. Therefore, the bathtub will make excellent elements for your home or cottage. The easiest option is to take it outside and make it a container for storing water. This method is suitable for summer residents who have a vegetable garden or bed. Rain or plain water is ideal for irrigation. In addition, there will be constant access to it. The method is possible if the bathtub has been preserved completely intact.
Note! Why not use the bathtub at your dacha for bathing? In the summer heat, such a mini-pool is suitable for both adults and children.
Another way is to create furniture elements from a cast-iron bathtub. These can be armchairs, sofas, tables, etc. Only in this case, when dismantling, you need to use exclusively an angle grinder and cut through the entire width of the bathtub. This is how you will get a perfectly even cut and parts of the structure will remain intact. The photo below shows how to make comfortable chairs from the halves of a cast-iron bathtub. They are not only functional, but also very stylish, original and unusual. 1 bath makes 2 armchairs.
This is an ideal option for a summer residence. And it won’t hurt in the house. Another way is to make two full-fledged armchairs out of the bathtub and a table between them. In this case, the bathtub should be 1.5 m in size. It is cut into three parts - two of them will be armchairs, and one will be a table. The part in the middle needs to be modernized - tempered glass or boards attached to the sides. The photo below shows how to implement this.
Another alternative way to get rid of a bathroom is to turn it into a flower bed. In landscape design it looks very attractive. It is enough to paint the product, fill it with soil and plant the desired plants. And to transport the product, you can weld wheels to it.
There is a non-standard option - to make a barbecue out of the bathtub. You will need two small structures that are connected via hinges. An example of a flowerbed from a bathtub in the photo:
If we return to the method of creating furniture, then the bathtub will turn out to be two full-fledged sofas. It is enough to saw it not across, but along, as shown in the photo:
Some people dig a cast-iron bathtub into the ground at their dacha to make a decorative pond. It looks very decent. The bathtub is filled with water (the drain is first closed), stones are placed around it, and the pond is decorated with vegetation. An example of a pond from a cast iron bath in the photo:
And these are not all the non-standard options for using a bathtub that can be brought to life. Imagination and skillful hands are used.
Some advice from experts
For those who do not know how to break a cast iron bathtub, professionals recommend following safety precautions. Mostly this work is performed by two people. Since the procedure involves a grinder and a sledgehammer, you can protect yourself from injuries if all actions are coordinated.
Due to the fact that particles of broken cast iron can get into the face from strong blows of a sledgehammer, the plumbing product should first be covered with burlap. This will also protect the bathroom itself. The speed of dismantling and safety directly depend on the proper organization of work.
Options for recycling an old cast iron bathtub
The pressing question remains, where to put the bathtub next. There are several options for further action here. It all depends on the condition of the bath and whether a container is needed. We'll look at them all.
One option is to reuse an old bathtub. Next we will learn that you can use it to make a lot of useful things around the house. Moreover, if you managed to keep the structure in decent condition, then why not take it to the dacha?
The second option is to rent out the bathtub. In this case, it can simply be taken out for scrap, or exchanged for a new one with an additional payment. Agree, the option is quite profitable. After all, a new one will cost at least 6 thousand rubles. And this is the cheapest option. The average cost is 15–20 thousand.