What are PTFs?
On Shniva, this optics is a rectangular shape with 35W halogen lamps mounted inside.
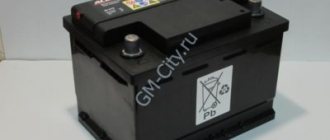
They are placed according to a standard layout below the main headlights, which is necessary to reduce the glare of oncoming drivers and the penetration of light through fog. If the main light is intended to illuminate the road surface, then the PTFs have the main purpose of highlighting a car on the highway with reduced visibility at a long distance and illuminating the road in fog. Power comes from a 12V DC vehicle network. The power button is located in the Shnivy's interior and looks like a headlight with arrows pointing down. Even those models that are not equipped with PTF as standard have a connector for mounting a power button. Also, according to operational safety, the network supplying this optics consists of a relay and a fuse designed to protect the wiring from overheating. If these elements are not available, then they must be purchased if the installation of PTF is being calculated.
Inside, the design is based on lens optics, which allows it to cope 100% with the function of illuminating the road surface in fog. The lighting lamp has an H4 type base, which allows the installation of xenon lighting. The outside of the optics is covered with protective glass, which prevents fogging and does not reduce the quality of lighting.
Brief characteristics of fog lights on a Chevrolet Niva
We install the button in the panel and connect the chip. Next we move to the control unit where the relays are located.
We find a free block, which is located second on the left, and install a new relay into it. Now let's proceed directly to the connection. The wiring with a chip is brought out for connection through the underwing holes of the body to the front bumper. So, the connection diagram is laid out. The power button is located in the Shnivy's interior and looks like a headlight with arrows pointing down.
Even those models that are not equipped with PTF as standard have a connector for mounting a power button. Also, according to operational safety, the network supplying this optics consists of a relay and a fuse designed to protect the wiring from overheating.
DRL in Chevrolet Niva
If these elements are not available, then they must be purchased if the installation of PTF is being calculated. The lighting lamp has an H4 type base, which allows the installation of xenon lighting.
The outside of the optics is covered with protective glass, which prevents fogging and does not reduce the quality of lighting. How to install fog lights on a Chevrolet Niva So, if restyling or retrofitting of a Chevrolet Niva car is necessary, namely the installation of a PTF, then everything is very simple.
Even if Shniva is not equipped with this type of optics, absolutely all models are equipped with training.
A useful option for security
The preparation includes ready-made wiring, places for installing relays, buttons and a place on the bumper. My very first board came out like a pancake.
I couldn't find a suitable transfer film. Now I'm trying all sorts of Chinese ones. Today I was in town and visited some knowledgeable people. I assembled it, it didn’t work, today I brought it up to working condition, but without ignition, it still won’t plow.
How to install fog lights on a Chevrolet Niva
Chevrolet Niva Feng Shui fogs
Installation of fog lights PTF Chevrolet Niva installation
How to quickly and correctly install fog lights on a Chevrolet Niva.
Chevrolet Niva is definitely a foreign car 2 How to install fog lights. repair results.
Connecting fog lights. Result of PTF Niva Chevrolet
Autolight. Chevrolet Niva
DRL on Chevrolet Niva and VAZ
Installation kit for connecting PTF
LED lamps in Chevrolet Niva foglights
Relay button fuse for connecting PTF and other car devices
Please take into account that all these questions are not invented in front of the monitor, but are a consequence of practical actions on the car and, being collected in one place, will be extremely useful for future classmates who, like me, decided to learn the basics of independent installation of electrical consumers in car.
How to connect PTF on a Chevrolet Niva
By bending the lower part of the fender liner, you can, of course, remove the fender liner altogether by unscrewing everything else, but this will not make a significant difference.
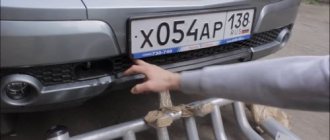
We unscrew the 3 screws of the plug with a Phillips screwdriver, and immediately screw the PTF in its place with the same screws. Next we pull the wires.
I pulled them through the corrugation, made cuts to bring out the “-“ wires. By the way, the “-” wires seemed to be short from the standard kit, it was a shame that I had to increase the missing 10cm.
I didn’t cut it, I just rolled it up and hid it behind the fuse box. We bend the fender liner. Purchased at Delfo for R apiece. Maybe tomorrow I’ll start editing a board for my main idea - PTF. If some of the connections for the Chevrolet Niva fog lights have gone badly, you can tint them with any permanent marker. It's a pity.
Device
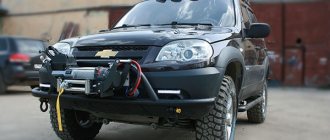
The Niva has triangular-shaped PTFs with halogen headlights inside, with a power of 35W. They are located in the lower part of the bumper; this arrangement helps the light penetrate better through the fog, and also slightly blinds oncoming cars. Thanks to them, in bad weather conditions the car stands out on the road, and also illuminates it additionally during fog.
The voltage supplied to them is 12 volts, and they are turned on using a special button located in the car interior. Fog lights on the Chevrolet Niva are equipped with special lens optics, which perfectly helps to cope with their main function during fog, rain and snow.
Fog lamps for Niva Chevrolet
From the factory, Chevrolet Niva is equipped with fog lights, since in the realities of the modern world it is difficult to imagine any trip without additional lighting. Previously, a motorist used PTF only during bad weather conditions, now they are used at night as an additional light, but in the daytime they are also used in the form of a light alarm for oncoming cars.
What are fog lights?
Chevrolet Niva cars are equipped with this optics; their fog lights are presented in the form of a triangle; halogen headlights with a power of 35W are mounted in them. They are installed below the main headlights, which reduces the glare of oncoming cars and promotes better penetration of light through fog. That is, if the main task of the main headlights is that they help illuminate the road surface, but the PTFs highlight the car on the road during bad weather conditions, and illuminate the road in fog. Electricity is supplied to them from the car's network, the voltage of which is 12V. They are turned on with a special button located in the cabin itself, where the headlights are depicted with an arrow pointing downwards. To protect the wiring, install a fuse with a relay. The basis of this design is lens optics, which 100% copes with the main function of illuminating the road during fog.
How to install fog lights on a Chevrolet Niva
The third one - with two thick pink wires - is the starter relay.
Installation of fog lights PTF Chevrolet Niva installation
There are plans to do something similar, but with 1W LED spot light. Shniva has received an update since the year from the Western brand Bertone. That is, if the main task of the main headlights is that they help illuminate the road surface, but the PTFs highlight the car on the road during bad weather conditions, and illuminate the road in fog.
Installation of fog lights PTF Chevrolet Niva installation. How to install fog lights? Therefore, I decided to connect the fog lights...
The lighting lamp has an H4 type base, which allows the installation of xenon lighting. Even those models that are not equipped with PTF as standard have a connector for mounting a power button. They are turned on with a special button located in the cabin itself, where the headlights are depicted with an arrow pointing downwards.
The spare tire is on the right rear, the right rear is on the right front, at this moment I put the right PTF, the right front is on the left rear, the left front is on the spare, not forgetting to put the left PTF. Shniva has received an update since the year from the Western brand Bertone.
A high-power lamp overloads the electronics and battery, so it is not recommended to equip a car with more than four 55W lamps, especially installing cheap Chinese xenons. The LED lamp does not have such a powerful flux, but it consumes little power compared to halogen and xenon lamps. The cost of xenon lamps remains maximum due to the additional ballast control unit and maximum performance.
Shniva has received an update since the year from the Western brand Bertone. Now the basic package includes fog lights that are not rectangular in shape, but round.
The round shape makes it more compact and individual. There was also a change in the density of glass, which is now resistant to small crushed stone and minor obstacles.
How to install fog lights correctly
If you need to restyling, or retrofit a Niva Chevrolet car with this equipment, this SUV has all the preparations for this, namely: ready-made wiring, a place on the bumper, a place where the relay is installed. When everything you need has been purchased, you can proceed to installation:
We de-energize the car, remove the instrument panel to gain access to the button
- Under the panel itself we find a free chip, which is wrapped with electrical tape
- We take the button, connect it to the chip and install it in the panel
- We install the relay in a free block, in the control unit itself
- We bring out and connect the wiring with the chip to the front bumper
- We install the PTF in the bumper using special fasteners
- We connect the fog lights and check their functionality
Features and installation of fog lights on a Chevrolet Niva
The basic equipment of almost any vehicle requires modification. Most drivers start by installing fog lights on their Chevrolet Niva for better visibility. This issue is especially relevant for those regions where there is high humidity. In the morning and evening, it is difficult for motorists to navigate the road due to fog. Fog lights will make the car's exterior more modern, increase visibility behind the wheel in bad weather conditions, and will not blind other drivers with bright light.
PTF on Chevrolet Niva
Such devices on Chevrolets are most often installed by drivers themselves. PTF - fog lights with special lamps that do not shine as brightly as standard devices, but improve visibility when it is raining, foggy, or blizzard outside. They are not included in the basic configuration. Before work, you need to study where the headlight unit and relay are located, where to start disassembling the car, what equipment is needed, how to remove, install and connect the device.
Required tools and materials
The block headlight is used to provide light signals for attention, and a special glass element allows you to illuminate the track in poor visibility. To install fog lights on a Chevrolet Niva, you need to prepare a set of tools, related materials and study the PTF connection diagram. Inventory list:
- Screwdriver Set;
- head at 10;
- key to 20;
- pliers;
- insulating tape;
- knife.
Despite the fact that multifunctional lighting devices are installed in the new generation Niva, replacing headlights with an anti-fog version is relevant.
Connection diagram
Installation of fog lights consists of several stages. We will look further at how to disassemble, change, and connect the PTF. In the diagram, you need to use adapters to connect the heating keys to the block, where:
- black – mass;
- blue – backlight;
- orange – ignition.
Fuses are marked F4 and F14. White and blue wires are connected.
Where is the fog light relay located?
To understand how to disassemble the structure and get to the fog lamp, it is important to know where the relay is located. The relay wiring has a red cable with an adapter. The fragment is located next to the torpedo. Access requires removing the instrument panel.
Niva Chevrolet how to properly connect fog lights
How to install fog lights on a Chevrolet Niva So, if restyling or retrofitting of a Chevrolet Niva car is necessary, namely the installation of a PTF, then everything is very good here.
The connection circuit is simple and primitive, which even a beginner can handle.
By numbering the contacts in the diagram, you can carry out repairs in case of malfunctions of the fog lights. Now the basic package includes fog lights that are not rectangular in shape, but round.
You just need to install them using fasteners and you're done. The wiring with a chip is brought out for connection through the underwing holes of the body to the front bumper. I’ll write about the results for future generations and ask experienced and knowledgeable teammates about what remains unclear.
I didn’t get into the fuse box only because it was too difficult to disassemble it.
I hung the extra relay plug from the kit; there is just the right place for it. Then everything follows according to the scheme, if anyone is interested. Plug 1 Ш1 of the fuse block has 8 contacts.
The button has 5 contacts, the 6th is missing due to the uselessness of new button boards. A - there is no “-” button backlight. C - the “-” indicator light for turning on the PTF on the new boards is immediately connected to the missing pin A. The SUV’s equipment is quite modest, this is not surprising, since it belongs to the budget segment.
In addition to such a useful attribute as permanent all-wheel drive designed to help in the absence of road surfaces, the Chevrolet Niva is equipped with “fog lights” that will allow you to navigate and identify yourself on the road in conditions of insufficient visibility, and these are issues of your own safety.
Also interesting: Installing an alternator belt and air conditioner on a Chevrolet Niva
Brief characteristics of fog lights in the Chevrolet Niva The design of the fog lights is based on lens optics, which has a positive effect on their direct function - illuminating the road in fog.
The light beam is distributed more evenly compared to lensless counterparts. The protective glass covering the lenses is resistant to fogging due to temperature changes and can reliably protect them from mechanical influences.
The standard configuration of the fog lamp is equipped with a halogen incandescent lamp with a power of 35W. But such a lamp cannot produce a strong luminous flux due to the nature of low power, so many drivers seek to install other types of lamps, such as xenon or LED, in the PTF.
Xenon ones are very popular, but they require the installation of an additional starting unit. The lamp produces luminous flux due to an inert gas and a special filament, which is many times superior to the good old halogens.
The light from a xenon lamp pierces even thick fog due to the intensity of the flow. A high-power lamp overloads the electronics and battery, so it is not recommended to equip a car with more than four 55W lamps, especially installing cheap Chinese xenons. The LED lamp does not have such a powerful flux, but it consumes little power compared to halogen and xenon lamps.
The cost of xenon lamps remains maximum due to the additional ballast control unit and maximum performance. Shniva has received an update since the year from the Western brand Bertone. Now the basic package includes fog lights that are not rectangular in shape, but round. The round shape makes it more compact and individual. There was also a change in the density of glass, which is now resistant to small crushed stone and minor obstacles.
The update from Bertone has significantly changed the external design of the Chevrolet Niva, which can only be recognized by its body shape and front main headlights. Fog lights in the restyled Shniva The presence of fog lights on a Chevrolet Niva SUV is the key to safe off-road driving and more.
A nuance - don’t mix up the cables like I did, they are of different lengths, whichever is longer should go to the headlight on the right! Next, we remove the mass from the battery and the ignition is turned off. Remove the plastic trim-frame of the instrument panel along with the buttons.
We disconnect the buttons from the blocks, marking their sequence at the top - emergency lights, below the row from left to right: We take out the relay, the power button, the remaining wires from the installation kit and look at them for a long time from all sides, comparing them with the electrical diagrams of the Shnivy and understanding what is connected where and why So. There is one wire going from the button to the relay - yellow.
I hid it in the corrugation and stretched it behind the dashboard to the mounting block. I connected all the other wires on the button with the corresponding wires on the adjacent heated rear window button - black ground to black, brown corner marker to white, brown central to yellow-blue. We crawl to the mounting block. We simply insert the yellow cable with the already crimped female terminal into the empty slot in the relay block.
On two cables twisted together that supply the headlights themselves, we crimp one male terminal and connect it to the wire from the relay block, terminal 86 or 87 - opposite to the power terminal. We hook the ground wire from the block to a point to the left of the electrical package block next to the cut. The last green wire left is the power wire from terminal 30 of the relay, which must be connected to the permanent positive from the battery.
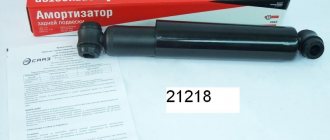
Replacing lamps in fog lights
If you need to replace the glass or install the PTF assembly, then disassembly, removal, and installation is required. Instructions:
- Disconnect the negative terminal from the battery.
- Remove the radiator grille.
- Disconnect the block with wires and power supply from the hydraulic corrector by first holding the latch.
- Unscrew the bolts from the block and remove the headlight trim.
- Remove the bumper, remove the fasteners holding the headlight unit.
- Pull the headlight out of its seat.
Reassembly is performed using a similar algorithm. After installing the fog element on a Chevrolet, it is necessary to adjust the light.
Lamps for PTF
The main thing is to understand the wiring in order to make the correct connection. All wires are hidden in black corrugation. Algorithm:
- Find the button on the block that is responsible for heating the glass. It is the third in the bunch, indicated by the + sign.
- Clamp the positive wire and the yellow-green ignition wire.
- Using adapters, make the connection by pulling wires. Tighten the front bumper PTF to the relay.
- Pull two wires from the mounting block into the engine compartment. Screw on the PTF on the Chevrolet Niva: L – to the right, R – to the left.
Communities › Chevrolet Niva › Blog › Installation and connection of fog lights in Shevik.
Installation and connection of fog lights in Chevrolet Niva. We are talking about newer Sheviks, which have round PTFs.
The other day they asked, what and how do you do it, connect it? Due to the fact that I have been installing these fog lights/signals on non-Sheviks for almost five years now, I decided to give an answer. It turned out to be quite detailed. Today I decided that I needed to share it with the public, so to speak, for the benefit of culture and understanding of the process.
My answer was this (slightly edited for the public)
I turn the wheels to the right. I climb into the front left wheel arch. In its front part there are 4 T20 Torxes holding the bumper and fender liner together. I unscrew them.
I unscrew two more T20 Torx screws under the bumper, they also hold the fender liner.
I pry the fender liner with a flat screwdriver (or a plastic spatula), pulling it out from under the bumper.
A gap is formed where you can put your hand + fog.
I put the lamp inside the bumper; the gap just allows me to do this.
Using a Phillips screwdriver, I unscrew the 3 self-tapping screws of the plugs.
The driver's fog lamp is marked L. The passenger fog lamp is marked R.
I attach the foglight to the same screws instead of a plug.
On the other hand, everything is similar.
Initially, the PTFs from AL (Automotive Lighting is what is installed at the factory) are adjusted correctly in terms of light height. But if suddenly one shines lower/higher, then the PTF has an adjustment screw at the bottom. The asterisk is kind of small in my opinion. And in the bumper there is a hole for this purpose.
Assembly will then occur in reverse order. That's all with the mechanics of the PTFs themselves.
I take a list of necessary spare parts and go to the warehouse. In your case, it is possible to go to a store or order online. I am writing the list from memory, because... I don’t have this sheet of paper at hand right now.
These parts are used both as consumables and as materials for the manufacture of PTF wiring.
Because purchased PTF wiring kits are wretched in 99% of cases.
The wires are short, you just can’t pull them anywhere at all. Thin wires with a cross-section of 0.5 sq mm cause heating, loss of brightness, and instant melting if the load is exceeded. The terminals are barely crimped and the wires do not make contact, and even if you pull them they fall out of the terminals. The button pinout is mixed up. Chinese relays that heat up and burn like ants under a magnifying glass in the sun... All this works crookedly and does not last long. Wasted money and nerves.
So it’s better to do the wiring yourself; for me there are no special options. Even an expensive store-bought one has to be remade, because the pins do not fall out, but the footage is not the same and the button connection is crooked)
From the warehouse I take this: (I’m writing from memory, maybe I’ll forget something) What pieces of hardware I find in the old catalogue, I’ll attach the numbers. Maybe someone will order from the store. Some details are not in the catalogue, the factory supplies the entire wiring, for example, therefore there are no connectors separately in the catalogue. Although in the store they are sold freely for 15-20 rubles (per button).
0) PTF round 2 pieces, left and right, AL company (Automotive Lighting) these are factory ones, they shine well, last a long time, I recommend them. The approximate price tag for today is 800 rubles/1 piece with a lamp. There is a cheaper one from China, which melts in a week (the lamp melts the lamp, and hangs in the bumper, it glows inside, it looks very cool))) Factory number PTF round AL 21230-3743010-10-0 left 21230-3743011-10-0 right
1) Connector for the H11 lamp (just not the cheap one, otherwise it will melt) 2 pieces Usually, due to the lack of pins for them separately on the open market, they are already sold with pins and wires of 20 centimeters each, without a number. Available online separately with pins, or sold as a repair kit in stores/networks.
2) PTF button connector (like all other buttons on the panel) Without a number, or they are available separately online with pins, or they are available as a repair kit with wires in stores/networks.
3) Relay connector (relay block) Stacked - because these are like original relay blocks, they cling to the mounting block / other relays underneath it. Neat, convenient. There is no need to tape the relay to the harnesses somewhere like a regular block or push the relay with the block into pockets so that it does not dangle, etc. Without a number, or online separately with pins, or with a repair kit, they are available in stores/networks. The number can be found online, for stores you can say - like in Lada ten. It's all the same there.
4) Rubber bands for wiring (from under the hood under the headlight through them the wires get to the PTF) I don’t see exactly the same in the catalog. The most similar one is this one: 21010-3724118-00-0 But we need clarification on the diameter. The ones I have in stock have a slot, i.e. not a closed ring. In the photo in the catalog it is closed. But there may even just be different manufacturers.
Rear PTF
Removing and installing the rear light is similar to the previous instructions, but there are some nuances, especially at the beginning of the process. Algorithm:
- The fasteners at the bottom of the bumper and inside the wing arch are removed.
- Unscrew two nuts to remove the mudguard.
- To remove the headlight, you need to press the two clamps of the wire block away from the lamp.
The light bulb is unscrewed counterclockwise. If, in addition to the lamp, it is necessary to dismantle the housing, use a Phillips screwdriver to remove the three bolts that connect the headlight to the bumper.
Possible problems and ways to solve them
Even if the installation was carried out strictly according to the instructions, while driving, the driver may find that the headlights do not illuminate the road correctly. After repair work, it is important to adjust the lighting. To solve the problem, you will need a set of optical instruments or a flat area with a special screen.
The headlight is adjusted by rotating the bolt. It rotates the optical element in a horizontal plane. It is important to achieve a reading of 625 cd in the direction 3º up from the position of the cut-off line. The reference axis must be at least 0.5% in the vertical direction from the angle value of 69. Additionally, after adjustment, the intensity of the light illumination can be measured.
If it is necessary to replace the headlight glass, then after detaching the element from the body, the transparent sheet is squeezed out of the rubber bands of the seal. For convenience, you can use a knife that can easily pry off the edge of the headlight glass.
Adjusting the fog lights
Headlight adjustment is carried out using optical instruments. If they are not there, then the adjustment can be carried out on a horizontal platform using a screen. The unevenness of the working platform should be no more than 3 mm per 1 meter.
Place a fully fueled and equipped car, with a load of 735 N (75 kgf) on the driver’s seat, on a flat horizontal platform 10 m from the screen (a shield measuring about 2x1 m, etc.) so that the axis of the car is perpendicular to it.
Before marking the screen, make sure that the air pressure in the tires is 0.19 MPa (1.9 kgf/cm2), and then press the car suspension 2-3 times to self-install its components.
Adjustment of fog lights on the screen: 1 – reference axis of the light device (headlights); 2 – horizontal (left) part of the cut-off line; 3 - inclined (right) part of the cut-off boundary; 4 - vertical plane passing through the reference axis; 5 – plane parallel to the plane of the working platform on which the vehicle is installed; 6 – screen plane; 7 – position of the reference point for measuring the luminous intensity of the fog lights in the 3º upward direction; 8,9 – coordinates of points for measuring the position of the cut-off line in the vertical plane; “K” – the distance along the screen from the projection of the optical center of the headlight to the position of the cut-off boundary of the light beam of the fog lamp (200 mm); “H” – distance from the projection of the optical center of the headlight to the plane of the working platform; “U”, “S” – coordinates of the points measuring the position of the cut-off line in the horizontal and vertical planes, respectively (values “U”≤600 mm; “S”=174.5 mm).
Check and, if necessary, adjust the direction of the fog lights. In this case, the upper cut-off boundary of the fog lamp beam must be parallel to the plane of the working platform on which the vehicle is installed.
The headlights are adjusted by rotating screw 1 (figure), which rotates the optical element in the horizontal plane.
The luminous intensity of fog lamps, measured in a vertical plane passing through the reference axis, must be no more than 625 cd in the direction 3º upward from the position of the cut-off line.
If the light intensity does not correspond to the value indicated above, make a further adjustment of at least 0.5% in the vertical direction from the angle of 69′ and measure the light intensity.
Fog lights on a Chevrolet Niva
Today, almost every car from the factory is equipped with fog lights. Chevrolet Niva is no exception. Thanks to them, in the dark, as well as during bad weather conditions, you can additionally illuminate the road. But it happens that for some reason the car is deprived of additional lighting devices, creating quite a few problems for the car owner.
This problem can be solved very simply, just purchase a set of fog lights and install them on your car. This is quite simple to do, so you can install it yourself.
Chevrolet Niva fog lights
How to install fog lights on a Chevrolet Niva So, if restyling or retrofitting of a Chevrolet Niva car is necessary, namely the installation of a PTF, then everything is very good here.
replacing the fog light on a Chevrolet Niva, the subframe burst, more surprises from the car
The connection circuit is simple and primitive, which even a beginner can handle.
How to install fog lights? Installation of fog lights Niva Chevrolet. Diode lamps in Chevrolet Niva fog lights...
By numbering the contacts in the diagram, you can carry out repairs in case of malfunctions of the fog lights. Now the basic package includes fog lights that are not rectangular in shape, but round.
You just need to install them using fasteners and you're done. The wiring with a chip is brought out for connection through the underwing holes of the body to the front bumper. I’ll write about the results for future generations and ask experienced and knowledgeable teammates about what remains unclear.
I didn’t get into the fuse box only because it was too difficult to disassemble it.
Chevrolet Niva 2013, 80 l. With. - electrical and electronics
I hung the extra relay plug from the kit; there is just the right place for it. Then everything follows according to the scheme, if anyone is interested. Plug 1 Ш1 of the fuse block has 8 contacts.
The button has 5 contacts; the 6th is missing because new button boards are not needed. A - there is no “-” button backlight. C - the “-” indicator light for turning on the PTF on the new boards is immediately connected to the missing pin A. The SUV’s equipment is quite modest, this is not surprising, since it belongs to the budget segment. In addition to such a useful attribute as permanent all-wheel drive designed to help in the absence of road surfaces, the Chevrolet Niva is equipped with “fog lights” that will allow you to navigate and identify yourself on the road in conditions of insufficient visibility, and these are issues of your own safety.
Brief characteristics of fog lights in the Chevrolet Niva The design of the fog lights is based on lens optics, which has a positive effect on their direct function - illuminating the road in fog.
The light beam is distributed more evenly compared to lensless counterparts. The protective glass covering the lenses is resistant to fogging due to temperature changes and can reliably protect them from mechanical influences.
The standard configuration of the fog lamp is equipped with a halogen incandescent lamp with a power of 35W. But such a lamp cannot produce a strong luminous flux due to the nature of low power, so many drivers seek to install other types of lamps, such as xenon or LED, in the PTF.
Xenon ones are very popular, but they require the installation of an additional starting unit. The lamp produces luminous flux due to an inert gas and a special filament, which is many times superior to the good old halogens.
Device
The Niva has triangular-shaped PTFs with halogen headlights inside, with a power of 35W. They are located in the lower part of the bumper; this arrangement helps the light penetrate better through the fog, and also slightly blinds oncoming cars. Thanks to them, in bad weather conditions the car stands out on the road, and also illuminates it additionally during fog. The voltage supplied to them is 12 volts, and they are turned on using a special button located in the car interior. Fog lights on the Chevrolet Niva are equipped with special lens optics, which perfectly helps to cope with their main function during fog, rain and snow.
Installation
If you decide to install it on your car, then special preparation is provided in it specifically for these purposes in the form of ready-made wiring, a special place for them, as well as a place for a relay. When you have everything necessary for installation prepared, you can proceed with the installation:
- First of all, disconnect the terminals from the battery, then you need to access the button by removing the dashboard
- Under the dashboard you need to find a free chip
- In the control unit we install the relay in the free block
- Wiring is routed to the bumper
- Using special fasteners, additional headlights are installed
- We connect and check the functionality of the fog lights
Removal
If fog lights are installed on your car and they need to be replaced and removed for any work, you need to prepare a standard set of tools and do the following:
- We de-energize the car by removing the terminal from the battery
- At the wheel arch liner, remove the front part by unscrewing the screws
- Disconnect the block with wires from the headlight
- From the bumper we unscrew the screws that secure the headlights to it.
- Dismantling the headlight
- We carry out all the necessary actions and install them all in place in the reverse order
These light elements are the key to your safety in poor visibility conditions. If for some reason they are not on your car, you can always install them yourself.