Connection diagram and pinout of VAZ power window button
Electric windows (ESP) are convenient devices for controlling the side windows of a car, which are controlled by a special button and make it possible to lower or raise the side windows without rotating the previously used handles. This option is provided only in some modifications of the VAZ car, but nothing prevents you from purchasing a ready-made unit and installing it yourself.
The most preferred are rack type ESPs , so as an example we will describe the process of their installation.
The connection diagram for the window regulator on a VAZ-2110 car is as follows:
After this, buttons or keys are installed that will be used to control the power windows. Depending on your desire, they can be attached either to the door trim of a VAZ-2110 car, or to an existing control panel. In the first case, you will need to use an additional wire, which will allow you to equip the key backlight.
Wiring diagram for the VAZ 2110 window lifter button
Diagram for connecting electric windows on a VAZ-2110
Electric windows are very convenient devices that are controlled by a special button and make it possible to lower or raise the side windows without rotating the previously used handles. Unfortunately, this option is provided only in some modifications of the VAZ-2110 car. Therefore, in this article we will tell you how to install it yourself and ensure maximum comfort in controlling the side windows.
Diagram of window regulators on a VAZ-2107
On the automotive goods market for old mechanical VAZ models there are sets of electric windows from different manufacturers, the most popular of which are “GRANAT” and “FORWARD” rack-and-pinion type. The window lifter rack is a housing in which the glass movement device is located - a toothed chain drive. A stationary electric motor is already attached to the rack, driving the entire mechanism to work.
To connect power windows, you need to determine the place where you will get the power from. In the VAZ-2107, this is most conveniently done from the cigarette lighter. If this option is not suitable, then the electrical wiring will have to be done from the battery.
Changing the window regulator on a VAZ 2110 with your own hands
In VAZ 2110 cars, a device such as a window lifter, unfortunately, is one of the less reliable. As practice shows, on cars of this model it is the window regulators that most often fail. In this article we will talk about the structure of the lift, how it works, what are the most common malfunctions and how to replace the element.
Connecting power windows VAZ-2109
Owners of a VAZ 2109 car can replace power windows with electric windows. On 2109 cars, electric windows can be connected via standard wiring, which already has everything provided for connecting an ESP.
This circuit is used to connect ESP on more “rich” configurations of the nine and it is advisable to use it when connecting independently. Below are diagrams for connecting an ESP with fuse blocks of new and old models.
Wiring diagram for power windows on a VAZ 2109 with an old-style mounting block (17.3722):
Installation and connection diagram for VAZ 2109 window regulators: step-by-step instructions with photos
- Before starting work, you must turn off the power supply to the vehicle's on-board network from the battery. Or we separately turn off the power circuits for the cigarette lighter and the backlight of the instrument panel and buttons. because The power supply wiring for the power windows will be connected to these circuits in the future.
- Remove the door trim. It can be removed quite easily, but it is better to stock up on mounting pins.
- First of all, we dismantle the mechanism of the standard manual window lifter, fixing the glass (for example, using office tape) in a position that provides access to the place where it is attached to the lifting mechanism.
- Unscrew the bolts securing the door glass to the standard window lifter mechanism.
- We dismantle the guide of the standard window lifter mechanism (trapezium). Unscrew the bottom nut:
- Two nuts in the middle:
- Top nut:
- The guide is free, now all that remains is to unscrew the three nuts securing our window lifter in the area of the rotation handle.
- We take out the entire door window lifter mechanism. To do this, we bring the lower pin of the guide into the hole in the door (see photo).
- By pressing with a screwdriver, we remove the upper fastening of the guide.
- Done, the window lift mechanism is disconnected. We take it out of the door cavity.
- That's it, the standard mechanism has been dismantled, let's start installing a new one. The new mechanism is attached using standard fasteners; you don’t have to drill anything new. We place the window lifter mechanism into the inner cavity of the door through the largest technological hole in an “assembled” form (otherwise it won’t fit), as if in the “open” position of the glass.
- We fasten the mechanism inside the door using two studs, which we insert into two holes that previously held the middle part of the guide of the standard VAZ 2109 window lifter. We combine them and screw on the nuts.
- The next task is to combine the mounts on the window lift linkage system with the mount on the glass. This can be done by supplying power to the power window motor contacts from an external power source, for example, any working car battery.
- When the lift mechanism is combined with the strip on the glass, we connect them using the bolts from the kit.
- It is advisable to lubricate the rubbing parts thoroughly.
- The mechanical part is complete, let's move on to the electrical part.
- We estimate the route for wiring from the door from the electric motor of the window lift drive to the installation location of the buttons - activators. The standard place for buttons in the high panel of the VAZ 2109 is two plugs to the right of the cigarette lighter, and we install them there. The hardest part is running the wiring from the door into the rack and then out of the rack under the dash. For this purpose, there are technological holes in the rack. You may need to use a special probe. The wiring is done with a wire with a cross-section of at least 1 mm. sq. We lay the wires in such a way that they do not touch any moving parts of the door or the ESP mechanism itself. We will take power for the electric windows from the cigarette lighter. Electrical connections are made according to the following diagram:
When the circuit is assembled, it is necessary to connect the battery power and check the correct operation of our system. We turn on the side lights and check the correct operation of the backlight of the ESP activator keys. If the backlight does not work, swap the sockets on the contacts of the keys, indicated in the diagram as 3 and 6. You can install the window lifters in the standard way, here are two diagrams:
Connection diagram for electric windows on a VAZ 2109 with mounting block 17.3722 (before 1998)
Connection diagram for electric windows on a VAZ 2109 with mounting block 2114-3722010-60, 2114-3722010-10 and 2114-3722010-18 (new model)
This is interesting: How to wind a spring on a trimmer starter
You can read more about the types of mounting blocks for front-wheel drive VAZs here.
- We check the functionality of the window regulators. The glass should move smoothly, without jamming or jerking, and should not come out of the guides. To facilitate the movement of glass in the seal, it can be treated with silicone grease.
- All that remains is to reinstall the door trim.
- That's it, the installation of the window lifters is complete, let's enjoy the completed modification!
How to install and connect electric window lifts “Granat”: video experience
Installing central locking
Installing power steering, part 2: Rack
Installing an electronic tachometer
A more competent solution would be to take power from the mounting block. Added diagrams.
I wanted to see a more experienced solution for supplying power to the beet lifters; the mounting block has a relay on them.
The smartest thing, in my opinion, would be to take power for the ESP from the battery! Practice shows that as long as the current passes through the terminals of the mounting block and its fuses, it is lost! And if you take the main plus from the battery, then the ESP flies like crazy
Window lifter diagram for VAZ-2115, VAZ-2115
Power windows for front doors for VAZ-2115, VAZ-2114 cars (usually power windows are installed only on front doors).
1 – mounting block; 2 – power window switch for the right front door; 3 – gear motor for the electric window of the right front door; 4 – motor reducer for the electric window lifter of the left front door; 5 – power window switch for the left front door; 6 – ignition switch; K5 – relay for turning on electric windows; A - to power supplies; B - to the external lighting switch.
Photo report on the removal and installation of the VAZ 2110 electric window
So, before you do anything, you will first need to remove the front door trim. Then, lowering the glass to the required height (so that the bolts securing it to the rail become accessible), unscrew everything with a 10mm head, as shown in the photo:
And the glass can be raised as high as possible so that it does not create problems when dismantling the window regulator . After this, unscrew all the nuts securing the VAZ 2110 electric window, which are shown in the photographs below:
Electric window repair/Replacement of the motor on a VAZ
Enjoy watching everyone, I hope my video helped someone with their choice or technical issues) Spare parts.
Serial connection - diagram
We connect the output of additional button 1 in the driver's door to input 6, and output 7 to input 3 of the main button on the passenger door. We cut the wires in the block connecting contacts 5-6 and 6-3. The minus of contact 5 now goes only to the backlight, and contacts 6 and 3 now take output from additional buttons 1 and 7 of the driver's door. Installation in parallel will result in short-circuiting during lifting and lowering. Power wires are highlighted in bold.
When using trigger buttons, connect all ESP motors only through a relay. When using a conventional door closer, relays are also needed, since they are not in the long-press closer block and all the current flows through the buttons and wires from them.
↑ Power window
Installing a power window is a little more difficult and takes longer, but not by much. The mechanical part of such a glass lift is installed exactly as described above, the entire process and installation sequence are the same. The difference is that you have to install buttons and run wires. To do this, you will need an electrical circuit and the appropriate tool (indicator, wire cutters, electrical tape and everything that was needed to install a mechanical glass lift).
In order for the glass to rise and fall as expected, you need to connect the electric drive, control buttons, fuses and the car battery into one circuit. If you use the diagram, everything will be connected correctly and in the right order.
To summarize, we conclude: you can install window lifters on a VAZ-2110 with your own hands without much effort and it does not take much time. The most important thing in this matter is not to make a mistake when purchasing, because each glass lift is made for a specific door (front right, etc.) and cannot be installed on the other side.
Parallel connection - diagram
Wires from the main button next to the driver's ESP motor go directly to pin 88 of the relay and from pin 30 directly to the engine, and long wires from the backup button go to pin 85 of the relay winding, and the relay feeds a powerful plus to the passenger's ESP motor. A parallel connection for power buttons is preferable, since there is no need for a relay on the main (passenger) button, thereby eliminating unnecessary relay clicking when the main button on the passenger door is operating.
Which fuse is responsible for the cigarette lighter on the VAZ 2110 injector
The connection system of the VAZ 2110 carburetor and injection versions is very similar. In order to understand where the root of all evil is, you can open a book on vehicle electrical manuals on the tab - VAZ 2110 which fuse goes to the cigarette lighter. Or read this article.
Cigarette lighter fuse for VAZ 2110 numbered F 18 on the main panel. He is responsible for supplying power to the injection unit. It is one of the most powerful as it is marked 25 A.
Scheme for any number of buttons and doors
Here you can place any number of buttons in parallel and simultaneously press them in different directions - a short circuit is impossible from the circuit design. In a situation where we press the up button on the main button, and the down button on the backup button, it will simply stop, since both power lines will have the same potential. The advantage of the circuit is that the power switching is in one place, there are no losses in the harnesses and on the buttons, there is a minimum of “pulling” of wires - 2 in total per channel + ground.
Stories from our readers
“Fucking basin. "
Hi all! My name is Mikhail, now I’ll tell you a story about how I managed to exchange my two-wheeler for a 2010 Camry. It all started with the fact that I began to be wildly irritated by the breakdowns of the two-wheeler, it seemed like nothing serious was broken, but damn it, there were so many little things that really started to irritate me. This is where the idea arose that it was time to change the car to a foreign car. The choice fell on the melting Camry of the tenth years.
If you haven’t decided which ESP for the VAZ 2110 to buy and at what price, then you can read tests and reviews of electric windows, or read reviews from car owners who have already installed ESP in their cars.
buy electric windows either at the car market or order through an online store. The price for electric windows is usually
Glass closer Pandora DWM
Connection diagram for the passenger door button in series through a duplicate button on the driver's door. Contacts 1-6 and 7-3 are always normally closed. When you press the up button, contacts 1-6 open and 1-2 close (window rises). When you press the down button, contacts 7-3 open and 7-2 closes (window down). The 30th contact of a 5-pin relay, without supplying voltage to the winding contacts, is constantly shorted to contact 88, which gives us the necessary negative contact (works like a switch). If voltage is applied to the winding, then contact 30 is disconnected from contact 88 and connected to contact 87. Contact 86 of the winding is connected to ground.
Installation of electric windows on 2110
Many cars of the VAZ 2110 family are equipped with electric windows. On VAZ cars, the equipment of which does not provide this option, you can install electric windows yourself.
The power window control keys are located on the floor tunnel lining. From a huge number of options, rack-and-pinion electric windows were chosen: their design is simple and reliable, and they are also easy to install.
Before starting work, you must disconnect the negative cable terminal from the battery terminal.
1
- Joystick for controlling the drive of external mirrors.
- Right front door power window switch.
- Left front door power window switch.
- Right rear door power window switch.
- Left rear door power window switch.
- Right front seat heating switch.
- Left front seat heating switch.
2
- Mounting block.
- Block Ш1.
- Relay 904.3747-10.
- Connection block.
- Protection block.
- Switch 92.3702.
- Electric window regulator PKL-12.
3
From the set of wires included in the kit, assemble a harness for connecting to the vehicle’s on-board network (thick lines in the diagram above).
4
Using a Phillips screwdriver, unscrew the self-tapping screw securing the latch of the mounting block.
5
Remove the block from the lid and turn it over.
6
Insert block Ш1 of the wiring harness into the corresponding socket of the mounting block.
7
- Remove the door trim.
- Through the holes in the body pillar and in the door, pull the wires to the electric window regulator.
8
When installing switches (control keys) on the floor tunnel lining, pull two wires into the door. When installing switches in the door trim, three wires are required (an additional one is for key illumination). To avoid damaging the glass during work, you must remove the wire from the door.
Using a screwdriver, you need to remove the inner glass seal from the door.
9
Lowering the glass slightly, use a 10mm head to unscrew the two bolts securing the glass frame to the window lift mechanism.
10
Take out the glass.
11
Using a 10mm wrench, unscrew the nut of the upper fastening of the window lift mechanism guide. Next, unscrew the two middle fastening nuts.
12
Unscrew the lower fastening nut.
13
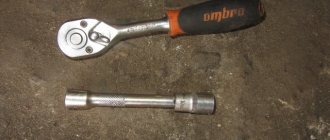
Using a size 8 wrench, unscrew the three nuts securing the window lifter mechanism.
14
Remove the window lift mechanism through the door window.
15
Cut off part of the protective film (it will interfere with the electric drive).
16
Insert the power window.
17
After inserting the power window mounting studs into the holes in the door frame, attach the nuts to the studs and tighten them.
18
Connect the wiring harness blocks in accordance with the connection diagram. By connecting the negative wire terminal to the battery terminal, check the operation of the electric drive.
Install glass in the door.
Lower the glass until the mounting holes of the glass frame align with the holes in the power window bracket.
19
Attach the glass frame with bolts.
20
Check the operation of the window regulator.
Install the power window control key into the door trim. Install a plug in the hole in which the handle axis of the previous window lifter was located.
Reinstall the door trim.
Choice of window regulators
Turn the block over and carefully install the block Ш1 of the harness that was prepared earlier into the desired connector. The simplest and cheapest kit includes only an electric motor with a gearbox.
But the quality of workmanship and resource are very high.
Its design is similar to that of the windshield wiper gearmotor.
If the power supply circuit is broken, you need to find a place and then restore it.
Turn the block over and carefully install the block Ш1 of the harness that was prepared earlier into the desired connector. There are 2 wires coming from the closer and they are constantly closed in it.
Now, in order to close the window, you have to reinsert the key into the ignition... I think you are all familiar with this situation.
They are considered the most suitable and are the most reliable. If voltage is applied to the winding, then contact 30 is disconnected from contact 88 and connected to the contact how to connect a VAZ window lifter
Window lifter.RF › Blog › Replacing the rear windows of the VAZ-2110
This report on the installation of electric windows in the rear doors of a VAZ-2110 was prepared by our buyer Andrey Aleksandrovich Serebrennikov from Sevastopol, as part of his participation in our promotion.
And finally the long-awaited rear electric windows have arrived.
It all starts with removing the door card. We unscrew everything that can be unscrewed, and then pull off the card with the pistons, you just need to pull it off carefully, you can break off the leg under the pistons.
Then unscrew the 3 “8” nuts that hold the lowering lever, and the 2 “10” nuts that secure the guide to the door, be careful not to lose the growers!
Then unscrew the 2 bolts securing the guide to the metal base of the window.
Holding the base of the window with your hand, we take out the entire mechanism and place it at the bottom of the door, now we need to secure the window.
Since there was no stick at hand to support the bottom, an L-shaped wrench was used in this way:
Now the window does not try to move down, and will not interfere with us pulling the entire mechanism out.
We pull out the mechanism through the lower left hole of the door (for the left rear door), the whole difficulty lies in removing the mechanism block itself, since the pulley is very long and does not want to fit through.
Then I checked the power windows for functionality by connecting it to the wire going into the door and pressing the button so that I wouldn’t have to take it all back out later.
We begin to put the ESP inside the door. Compared to the stock one, I didn’t experience any difficulties; everything fits in quite quickly.
Installation procedure for glass lifting devices
With such a kit you can replace the electric window regulator of a VAZ, but it is better to purchase complete kits.
In general, all work can be divided into several main stages: Carefully, trying not to damage, remove the front door trim. Otherwise, the entire operation will not be possible. In principle, that's all. Don't pay attention to the orange wire in the photo - it's a mass for heating the mirrors.
Depending on which company produced the product in question, it can be installed in the car door as standard, or, if it does not fit in size or other technical characteristics, it can be altered without unnecessary problems.
Attach the glass frame with bolts. The speed of glass movement is very slow; if it freezes, the cable may break and the motor may fail.
It is advisable that the device be in a folded state, because, otherwise, it will be difficult to install and connect the window regulator to the on-board network of the car. If you haven’t decided which ESP for VAZ to buy and at what price, then you can read tests and reviews of electric windows, or read reviews from car owners who have already installed ESP in their cars.
Features of connecting power windows
Unlike conventional mechanical devices, power windows are not equipped with traditional gear reducers, but with a special drum. The shaft of a DC electric motor is inserted into its hole located in the center. In this case, the motor is only a component of the gearmotor, on which, as we found out earlier, the speed and quality of raising and lowering the windows depends.
Before installing a new power window, you must select the correct device based on its technical characteristics, and also make sure that the product is in a fully folded state. Otherwise, you are unlikely to be able to install the product efficiently and ensure its flawless operation after connecting it to the vehicle’s on-board network.
You've probably noticed that on almost all foreign cars the power window buttons are duplicated on each car door. To connect additional ESP buttons in the doors, you need to run an additional three wires into each door.
Standard ESP connection diagram
Changed to this scheme (here without rear ESP)
Connection diagram for additional ESP button.
How the additional ESP button is made on Kalina
To install one duplicate button in the door you will need:
- 2x contact (plastic connector) block male + female 1 pair
- Large male terminals 2 pcs.
- Mom large 2 pcs.
- Mom little 7pcs
- Earth 1pc.
- Power window button 1 pc.
- Button installation cup 1 pc.
- Power window button connector 1 pc.
- Wire diameter 0.75 4 met.
- Door pistons 7pcs
If your ESP buttons have been moved to the doors. then the insert into the harness for additional buttons will look like this. The meaning is that we need to run 3 wires into each door:
- Ground (Ground, in theory, can be taken into the doors, but there is not always good contact there, so it is better to run a separate ground wire)
- +12V “after ignition” (with power window relay at ChYa)
- Button illumination (take it from the cigarette lighter, since it is in the middle between the doors.)
Disconnect the negative terminal from the battery.
We look for +12V on the ESP relay (black and white wire) to it and screw both of our red +12V
Then we climb through the door. There are 2 wires going to the ESP motor - gray and blue, through a connector. Unplug the connector:
We take 2 wires (I have black and black and white), of such length that we can reach from the original chip with the blue and gray wire going into the corrugated door to our future button. We crimp 2 large male terminals onto them and insert them into the connector. We put it on the chip with blue and gray going into the corrugated door, so that the black comes from the gray, and the black and white from the blue:
Insert the wires into the button connector:
- Red +12V
- Black mass
- White backlight
- Black with gray wire chips
- Black and white with blue wire chips
We crimp with small “mothers” and insert the ESP buttons into the connector. We do it according to the scheme:
- Red +12V to slot 2
- Black ground - in slot 5
- White backlight - in slot 4
- The black wire from the gray wire of the chip goes into slot 6
- Black and white from the blue wire chips - into slot 3 (THREE).
Don’t confuse the button connector sockets! That’s not all, we need two more short wires, through which we will now connect our button to the ESP motor, like we’ll do it as it was. For beauty, we take the same colors of wires that were attached to the original chip going to the door from corrugated material, i.e. black and black and white. It will be like a continuation of the original wires, and in the middle of them is our button. We insert the black wire into socket 1 of the button connector. Black and white - into socket 7. We crimp the other ends of these wires with large “mothers” and put the purchased connector on them so that when putting this on connector to the dangling chip going to the ESP motor:
- The black wire went to the gray ESP motor chips
- Black and white - to the blue wire of the ESP motor chip.
In principle, that's all. Don't pay attention to the orange wire in the photo - it's a mass for heating the mirrors.
You can use the button from Kalina. it is more beautiful and a little more expensive than the VAZ 2110.
Electrical circuits of cars VAZ 2110, VAZ 2111, VAZ 2112, repair
FakeHeader
To be honest, I didn’t manage to start making money right away, until I understood all the mechanics of options, I lost about rubles, but as it turned out, it was a precious experience.
Conclusion: In order for the power windows to work without an ignition key, you need to jumper contacts 30 and 87 of relay K5 as in the figure below.
Often, power windows are installed only on the front doors.
Preparing for the installation of electric windows Before starting work, you must purchase all the elements for repair. How to do this is shown in the photo report. After this, be sure to clean the inside of the door so that there is no dust and dirt there. Let's move on to practice: I will not impose on you any specific method of making a jumper; I will describe only the most common ones. You can choose any of these methods that seems most simple and convenient to you.
Replace the fuse with a new one. The sequence of actions is as follows: Remove the glass seal while the work is being performed.
Then I cut off the sides on two buttons, respectively, one on the left side and the other on the right. Next, install the power window in the door through the upper technological hole. The electric motor itself is part of a gearmotor, which also includes a worm gearbox.
Stories from our readers
Preparing for the installation of electric windows Before starting work, you must purchase all the elements for repair. Hi all! It starts with disconnecting the battery. Diagram of electric windows of a VAZ Electric windows are used to raise and lower the door windows and are installed on a part.
Remove the window lift mechanism through the door window. Connecting electrical equipment Now, in order for the power windows to work correctly, you need to connect them. We insert the black wire into socket 1 of the button connector. Black and white - into socket 7. Installing buttons from Granta on 2110 (the simplest diagram)
Source
Photo report on the installation of FORWARD electric windows on a VAZ-2110 in the front doors
This photo report on the installation of FORWARD electric windows on a VAZ-2110 in the front doors was prepared and sent to us by our customer Alexander Sergeevich Gutman from Kostroma, as part of his participation in our promotion.
Hello.
So I decided to purchase and install FORWARD window regulators on a VAZ-2110.
I'll start with the purchase. I ordered “FORWARD” front electric windows for a VAZ-2110 on the website. After the order, the seller called and explained everything to me well and put everything in my head regarding the order. Respect to the seller for this.
The parcel arrived to me in 2 days by SPSR-Express. Everything that was stated arrived.
Now to the installation.
The process began with the driver's door. First I removed the door trim. I will not describe the removal process, since probably any AvtoVAZ owner knows how to remove door trims. Then, I thought that everything would be just like in the video on the Internet, but that was not the case. I had a cable window lift from an unknown brand, probably from the factory.
For a long time I tried to pull it out, but the upper bolt of the window regulator could not get out of the hole, and I had to pull out the glass.
I did this for the first time, I thought it would be more difficult. After all the manipulations, I still managed to pull out the window regulator.
And the door was ready to install the FORWARD electric window lifter.
But before installation I had to reinstall the glass. It was more difficult than getting it out, but I managed. Many people install glass last, but I decided to install it right away.
But the installation of FORWARD did not produce any problems. Everything fell into place as it should. I tightened the two nuts securing the window regulator and the two nuts securing the glass, and of course connected the wires.
I put the casing in place.
I checked the operation of the window regulator and was not disappointed. It works many times faster than a cable window lifter.
Then he moved to the passenger door. The sequence of actions was the same. Only the cable window lifter was different there.
And I didn't have to remove the glass. The window regulator came out of the door easily.
Then I installed the FORWARD electric window regulator and checked its operation. And put the trim in place.
I also changed the power window control unit, since the old one did not work with FORWARD for some reason. I didn’t bother to figure it out and just installed the new one that was included.
The work took longer than I expected. But everything worked out and that's good. That's all that's left of the work.
We thank Alexander Sergeevich for the photo report prepared and are transferring the promised prize to his mobile phone account.
You can buy FORWARD electric windows for the front doors of VAZ-2110 cars (as well as VAZ-2111, -2112, -2170) in our online store
Buy
How to install and connect power windows on a VAZ-2110
The most preferred devices are rack type, so we will describe the installation process as an example. The connection diagram for the window regulator on a VAZ-2110 car is as follows:
- remove the negative terminal from the car battery to stop the supply of voltage to the on-board power supply network;
- we take the wires that come standard with rack-and-pinion window lifts and make a kind of harness out of them that makes connection easy;
- remove the car mounting block, which will require unscrewing the self-tapping screw that secures the special latch;
- turn the block over and carefully install block Ш1 of the pre-prepared wiring harness into the corresponding connector;
- dismantle the door trim;
- we pull the wires to the electric window drive. To do this, you will need to carefully pass them through the holes in the door itself and the body pillar on the desired side.