In addition to the multimedia system, AVTOVAZ installs a simpler audio system on the Lada Vesta. It has a 4.3" monochrome display, FM/AM with RDS, USB, AUX, Bluetooth and Hands free functions. There are 4 speakers paired with the radio. Let's take a closer look at the capabilities of this radio.
↑ Description of the radio and controls
The radio for the Lada Vesta is located, as always, in the center of the front panel. The description of the characteristics of the standard Lada Vesta radio is as follows:
- there is a button to turn on the radio;
- it is also equipped with a monochrome display;
- The Lada Vesta device also has functional radio control buttons (that is, you can turn on both the track playing before and the next version);
- there is MUTE, which allows you to completely turn off the music;
- SCAN allows you to perform several functions at once;
- DISP allows you to show the time;
- there are also keys responsible for switching the Lada Vesta push-button radio from the radio playback mode to the playback mode of internal and external media and back;
- buttons corresponding to a serial number from one to six are responsible for switching radio stations, setting the time and other functions;
- Additionally, there is a washer that rotates and performs several functions at once;
- buttons responsible for starting a call and connecting with the phone and ending the call;
- RESET allows you to reset the settings that are already on the standard radio and reboot the system;
- if necessary, you can use the microphone built into the system;
- there is a slot for an SD memory card;
- the available AUX connector makes it possible to work with external speakers;
- The USB connector available here makes it possible to connect devices such as a player, cell phone, and so on.
Interestingly, if we talk about the battery of the radio, it is capable of storing radio settings for a maximum of ten days, and this without a connected battery.
It is interesting that if we talk about the multimedia system on the Lada Vesta, it has only three control keys. In order for the MMC to start working, you need to press the rotating encoder, which is designed for several functions at once.
A large number of commands on Vesta multimedia are performed by pressing a special touch screen. In addition, the radio processor can also perform several actions at once. MMS Lada Vesta in the form of an update provides that here, in addition to the main one, you can also install additional software (various applications, navigation, etc.), which can be purchased both from an official dealer and through the website.
Setting up the Lada Vesta radio
First you need to apply power by pressing the device's power key or encoder knob. Switching off is carried out automatically after turning off the ignition.
There is a battery in the panel to save radio stations when the battery is low for ten days.
The band is supported by FM/AM. Frequencies are selected in two ways: automatically and by selecting the encoder knob, RDS AF, RDS PTY, RDS REG keys. There is a noise reduction function.
Audio adjustment is carried out in the following order: equalizer, bass tone, treble tone, balance, front/rear balance, loudness, output.
The equalizer adjustment on the video is as follows: EQ JAZZ, EQ POP, EQ CLASSIC, EQ VOCAL, EQ USER. In the time section, the hours/seconds of the required time zone are set.
Installation of the Lada Vesta radio and its configuration is carried out in three frequency ranges: VHF, AM and FM. To make it more convenient to search for radio stations on the radio, there are six buttons, each of which can be assigned a specific radio station. For example, for FM it is possible to store eighteen stations at once.
As for the search, in this case it is possible both manually and automatically.
↑ Radio functionality
A review of the standard MMC Lada Vesta radio proves that the standard radio practically does not lag behind in its functions. So, for example, it works with all four of its factory speakers that are installed in the cabin.
In addition to several equalizer modes at once, there are additionally several ways to play tracks at once: for example, repeating an entire folder or repeating only one track, scattering among all folders or one, playing in order, and so on.
Since the player has the ability to view a memory card, it is important that it does not weigh more than 16 GB, otherwise the audio system will not read it. In addition, there are restrictions on folders and files. For example, there should be no more than 1024 files, and no more than 256 folders.
↑ Bluetooth and Handsfree
Thanks to such a convenient function as Bluetooth, the standard tape recorder can operate in telephone mode, which allows the driver to answer calls without being distracted by a mobile phone. If you press the key with the green handset, the phone mode turns on and finds nearby phones with Bluetooth functionality.
Next, a password is displayed on the radio screen, which you must enter on your mobile phone. And in order for this mode to be disabled, just press the button with the red tube.
↑ Push-button radio
In addition to multimedia with a touch screen, the plant installs a simpler audio system on the Lada Vesta. This standard radio has a monochrome display, the size of which is 4.3 inches, RDS, USB, AUX functions, as well as the ability to communicate with the phone when your hands are busy.
Also, along with the radio, four speakers are installed in the car. By the way, such a radio, like its touch-screen counterpart, has a lot of possibilities.
The standard radio offers the following modes:
- “Radio” mode, which offers both automatic and manual selection of the desired radio station.
- There is also an “Audio” mode, which allows you to listen to music via your phone via Bluetooth, a USB drive, or an SD card.
- “AUX” mode, which makes it possible to play audio using an external drive.
- Using the same Bluetooth, speakerphone can be enabled.
- By quickly pressing the enconder, you can adjust the audio parameters.
Both changing settings and switching various functions of the device is carried out by rotating the encoder.
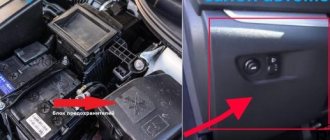
By the way, in the glove compartment of the car, next to the cigarette lighter, there is a USB connector, which is successfully used for a Flash Card and a player with a memory capacity of no more than 1024 MB. In addition, using the same device, you can at the same time connect your phone and, if necessary, recharge it. By the way, the touch radio also has the same connector.
As you can see, even the standard device has undergone many changes. And, of course, the new equipment of Vesta with its new MMC is much more interesting. If you don’t have enough money for one, you can always replace it with an alternative Lada Vesta radio, which has a more economical price.
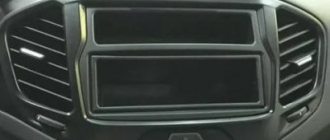
Control elements for the standard Lada Vesta radio
In the usual place for everyone - in the upper left corner of the radio there is a button to turn the radio on and off.
To the right of it there is a microphone for communication when the Hands free function is turned on, as well as a Reset button to reset the device settings. Even further to the right is a monochrome display that serves to display various information – track name, radio station and its frequency, time, etc. In general, here is everything that we are used to seeing and expecting from the radio display.
To the right of the radio there is an SD card slot and a DISP clock display key.
In the bottom row we can see the buttons:
MUTE – mute the sound Green and red tubes – accept and reject calls, SCAN – multifunction key.
A little lower we see the RADIO and AUDIO keys, which perform the functions of switching playback modes - either radio or audio from a storage medium.
In the very center of the radio there is a puck for scrolling through various functions, but most often it is used to increase or decrease the volume.
Below are keys with numbers from 1 to 6. These are used to quickly navigate to saved radio stations. In addition, in audio mode they can be used for other purposes. So, for example, key 1 can scroll through folders on a flash card.
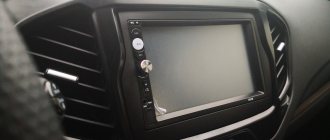
↑ Radio with touch screen
The old radio, if desired, can always be replaced with a new, more modern model. The instructions state that this multimedia from Lada Vesta is equipped with a special touch screen that is not afraid of temperature changes and responds to the slightest touch.
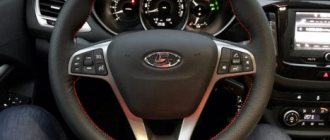
In addition, a special multimedia Lada Vesta is installed on the steering wheel, which allows you to control the radio without being distracted from the road. Using special keys on the steering wheel, you can answer a call, end a call, turn up the music or, conversely, make it quieter. Moreover, you can press the keys even with gloves on!
What other functions are typical for this system? This:
- a radio system that allows you to memorize several radio stations at once;
- the ability to listen to audio, and this can be either using USB flash drives or playing from a phone, or from an external HDD via a USB channel;
- The multimedia also has a phone mode that allows you to talk hands-free via Bluetooth;
- you can install a navigation application on the radio and use it for Russian roads;
- If you connect a flash drive or SD card, you can not only listen to audio, but also watch videos with small pictures.
As you can see, the functionality of such a system is enormous, and, compared to a standard radio receiver, this device is many times more convenient.
The radio manufacturer warns that the more different folders and files there are on the media, the longer the files will take to load. In this case, it is recommended to use external media that contains only video files, pictures and audio files.
The manufacturer categorically does not recommend placing *.bin resolution files on the media. Such files can lead to loss of functionality and damage to the firmware.
At the same time, the audio player window is intuitive. All files are played on six speakers, and the sound is at a truly decent level. You can make adjustments using the equalizer.
The driver can also listen to music via his phone via Bluetooth. But, unfortunately, information about the melody being played is not displayed on the multimedia screen.
Screen/Display Description
1 – folder number indicator; 2 – indicator of the track number being played; 3 – playback window; 4 – “Radio” mode indicator; 5 – playback mode indicator from SD memory card; 6 – USB flash drive playback mode indicator; 7 – indicator of connection to the device’s radio receiver via the Bluetooth® channel; 8 – radio station scanning mode indicator; 9 – indicator of random track playback mode; 10 – indicator of the repeat mode of the track being played; 11 – equalizer mode indicator; 12 – stereo mode indicator; 13 – indicator of loudness compensation mode operation; 14 – silent mode indicator; 15 – indicator of the mode of displaying stations by genre or receiving text information transmitted by FM radio stations; 16 – indicator for transmitting information about the general state of road traffic; 17 – indicator of the mode for displaying the names of some stations; 18 – indicator of the reception mode of regional radio stations; 19 – indicator of the search mode for alternative frequencies.
The first reviews from owners about the standard Lada Vesta radio are only positive. The radio is quite functional with a friendly interface, nothing superfluous. The sound of the music is good. For an ideal case, the only thing missing is the buttons on the steering wheel. You can learn more about the audio device from this video:
Support for files on external media is exactly the same as on a more expensive multimedia system. For owners of Lada Vesta, we are posting a user manual for the radio, in which you can find a detailed description of _x000D_ To download files you need to log in to the site, password ladaonline.
Review of the radio from the magazine “Behind the Wheel”:
Expecting something supernatural from the audio system of a $10,000 car is stupid. Therefore, we will ignore the issue of sound quality. To my non-automobile taste, the Vesta is no better and no worse than those of its foreign-car classmates. Otherwise, the head unit in the flagship Lada is decent. The display correctly displays Russian tags from external media, the speakerphone works well, and the Bluetooth connection is reliable. For comparison: the multimedia in the Nissan Almera was very selective with smartphones, and wireless synchronization periodically failed. Special thanks for the large control keys. Nowadays, almost everyone has standard double-din audio systems, but for some reason this does not always mean successful ergonomics. Often, creators prioritize the beauty of a large display, which is absolutely useless in the absence of navigation or a rear view camera. Vesta’s priorities are correct: it’s easy to get to the right button without looking, and two lines on the screen are more than enough to display the necessary data.
Some may regret the lack of a CD player, but let's be objective: this format is becoming a thing of the past. It is more convenient to use SD cards and USB flash drives. It’s much easier to record and re-record music on them, they don’t take up any space at all, and they hold so much data that you won’t be able to listen to everything in every “long-distance” trip.
Take the survey. Help us evaluate the stock radio by leaving reviews about it. Let us remind you that other operating instructions for Lada Vesta can be found in this section.
Categories of products that may be of interest to you based on the article “Review of the Lada Vesta head unit without a touch screen”:
No entries found.
Products from the Dustershop77 range on the topic of the article:
| Image | vendor code | Name | Manufacturer | Price | Availability | Add to cart |
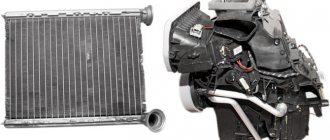
↑ Problems and their elimination, as well as how to remove the radio from Lada Vesta
If the driver presses several options at once, or during a sudden temperature change, the radio may freeze. In this case, you will have to first press RESET and then reboot the radio. If even after this the radio does not start working, you will have to contact a service center.
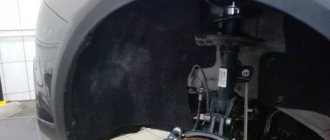
The radio is removed only for repairs or subsequent dismantling. Before doing this, you need to disconnect the wire terminals from the car battery.
First you need to remove the central trim. In this case, the console is held on by clamps and can be easily snapped off. Disconnect the wires from the emergency lights and remove the plastic cover.
Next, the screws and air ducts are turned out, for which a screwdriver and a T20 nozzle are used. Using the same tools, the screws are unscrewed and the radio is removed from the socket. At the last stage, all that remains is to pull the tape recorder towards you and disconnect the connectors with wires.
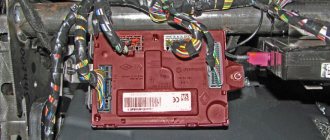
Removing the standard radio in Grant Lux
The difference between grants of the luxury configuration: the MMS (multimedia system) installed from the factory. This is a 2 din device.
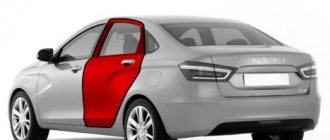
To remove standard acoustic grants:
- take a knife or plastic spatula to dismantle the acoustics and disconnect the decorative trims to the right and left of the radio. It is not necessary to take pictures;
- in the gap between the cover and the panel we find the head unit lock. There are two of them on both sides. Press it out with a screwdriver;
- we take out the GU on ourselves.
Everything is described in detail in the video:
Replacing the standard MMC in Grant
The process - after removing the acoustics, we install a new system.
Difficulties: you may have to finish the fastenings of the new system for VAZ ones. Plus you need the right frame. The factory MMC frame may not fit.