Purpose, device and features
The steering column is the connecting link between the steering wheel in the cabin and the wheels of the car. Its task is to transmit commands from the driver turning the steering wheel to the worm of the steering mechanism. Many car enthusiasts underestimate the importance of this unit. But in vain. Ignoring seemingly insignificant problems can lead to the destruction of mechanical elements and, as a result, loss of vehicle controllability. It's scary to imagine how this could end when driving on the highway.
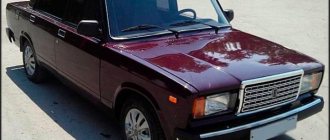
Replacing the steering column of a VAZ 2106
Among the structural elements of the column, it is worth highlighting the shaft itself (essentially the same steering column), the bracket on which the steering wheel is attached, the bearing, the crosspiece (some models have it) and the steering wheel. Please note that even in classic models of AvtoVAZ products, the design of the steering columns may vary. For example, in the “six” it is a solid shaft made entirely of metal. On top there is a spline connection and a special thread for mounting the steering wheel. On the other side of the column there is an internal connection intended for fastening to the worm gear. In the same “seven” the design of the mechanism is more sophisticated. It includes a pair of small hinges that allow the steering column to fold in the event of a powerful frontal impact. Thanks to this property, this type of design is called “injury-proof”.
Signs and causes of failure
Signs of a faulty steering column are as follows: 1. A knocking sound appears in the rack. If nothing is done, the sound will increase (especially with frequent trips on uneven roads). Over time, strong feedback will appear in the steering wheel, which in itself is very dangerous. The longer you ignore the problem, the worse the controllability will be, and the greater the likelihood of complete failure of the unit. 2. The occurrence of backlash. The appearance of play in the axle is often caused by loose spline connections, and in the plane - by problems with the bracket elements (wear or weakening of the structure is also possible here). 3. Creaking in the steering column is often caused by bending of facing panels or trim, or failure of the steering column switch unit. With high-quality installation and timely care, the steering column can last a very long time. But most car enthusiasts don’t even look under the car. With such operation, after just a few thousand kilometers, nuts and bolts may become loose, play may appear, and the splines may wear out. Over time, the unit becomes completely unusable.
Replacement features
I would like to note that replacing the steering column is a very complex process that will require some patience and knowledge from you. But armed with the necessary tools and tips from the article, you will definitely cope with the task. As a “test subject” we use one of the most popular domestic cars - VAZ- 2106.
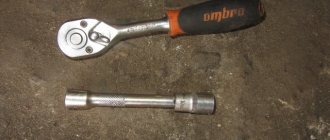
So, let's get started: 1. Drive the car onto a pit or overpass. If this is not possible, raise one of the sides with a jack and secure it with a wooden stand. 2. Prepare the necessary tools. You will need a wrench with a head at “30” and at “17”, a wrench (it is important that it is long and powerful), a hammer, a pry bar, a handle with a ratchet and one open-end wrench at “17”. 3. Immediately find the steering column - for the “six” it is located in the lower left corner. 4. Remove the steering shaft (without this, further work will be impossible). 5. Unscrew the nut holding the column to the steering rods. This is where big problems can arise. To make your task easier, treat the threads thoroughly with WD-40 and stock up on a long lever (two powerful wrenches will be just right). Be prepared to use a lot of force.
READ Do-it-yourself subframe for a cornfield for a transfer case
Some car enthusiasts do not unscrew this nut at all - they simply dismantle the column and steering ends assemblies (here it all depends on your tasks). If you still decide to unscrew the nut, then be prepared for another very unpleasant job - knocking the column off the splines. 6. Unscrew the bolts securing the column and spar. Getting access to them is a very difficult task, so remove the front left wheel (the work will be much easier). 7. Take the knob at “17” and unscrew the three fixing bolts one by one. To prevent turning on the other side, hold the nut with an open-end wrench. Please note that there is very little space there, so the key will have to be inserted and held from the end. 8. Once you have managed to remove all the bolts from their “established” positions, finish the job using a more convenient ratchet. 9. After removing all bolts, remove the column. And here the nuance that we discussed in point 5 “pops up”. If the tips are disconnected, you can safely remove the assembly. Have you decided to unscrew the big nut? Then you will have to work extra hard to knock it off the splines.
Now install the new steering rack and reassemble the unit in reverse order.
In principle, if you have the necessary tools at hand and minimal technical talent, this work can be completed in 1-2 hours at a leisurely pace and with smoke breaks.
Replacing the steering column of a VAZ 2106
It is no secret that not only the controllability and stability of the car, but also the safety of the people in it depends on the serviceability of the steering system. When you first suspect a breakdown, you must quickly diagnose and fix the problem. But what is the right way to proceed? In fact, everything is simple - just know the design features of the unit, possible faults and methods for eliminating them. And in this article we will focus on one of the most important elements of the system - the steering column.
A good driver will never cause a fault and will detect the defect at an early stage. Follow this principle too. When you first suspect that the pad is failing, inspect it and, if necessary, replace the unit. Why put yourself and your loved ones in danger if you can spend only 1-2 hours of personal time, solve the problem and calmly go on a trip. Good luck.
Pendulum VAZ 2106
A pendulum arm or simply a pendulum is a part that connects the steering rods and the steering gearbox. The product is located under the hood symmetrically to the steering gear and is mounted on the right side member.
Replacing the pendulum
Like other parts of the car, the swingarm is subject to wear and tear and sometimes requires repair or replacement. The following characteristic signs indicate that problems have arisen:
- when driving on uneven roads, knocking noises are heard;
- large play in the steering wheel.
When the pendulum breaks down, sometimes you have to exert a lot of force to rotate the steering wheel.
It should be taken into account that the listed symptoms can appear not only when there is a problem with the pendulum arm, but also when the assembly is loosely tightened or the adjusting nut is overtightened.
Replacing the steering column of a VAZ 2107
Replacing a steering column is a rather difficult task, but it can be done independently if you have some experience in car repair. You will need the following tools:
- Wrenches 17 (socket and open-end).
- Socket heads for 17 and 30.
- Handle with ratchet.
- Mount.
- Hammer.
- Collar.
The column is removed in the following order:
- Disconnect the battery.
- Remove the steering wheel.
- Remove the steering shaft housing.
- Remove the wire block from the ignition switch.
- Remove the ignition switch.
- Remove the steering column switches.
- Remove the steering shaft clamped in the column.
- Using a 30mm socket and a powerful wrench, unscrew the steering column mounting nut. The tightening force here is significant, so the knob must be a fairly long lever. If you can’t unscrew it, you can lengthen the knob by putting a piece of pipe on it.
- Unscrew the 3 bolts securing the column to the body. The procedure is not easy - the distance between the parts and the body is too small, the bolts are difficult to keep from turning. A handle with a ratchet will come in handy here, which will speed up the process.
- Remove the column from the shaft. To do this, you need to knock the column off the tie rod using a pry bar. This must be done in jerks, resting your feet on the body.
- Unscrew and remove the shaft seal installed at the bottom of the column.
READ Updated Tesla Model S Features Radical Steering Fork, 520 Mile Range
After dismantling the old column, it is necessary to clean the seat from dirt. Before installing a new column, you should check the condition of its hinge joints and needle bearings. If everything is in order, you can begin installation, which is done in the reverse order of removal.
When installing a new VAZ 2107 steering column, you must pay special attention to ensure that all fastening bolts and nuts are well tightened. Considering how important this unit is for driving a car, play, and even more so, slippage of the steering column splines can lead to tragic consequences.
When installing the steering wheel, pay attention to the position of its spokes.
After completing the installation of parts and connecting the wire block to the ignition switch, you can connect the battery. Column replacement is complete.
steering column of a VAZ 2108, VAZ 2109, VAZ 21099 - removal, installation and disassembly
1. Disconnect the wire from the negative terminal of the battery. 2. Set the wheels to the straight ahead position of the vehicle. 3. Remove the steering wheel from the VAZ 2108, VAZ 2109, VAZ 21099 (see “Removing and installing the steering wheel”).
4. Remove the six screws securing the lower steering column housing.
5. Remove the lower steering column cover.
6. Remove the ignition switch trim.
7. Remove the upper steering column cover.
8. Loosen the bolt securing the base of the steering column switches.
NOTE If you do not intend to disassemble the steering column, then the steering column switches and the ignition switch do not need to be removed.
9. Disconnect the connector with wires from the wiper and washer switch.
10. Remove the base of the steering column switches from the steering shaft and disconnect the two connectors with wires from the horn contacts.
11. Disconnect the connector from the turn signal and headlight switch.
12. Disconnect the ignition switch connector from the wiring harness.
13. Disconnect the connector with wires from the ignition relay.
14. Insert the key into the ignition and turn it to position “0”. Unscrew the four fastening bolts and remove the bracket and ignition switch (see section 9 “Electrical equipment”, subsection “Ignition switch”).
HELPFUL ADVICE If the ignition switch mounting bolts are cut off, it is more convenient to remove the ignition switch on the removed steering column.
15. Unscrew the coupling bolt of the steering shaft coupling flange.
16. Unscrew the two bolts and two nuts securing the steering column to the body bracket and remove the steering column from the VAZ 2108, VAZ 2109, VAZ 21099. If the bracket is secured with bolts with cut heads (as on the ignition switch), then the bolts must be drilled out.
17. Remove the steering shaft from the steering column pipe. Replacement of the steering shaft is required in the following cases: a) if the rubber bushings of the coupling are cracked, delaminated or have lost their elasticity; b) if the rivet connections are loose; c) if the splines and (or) threads are damaged or worn.
Steering shaft coupling: 1 - rivets; 2 — rubber bushings; 3 — steering shaft; 4 — coupling flange.
18. Check the connection between the bracket and the steering column pipe. If there are cracks, replace the steering column tube.
19. Install the steering column on a VAZ 2108, VAZ 2109, VAZ 21099 car in the reverse order of removal. Before installing the steering column, make sure that the flat on the steering gear drive shaft and the hole for the pinch bolt on the steering shaft match.
- Author: admin
Rate this article: Share with friends!
steering wheel of a VAZ 2108, VAZ 2109, VAZ 21099 - removal and installation
steering mechanism of a VAZ 2108, VAZ 2109, VAZ 21099 - removal and installation
Do-it-yourself steering column replacement
Since the spline joints in the steering column cannot be restored if they are in good working order on the steering wheel and steering mechanism, the steering column simply needs to be replaced. It is worth remembering that removing the column is easy. You just need to prepare in advance.
- the battery is disconnected;
- the steering wheel itself and the steering shaft casing are removed;
- the steering column control system and ignition switch are unscrewed;
- remove the steering bracket bolts (difficulties may arise, drill them out);
- the coupling bolt of the splined connection with the steering mechanism is removed;
- the lower shaft seal is unscrewed and it moves into the cabin.
When replacing spare parts in a car, be sure to put the removed parts one by one. Assembly will be easier. Follow the instructions or contact a specialist. This is your safety on the road.
VAZ steering column
The steering column is mounted on the body using a specific bracket, as well as a rigid clutch with the steering mechanism. The column on the VAZ 2106 is an all-metal shaft, which has an external spline connection on top and a special thread with which the steering column , as well as an internal spline connection for attaching to the upper part of the worm shaft.
For example, the column on the VAZ 2107 model has a more complex structure: there are two “cardanic joints” - hinges that fold the shaft itself. For this reason, it is called safer.
In case of injuries, breakdowns and accidents in the front left part of the car the steering shaft folds in hinges and is considered safer for the driver when driving. In addition, the upper shaft 2107 has 2 needle bearings, which greatly simplifies driving.
In what cases does the steering column not work?
Since the steering column has a simple structure, there may be fewer problems. Monitor its condition and make repairs on time.
Signs that the steering column is not working:
noticeable creaking in the steering column due to wear of elements, breakage of facing panels and trim, the steering column switch does not work;
Play in the steering column is a serious problem.
Play in the plane of the steering wheel may indicate wear or weakening of the bracket elements, and axial play indicates weakening of the spline joints.
If well repaired, the steering column will last a long time. Loosening the bolts and nuts of spline joints leads to free play and gradual wear of the splines.
READ Replacing the Hyundai Solaris steering rack bushing
As a result, this leads to the column turning and malfunctioning, since connections without splines no longer work.
How to replace the steering shaft of a VAZ 2101, VAZ 2102, VAZ 2103, VAZ 2106?
Removal: 1) First, de-energize the battery; to do this, remove the “Negative” terminal from it. (For information on how to remove the terminal, see the article: “Replacing the battery” in paragraph “1”)
2) Next, remove the steering wheel from the car. (For information on how to remove the steering wheel on a VAZ 2106, see the article: “Replacing the steering wheel on a VAZ”)
Note! On other cars such as VAZ 2101, VAZ 2102, etc. The steering wheel can be removed following the example of removing the steering wheel on a VAZ 2106!
3) Now remove the casing from the steering column by unscrewing all the lower screws that secure it.
Note! For more information on how to remove the casing, read the article entitled: “Replacing the instrument panel”, in paragraphs “1-2”!
4) Next, find three blocks that are connected to three wire connectors, and after finding them, disconnect them from each other.
5) Then loosen the bolt that secures the clamp of the switch (Turn, light, etc.), and after unscrewing the bolt, carefully remove the switch by sliding it toward you along the shaft.
6) Next, remove the two screws that secure the ignition switch.
7) And after that, insert the key into the lock and turn it to position “0”, and then carefully insert a thin screwdriver into the hole and press the latch, and then remove the lock by pulling it by the key that is inserted in this lock.
Now you should use a marker and thereby make marks on the wires relative to the ignition switch so that when reinstalling the wires they do not get mixed up.
9) Next, unscrew the two bolts and two nuts that secure the steering shaft bracket to the car body.
10) Next, loosen the bolt that tightens the terminal connection of the steering shaft to the steering shaft by 2-3 turns.
Note! After the bolt is loosened, loosen the terminal connection as far as you can using a screwdriver!
We recommend: Replacing the cabin filter of Granta with air conditioning video
11) Next, without removing the screwdriver from your hands, loosen the bolt that tightens the clamp securing the tube of the upper shaft support by 2-3 turns.
Note! After loosening the bolt, slide the tube up the shaft and remove it. Following the tube, slide and thereby remove the shaft bracket indicated by the arrow!
12) Finally, pull the shaft towards you and thereby remove it from the car.
Installation: 1) Installation is carried out in the reverse order of removal.
Note! Before you start installing the new steering shaft in its place, pick up the shaft mounting bracket and loosen the two nuts that secure it!
And all the nuts and bolts need to be tightened only after the shaft and all the removed parts are finally installed in their places!
Hello, dear car enthusiasts! Without a doubt, one of the most important attributes for safe driving is the steering. Attempts to find another way to give the machine the required direction of movement do not stop.
But in the coming decades, automakers are not going to change their traditions of putting steering wheels in cars. The steering is very reliable, durable, and informative. The steering system does not have many parts, and it is not difficult to understand.
As a rule, almost no attention is paid to such a part of the steering system as the steering column, mistakenly believing that a piece of metal rod cannot create problems.
Despite its structural simplicity, the steering column also wears out and can give the driver many “surprises”. A heart-rending squeak when turning the steering wheel is the most harmless nuisance that a steering column can cause.
The rotation of the steering wheel seems much more frightening when the car does not change the direction of its movement due to such actions. Such a breakdown can cost the life of the driver, passengers and other road users. The steering column must be monitored and kept in good condition.
Steering column VAZ 2106 – 2107. Design and purpose of elements
Despite all the unity and similarity of the structure of the elements of classic VAZ models, there are still differences between them. This also applies to the steering column. Any car enthusiast knows that the steering column or steering wheel shaft is designed to transmit rotational motion from the steering wheel to the steering worm shaft.
The column itself is held on the body using a special bracket, as well as a rigid clutch to the steering mechanism. The steering column of the VAZ 2106 is an all-metal shaft, which in the upper part has an external spline connection and thread for attaching the steering wheel, as well as an internal spline connection for attaching the worm shaft to the upper part.
The steering column of the VAZ 2107 has a more complex structure: it includes two “cardanic joints” - hinges that allow the shaft to fold. Thanks to this device, the steering column is called injury-proof.
In the event of an accident and a blow to the front left side of the car, the steering shaft folds in hinges and does not injure the driver. In addition, the upper shaft of the “seven” has 2 needle bearings, which greatly facilitates control.
Typical steering column problems
Given the simple design of the steering column, there may not be many breakdowns. It is important not to ignore “signals” from the steering column itself about a malfunction and carry out repairs in a timely manner.
Among the main signs of a faulty steering column, the following should be highlighted:
- creaking in the steering column, which can be caused by wear of elements, deformation of facing panels and trim, malfunction of parts of the steering column switch unit;
- play in the steering column is a more serious symptom. Play in the plane of the steering wheel may indicate wear or weakening of the bracket elements, and axial play indicates weakening of the spline joints.
Provided that all parts are installed properly, the steering column will serve for a very long time. Loosening the bolts and nuts of spline joints leads to free play and gradual wear of the splines.
As a result, this leads to the fact that the column rotates and becomes unusable, since the connection without splines can no longer perform its function.
DIY steering column replacement
Considering that the spline joints in the steering column cannot be restored, provided that the steering wheel and steering mechanism are in good condition, the steering column simply needs to be replaced.
The column itself is quite easy to remove; much more time is required for the preparatory procedures.
The steering column is replaced as follows:
- the battery is turned off;
- the steering wheel and steering shaft casing are removed;
- the steering column control system (switch) and ignition switch are removed;
- the steering bracket bolts are unscrewed (some of them will have to be drilled out);
- the coupling bolt of the splined connection with the steering mechanism is unscrewed;
- the lower shaft seal is unscrewed and it is removed inside the cabin.
When starting to repair a car, you should make a rule of putting the removed parts one by one. This will make reassembly much easier. This will make your work easier, and there will be significantly fewer stupid questions on car Internet forums.
Adjusting the VAZ 2107 steering gear
It can be determined that the unit in question needs adjustment by the spontaneous deviation of the machine from the intended trajectory when hitting holes, bumps and other obstacles.
To carry out adjustment work, you will need a flat-head screwdriver and a 19mm wrench. The operation is carried out as follows:
- We place the vehicle on a level surface and align the wheels, placing them in a position that corresponds to straight-line movement.
- We clean the mechanism cover from dirt.
- Remove the protective cap from the adjustment screw.
Problems with the "seven" steering gear
For trouble-free operation of the steering, its condition must be constantly monitored. If any signs of problems are detected, immediate action must be taken to correct the problems. Since malfunctions can be of different types, we will dwell on them in more detail.
Steering column
The gearbox is designed as a separate unit with shafts, bearings and other structural elements enclosed inside.
Mechanism design
To repair the steering column on a VAZ 2107, you first need to understand its structure, as well as the principle of operation.
The seven is in many ways similar to the “penny”. Therefore, the device and design received minor changes. The structure includes:
- A mechanism that transmits the driver’s force to the executive components;
- A steering drive that turns at an angle specified by the driver.
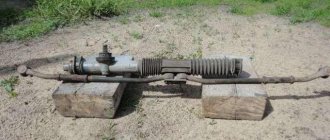
In turn, the steering mechanism consists of:
- Composite shaft with cardan transmission;
- Steering wheel (steering column together with a steering wheel with a diameter of 520 mm);
- Worm gearbox of the VAZ 2107 steering mechanism.
The control system has the following components:
- Bipod;
- Pendulum arm;
- Swivel arms;
- Steering rods for VAZ 2107 (one middle, two side).
The outer rods include two parts, which allows you to change their size by adjusting the toe angle.
The operating principle of the steering mechanism looks like this:
- The driver begins to rotate the steering wheel, the wheel size of which ensures that this task can be performed quite simply;
- By means of a composite shaft, a worm gear is activated, which reduces the speed;
- The steering mechanism is lubricated with special oil (TAD 17) poured into the gearbox;
- The worm gears rotate, which causes the double ridge roller to move;
- This, in turn, causes the secondary shaft to rotate;
- The tray mounted on the secondary shaft makes a turn and pulls the rod system behind it;
- These components influence the levers that synchronously rotate the wheels to the required angle specified by the driver.
Steering column for VAZ 2110 do-it-yourself repair
steering adjustment
We carry out the work on an inspection ditch or a lift.
Using pliers, remove the cotter pin... ...and use a 22mm wrench to unscrew the nut securing the middle link to the pendulum arm. Using a fork puller, we press the middle thrust ball pin out of the hole in the pendulum arm of the Niva 2131. The pin can also be pressed out by applying a sharp blow from below (near the hinge) with a chisel with a blunt end to the pendulum arm. Remove the ball pin from the eye of the pendulum arm.
Similarly, we press the ball pin of the VAZ 2131 rod out of the bipod.
Remove the middle link.
Install the middle link in the reverse order.
The left hinge pin (inserted into the bipod hole), in addition to rotation, can swing (unlike the right one).
At the same time, when installing the VAZ 2121 on a car, we orient it so...
...so that its longitudinal axis is in front of the Niva 2131 hinge axes.
Checking and adjusting the steering of VAZ 2121, Niva 2131
- – Steering gear adjustment
- – Replacement of side rod
- – Removing and installing the middle link
- – Replacement of steering tips
- – Assembling and disassembling the lever bracket
- – Removing and installing the steering wheel
- - Steering column
- – Replacement of the steering mechanism
- – Steering bipod
Steering design of VAZ 2121, VAZ 2131
Features of the Niva 2121 steering device. Adjusting the steering column, eliminating knocks in the Niva 2131 steering mechanism.
DIY steering repair design- Check and adjustment
Steering adjustment, inspection and maintenance
NIVA / 2121, 2131 / repair / steering / checking and adjustment / Removing and installing the middle link
How to remove the steering column on a VAZ 2107
Gearbox oil
The lubricant in the steering column of the “Seven” is changed, although infrequently, but it is still worth performing this procedure every 60 thousand km. mileage The mechanism in question uses GL-4, GL-5 oil. The manufacturer recommends using oil of the following viscosity classes:
To replace, you will need only 0.215 liters of the substance. Checking the level and replacing the lubricant is carried out as follows:
Sources:
https://avtonova37.ru/remont/kak-zamenit-rulevuyu-kolonku-na-vaz-2107.html https://avtoshkolak.ru/remont/kak-zamenit-rulevuyu-kolonku-na-vaz-2107.html
Checking the oil level in the steering column on a VAZ 2101-VAZ 2107
Welcome! Steering column - thanks to it, both front wheels of a rear-wheel drive car of the “Classic” family are turned. In order for the steering wheel to rotate well and with little effort, the steering column is constantly lubricated with oil located inside it. But like any other oil, the oil inside the steering column disappears over time, and therefore its level must be constantly monitored and topped up whenever possible. You can find out how to check the oil level below.
Note! To check the oil level in the steering column, you will need to take: “8” wrenches, and also, just in case, take with you a funnel, clean oil and a brush or just a rag!
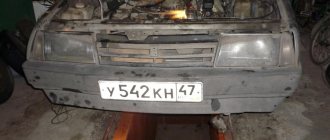
Where is the steering column located? Most likely, you have already seen where the steering column is installed, and more than once, because it is located in almost the most visible place, namely in the engine compartment of the car, on the left side (Indicated by a red arrow), and just above the steering column is the main brake cylinder on the photo indicated by the blue arrow.