The car engine is switched to idle mode (idle speed) by command from the electronic control unit (ECU). This happens at the time of start-up or when it is necessary to warm up the engine. The engine is in this state when the transmission is turned off, when the car is stopped, for example, at a traffic light. The engine operation is controlled by a special idle speed sensor (IAC). Usually it does not cause any special problems, but its breakdown can cause a lot of trouble for drivers. That is why the performance of the DCS must be constantly monitored and, if defects appear, they must be promptly eliminated.
Design
Any DXH provides air flow inside the engine when the throttle valve is closed. Moreover, if previously the idle speed sensor of the carburetor VAZ 2109 functioned as a shut-off valve, the calibrated hole of which could only be either open or closed, then the new idle speed sensor VAZ 2109 injector is capable of independently, depending on the position of the throttle valve, reducing or increasing the amount air, which is needed at different periods of time. That is why experts consider the new version of the IAC not to be a sensor, but a measuring device, and recently it has received the name idle air controller (hereinafter referred to as IAC).
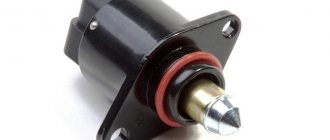
The idle speed control of the VAZ 2109 injector is structurally reminiscent of a miniature module; in addition to the stepper motor, its body contains a rod with a needle with a cone-shaped tip.
The IAC is secured to the throttle body housing with two screws.
The device is also equipped with a 4-pin connector designed to connect the device to the car's ECU.
Lada 2109 › Logbook › Unreliable XX system on the VAZ 2109 carb!
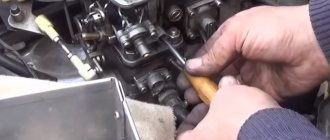
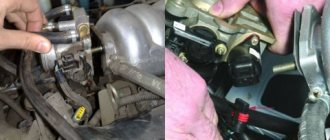
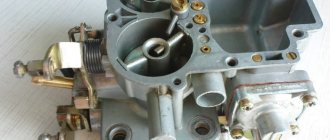
The long torment is over and it looks like I have solved the problem! I used to have difficulty idling my car. then the wire flew off, then the solenoid valve did not work, and then the EPHH unit itself flew off. I decided not to bother and, as they say in the language of garage “bugs,” drown it out. Work order: 1) Remove the pan (carburetor cover). You need to remove both covers 2) Next, we unscrew the electromagnetic valve with a peck at 13 (you can see it; there’s just a wire going to it) 3) We take out the yellow jet and see a plastic needle on the valve, carefully cut it off with pliers to the very root. put the jet in place. tighten the valve by hand 4) start the car by sound, tighten it a bit with the key (it’s important not to overtighten it, otherwise I broke the thread and bought a new carb cap) 5) assemble the pan and don’t forget to put in the air filter Consequences: The car will consume more gasoline But not by a lot, since gasoline will always be present in the idle jet. But I think it’s better to turn it off and forget about the problem than to constantly stall without suction) Thank you for watching! I'm waiting for comments!
Like 4 Subscribe
Principle of operation
The basic principle of operation of the IAC is reduced to changing the cross-sectional area of the calibrated hole in the bypass channel based on the current position of the throttle valve. This change begins with the translational movement of a needle connected to the armature of a stepper motor through a worm gear. Completely closing the bypass channel with the throttle valve fully open does not affect the operation of the power unit. When the needle moves back, the amount of air increases in proportion to the closing angle of the throttle valve. Due to this, it is possible to smoothly regulate the crankshaft speed during the transition from the operating state of the car engine to the idle mode.
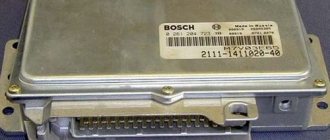
IAC connection diagram and its operation
The IAC is connected to the ECU control controller with a 4-wire harness through a standard connector.
The existing electrical circuit does not allow the driver to influence the operation of the IAC, since the control algorithm of the controller is reflashed exclusively on special equipment.
The IAC mechanism works according to the algorithm indicated below:
- When you turn the ignition key, the regulator rod moves to its extreme position and the calibration hole of the air pumping channel in the throttle pipe is completely closed.
- The IAC returns the valve to the primary position after starting to read steps. At this location of the rod, the motor starts and its operation begins in the XX mode.
Important! The basic position of the rod is determined by the ECU firmware - for example, it is equal to 50 steps for Bosch firmware, and for January 5.1 firmware it is 120 steps.
- When the gear is engaged, the throttle valve is open and the IAC does not take part in the operation of the engine - the valve position is closed, while the rod and needle are motionless.
- If the power unit enters idle mode (which means the throttle valve is closed), voltage is transmitted to the stepper motor.
- The needle opens the hole in the valve slightly after the stem begins to move.
- In a roundabout way, the required amount of air moves into the engine (through the slightly open hole of the additional pumping channel), preventing the latter from stalling.
The disadvantage of the VAZ 2109 injector idle speed sensor and its connection to the ECU is the lack of a self-diagnosis system. In case of malfunctions and errors in operation, the driver will not receive any useful information about this. The Check Engine light on the dashboard will not illuminate. Therefore, the driver must independently guess about the malfunction of the regulator based on his own analysis of randomly appearing indirect signs that affect the operation of the engine.
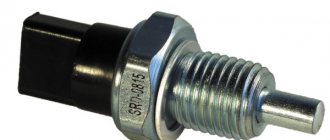
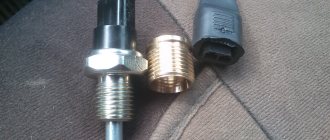
Hall sensor VAZ 2109 (carburetor)
Its malfunction can cause problems in the carburetor. And it is very difficult to determine that this tiny detail is to blame. Perhaps, by the method of elimination. Sometimes they suggest checking its operation using a special device.
A simple way to check the performance of the Hall sensor of a VAZ 2109 (carburetor)
Take a sample with a light bulb. Its plus and minus (these are the extreme contacts) on the plug are connected to the distributor. There should be a gap between the center wire and ground. After this, you need to close the “minus” and the center. terminal. A spark will appear on the wire or spark plug. If it appears, the Hall sensor needs to be changed. If not, check further.
However, it also happens that the sensor works, but incorrectly. Here you can find out only by replacing.
If you do not know where the Hall sensor is located on a VAZ 2109 (carburetor), the photo below will help you.
"Hall sensor" number 8 in this photo
The price for a VAZ 2109 Hall sensor (carburetor) is usually low - about 120 rubles.
This photo shows a VAZ 2108 breaker plate with a Hall sensor:
Fan switch on VAZ 2109 (carburetor)
If you are interested in replacing the VAZ 2109 carburetor fan switch sensor, many are interested in whether it is possible to change it without draining all the coolant?
The answer is yes. But you will lose some coolant during the replacement process. This sensor is essentially an ordinary thermostat. There are special toggle switches on sale that can be used to turn it on forcibly.
Fan switch on VAZ 2109 (carburetor)
Sometimes you just need to take everything apart and clean it. Dirt and scale may get on the sensor. In any of these cases, even if you need to change the sensor, there is nothing wrong with that. The part itself is very cheap; it can be replaced either by the driver himself or by car workshop workers.
You can also read on this topic:
Signs of IAC malfunction and ways to eliminate them
If the engine begins to malfunction or previously unidentified symptoms are observed in its operation, then they may indicate malfunctions in the regulator, for example:
- idle speed is unstable;
- when changing gears or by itself, the engine begins to stall;
- there is no increase in speed when starting the car, which is typical for the primary mode
- warming up;
- When various additional equipment is turned on, the speed decreases.
Similar symptoms are also observed if:
- the bypass channel of the throttle assembly is clogged with dirt;
- there is damage to electrical wires (breaks, broken contact connections, etc.);
- The installed IAC variant does not match the ECU firmware type.
Before starting diagnostics of the regulator, it is recommended to make sure that the above defects are absent.
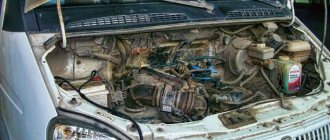
What you need to know when buying a used car
Since 1998, the VAZ 21099 began to be equipped with injection engines, which are a priority to buy. Once you own a used car, you will often need to repair it yourself. There is nothing wrong with this; changing the knock sensor of a VAZ 21099, whose injector has begun to act up, will not be difficult. Most operations do not require special training or special knowledge - you can do everything yourself by watching a video from YouTube or reading step-by-step instructions on the Internet.
Dismantling the IAC
Dismantle the regulator as follows:
- Block the car with a handbrake or wheel chocks.
- Remove the terminals from the battery.
- Disconnect the connecting connector from the IAC.
- Clean the area around the IAC from contamination.
- Unscrew the 2 mounting screws.
Having completed all these operations, the regulator is removed from the mounting socket.
Checking the serviceability and restoring the functionality of the IAC
Check the functionality of the regulator as follows:
- Connect the battery to the vehicle's on-board network and, holding the IAC in your hands, put the power supply block in place.
- Turn on the ignition. In this case, the regulator rod should retract inward and then extend back to a certain distance. If the IAC acts this way, then it is operational. Otherwise, it must be replaced.
Sometimes the functionality of the regulator is restored after cleaning the spring, valve hole and needle.
Clean the IAC with a cleaner like WD-40. In this case, there is no need to disassemble the device - just treat the rod, needle and spring with a solvent. It also doesn’t hurt to spray the cleaner inside the XX channel, which will clear the valve hole of any contaminants. As soon as the cleaner dries, the functionality of the regulator is checked again and only after that a decision is made on the advisability of replacing it.
IMPORTANT! Before installing a newly purchased or repaired IAC, it is recommended:
Make sure the product matches the vehicle ECU firmware; check functionality; Lubricate the spring and rod with grease.
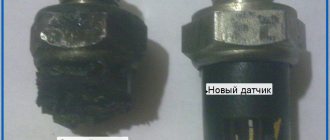
When choosing an IAC VAZ2109 injector, avoid purchasing counterfeit products. A fake is distinguished by the following characteristics:
- information on the packaging does not allow identifying the manufacturer;
- yellow color of the sticker on the product body;
- dark tip of the locking needle;
- thin sealing ring.
The figure below will help you distinguish the old-style sensor (on the right) from the new-style sensor (on the left):
HOW TO CORRECTLY INSTALL A NEW DEVICE
We have already discussed how to remove the device, let’s talk about its installation.
Before installing a new device, you need to inspect and clean the air duct and the DXH mounting location.
Installation is carried out in the reverse order from its removal. The rubber sealing ring is lightly lubricated with engine oil before installation. The device itself must be calibrated before installation. The distance from its body to the tip of the conical needle should be 23 mm.
To correct it, the “+” from the battery is applied to the “D” terminal, and the “minus” of the on-board power is applied to the “C” terminal with short touches. So, in small steps, the needle moves to its extreme position and the installation size is again controlled. When the desired needle extension parameter is obtained, the DXX is installed in its place.
As you can see, the process of checking, adjusting and replacing the device is accessible and does not cause any particular difficulties, so you can do this work yourself.