Self-replacement of the VAZ reverse sensor
Today we will change such a thing - the VAZ reverse sensor.
Have your neighbors started complaining that when you reverse in your favorite VAZ, it is not noticeable to others? Well, it's time to change the reverse sensor and forget about all the problems, including the neighbors. What could be the reasons for the rear lights not shining? How to do it yourself? Is it difficult and what is needed for this? What should I do in what order? This article provides answers to all these questions; it also contains supporting photos showing how to correctly replace this sensor on a VAZ 2106, 2108 and other models:
- Reasons why the reverse lights of a VAZ car do not light up
- Tools
- Replacing the sensor
- VAZ 2107
- VAZ 2109
- VAZ 2110
- VAZ 2114
- Functionality check
- What to do if replacing the sensor did not help?
Tuning the rear lights of the VAZ-2107
You can add exclusivity to your “Seven” using one of the taillight tuning options available today. You can modify the rear lights using:
- use of LEDs;
- applying a tinting layer;
- installation of alternative lights.
Tinting of lamps is done with film or special varnish . Unlike tinting the headlights, for which you can get a fine, in this case the state traffic inspectorate usually has no questions about the rear lights. The main thing is that the color of all signals complies with the requirements of the traffic police: clearance and brake lights must be red, direction indicators must be orange, and the reversing light must be white.
I don’t know about anyone else - but my question was about the reflector - it clearly interferes with this device! I advise you to try this on an old taillight, using plexiglass instead of the stock one! That is, the glass of the rear light is replaced with plexiglass - but here LEDs are already asking for the headbands, and the feet, and the clearance - everything is done experimentally!
Video: how the rear lights of the “Seven” are transformed after tuning
»
Using LEDs allows you to:
- reduce energy consumption;
- increase performance;
- increase information content;
- increase the brightness of the rear lights compared to standard lighting equipment.
On a cheap LED strip you will definitely get dots that are barely visible during the day, there’s nothing even to dispute here. If you buy expensive, good modules, it will be comparable to stock in terms of brightness, but in terms of money it will be very expensive.
Instead of the basic rear lights of the VAZ-2107, tuning enthusiasts, as a rule, install:
- sports version with four round and two rectangular lamps;
Causes of failure
Before you start replacing the reverse sensor (RDS), we recommend checking the condition of the rear lights and determining whether the signal may not be working for other reasons.
Possible reason
Your actions
A common and fairly banal cause of problems, which, nevertheless, many ignore. Take out the light bulb, arm yourself with a multimeter and check if they have burned out. Replace if necessary
The problem is no less common, but looking for the source of the problems in such a situation is a little more difficult. You will also need a multimeter, which you need to test the wiring and check the resistance readings
Poor regulator contact
It happens that during operation the contact of the sensor with the socket is broken. Lack of contact means that the device will not work normally. So check its condition
Wiring insulation is broken
If the insulation on the wires near the sensor is broken, this can lead to a short circuit. The result is quite obvious, so check the condition of the wiring and replace it if necessary
Electrical diagram of VAZ 2107, 21074
This page shows a color diagram of the electrical equipment of VAZ 2107, 21074 cars produced in 1988-2001 with a 37.3701 generator (with a built-in voltage regulator).
To enlarge the wiring diagram, click on the image below.
Electrical diagram of VAZ 2107, 21074 produced in 1988-2001 with generator 37.3701
- block headlights
- side direction indicators
- accumulator battery
- starter relay
- carburetor electro-pneumatic valve
- carburetor microswitch
- generator 37.3701
- gearmotors for headlight cleaners *
- Fan motor switch sensor
- engine cooling fan motor
- sound signals
- distributor
- spark plug
- starter
- coolant temperature gauge sensor
- engine compartment lamp
- low oil pressure warning sensor
- low brake fluid level indicator sensor
- windshield wiper motor
- carburetor electro-pneumatic valve control unit
- ignition coil
- headlight washer pump motor *
- windshield washer pump motor
- mounting block
- windshield wiper relay
- hazard warning and direction indicator relay
- brake light switch
- reverse light switch
- ignition relay
- ignition switch
- three lever switch
- hazard switch
- socket for portable lamp**
- heater fan switch
- additional resistor for the electric motor of the heater (stove)
- rear window heating indicator lamp
- low brake fluid level warning lamp
- signaling unit
- heater fan electric motor
- glove compartment lamp
- light switches on the front door pillars
- switches for warning lights of open front doors ***
- front door open warning lights ***
- connection block
- cigarette lighter
- watch
- instrument light switch
- diode for checking the serviceability of the low brake fluid level indicator lamp
- fuel level indicator
- fuel reserve indicator lamp
- speedometer
- turn signal indicator lamp
- carburetor choke indicator lamp
- battery charge indicator lamp
- carburetor choke warning switch
- instrument cluster
- econometrician
- light switches on the rear door pillars
- coolant temperature gauge
- tachometer
- parking brake indicator lamp ("handbrake")
- low oil pressure warning lamp
- high beam indicator lamp
- indicator lamp for turning on external lighting
- voltmeter
- parking brake indicator switch ("handbrake")
- outdoor light switch
- rear window heating switch with backlight
- rear fog light switch with on/off indicator *
- fog light circuit fuse
- lampshade ****
- tail lights
- level indicator and fuel reserve sensor
- connectors for connecting to the rear window heating element *
- license plate lights
In order to download the VAZ 2107 diagram and save it to your computer, hover over the image above, then right-click and select “save as image” (size about 300 kilobytes).
The image resolution is 1600×872 pixels, so the electrical circuit can be easily printed on a printer and used when repairing a car.
The order of conditional numbering of plugs in blocks:
- a - headlight units, headlight and windshield wipers, windshield wiper relay, carburetor solenoid valve control unit
- b - mounting block and three-lever switch
- c - hazard warning and direction indicator relay
- d — rear lights (numbering of pins in order from the edge of the board)
- d - hazard warning switch
Additional information "asterisks":
* — Installed on parts of manufactured cars.
** — Not installed since 2000.
*** - Not installed since 1998.
**** — Since 2000, instead of one lamp on the roof, two lamps have been installed on the door pillars.
Symptoms of malfunctions
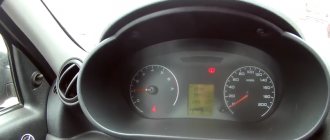
Of course, it is very easy to suspect that the reverse sensor is not working - when you engage reverse gear, the lights do not light up.
In such a situation, there are only three options for the development of events:
- The light bulb itself has burned out, so the element itself may be intact.
- The power fuse has stopped working. It’s not uncommon for him to simply burn out.
- The sensor itself does not work. This does not happen so often, but you will have to check its condition.
Is it because of the sensor?
Indeed, how can one determine that it is the one that has failed and not a fuse or light bulb that has blown? Everything is quite simple.
- You will have to remove the fuse and check it for integrity. For a VAZ 2110 car, it is planned to install a fuse number 19, the rated current of which is 7.5A. It is located in the mounting block, and the mounting block is under the dashboard.
- Check the condition of the lamp. If everything is fine with it too, then there is only one option left - the reverse sensor has broken.
Causes of extinguished reverse lights
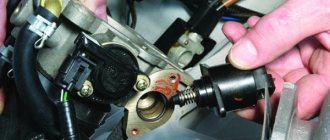
To control the operation of the reverse gear lights, a contact sensor is used, installed on the gearbox housing or inside the speed selection mechanism.
When reverse is engaged, the rod shorts the metal plates and supplies positive power to the lamp. After turning off the speed, the rod is pushed out by a spring, breaking the electrical circuit.
If the car's reverse lights do not work, the reasons are:
- Failure of the fuse protecting the lamps. On some cars, the element prevents damage to additional electronic devices. The thread burns out due to an increase in current strength above the rated value (for example, during a short circuit). When replacing, a fuse with identical parameters is installed; the use of metal jumpers is prohibited.
- Broken or corroded contacts inside the selector position sensor. Repair of the unit is not provided; the faulty switch must be replaced with a similar product.
- Breakage or oxidation of the wiring going from the contact group to the lamps. After checking the cables with a test device, the damaged area is removed, and the connection points are protected with an insulator from moisture and dirt.
- Corrosion and burning of electrical wiring contacts or on the sensor body. Metal surfaces are cleaned with sandpaper; in case of severe damage, replacement of parts is required.
- Failure of negative power supply to the lamps installed in the rear lights. The defect is observed on domestic cars (for example, on the VAZ-2107 or VAZ-2108) due to the leaky design of the lampshades. To restore functionality, you will need to dismantle the device and check the condition of the metal jumpers.
- Failure of the incandescent lamp. If the car has 2 signals for reverse gear engaged, then in this case one light will remain operational. To replace the lamp, you will need to remove the lighting fixture or remove the plug (depending on the machine model and manufacturer). After installing the new part, a test operation of the reverse speed is carried out.
Replacement
Many people ask the question: where should you change the reverse sensor?
Of course, the easiest way is to take the car to a service station, where they will replace it at a price of 3-4 times its cost. But you can change it yourself, there’s nothing complicated about it. Let's look at the step-by-step instructions:
- It is necessary to remove the engine protection, if equipped.
- Turn off the electrical power and disconnect the wires connecting to the sensor.
- Prepare a container for oil, since all front-wheel drive cars leak oil when replacing reverse sensors.
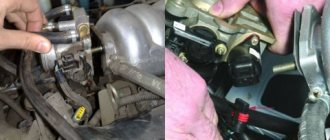
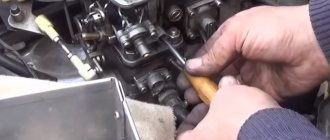
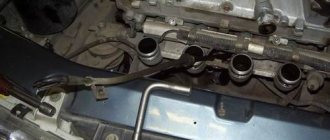
- Using a 22mm wrench, preferably with a long ratchet type head, we try to remove the sensor. In this case, a problem may arise - the old thread does not allow it to be unscrewed. Then you need to arm yourself with a hammer and chisel.
- As soon as it is unscrewed, we substitute the oil container.
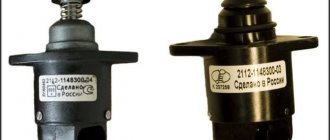
- We insert a new one very quickly.
- Using the same key, tighten it.
- We connect the wires and check the operation of the reversing lights.
- If everything works, add the leaked oil and install protection.
The main causes of brake light failure
Unlike dimensions and hazard lights, your car must have working brake lights. They signal to cars behind that the driver is slowing down. Notifying drivers behind when braking helps prevent collisions and accidents. It is quite difficult to detect a stop fault on a VAZ 2107 yourself, since these signals are located at the rear. In order to see the operation of the brake lights, you will need two people, one of whom must press the brake pedal, and the second must control the effect.
When you press the brake pedal, the following effects may occur:
- If they don’t light up, you need to look for the problem. Moreover, the signal that both lamps on the car are not lit indicates the need for a global check, since paired light elements burn out in rare cases.
- They are half lit - if only one brake light is on, then you need to disassemble the second headlight and check the serviceability of the lamp. It is more likely that the lighting element (light bulb) has failed, and less often the cause may be a broken contact.
The reasons for the stop malfunction on the VAZ 2107 are:
Flashlight weight
- Fuse F11(10A) has failed. A fuse consists of a fuse-link that burns out when a large current passes through the circuit. The fuse is designed for the appropriate current value, so its blowout may be due to a short circuit or the installation of high-power lamps.
- Wiring is shorted or damaged. This type of malfunction often occurs after work has been carried out in the interior or luggage compartment.
- Oxidation of contacts. Oxidation may form over time at the junction of the lamps with the socket, or at the junction of the wires to the headlights, which is caused by poor contact and moisture getting inside the taillight headlight unit.
- Burnout of incandescent lamps - lamps have their own resource, so often the inoperability of the brake light is associated with their burnout.
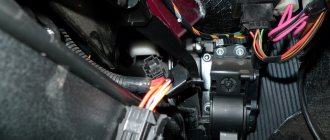
- The malfunction of the toad or frog is a sensor that is located in the brake pedal structure. The sensor closes the contact when the brake pedal is pressed, causing the brake light to come on.
These are all types of malfunctions that are associated with the inoperability of the stop on the VAZ 2107 and other cars. You can identify the breakdown and fix it yourself, without contacting an electrician. To identify a breakdown, you will need a tester or multimeter. Let's take a closer look at how to find and fix brake faults on a VAZ 2107.
Read this, it might come in handy: Compressor or turbine?
Checking the light bulbs
The most common scenario is trivial: a light bulb or even two has burned out (this also happens, for example, when a car gets caught in a heavy downpour). Well, or in case of abnormal contact closure. So, we disassemble the sidelights from the inside and take out the brake light bulbs. If they turn black/cloudy/stained, we change them immediately without further discussion. If the defect is not visually detected, then the best option would be to take a good-quality spare light bulb and replace it with the problematic one. In this case, the brake pedal should be in the pressed position (by the way, if you are checking alone, you can put something heavy on it, for example, a brick). If a new lamp lights up, then this is exactly the problem. No - let's move on. Checking contacts:
It is possible that the contacts in the socket have oxidized and do not give a good light bulb a chance to light up. This reason can be detected visually by removing the lamp and inspecting the socket. To clean the oxides, we rotate the lamp in the socket or, to be sure, we treat the socket from the inside with a small piece of sandpaper. You should also check the contacts leading to the cartridge; damage may occur or the cartridge needs to be replaced. If this is okay, we continue checking the contacts in the wire block for oxidation. Manual stripping may be required. Or try putting on and taking off the spare part several times in a row (this will remove the oxide layer if it is not too large).
DSS:
For VAZ owners, the brake light sensor is one of the most vulnerable points in the system. This may be why the lights don't light up. You can check for a malfunction using a fairly simple method: remove 2 wires from the frog and connect them directly with a piece of wire. If at the same time the brake lights come on, then the DSS needs to be changed - it is not working. By the way, many experienced VAZ owners begin a general check to identify such faults with this sensor, since it fails quite often.
Contacts have oxidized
It is not difficult to identify such a malfunction; to do this, you should unscrew the lamp from the socket and inspect the inside. Oxides and rust can be identified visually, and to eliminate the malfunction, you will need to clean the contacts with sandpaper. After this, before installing the light-emitting element, you should treat the socket area with silicone grease.
This is interesting! The contacts may oxidize, become corroded, or become loose, resulting in the brake lights not functioning properly. The contacts should also be checked on a frog or DSS.
Replacement of reverse sensor VAZ 2109
Replacing the reverse sensor on a VAZ 2109 is a simple process. Experienced car owners can do everything without difficulty.
The following actions must be taken:
- Place the car on a pit or a lift; in extreme cases, use a jack;
- Remove the (–) terminal from the battery for safety (it is labeled);
- Drain the transmission oil for convenience, otherwise it will leak after removing the product. You will need to unscrew the drain cap, first replacing the container;
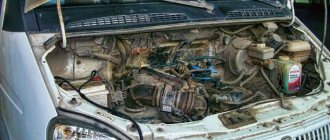
- Remove the engine protection;
- Find the sensor, which is located on the side of the gearbox housing, disconnect the terminal from it;
- Unscrew the clamping bolt to “22”. It is located on the crankcase;
- Take a new sensor, lubricate its seal with oil and install it by tightening it by hand and then with the head;
- Connect the wire block;
- Fill with transmission oil. If it has not been changed for a long time, it is better to fill it with a new one;
- Check the lubricant level;
- Install engine protection, remove the car from the jack;
- Connect the terminal to the battery;
- Turn the ignition key, set the lever to the reverse position to turn on the light, check operation.
After all this work, the reverse light on the VAZ 2109 will be in good working order. It is advisable to check the functionality on the go, making sure that it is in full working order.
How to replace reverse lights?
Replacing lamps in rear lighting depends on the type of car. For example, on a Lada Kalina with a station wagon, you need to unscrew 2 bolts holding the lamp in the opening of the tailgate. Then the housing is forcefully removed from the mounting socket (the design provides additional plastic clamps) and the cartridge is removed along with the wiring. On cars with a sedan body, to remove the courtesy light, you need to fold back the flap on the trunk trim and unscrew the fastening nuts with a long-head wrench.
On a VAZ-2105 or 2107, the rear light is covered with a plastic cover located in the luggage compartment. To dismantle the casing, you need to unscrew the nuts and then remove the printed circuit board with the lamps from the lampshade. The faulty element is removed from the socket for replacement, and at the same time the condition of the tracks and contacts is visually checked. Detected oxides must be removed.
On the Kia Rio sedan, you need to remove the handle on the trunk lid, and then partially dismantle the trim, which is attached to the pistons. After bending the casing, access to the flashlight opens; to remove the cartridge, you need to turn the element counterclockwise. The lamp is removed from the socket by the bulb (no thread is provided); the lamp body is marked with a marking indicating the type and power of the lamp.
>
Checking the idle air control circuit
Before moving on to diagnosing the regulator itself, it is necessary to check its circuit, because the reason that it stopped working could be a simple break in the wires or a malfunction of the electronic control unit. To diagnose the circuit, you only need a multimeter with the ability to measure voltage. The procedure is as follows:
- Raise the hood and find the sensor wiring harness on the throttle assembly.
- Disconnect the wiring harness block.
Each of the IAC pins is marked - Turn on the ignition.
- We turn the multimeter into voltmeter mode with a measurement range of 0–20 V.
- We connect the negative probe of the device to the ground of the car, and the positive one in turn to terminals “A” and “D” on the wiring harness block.
The voltage between ground and terminals A, D should be approximately 12 V
The voltage between ground and each of the terminals must correspond to the voltage of the on-board network, i.e. approximately 12 V. If it is less than this indicator, or is absent at all, you need to diagnose the wiring and electronic control unit.
Troubleshooting procedure
Lamps fail most often. It's best to start with them. If they are working properly, remove the plugs from the frog and connect them together. The plugs should have +12.
If there is no voltage, check the fuse. If the fuse is intact, check connector Ш12. By applying 12V to pin 3 of the Ш12 connector, voltage should appear. Check the voltage at the fuse contacts. If there is voltage on the fuse on both sides, we try to apply +12 directly to the frog plug. If the lights come on, change the fuse box.
The fuse box can only be repaired in specialized workshops. In this case, the board track could have burned out.
When there is voltage at the frog plugs, but the lights do not light up, we check 12V directly at the contacts of the lights board. If there is voltage, but the lamp does not light, check the connector contact. When there is voltage at the board contact, but the lamp does not light up, remove the lamp and check for the presence of 12V directly on the current of the conductive surface of the base. If there is voltage and the contact is clean, check the housing part of the base. If necessary, replace the flashlight board.
It is extremely rare for the brake light wire to break. The wiring harness comes out from under the instrument panel and runs along the floor of the car under the carpet. Both brake lights are connected in parallel. We check the integrity of the wire from the frog to the lights. If necessary, replace a separate stop wire.
Do it yourself: The reverse light does not turn on - we fix it!
One evening I noticed that the reversing lights stopped turning on, I checked the fuse - it was ok.
I looked under the car and found the reason - the contacts on the reverse sensor-switch on the box had rotted, there was a break in one of the wires.
In general, on the “classic” it is, since in this place the connection is in no way protected from road salt and moisture, the wires simply dangle from the box, the contact regularly disappears. The factory could have thought of installing a waterproof feature, but apparently they didn’t get around to it).
I bought ready-made wiring with terminals, cut off the old ones and re-wired them.
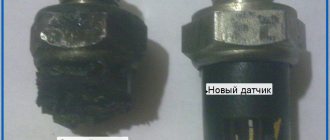
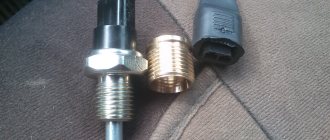
I also bought a new sensor, since one contact on the old one was completely rotten and simply fell off.
The first time I couldn’t unscrew it with an open-end wrench - I had to buy a long socket “27”, but the new sensor was shorter and was already “22”, so a socket from a standard road kit fit.
When replacing, I replaced the old copper ring, since I forgot to buy it, and just in case, I lubricated the end of the thread with silicone sealant.
Still, we need to come up with something to isolate this connection.
The design of VAZ 2107 cars has a light alarm that indicates that the car is moving in reverse. This is one of the main indicators by which accidents can be prevented. The operation of this light alarm depends on the functionality of the sensor. However, situations often arise when the VAZ 2107 reverse sensor fails, which leads to the need for immediate repairs.