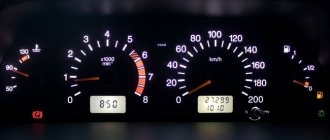
Compared to other VAZ cars, the Lada Priora has a more modern design and fairly high-quality materials. The panel is made of Soft Look plastic and has a convenient instrument cluster. However, there are also disadvantages, for example, the backlight could be more effective. Therefore, many drivers decide to tune the Priora instrument panel.
Body plastic
Body elements can be replaced. Replacing some components and adding accessories will turn the AvtoVAZ model into a normal car. Replacing the rear bumper on a VAZ will refresh and update the design. Replacing the front bumper will affect the performance and improve the power qualities of the engine. In addition, the following accessories are used for decorative purposes: spoilers, plastic, chrome trims. Stainless steel thresholds are installed to protect against dirt and damage. Changing the radiator grille to different shapes radically transforms the front view. A radiator grille in the form of a saber, in the form of a honeycomb, or stripes - any of these accessories will elegantly complement the design. Replacing the mirrors with the new se model will please the eye and expand the side view.
Modernizing the design and interior space, adding modern accessories increases the level of comfort, transforms the car, and improves technical characteristics.
Rear bumper
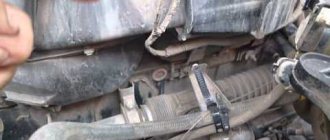
To carry out body work or replace damaged elements (reflectors, parking sensors), you need to remove the bumper on the Priora. This work is simple and differs from dismantling the front structure only in the number of fastening screws.
In some cases, difficulties arise when removing the side wings from the grooves, especially at low air temperatures. Doing these steps may cause the plastic to crack. The same problems arise on Kalina 2. Due to the unique shape of the buffer, it can be difficult to push it out. However, if you follow all the requirements of the vehicle’s operating instructions, dismantling can be carried out without difficulty.
How to remove the rear bumper from a Priora
For cars of different versions, the dismantling of the buffer differs only in the locations of the fasteners. For example, on a sedan the screws are screwed into the trunk frame vertically from top to bottom, while on a Priora station wagon - horizontally. Due to the shortened end part of the hatchback body, it is difficult to reach the structure fasteners in the arches.
For comfortable work, it is recommended to remove the rear wheels.
To remove the rear bumper on a Priora you must:
- Unscrew the 2 fastening bolts on the trunk frame, and then the 2 nuts connecting it to the body at the bottom of the car.
- The wings of the structure are held in place by 3 screws located in the wheel arches.
- After dismantling the fasteners, the buffer is removed.
- Inside it there is a structural reinforcement, which is fastened with self-tapping screws.
- The reflectors are screwed on with one nut.
Installation on the first generation Priora
To install the car radio in its original location, you need:
- Disconnect the battery from the vehicle's on-board network.
- Remove the 1DIN decorative frame with a box for small items from the center console of the instrument panel. The assembly is held in place by plastic latches located in pairs at the top and bottom of the drawer. Removal is carried out by pulling the part towards you; it is possible to bend the edges with a plastic mounting spatula.
- The rear has mounting points for the factory patch harness equipped with ISO connectors. It is necessary to disconnect the plugs from the box, which is then set aside.
- Connect the pads to the radio and check the operation of the device. Priora cars are supplied from the factory with a constant supply of positive power, independent of the position of the key in the ignition switch. It is necessary to change the wire connection, following the operating instructions for the head unit. The positive signal sent when the ignition is turned on is taken from the rear window heating button.
- Lay the wire leading to the external antenna. The cable runs under the plastic trim of the A-pillars and the roof panel. To reduce the likelihood of noise, the wire is wrapped in fabric insulating tape or foam rubber.
- Reinstall the removed trim elements.
- Connect the antenna power from the ISO connector and check the functionality of the acoustic device in radio receiver mode.
- Place the standard mounting shaft into the hole in the center console. The part is attached using tabs that are pressed out with a screwdriver. During installation, it is necessary to ensure maximum fit density, which will reduce vibrations of the radio when moving.
- Connect the power, speaker and antenna plugs to the connectors on the back of the head unit. Place the radio in the guide shaft until the locking latches engage. Check the tightness of the installation, and then place the decorative frame in place.
To install a 2 DIN radio you will need:
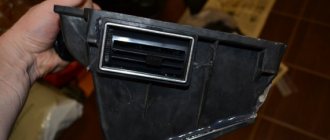
- Remove the front trim of the instrument panel along with the central air ducts.
- Cut the connecting jumper between the standard socket for the radio and the plug. Expand the rectangular hole to the dimensions specified in the technical documentation for the head unit.
- Using a saw, modify the plastic frame inside the instrument panel.
- Place metal guide slides in the resulting window on the front trim and secure them by bending the triangular fasteners.
- Reinstall the removed parts, and then connect the new head unit and insert it into the guide shaft.
- Check the functionality of the equipment, configure the radio receiver and loudspeakers.
- Install a decorative frame located around the perimeter of the front panel of the radio.
Interior
There is also a lot that can be changed in the interior space of the cabin. The interior of the Lada Priora is transformed as a result of tuning.
What does interior modernization consist of?
- Replacing the steering wheel braid with leather;
- Refinement of the instrument panel;
- Parts are manufactured according to personal orders or sold in sets;
- Replacement of door trim components, handles;
- Replacement of factory plastic on the dashboard, inner surface of the doors;
- Lada Priora interior reupholstery;
- Installation of lighting on the inner surface of the doors, in the driver’s and front passenger’s foot areas;
- Installation of LED strip in the area of the rear row of seats;
- The seats are covered with covers.
The luggage compartment occupies a special place - it can be equipped with an additional protective floor covering. It is made of plywood and chipboard. Such flooring will perform a protective function and serve as the basis for placing additional acoustics. Installing independent operation of lighting accessories also plays an important role. The standard option is to turn on when the dimensions are on. Changing the trunk lid upholstery is carried out in order to provide additional sound insulation and smoother, softer closing of the compartment lid.
Torpedo for VAZ 2110 from Priors for VAZ
result!
Today my story is about installing a “torpedo” panel from a Lada Priora. All of you (who drive VAZ 2110,2111,2112)
Do you know what advantages this panel has, how convenient, practical and technologically sophisticated it is (possibly), someone just wants to install it, someone installs it and is happy, someone modifies it, and someone immediately installs the panel from “ Priors No. 2.”
But due to the pricing of our valiant “showdowns” as well as Avito users and the not particularly high availability of purchasing the panel
Priora 2,
it was decided to purchase a panel from
Priora 1.
04/26/2018 After searching, I found the right option and made an appointment. The path was not easy, I had to go to another city “Perm - Kungur” 115 km. from my location to the city. Well, okay, on the road - the road! As always happens on the road, strange things happen that you don’t even expect. More precisely, on the road, my engine temperature gauge began to jump spontaneously, up and down! ! ! I’m alone, I’ve already driven more than half the way, I don’t know what to do. I stopped to look under the hood, opened it - everything is in order, there is fluid in the barrel, there are no fluid leaks, the connector on the sensor is in place, in order to make sure that everything is in order, I removed the connector - put it in place, checked the instrument panel
— everything is in order, the arrow is at 90* degrees.
We close the hood, get into the car and drive on, BUT! The arrow starts jumping again!
We “forget” this and move on, but we don’t put the problem off for a long time, we will look into it, most likely the “sensor” of the engine coolant temperature has failed - we need to replace it.
An hour's journey and we are there. Meeting, we look at the product, we discuss the terms and price, handshakes and I become the owner of the “Prior 1” panel
, Hurray, comrades, Hurray.
The kit consisted of - the panel itself, the tidy, a tunnel, a harness under the panel, fastening screws and bolts, a ceiling lamp + a pocket for glasses, a ceiling harness, a central (passenger) lamp, rear windows (left-right), door trims (front-rear) ) + accessories for them.
We pack everything into the car and hit the road to work.
I went to work, laid everything out and went home. 04/27/2018 The next day I collected the material I needed, tools, installation instructions, as well as electrical diagrams. I set myself up to collect it day and night, or rather, I’ll start on Friday, continue on Saturday, and most likely on Sunday I’ll try to go home by car! And so the end of the shift is 17:00. I decided to wash the whole thing since everything was covered in dust and a little dirt.
Let's put it in order
While everything dries after washing, we go to disassemble the car.
Let's begin!
What chaos and a lot of dirt!
It’s so dirty, you’ll need to vacuum everything!
After tidying up the cabin, I began to remove the panel. This turned out to be not particularly quick and pleasant; a lot of bad and unkind words were said, BUT!
Things went as they should, time flew
sooooo
fast!
I didn’t take much pictures of how I took off the panel, it wasn’t that convenient and I most likely forgot. After I took it off I started fiddling with the wires and circuits.
This miracle without a panel)
We cut, implement, merge. We are waiting for a miracle!
At some point I decided to take a break with coffee and a snack, collect some information from the Internet and hit the road again.
Om nom nom
Let's sketch out the panel from the Priora.
fitting.
replacement
replacement
wire layout.
At some point I started to get bored with everything, since this whole process is still long and tedious, laughter-wire-scheme-wire and so on. I no longer took pictures of what I did and how I did it, how I connected the devices, the stove control, the alarm system and everything else. I was very exhausted, my head was hard to think, there were problems with starting, but I quickly solved them because I thought that I had mixed up the wires, but no, I just forgot to connect one contact from the alarm system, because of this contact I got blocked, but everything worked out and after a while At that time, I threw on the seat, screwed what was needed, went home and only on the way I remembered that I had to at least somehow show that the panel was standing, the instruments were working, I took a photo on the way.
Left the workshop.
All that remains is to install various types of plastic, put the interior back together and resolve the issue of some light bulbs on the dashboard.
And so, of course, it’s good that everything worked out, but without experience, everything took a very long time to assemble and install, there were difficulties and all sorts of nuances,
BUT! everything is decided - everything is established.
Characteristics
There is a hole for the on-board computer on this panel
I bought this kit. The quality is normal. But there are several pitfalls that sellers are silent about. If you replace the old panel from the Priora with a new one, then there will be a little less problems, if you install it on the tenth family, then everything is sad. The kit does not include the following parts, which are not available in retail sales at all. 1. Air ducts (left, right) 2. Glove box lid lock latch 3. Glove box lid axle. In addition to this, the panel does not fit into the old style floor tunnel. There is a new sample for sale. But only its upper part, which also does not fit with the old lower part. But the lower part is not on sale anywhere, nor is the tunnel lining bracket.
Torpedo Priora 2 on VAZ 2110: On-site installation, wiring
Hello everyone who is interested in how the installation of the Priora 2 torpedo on the VAZ 2110 is going
There will be a lot of letters, since the entry is aimed at those who decide or have already decided to install a torpedo from Priora or Priora 2 on the tenth family
Meanwhile in the garage...
I turn on the stove and move on
I’m taking off the torpedo after the preliminary fitting, now it’s time for me to put it on and take it off, how to put on a shirt, I’ve lost count of how many times I’ve done this.
Next in line is laying the under-panel native tenth wiring. I remind you that I am leaving the tenth wiring, due to the inexpediency of switching to the wiring of Priora 2. On the Priora, the differences are: 1) From the fuse block to the center, the wiring runs above the steering column, at 2110 below it. Without extending a single centimeter of the wiring, it was easily possible lay it over the steering column, everything is real. 2) The wiring is held in place by its original clamps, which in turn are attached to the dashboard through iron brackets. I make my own:
Drilling holes
I install the same clamps on which the tenth sub-panel wiring was attached
As a result we get
I repeat that nothing was extended, except for the wiring to the backlight button and the glove compartment lighting itself + there are Prior connectors.
I untangled and separated the wires of the rear PTF buttons and the heated rear window (now they are not neighbors)
Preparing the installation site
For those who still doubt that the Priora torpedo may not fit the seats for the tenth family, I declare! fits perfectly!
If there are fewer fastening points, the load on the remaining fastenings increases accordingly. I welded the plates to the upper brackets (this is a rough version, maybe I’ll weld them and paint them), I’ll strengthen the lower ones later And then a surprise awaited me...
The bracket cracked and I didn’t notice it when I was welding the plate, or maybe the crack appeared after... in general, for welding
Central frame
I’ll say right away that you don’t need to buy a Priorovskaya one
No comments. The only thing that surprised me was the factory hole; the designers of AvtoVAZ foresaw that someday in the future they would invent the Priora and this hole would do its job.
The wiring is packed, everything is convenient, in order
I made it so that the entire torpedo could be removed with the under-panel wiring; a dozen additional connectors were added, most of which went to the alarm system (like a spider’s web connected the torpedo to the wiring and did not let go)
There are cracks, no matter how you look at them
Priorovodov, please respond, how is your situation with the cracks around the edges?
Some of the ground wires moved to the upper part, in my case to the steering column
That's all! The torpedo is installed, the wiring is laid out, the connectors are removed for further alteration, and you still have to remove it at least twice, but there are no problems, it has been done in such a way that all difficulties are reduced to a minimum.
To date
About R16
A small digression. A little more and the shesnari will delight the new owner, and I will move on - Be a hen!
WHAT'S NEXT?
In the following posts I will tell you how to install the tenth fuse block and make the emergency button work without a comfort block.
A thumbs up and repost are welcome as proof that the post is useful and it was not in vain that I sat and spent time sharing my experience with you.
Good luck!
Online store of VAZ and Lada spare parts NVS-Car
You can order spare parts for VAZ (Lada) for all parts of the car:
- engine and brake system;
- transmissions and suspensions;
- electronics and exhaust system;
- fuel system and wheelbase;
- optics and glass.
You can buy these and other components, as well as body parts, tuning elements, auto chemicals, mats and other little things in one place, thereby saving time on searching and ordering the right product. Whoever you are - a private motorist, the owner of a car service or tire shop, a tuning specialist - you can always count on us! We guarantee high quality products, secured by guarantees, as well as prompt processing of your orders.
Engine
Car owners seeking to improve their car do not limit themselves to modifying the appearance. Installing additional accessories and replacing parts with more expensive, high-quality ones will allow you to modernize your technical capabilities. In order to refine the engine, the following activities are carried out:
- replace the engine mounts on the VAZ;
- change some accessories: camshaft, flywheel, standard pistons;
- reinstall the electronic unit software;
- install an automatic heater;
- replace the carburetor pump along with the jets;
- clean all channels;
- Use sandpaper to clean the carburetor from different sides.
What is good about the Lada Priora in Russia?
It was this model that became the first by AvtoVAZ to receive airbags and even air conditioning. Even though these were the most expensive trim levels, before Priora, no Russian car offered such amenities. Today this will not surprise anyone, but at the time of the launch of the model, such options could be considered a sign of the elite class. So, to some extent, Priora became a pioneer, giving impetus to the development of Lada.
It is also worth noting the following interesting features of the machine:
- it is this model that has become a cult favorite in the North Caucasus, where Priora is considered a sign of luxury and real honor, especially if the suspension is lowered to the minimum ground clearance;
- Surprisingly, the car has become one of the world leaders in terms of timing belt endurance - it lasts here (according to the factory) for 200,000 km, but all owners change it much earlier;
- Kim Jong-un, the leader of North Korea, rode in this car, this indicates incredible trust in security systems and other technical solutions on the part of the ruler’s entourage;
- the car practically did not change its appearance, and the only restyling affected only the interior; there were many changes in technical elements, but they all turned out to be insignificant;
- over all the years of production, almost a million copies of this car were produced, so the car can be called successful, even if many critics call it a failed development.
It is difficult to form a unified opinion about a car that was bought by almost 1,000,000 people. Only a small part of the car was exported, although until today it was the Lada Priora that formed the main share of exports of the Russian automobile enterprise. Most likely, this model will be overtaken by Vesta in the coming years, but for now the record remains with the old man. Despite all the advantages, the car also had many disadvantages that have not painted the car to this day.
Analysis of the Priora shield
The panel can be attached in two ways. These can be latches that you just need to press and the panel will simply come out. Or there may be bolts that need to be unscrewed with a screwdriver. However, in general the panels all come out the same way without any effort.
We continue disassembling for subsequent tuning of the Priora instrument panel.
Once you have removed the panel, you need to remove the glass from the front and unscrew the back cover. It is held on by several bolts. Under it you will see a green microcircuit and other internals of the devices.
Visor
After the back cover, you need to remove the visor. It is held on by two latches. The arrows should be positioned at zero. In general, when disassembling the panels, it is better to take a photo of where the arrows point, so as not to get confused later and to align them correctly.
Arrows
The next stage of tuning the Priora dashboard is removing the arrows. This must be done carefully, in no case should you pull them, tear them or apply much force. The arrows are removed by turning counterclockwise and lightly pulling upward. If the arrows are jammed and cannot be removed, you can use a screwdriver and “pick them up” a little. We pry the arrows on both sides and gradually pull up. At some point the arrow will pop out, but be aware that the spring may cause it to fly quite far.
You must try not to touch the coating with your nails, otherwise marks and scratches may remain on the panel. They will be highlighted and spoil the whole picture.
Overlay and light guides
Next, remove the cover. Some Priora instrument panels cannot be disassembled without removing this trim. But in other cases it is better to remove it, since because of it you cannot see what is behind the devices and how the backlight is located. The backlight can be uniform for all sensors or separate for each. Remove the glued overlay with light filters so as not to damage it in any way.
Priora usually has three separate light guides. They are attached with latches and can be removed very easily. Sometimes the light guide may be damaged during removal. There is nothing wrong with this and you can continue to use it.
Removing the screen
To continue disassembling the instrument panel in the Priora for tuning with your own hands, remove the screen. It rests on rubber conductors, so it is also easy to remove. Turn the panel over and unscrew the remaining bolts. We also take out light bulbs that are no longer needed.
Using pliers, release the clamps and take out the screen. Under the screen there is another light guide - a bright light green color; it must be removed.
The panel is almost disassembled, all that remains is to separate the main white part from the green microcircuit. Thus, we have disassembled the entire dashboard and can continue tuning the Priora instrument panel.
Interior transition kit for Priora 2 for Lada Priora
CHOOSE SECURE PAYMENTS After payment you will receive an electronic cash receipt
Pay for goods by credit card, using QIWI, Yandex.Money or WebMoney and save on your purchase from 4%, avoiding postal and bank commissions
This product was chosen by 33 customers
Do you want to update the interior of your car? If so, this kit may be of interest to you.
It is intended to upgrade the interior of an old Priora to a new one (Lada Priora 2). The kit includes everything you need to re-equip the interior; you don’t need to buy anything else. The installation process requires some modifications to the standard places, since the fastening elements are different.
The price is per set:
- console new model 2172 black lacquer;
- console trim 2172-5326014;
- console trim plug 2172-5326115;
- lower leg heating duct 2172-8101340;
- intermediate housing of the central nozzle 2172-8104200;
- instrument panel visor 2172-5325125;
- body of the glove box (glove box) 2172-5303014;
- side nozzles 2172-8104040/41;
- central nozzle 2172-8104090;
- emergency button 2172-3710010;
- metal clamps (panel bracket) 7 pcs.
Set: 11 elements
Weight, kg: 4.95 Dimensions, cm: 132 x 45 x 32 Volume, m3: 0.19008
Description
Many owners of Lada Priora 1 cars update the appearance and decorative elements of the interior by installing parts from Lada Priora 2. We also did not ignore the instrument panel , so we present to your attention a set of parts with which you can convert the old panel into the panel of a new one sample
Installed to replace the old panel trim.
Completeness:
— Center console assembly (emergency warning button, compartment for buttons, plug)
— Air ducts (central with guides, side nozzles — 2 pcs.)
Hi all! The winter was long, and we had a lot of time to think about our future plans. Something is already on the schedule;) Spring is gaining momentum, the season is coming =) Today about one of the future changes. On the agenda is “A set of parts for the Priora 2 instrument panel for the conversion of Priora 1 to Priora 2.”
Why a kit and not a finished torpedo?
There are several “buts” that significantly influenced my choice.
1)
The most important! Previously, a torpedo of the first edition was already purchased in excellent condition, minimal mileage and manufactured in 2013 (under the Panasonic climate). Bought for reasonable money + several spare parts were delivered at once. At the time of the search it was like this:
Before the purchase, it was sold with a black fuse box cover and a dark glove box...
They reduced the price and added gray parts from the 10th year. Now I bought them a replacement and black ones!
2)
It was difficult to find a Priora 2 panel in the desired condition and configuration. The item is popular and so are the prices! Plus, all the offers are far from my city, delivery costs about 1500-2000 rubles. And don’t forget about the risk of damage during transportation... Ps: the first one arrived without any jambs.
3)
“A set of parts for the Priora 2 instrument panel for the conversion of Priora 1 to Priora 2” are completely new, factory parts and a guarantee of an almost perfect appearance. Delivery from the store. Relatively inexpensive delivery due to its smaller size and volumetric weight (an important criterion for assessing the cost of transporting TC). In addition, it was possible to purchase other necessary items in one order.
So far I don’t see any significant downsides to such a purchase. There are still some issues with mounting it on the frame and removing the old cover. I would like to do it according to the factory and no worse =) In any case, it can be solved!
I’ll add (03/13/2016) Additional problems have come to light! The central part of the buildings (where the instruments and radio are) is different and 100% there will be problems with installing the Priora 2 tunnel, inserting the upper air ducts, and the upper and middle fastening of the console trim. As sad as it may be, “refinement with a file” is planned...! Previously, I thought the frames were completely identical and, according to the comments of the stores, they should be 1 in 1.
About the prerequisites that led to thoughts about the Prioro Salon.
Anyone in the know knows about the already installed Euro torpedo to replace the S.O. torpedo. Selection: Part 1 Other parts: Frame, Differences in wiring, Buttons, Assembly nuances, Installation of gear motor 2170., Pads and wiring, In the car
During the process of alterations, I answered a large number of questions on the topic of choice and I will say that now my position has not changed. Externally, I continue to like both options; the euro is good in its own way.
Design (appearance) is the first factor that often forms the first impression of a thing. The other side of the coin is the technical features and mechanical part. According to this criterion, the Priora torpedo is ahead.
Everyone evaluates external attractiveness in their own way, there is no point in arguing here because people have different tastes, but constructive solutions can be considered more objectively.
I will describe the most important ones for me.
1)
Air flow distribution system. Now the climate control is Panasonic, the flow direction pattern does not coincide with the standard geometry of the air ducts and damper complex. For example, by turning the handle of the unit to the foot blowing position, you get a direction towards the windshield. It is not possible to use the defroster (the function of blowing dry and warm air onto the windshield).
I think it’s clear) The electronics work correctly, but the mechanical part does not match the plastic.
2)
Internal air ducts in the form of pipes.
More powerful air flow, good performance due to a minimum number of joints and losses. Compactness.
3)
Fuse box compartment. Here it is radically changed, there is more space and a huge plus - a removable lid! Convenient access to electrics thanks to a completely open space.
Conversion of Priora 1 torpedo into Priora 2
It's been so long since I wrote anything... a long time ago... does anyone miss you?
Well, okay, let’s get straight to the point)) I’ll say right away that work is going on and by the way, work is not only on the panel, it’s slow for certain reasons, but things are going and that’s the most important thing))
At the time of purchasing the Priora panel, there was a rush to install the panel from Priora 2, but since it is expensive, and the panel from Priora 1 came across to me very cheaply for my area, so I didn’t even think about refusing)) besides, I immediately had an idea do like Foks91 - buy a kit for converting Priora 1 into Priora 2 - Torpedo Priora 2. Upgrade kit. However, the price stopped me)) and I also didn’t like the fact that the monitor was installed a little far away, which would not be very convenient when using a tablet, and then I accidentally came across people making a visor for a tablet from a Kalina 2 Lux visor - this option interested me, if anyone is interested, I can provide a link send it to the VK group, this is not an advertisement))
Improvements in the interior
Lux salon
If your car is not luxury, then you can give it this manually by purchasing an additional interior lamp from Priora Luxury, installing heated seats, sun visors from Luxury with a mirror. All these spare parts and accessories are sold in any car spare parts for Lada Priora.
Cases
Every car owner would like his car to remain in new condition for as long as possible. During use, seats are subject to a lot of wear and tear. In order to preserve the original appearance of the seats, it is best to put covers on them. There are a large number of different covers for taste and color. The cost of covers for a Priora varies from 1,500 rubles to 5,000 rubles, depending on the quality of the materials.
Steering wheel cover
With active driving, by 100,000 km, the steering wheel of the Priora begins to wear out. In order to protect it from wear and tear and an unsightly appearance, it is best to put a braid on the steering wheel. There are two types of braids that are put on the steering wheel and that need to be sewn together. Slip-on braids are easy to install, but do not completely cover the steering wheel. Stitched braids completely cover the steering wheel and protect it from damage, but are quite difficult to install.
Replacing Heater Switches
The interior heater switches in the Prior are not very nicely designed. In order to give them a more modern and beautiful look, they can be replaced with switches from Ford Focus. Such switches are not expensive and fit into the place of the standard Prior ones without any modifications. You can order them on AliExpress.
Rugs
Most of the time a person is inside a car. Therefore, it is important to maintain the frequency there. To do this, we will be helped by special EVA mats that perfectly retain moisture, unlike standard ones, and do not allow it to spill outside the mat. This is very important in winter, since snow that gets into the car with your feet begins to melt and form puddles in the cabin that can spill and an unpleasant smell of dampness in the cabin cannot be avoided.
Side mats
You can also install side mats between the door and the seat to protect your carpet from dirt. Such rugs are not expensive, around 400 rubles.
Product delivery options
Note! Below are the shipping methods available specifically for this product. Payment options may vary depending on the delivery method.
Detailed information can be found on the “Delivery and Payment” page.
Parcel by Russian Post
Available payment methods:
- Cash on delivery (payment upon receipt)
- Using cards Sberbank, VTB, Post Bank, Tinkoff
- Yandex money
- QIWI
- ROBOKASSA
Shipping throughout Russia. Delivery time is from 5 to 12 days.
Parcel by Russian Post 1st class
Available payment methods:
- Cash on delivery (payment upon receipt)
- Using cards Sberbank, VTB, Post Bank, Tinkoff
- Yandex money
- QIWI
- ROBOKASSA
Shipping throughout Russia. Delivery time is from 2 to 5 days. More expensive than regular delivery by Russian Post, approximately 50%. Parcel weight up to 2.5 kg
Express Parcel EMS
Available payment methods:
- Cash on delivery (payment upon receipt)
- Using cards Sberbank, VTB, Post Bank, Tinkoff
- Yandex money
- QIWI
- ROBOKASSA
Shipping throughout Russia. Delivery time is from 3 to 7 days. More expensive than regular delivery by Russian Post, approximately 100%.
Transport companies
Available payment methods:
- Using cards Sberbank, VTB, Post Bank, Tinkoff
- Yandex money
- QIWI
- ROBOKASSA
Delivery is possible to any locality where there is a representative office of the transport company. Delivery time is from 2 to 10 days. Sending large parcels is approximately 50% more profitable than by Russian Post.
Courier delivery in Togliatti
Available payment methods:
- Cash upon receipt
- Using cards Sberbank, VTB, Post Bank, Tinkoff
- Yandex money
- QIWI
- ROBOKASSA
Delivery time from 1 to 12 hours.
Pickup from our warehouse
Available payment methods:
- Cash upon receipt
- Credit, installments
- Using cards Sberbank, VTB, Post Bank, Tinkoff
- Yandex money
- QIWI
- ROBOKASSA
Pickup times must coincide with store opening hours.
Glass tinting
Glass tinting is an elementary type of tuning the panel of a Lada Priora. The film is attached to the outside of the glass. You can use film No. 15 or any other depending on the driver’s preference. The main thing is to choose the right shade to make the glass look good. American film, which often has a reddish tint, is not suitable for every interior.
The film is applied as usual - we degrease the glass using any dishwashing detergent, Fairy and others will do. We apply the film and cut it, paying special attention to the edges. It is better to cut off the edges so that the film does not start to bubble after installing the glass in place.
Visor for Priora (for installing a tablet)
Information
Description: Hello everyone from the auto city of Togliatti! I would like to bring to public discussion the idea of installing the Visor we made on the panel of Priora 1 for installing a tablet as a multimedia system. Show in full…
After you mount the Visor on the car panel and install our prepared tablet with special software. On board your car you now have:
1. Navigator (you can install two or three different navigation applications). GPS and Glance support. Works without the Internet.
2. Engine diagnostics (using ELM327 adapter). Engine operating parameters are displayed on the tablet monitor.
3. Video and music (playing most formats; a tablet can do this better than car radios).
4. Internet. (4G via 2 Sim cards or via WI-FI)
5. Online TV with many (66) TV channels via 4G.
6. The tablet supports two SIM cards. so you can take calls without being distracted from the road! You can answer by installing a hands-free device on the visor.
7. Install the SD card and download music and videos onto it. We watch and listen to everything we “pump up”.
8. Warning about speed cameras and their location. (the database is updated). A graphic and sound warning of the presence of cameras is displayed on the monitor screen in advance of the camera itself.
Well, if we install an active hub. the one here you can hook everything. What do you have enough imagination for? from external drives to rear camera and perimeter cameras. )))The sound is output to the AUX input of the radio or via Bluetooth (if supported by the radio). I didn't even expect that the sound could be so high quality. it all depends on the quality of the recorded audio and video sound.
https://litezona.ru/peredelka-paneli-priora-1-v-prioru-2/https://nvs-car.ru/product/komplekt-karkas—nabor-dlya-peredelki-paneli-torpedo-iz- priora-1-v-priora-2/https://pro-avtosalon.info/info/peredelka-torpedy-priora-1-v-priora-2/https://vk.com/public158445739https://vk. com/public158445739
How to quickly remove the glove box on a Priora model car
In order not to damage the car interior, you need to know how to remove the glove compartment on a Priora correctly. The design of this part of a passenger car interior is more than simple. The procedure for removing the glove box will take several minutes. Sequencing:
- Open the box lid by pressing the special button and lower it down until it stops.
- There are restraints on the left and right sides of the trunk lid. After opening the lid, you need to release the right stopper with light finger pressure.
- Then you need to do the same procedure with the second, left, limiter. Only after it is released it is necessary to move the part to the left.
- Next, the glove compartment lid can be easily removed. If after all the manipulations it does not want to be released, you just need to gently pull it down.
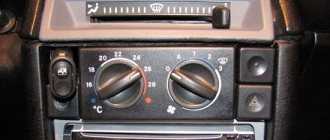
Reasons for installing an air conditioner
Buying a premium Priora is a big expense that not everyone can afford. The vast majority of drivers are accustomed to changing their “iron horse” after some time, since many spare parts and components wear out, not to mention the fact that it becomes possible to purchase a car of a higher class. Domestic cars in budget configurations are quite popular among car enthusiasts with average earnings. After all, after a few years, you can sell the car and buy a completely new one, if you add additional savings to the amount received. Bearing in mind this scenario, many treat their car very carefully.
So, we bought a basic Lada Priora. This means that, in addition to air conditioning, you are deprived of the following options: 2 front emergency airbags (the luxury class contains 4), a multimedia system, a heated windshield and front seats, a stabilization system, a rain sensor, parking sensors, cruise control, fog lights and alloy wheels.
Comfort in the cabin is impossible without climate control
Of course, many drivers can do without these devices. But installing an air conditioner on a Priora is a reasonable decision. In addition, such an improvement significantly increases the value of the car upon its further sale.
Installing an air conditioner on a Priora affects not only the cooling of the interior. It can be mounted so that it also cools the car engine. Such a system will become indispensable in the functioning of the car and will create a cozy and comfortable environment inside the cabin.
Appearance
Currently, tuning for VAZ cars has a wide range of choices. Since Russian-made cars are quite inexpensive, this attracts their buyers. Tuning for Lada cars is also available and can be found in almost any city.
Tinted glass
To give your car a beautiful appearance, the first step is to tint it. Car tinting is relatively inexpensive, ranging from 2,000 to 3,000 rubles. But after tinting, your car will shine with new colors. It is legally possible to tint car windows only from the rear. Since the light transmittance of the film is not so high, viewing in the evening will be difficult.
Lip installation
To give the car a stylish look, you can install a lip on the front instead of the standard fangs under the bumper. There are several types of lips. The rubber lip “Samurai” and the plastic lip from the Chevrolet Cruze fit perfectly on the Priora bumper. The lip should be secured under the bumper with self-tapping screws. The price of the lip is from 500 to 1000 rubles.
Lipspoiler
In the days of the nines, when our fathers raised the rear of the car by installing spacers under the rear shock absorbers and installing huge spoilers like in Need For Speed. Nowadays, it is stylish to lower a car; by the way, you can read how to properly lower a car on our website, and install a small spoiler that is glued to double-sided tape. The price of such a spoiler varies within 1000 rubles.
Alloy wheels
Everyone knows that the wheels of a car are the floor of the car, so the wheels of your car should be beautiful and you like them. On the Lada Priora you can install wheels with a radius ranging from R14 to R17. When installing R16 and R17 wheels, you will have to buy low-profile tires, which is very expensive and not practical, but at least beautiful. When installing disks with a large radius, comfort is lost and the chassis begins to work rougher since the rubber does not “eat up” minor road irregularities.
It is best to install R14 and R15 wheels. Such wheels are relatively inexpensive and the tires for such a radius are high profile. It follows that the comfort of driving a car will not be lost.
SE caps and mirror repeaters
In order to give your car a little luxury, you can install turn signal indicators in the prior mirrors and turn signal plugs in the wings on the SE. This modification is relatively expensive, but it significantly changes the appearance of the car and gives it a certain “richness”.
Sabers and bars
This is an amateur modification and is most often suitable for cars with a dark body color. The rear chrome-plated trunk saber and the front chrome-plated hood saber are painted matte black. This modification is very cheap and simple, but it has its own zest and is relevant when the chrome on sabers begins to swell, which is very common on Priors.
What to do if the glove compartment rattles
For a used Lada Priora car, the issue of eliminating crickets becomes urgent - since the fasteners become loose, unnecessary sounds appear excessively often. The glove compartment on a Priora can become one of the causes of discomfort, because it will make “squeaking” sounds that you want to get rid of.
Noise sources may include the following:
- Metal axes holding the lid. They fit tightly to the plastic, which is why they make a nasty sound. You can eliminate the problem in this way: the axles can be covered with electrical tape, and the plastic cells can be filled with bioplastic, which will soften the manifestation of the friction force.
- Separately, it is worth mentioning that if the axles make squeaks near the mounting points, you can use electrical tape, or solve the problem radically, using glue.
- Top part with metal fastenings. Pasting with an anti-creaking material will help - the same madeleine will do.
- The inside of the drawer lid may also squeak. It will be enough to cover its inner surface with anti-squeak to solve the problem.
Covering with carpet
To cover the inside of the lid with a carpet that will prevent squeaking, first of all, you need to remove the plastic part according to the instructions. Attaching the carpet by reaching inside with your hands will be inconvenient, and you may miss an important section or even glue it crookedly.
For installation you will need a carpet (1 m by 1 m in size) and regular plastic glue. The size of the piece of carpet is determined by the fact that first you will have to make a “pattern” to cover the entire inside of the lid, and then close the “sides” so that the lid looks organic.
The mechanism of operation is simple: when the pattern is ready, cover the glove box lid with glue and place the carpet to size. Without it, only the fasteners (arc-shaped slide) and the lock should remain.
Life hack: upholstery of the glove compartment on a Priora – tools – material, instructions
For owners of 2170 there is a pre-prepared kit. No need to measure or cut anything. KozhDesignAvto LLC, which is located in Tolyatti, produces a kit with ready-made carpet parts. The back is covered with wide strips of double-sided tape, so no tools are needed.
The manufacturer recommends gluing at a temperature of 15°C with average humidity. In order for the cover to fit correctly on the box lid, you should dismantle it, first applying the carpet to check the edges.
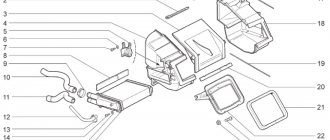
Manufacturer's modifications
Air intake mesh in frill
To ensure the supply of clean and fresh air to the interior of the Priora, the manufacturer has provided a cabin air purification filter. But since the holes in the frill for air intake are very large, which contributes to the fact that foreign objects and debris get into the filter and render it unusable. In order to correct this ailment, it is necessary to solder a metal mesh into the frill, which will protect the filter from debris. This will extend the life of the cabin filter.
Interior noise insulation
As you know, Russian cars are not famous for sound insulation, so domestic Kulibins do the sound insulation of their cars themselves. In order to make sound insulation in the Lada Priora, it is necessary to completely disassemble the interior and glue all the necessary places such as the floor, ceiling, doors, trunk and engine compartment. Sound insulation is glued in. several layers such as vibration, heat, noise. After which the car will be unrecognizable
Acoustic shelf
In a hatchback body on a Lada Priora, it is best to replace the rear parcel shelf with an acoustic one made of wood. Since the original shelf simply loses its shape and bends at extreme summer temperatures. In addition, a standard shelf creaks quite often.
Installation of the 5th gearbox support
On 16 valve engines, 4 engine mounts are installed from the factory. Two guitars and two props. On 8 valve engines there are 3 supports. Two supports and one gearbox cushion. Most owners of 16-valve cars prefer to install such a support on their engines. This support allows you to reduce the rattling of the gear shift lever, its jerking when moving and simply helps to securely secure the engine in the engine compartment. It should be noted that after installation, some vehicles experience increased vibration at idle.
When will we see the new Lada Granta
As the AUTOSTAT agency reports with reference to Lada dealers, production of the restyled Granta family is planned to begin this August. Now we will talk about four body types: sedan, liftback, hatchback and station wagon. As a result, the Kalina model will cease to exist.
The so-called “restyling family” of Lada Granta is planned to be presented at the Moscow Motor Show 2018. Also, as the media recalls, at the end of 2015, AvtoVAZ stopped the production of Lada Priora hatchbacks and station wagons, while keeping only the sedan on the assembly line, since approximately 80% of sales were accounted for by this body type.
Will there be a new model instead of the Priora – what are AvtoVAZ’s plans?
Most likely, the company is preparing space for new models, removing outdated and not so logical cars from production. But these are unlikely to be replacements for Priora and Kalina. The problem is that B-class sedans have oversaturated the company’s model range; other segments are needed that AvtoVAZ could cover with its products. For now, specific plans exist only on paper, and they can change a lot. Nevertheless, we can safely declare the following options for the concern’s actions:
- the discontinuation of cars that have begun to lose their liquidity in the new car market; over time, this will happen even to Grant, which was recently updated and released a facelift;
- proposal of a completely different concept for the development of Lada, as a joint venture with Renault-Nissan, selection of technologies that could be introduced for Russian production;
- the creation of 5-6 new models that will not replace the old ones, but will create a completely new image of the manufacturer and make it more profitable in the eyes of customers, will help raise the company’s image;
- constant updating of the offered assortment in order to prevent models from becoming obsolete, that is, working on the principle of modern European concerns in their profitable niches;
- Gradual addition of the model range and the withdrawal of those models that do not meet sales expectations will help the company remain profitable and interesting for investors.
Such development will ensure not only the growth of AvtoVAZ as a concern, but also the constant emergence of new domestic vehicles. Of course, the key to success in such a model will be the quality of production. Russians are ready to buy a car that may not have the best appearance, but one that is comfortable, durable and of high quality. So far, the budget segment does not offer many such options, and on this wave Lada can become a favorite national manufacturer.
We suggest you look at the last review of Lada Priora:
Let's sum it up
Modern cars are not the privilege of the AvtoVAZ concern, at least until today. But the company is striving to change its status and gain greater recognition in its state and beyond. Today, buying a new Lada is no longer as unusual as it used to be. The company began promoting its new models, which turned out to be of quite high quality, durable, and interesting in appearance. The cars have a good character, which allows them to take first place in sales in their class without much difficulty.
Despite the fact that many buyers are dissatisfied with Lada's pricing policy, the concern continues to develop and maintain a leading position in sales in certain segments. Today, the manufacturer’s products are even supplied to Central European countries and are beginning their promotion in this difficult market. But Lada Priora will no longer be a participant in this banquet. Most likely, the company is minimizing its model range in order to expand it into new segments and create more constructive competition in the market. What do you think about the removal of one of the most popular VAZ models from the assembly line?