Rating of the TOP 7 best pumps for VAZ
To understand which pump on the VAZ model is better, it is recommended to make a rating. The following is a table that lists the instances from last to first.
| № | Name | Performance | Supply voltage | Current consumption | Nozzle diameter | Length |
| 7 | TZA 2107130701075 | 160-170 l/min | 12V | 0.3V | 32 mm | 210 mm |
| 6 | Dolz L120 | 160 l/min | 12V | 0.3V | 32 mm | 210 mm |
| 5 | HOFER HF033024 | 170 l/min | 12V | 0.3V | 32 mm | 210 mm |
| 4 | Metelli 24-0833 | 170 l/min | 12V | 0.3V | 32 mm | 210 mm |
| 3 | FENOX HB1001L1.1 | 160 l/min | 12V | 0.3V | 32 mm | 210 mm |
| 2 | LUZAR 21124-1307010 | 170 l/min | 12V | 0.3V | 32 mm | 210 mm |
| 1 | Bosch 0392020024 | 180 l/min | 12V | 0.3V | 32 mm | 210 mm |
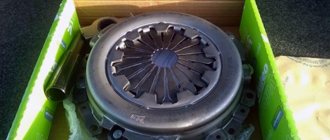
TZA 2107130701075
The TZA pump, applicable to the VAZ-2107 and other classic models, is one of the available options on the market.
A sealing gasket and a passport are supplied with the product. The packaging is branded, there is a protective sticker. The product is assigned a unique identification number.
The impeller of the pump is made of plastic and has 7 blades.
Cost - from 900 rubles.
The reviews note a small resource, play appears quickly. It is not recommended to install this pump on cars with a 16-valve engine. If a part jams, there is a high probability of serious repairs.
Source
Let's figure out which pump for the VAZ 2114 is better
A car pump is a unit that underlies the operation of the entire cooling system of a car. Sometimes it happens that it either stops working altogether or begins to work incorrectly due to wear and tear. Its failure is very dangerous, because along with it the entire cooling system will cease to function. What kind of pump to install on a VAZ 2114 and how to do it correctly will be discussed in today’s article.
What can a pump breakdown cause?
As already mentioned, the pump (or pump) circulates all the coolant in the system. If it stops working, the fluid circulation will stop.
Such a malfunction can lead to very serious consequences, including:
- boiling of coolant in the system (this can mainly be observed in the expansion tank);
- rapid engine overheating;
- damage or even destruction of the engine and adjacent units (if the engine runs for a long time without cooling).
As you can see, the breakdown of such a small device as a liquid pump can lead to engine failure, and repairs in this case will cost much more. For this very reason, you should periodically check the performance of the pump and, if a malfunction is detected, replace it immediately.
It is quite rare for a pump to completely fail; much more often you can observe its operation with interruptions caused by wear of internal parts. Such a pump should be replaced immediately, without waiting for it to stop completely, because it no longer creates proper coolant circulation.
You can quickly check whether the pump is working correctly as follows:
- Start the car and wait until it warms up.
- Place your palm around the upper hose in the radiator area.
- Squeeze the hose with enough force to feel whether there is a pulsation of liquid inside it.
- If pulsation is present, then the liquid is circulating and the pump is working properly, but if there is no pulsation, then most likely the pump is faulty and should be replaced.
Which pump to choose
Before replacing a broken pump with a new one, you should think about which pump is best to install on the VAZ 2114. This is due to the fact that different manufacturers produce pumps of different quality, and not all of them will be able to work properly for a long time.
According to the opinion of the majority of motorists, based on the practical use of pumps from certain manufacturers, it is better to give preference to pumps from the following companies:
- Gates;
- luzar;
- T3A;
- HEPU.
They have shown themselves to be the best, ensuring uniform circulation of fluid in the system and having the longest service life.
How to check for a malfunction
Having talked about which pump is better for the VAZ 2114 8 valves (and therefore which one will need to be purchased in the event of a malfunction), let’s also talk about what signs can be used to understand that the liquid pump has failed.
The most likely factors indicating a malfunction are:
- rapid drop in fluid levels in the tank. It may indicate the presence of leaks in the system, which can form in a variety of places - joints, pipes and even the radiator itself;
- presence of liquid at the ventilation hole. It indicates that there are leaks in the pump seal area;
- humming sound when the liquid pump is running. Most often it speaks of partial wear or even complete destruction of the bearings;
- destruction of the pump impeller (the most obvious factor, although its presence can only be established after dismantling and disassembling the old pump);
- presence of deposits on the oil seal. Plaque itself does not indicate wear or breakdown, but is one of the indirect factors pointing to it.
We independently change the pump on a Lada Priora car
One of the most important parts in a car is the pump. It is a pump that moves coolant through the system. If for any reason the pump stops working, this coolant will begin to heat up, which can lead to further boiling.
On a Priora with 16 valves, the pump is considered a part that is often subject to wear.
Manufacturers recommend changing it after 55 thousand kilometers. Sometimes it happens that it lasts longer, and it is changed at about 75 thousand kilometers.
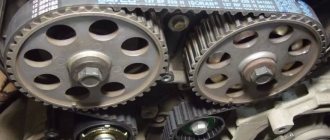
Engine Cooling Water Pump
Here it is, a mine - a water pump. Refers to the cooling system, but is driven by a timing belt. If the pump wedges due to the death of the bearing, it will cut off the teeth on the belt, and then there will be destruction in the motor. And they “forgot” to mention this detail in the routine maintenance section of all service books. What to do with it? The consumer can only guess. Should we wait for death from natural wear and tear on a plug-in motor? Stupidity. And if changed, then when? It seems that the mine is not even the water pump itself, but the complete disregard for it in all the official VAZ “literature” for the consumer.
New VAZ engines are now equipped with high-quality timing belts from well-known brands. I believe that if no oil gets on it, it will cost 180 thousand. But is the difference in components really so great that on the 8-valve VAZ-11186 for Granta the belt must be changed at the 75th thousand, and on its closest relative VAZ-11189 at the 180th?
Review of water pumps for Lada
There are currently a variety of brands and manufacturers of water pumps on the market; each manufacturer claims that its products are the best. We will try to impartially figure out what’s what, and consider one of the most popular items - a pump for front-wheel drive eight-valve VAZ cars. To avoid any confusion, let's clear things up right away. Eight-valve engines on front-wheel drive VAZs were constantly modernized and changed, so the pumps listed below are suitable for all engines equipped with the so-called “eighth” timing belt. If we take it by model, then these are VAZ 2108, 2109, 21099, 2110, 21013, 21014, 21015, as well as Kalinas and Prioras of the first years of production.
We purchased seven samples of pumps from different manufacturers - both domestic and foreign. But before we start introducing the products, I would like to explain some of the terms that are used below.
The impeller is a low impeller, which is located on the reverse side of the main impeller, its purpose is to relieve the shaft-housing seal. Equally important is the presence of holes in the base of the impeller - they also help reduce the load on the mechanical shaft seal with the housing.
A ball roller bearing is a bearing that has balls on one side and rollers on the other. Such a bearing can carry greater loads than a double-row ball bearing.
Double row ball bearing - balls installed on both sides.
Ceramic seal - a friction pair of two rings (moving and stationary) made of various materials (carbon graphites, metals, carbides (tungsten carbide with various bonds, silicon carbide), ceramics (metal oxides), plastics) both of the same material and in combination of various materials (stainless steel - carbon graphite, Al2O3 99% (ceramics) - carbon graphite). To ensure the necessary contact between the rings, a spring, a spring block or an elastic bellows is used.
The distance from the highest point of the impeller to the landing belt - this parameter characterizes the flow: the greater this distance, the better, the smaller the gap between the impeller blade and the mating part of the block - accordingly, suction losses are reduced.
Let's get started.
1.Fenox
Country of origin: Belarus
The pump is packaged in original packaging, a sealing gasket is included with the pump, a 7-blade plastic impeller, without an impeller. There is a product passport.
Warranty - 1 year from the date of sale.
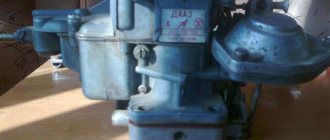
2. TZA
Country of origin: Russia
The pump is packaged in a branded cardboard box, the kit includes a sealing gasket and a product data sheet, and a protective sticker is applied to the box label, which breaks when you try to open the box. On the lid of the box there is an identification number under a washable protective layer to determine the authenticity of the product; for the same purpose, a QR code is applied to the pump pulley. The pump body is used from a VAZ-2112 with a molding for mounting the bracket, this is also evidenced by the markings on the body. The impeller is plastic, 7-blade, with an impeller.
Warranty - 1 year from the date of manufacture.
3. LUZAR
Country of origin: Russia
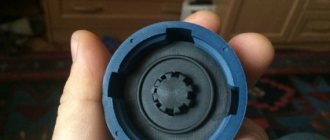
The pump is packaged in original packaging, the impeller is 7-bladed, made of aluminum alloy, the kit includes not only a sealing gasket, but also fasteners, sealed in a separate bag. Also included is a product passport. The LUZAR marking is applied not only to the body, but also to the pump pulley.
Warranty - 2 years or 125 thousand km from the date of purchase.
4. Oberkraft
Country of manufacture not specified
The pump is packaged in original packaging, the impeller is plastic, 7-bladed, without an impeller, the only marking is the Oberkraft inscription on the body, there are no original or company numbers. The kit includes only a sealing gasket, there is no product data sheet.
We could not find warranty information on the packaging.
5. Bautler
Country of manufacture not specified
The pump is packaged with branded logos, the kit includes a gasket and a warranty card. Bautler markings are applied to the pump body and pulley. Aluminum impeller, 6-blade, powder-coated, without impeller.
Warranty - 2 years, but not specified, from the date of manufacture or from the date of sale.
6. AV Autotechnik
Country of origin: Germany
The pump is packaged in a branded cardboard box and includes a gasket and product data sheet. The impeller is cast iron, 6-blade, there is no marking other than the original number - without packaging it will be impossible to determine the manufacturer.
Which pump to choose and install on the VAZ-2115
For the cooling system to function properly, the VAZ-2115 cannot do without a pump. Choosing the right pump allows you to preserve the radiator and engine for a long time. In an auto parts store, of course, they will tell you which model is better to choose, but will it meet the best characteristics?
Expensive models do not always show good performance results, so we asked experts which pump from which company would be the best and what knowledge you need to have when communicating with the seller.
Requirements for the VAZ-2115 pump
When buying a pump for the VAZ-2115, follow the selection rules:
- Move the pulley slightly along the body - there should be no active movement of the shaft in a quality part. Movement relative to the axis is allowed, but it is difficult to feel such rotation with your hands.
- Holding the device in your hands, twist it by taking the pulley. The component should rotate smoothly, without jerking, and no special effort is required. No jamming is a good sign that the water pump is working.
- Look from the side - perhaps the bearing is locking, your task is to select a pump with minimal indicators of the punch hitting the screw part.
- Pay attention to the design features of the domestically produced oil seal. To do this, evaluate the appearance from the pulley to the shaft:
- if empty, it is better to put the unit aside;
- a dark dot is visible - feel free to take it;
- there is a marking “M 9” or “M 5”, do not refuse such a device.
Review of water pump manufacturers for VAZ-2115
Each manufacturer claims that their product is of the highest quality.
The owner of a VAZ-2115, who is “led” by the exhortations of representatives of trading companies about how cool it is to purchase this particular pump, may, from his own experience, encounter the problem of frequent malfunctions of the water pump in the car or the fragility of the part. We tried to approach the review of the main manufacturers of pumps for the VAZ-2115 impartially and sought advice from professionals who have extensive experience in servicing domestic cars.
The VAZ-2115 most often has 8-valve engines, so we will talk about those pump samples that are suitable specifically for this type of car and which can be installed:
Malfunctions
Water pump for car
The causes of failure can be different, for example, bearing jamming or the formation of play. Sometimes it happens that the impeller begins to spin freely, but separately from the shaft. The pump also needs to be replaced if it leaks or becomes noisy.
Life time. A lot depends on the quality of the pump. For example, a low-quality and defective pump can last only 10-15 thousand km. The service life of a high-quality part is when the Priora runs 100 thousand km. and more.
The manufacturer installs a pump on the Priora, produced by the Russian enterprise Togliatti Automotive Units Plant (TZA). It has a long service life.
Unfortunately, recently sales of counterfeit pumps from TZA have become more frequent. Is it possible to distinguish a fake so that your Priora does not suffer?
A high-quality box should contain a pump, inside the box there should be a warranty card with stamps and the date of manufacture and a gasket. It is mandatory to have a holographic sticker on the pump.
What to do if they are already bent?
When this rumored incident has already happened, you need to know that dismantling these parts, as well as replacing hydraulic compensators (Priora, 16 valves), is not such an easy process, because it requires disassembling the cylinder head. It should be noted that disassembling the cylinder head itself is done only in particularly difficult situations. That is, only when replacing springs, valves
and other fundamental devices. Also, every time the cylinder block is disassembled, a new gasket is installed.
Replacing the Priora pump 16 valves with your own hands.
The replacement of valves on a Priora (16 valves) begins with disassembling the engine. It is not necessary to disassemble the entire motor - it is quite easy to remove the head and install it on a special workbench so that the distribution heads are placed at the top. Next, you need to remove the left side motor mount. For this purpose, unscrew the nuts holding the support. Once they are unscrewed, removing it will be very simple. Next, you should dismantle the support bracket, having previously removed the bolts securing the fuel pipe and phase sensor. Next, if you have a key for 21, disconnect the sensor from the emergency one that allows you to conduct accounting (software). This element indicates a critical oil level; it is located in the bearing housing.
How is the pump replaced on a Priora?
Replacing the Priora water pump. Warning! Do not turn the crankshaft or camshaft after the camshaft drive belt has been removed, otherwise the piston may hit the valves. Wear of the pump bearing (indicated by increased noise during operation) and leakage of coolant from the pump are the main defects of the water pump.
As a rule, repairing the water pump does not lead to the desired result, so it is recommended to replace the pump assembly. Replacing the pump is a procedure for performing actions that you can do yourself.
Description
| STEP # | |
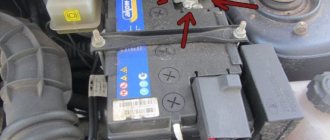
| 1 | You need to disconnect the wire from the negative terminal of the battery. |
| 2 | Next, you should drain the coolant. |
| 3 | Then the piston of the first cylinder is set to the top dead center position. |
| 4 | Then the tension roller is removed. |
| 5 | The camshaft toothed pulley is removed behind the tension roller. |
| 6 | It is necessary to unscrew the 4 bolts and the fastening nut and start removing the rear cover of the camshaft drive belt. |
| 7 | Insert a screwdriver into the groove, carefully separate the pump from the block and remove it. |
| 8 | Then you need to remove the gasket from the pump. If it is damaged, it needs to be replaced. |
| 9 | Then, if the coolant leaks through the drain hole, then you need to replace the water pump (if the seal is damaged). |
| 10 | If the pump shaft exhibits noticeable axial play (or the bearing is damaged), replacement is also required. |
| 11 | If chips, cracks, or chipping are found on the toothed pulley, impeller and pump housing, it is also replaced. |
| 12 | You need to check the tightness of the pump bearing locking screw. The screw must be tightened if necessary. |
| 13 | Next, you need to install the pump in the reverse order of removal. In this case, the number on the part must be directed upward. |
| 14 | And finally, you need to install the remaining parts in the reverse order of removal. |
Water pump Luzar
In this case, the camshaft pulley must be installed with the protruding part of the hub facing the engine. Then you need to check the alignment of the top dead center marks on the rear drive belt cover and the camshaft pulley. The last step is to adjust the tension of the camshaft drive belt, and only after that add coolant.
You need to rely on reviews, contact trusted stores or order the part directly from the manufacturer via the Internet in order to buy a pump for a Priora or another domestic car of good quality and avoid a collision with a fake. A survey of VAZ 2110 car owners on the question: “Which pump is the best for the VAZ 2110?” - shows that car owners mainly buy water pumps from 2 manufacturers: Tolyatti Automotive Unit Plant and Luzar.
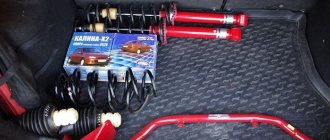
Possibility of installing an additional water pump on the Lada Priora
One of the disadvantages of the heater on the Lada Priora car is its low efficiency when the engine operates at low speeds in the cold season, due to insufficient coolant circulation. Therefore, the car interior warms up slowly and insufficiently, which causes some discomfort for the driver and passengers.
There are some requirements that must be met to obtain a high-quality result after installing an additional electric pump.
These include the following points:
- the installed product should not create excess pressure in the heater radiator during operation in order to avoid damage to the pipes or the formation of cracks;
- It makes sense to replace the thermostat and install this component with an increased opening temperature (90–95 degrees Celsius) due to the fact that as the speed in the coolant circulation increases, the engine parts will warm up more slowly, increasing wear on the power unit.
To solve this problem, you can install an additional water pump in the cooling system of the power unit, which will qualitatively improve the heating of the car interior even when the engine is idling. This technology is not new. Engineers have been using it for a long time. Examples include German cars BMW or Mercedes Benz.
Device selection
As a rule, devices from various manufacturers are suitable as an additional water pump for the Lada-Priora car.
These, for example, could be brands from:
- Bosch company;
- ;
- .
Video: positive effect of installing an additional electric pump on the Lada Priora
However, most often the Lada Priora is equipped with an electric water pump, which is installed on Gazelle cars. This may be an old or new design, but the principle of operation is the same for both: due to the vacuum at the inlet during operation of the product, a pumping force arises, which drives the coolant through the system. In fact, the pump from the Gazelle car is a classic centrifugal pump.
The design of the new pump version is much more successful and causes fewer complaints from car enthusiasts. And it is also less noisy during operation. The main problem that motorists encounter when using such an electric pump is its leakage.
Installation and connection of an additional electric pump
To equip a car with an additional electric water pump, you will also need a regular relay that has normally open contacts (this can be an ignition or starter relay from a VAZ 2105, VAZ 2108). It is necessary to close contacts No. o86 and No. o30. And you will also need a reinforced hose and clamps for clamping the pipes.
An additional pump can be installed in any of the gaps in the supply or outlet pipes of the car’s heating stove.
Installation of an additional electric pump is quite simple, and the efficiency of the heater increases significantly
The pump is fixed in the Lada Priora in the following places:
- stud for fastening the washer reservoir;
- studs located next to the battery;
- on the engine shield.
The device can be connected to a wide variety of systems.
It could be:
- recirculation button;
- SAUO stove block;
- heated mirrors;
- other convenient places.
What's next?
In this case, the replacement of valves on the Priora (16 valves) is not completed. When you unscrew the spark plugs, you should unscrew the bolts securing the camshaft, which remains for our client to do, and then remove this part from the outside. There are two of them on the sixteen-valve Priora, and both shafts must be removed. For this purpose, you will also need to remove the plugs located at the end of the cylinder head. When the engine is disassembled, the valves are specifically replaced. On the Priora (16 valves) it is done like this.
After removing the camshaft, use a puller to remove the fastening “crackers”. In this case, it is recommended to place a small stand under the “plates”. How to replace the valves on the Priora (16 valves)? After removing these parts, the plate is removed along with the springs. You have to be very careful because the spring force is very huge. Due to carelessness, they sometimes jump off the plate. There is still one piece under the springs. These are stubborn plates. They also need to be removed. Alas, this is done only after removing the valve seals. In order to dismantle it, we will use a special grip.
The dismantling process is as follows. We clamp the oil seal with a grip and at the same time press it a little. After making a couple of turns left and right (at the moment of turning), we pull the oil seal upward. It is not recommended to make such tilts with a pressed grip, because there is a risk of damaging the seating shoulder of the mechanism on the guide sleeve. We have done most of the work. Now all that remains is to remove the old valves and install new ones.
What kind of pump is installed on Priora
The original pump TZA 21126-1307010-75 . The cost of the pump at the moment is from 800 rubles and more, depending on the region. If for some reason you cannot find a TZA pump, you can choose a water pump from other manufacturers.
Pumps for 16 cl motor
- LUZAR LWP 0127
- FENOX HB1005P1
- HOFER HF033024
- LADA IMAGE 21126130701082
- SOATE (St. Oskol) 021126-1307010
- LUZAR LWP 01274 TURBO-2
All of the above pumps are designed for a 16 valve engine. When choosing a pump, we advise you to purchase a high-quality analogue or an original pump, so that you do not have to change it again after 20-30 thousand kilometers.
TZA 2109-1307010-75 is installed on the 8 valve engine . Its cost ranges from 900 rubles and above. Several types of analogues are also offered at lower prices.
Pumps for 8 cl motor
- HOFER HF 033031
- OberKRAFT KT 059346
- AMT-Miass AM2109-1307010
- LADA IMAGE 21114130701082
- LUZAR LWP 0108
Choose a pump not only based on reviews from friends, but also based on the quality and cost of the water pump. Beware of counterfeits, as there are quite a lot of counterfeit parts these days.
Metelli
This Italian manufacturer produces pumps not only for domestic cars, but also for well-known foreign cars. Many car factories cooperate with him. The products are subject to strict quality control and are practically not counterfeited.
Useful: Do-it-yourself pump replacement on a VAZ 2114 (step-by-step instructions)
Pros:
- High quality;
- Few fakes;
- Reliability;
- Durability;
- Rubber gasket included;
- Affordable price.
Minuses:
- Almost none found.
The cost is about 1300 rubles.
Thermostat
Next you need to go to the thermostat. " Priora " (16 valves), in which replacement of the thermostat itself is not necessary, remains as before, not running. The next step is to remove the temperature sensor from the element body. It is used to control the temperature of antifreeze. Now, of course, loosen a few fixing bolts and freely pull the thermostat out. The sealing gasket is removed from the studs. After which we need to extract what remains to be done for our client to make candles. With all this, such an act as replacing a pump
, " Priora " (16 valves
) will not seek from you. Below you will find a detailed description of how to dismantle the candles.
Instructions for replacing the pump on a 16 cl engine yourself
Before you begin removing the pump, you will need to drain the coolant. We find the drain plug, substitute a container with a volume of about 4 liters and drain.
After draining the liquid, remove the upper decorative cover, the alternator belt, and then the front timing cover, it consists of two parts.
Now you need to set the timing marks so that during assembly you do not make a mistake with the ignition setting.
Next, unscrew the pulleys. To prevent the pulley from turning, engage 5th gear and press the brake. Now the pulley will be motionless, you can safely unscrew it. Unscrew the pulley bolts using a 17mm spanner.
If you have a car with air conditioning, you need to use a 13 mm socket wrench to unscrew the bracket for the generator belt tensioner pulley and air conditioner with steering wheel.
The next step is to remove the crankshaft pulley. To do this, remove the right front wheel and mudguards. Next, engage 5th gear again and press the brake. The pulley will be fixed and can be safely unscrewed. Remove the pulley and timing belt.
Next, unscrew the 6 bolts securing the cover and then carefully remove it from the engine.
We unscrew the 6 bolts securing the pump, carefully pry it up with a screwdriver and pull it out. When installing a new pump, it is necessary to coat the gasket with a thin layer of sealant and screw the pump into place. Next, we reassemble in the reverse order, taking into account the timing marks.
For more detailed instructions, watch the video:
Replacing the pump
The process of replacing or diagnosing the pump is carried out after removing the timing belt; you can read how to remove or replace the timing belt here.
Required tool:
- Ratchet and extension;
- Head for “10”, “15”, “17” mm;
- TORX T30;
- Sealant;
Step-by-step instruction
- If, during the process of replacing the timing belt and diagnosing the coolant pump, faults are discovered in the pump, then it must be replaced.
- The pump is replaced after removing the timing belt.
- Before removing the belt, it is recommended to unscrew the camshaft pulleys, since it is much more difficult to do this with the belt removed.
- Do not confuse the location of the pulleys. The intake pulley has a ring inside for operation of the phase sensor.
- Next, you need to drain the coolant.
- Using the key to “13”, unscrew the plug in the cylinder block and pour the Antifreeze into a container with a volume of 5-10 liters.
- We dismantle the tension roller mounting bracket.
- We unscrew the plastic base of the timing cover with a 10mm head and remove it.
- Unscrew the three bolts securing the pump and remove it.
- Before installing a new pump, we clean the surface from dirt to avoid distortion of the pump, which can lead to misalignment of the timing elements and damage to the belt.
We install the new coolant pump in the reverse order of installing the timing belt.
The work process is completed. We hope our article was useful to you.
Important points
- When reassembling the cooling system, pay special attention to the mark on the crankshaft pulley and the triangular slot located on the oil pump cover. These marks must be combined, since this is the only way the piston of the first cylinder is guaranteed to be installed at top dead center. If the mark on the pulley is difficult to see, you can apply a drop of red or white paint to it.
The mark on the pulley, made with red paint, will be better visible when replacing
- Also, do not forget about the tension of the timing belt. You need to take the above-mentioned retaining ring puller, install it in the outer groove of the timing belt tension roller disk and turn it to the left. There is a cutout on this disk that must align with the rectangular protrusion located on the inner bushing of the tension roller. As soon as the marks are aligned, use a 15mm torque wrench to tighten the fastening bolt (and the tightening force should not be higher than that specified in the vehicle’s operating instructions).
Which pump is better to choose for a 16-valve VAZ 2112?
Today we will tell you how to choose the right coolant pump, what to look for, and find out what experienced VAZ-2112 owners advise. After diagnosing various forums, we compiled a rating of all pumps that are popular among VAZ-2112 car enthusiasts and compiled a rating that can fully reveal all the advantages and disadvantages of each model.
The video explains how to distinguish an original pump from a fake, and what to look for when choosing this part:
Twisting force
During the upcoming assembly, pay great attention to the force with which you twist them back. For a car like the VAZ Priora, the torque is 30-40 Nm. If you don’t have a torque wrench, use the traditional method. For this purpose, we twist the candle with one hand according to the full program. These efforts are completely enough to screw the parts into the well. When, if you lightly clamp the spark plug, during engine operation it can simply shoot out due to the enormous pressure in the combustion chamber of the engine.
Differences in pump production technology
Signs of a fake pump. This is clearly not the famous Gates. That's why we didn't include it in our rating, there are too many fakes.
Pumps are produced with six and seven blades; they differ in manufacturer and technical characteristics. According to various tests carried out, those models with seven blades perform much better during operation than its limited counterpart. Below we will present you with a rating of the five best pumps, the performance of which varies in the same range.
Skf
Swedish manufacturer, known in many countries around the world. Its production workshops are also located on the territory of the former CIS countries. The product is very durable. It usually lasts at least 130,000 kilometers, which is considered an excellent indicator for water pumps. All products at the factory undergo strict quality control. Therefore, the defect rate is negligible. Spare parts of famous brands are often counterfeited. Therefore, when purchasing, you need to be extremely careful. Original pumps have the workshop mark, and there is always a marking on the box. Even the absence of one of these signs indicates a fake. Pros:
- Excellent quality;
- Durability;
- Availability;
- Acceptable price.
Minuses:
- Lots of fakes.
The cost is about 2800 rubles.
What should I do to prevent the valves from bending?
Often motorists solve this problem by installing a piston group of type 124. But this replacement does not require your own funds, reviews say. After all, for this purpose you will need to remove the old piston group, pull out the engine, disassemble it, remove the shafts, which remains for our client to do, etc. For 100 for such a function they will charge you about 50 thousand rubles.
The main reason that causes the need to replace the pump is the start of a leak in the cooling system. If the car owner discovers a leak, you can continue driving for some time, but it is better to limit it to driving to the nearest service station or to your own garage.
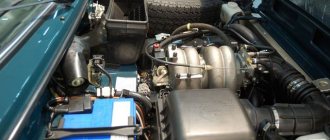
Functions and purpose of a pump in a car
Normal engine operation is impossible without a cooling system that circulates coolant through the pipeline (system components, pipes and hoses). The purpose of the pump (water pump) is to ensure constant movement of antifreeze throughout the entire system while the engine is running. If at some point the pump stops functioning, this will immediately disrupt the thermal conditions of the engine. In this case, the coolant will boil, which can lead to serious engine damage.
Structurally, the pump is a fairly simple structure, consisting of a metal body and a pulley and impeller located on the shaft. The pulley is driven by a belt from the engine crankshaft. An impeller is located on a shaft inside the housing, which moves the coolant with blades from one part of the cooling system to another. This is how the motor is cooled.
Rating and voting
FENOX
Valeo
World famous manufacturer. Its water pumps are installed on the assembly line on new cars of many brands. Pumps of this brand often last more than 150,000-180,000 kilometers. This is an excellent indicator. The cost of spare parts of this brand is quite high. In addition, fakes are often found on sale. Pros:
- Durability;
- High quality materials;
- Withstand significant loads.
Minuses:
- High price;
- Lots of fake stuff.
Cost – approximately 3000 rubles.
Tools for work
To extract these elements, we need the following set of tools:
- Spark plug wrench 16 mm with sealing rubber.
- 10mm wrench with ratchet.
- Ratchet handle.
- Extension. Without him we won't get to the wells.
First, the upper motor casing (plastic decorative trim) is removed. When, before this, it is necessary to remove what remains for our client to do, the ignition coils. For this purpose, remove the plug from each side and unscrew the bolts securing each of them. Next we move on to the candles. For this purpose, you are recommended to use a spark plug head with a rubber ring to grip the part from the well. Here the extraction of candles is complete.