One of the elements of a modern Vesta car that is impossible to do without is the front and rear bumpers. These body elements are important from a design point of view. Some models have become popular because of their unusual appearance, which has a lot to do with the design of the rear or front bumper. It has the protective function of a car and a pedestrian. During a traffic accident, it will protect the driver and passengers. On cars, the calculation is made not to seriously injure a pedestrian in the event of an accident.
The Lada Vesta has a stylish (from a design point of view) bumper. He copes with all the functions assigned to him.
Despite this, the car is unlikely to last long enough without replacing the standard unit; this body element sometimes needs to be replaced. To cope with the replacement procedure, you need to study all the design features of this car, the nuances of replacing both the rear and front bumpers of Vesta.
The front bumper of the Lada Vesta has special qualities. This body part needs additional protection, because it is often subject to impacts. There are cases when, even after strong blows from stones flying from under the wheels, he did not receive damage. This indicates its high quality.
Vesta's paintwork is durable. It withstands long-term exposure to chemicals used by road services. Vesta's coating copes with frequent washing. It is resistant to minor mechanical damage and scratches. In the center of the Vest bumper is a place for a license plate, and below is an air intake. Its sides are decorated with two inserts, each of which resembles the letter “X”. Its edges are complemented by headlights and fog lights.
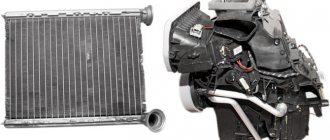
The front bumper of this car is one of the vulnerable points. This is due to the fact that it is often subjected to mechanical stress. We are talking about numerous small pebbles that fly into it while moving at high speed. This is especially dangerous for the radiator, which is protected by a grille. The grille allows air to enter the radiator. It also performs a protective function. Another problem concerns curbs that are too high. If you hit the curb while parking, Vesta's bumper can suffer serious damage.
Let's note such factors as:
1. Ice.
2. Chemicals.
3. Small metal objects.
Due to the large number of damage threats, the front bumper and its repair are a popular body part. It is bought often.
The rear bumper of the Lada Vesta Cross performs a much smaller set of functions. This part of the car is needed to protect the rear of Vesta. It takes a lot more hits, so its task is to protect the car from behind. Absorbing energy from a collision is the main function of this element of the car. More often during an accident, impacts occur on the rear of the sedan. The rear bumper is necessary for mounting parking sensors and fog lights. Without it, securing these devices would be difficult.
We also note that the rear bumper is an important design element of Vesta. It cannot be called non-standard, but it looks good.
Often car owners have to change both the rear and front bumpers of Vesta.
How to remove the front bumper on a Lada Vesta
Taking it off on Vesta is relatively easy. To do this you will need a minimal set of tools. An ordinary driver can cope with this task. It is not at all necessary to attract a master with a hundred.
Facial dismantling (removing the front bumper of the Lada Vesta) is required in a number of cases. More often we are talking about restoring and painting a car after a serious accident. Then it is impossible to do without removing the front bumper. Sometimes, after a serious accident, Vesta elements need to be urgently replaced.
It is removed if you need to replace it with a new one. Usually it needs to be replaced if we are talking about a relatively old car.
It must be removed when replacing the radiator grille or installing any elements. Usually we are talking about installing fog lights and a new signal. It is also impossible to do without removing it while working on the head optics.
Before work, you need to prepare; the Vesta owner needs to prepare the surface where the bumper will lie after dismantling. It's better to put it on a blanket. Otherwise, it will be impossible to avoid scratches on the paintwork.
Another tip concerns the work. Some car enthusiasts work without assistants. In the case of Vesta, consider getting help. Two people can handle the dismantling much faster.
To carry out work on the Lada Vesta you will need a number of tools. Without them, it will be much more difficult to cope with the work. Among the tools, we will highlight a 10mm head, Torx T20 and T30. The work flow looks like this:
1. At the very beginning, you need to remove 4 bolts located in the central part. Then you should take hold of the remaining 2 screws located on the sides.
2. You need to remove the side fastenings. To do this, also unscrew 2 more screws.
3. Now you can move on to the upper mount to the body. The bolts on this element are also twisted. All 6 bolts must be removed.
4. Then it remains to remove only 2 bolts, under the license plate.
5. The last stage is removal from the side grooves. This completes the process of dismantling the front bumper. There is nothing complicated about this, so anyone can cope with removing the knot.
If you complete this procedure, you can gain access to the radiator, amplifier beam, fog lights and other elements of the car. Attaching the bumper (installation) of Vesta to its original place is the simplest procedure, because to do this you need to perform the above steps in reverse order.
Painting
Another way to remove chrome from Lada Vesta. To do this you will need spray paint. Each owner chooses the color himself. Before painting, you must carefully seal the entire remaining surface of the front end with paper and tape. As for the moldings themselves, they need to be degreased with anti-silicone before work.
The only question that remains is regarding the cleanup. On the one hand, if you sand the surface, even with very fine sandpaper, the paint will adhere much better. On the other hand, it will no longer be possible to restore the original appearance of chrome.
Mastic on moldings
However, as an alternative, you can use anti-gravel mastic, since it is washed off with gasoline. The only caveat is that this mastic looks rougher in appearance compared to paint.
You can also use liquid rubber. The result will be approximately the same.
How to remove the rear bumper of Lada Vesta
Removing the rear bumper is even easier. To do this, follow the steps in the following order:
1. First you need to remove the lights.
2. Then you can proceed to removing the 2 mounting bolts at the bottom. Then you can move on to the bolts located along the edges.
3. Now all that remains is to unscrew the 3 screws that secure it to the fender liners.
4. The next stage of work is the removal of 2 bolts located under the headlights and another 5 bolts along the perimeter of the luggage compartment. You will find 2 more bolts under the rubber buffers. All bolts listed should be unscrewed.
5. Now all that remains is to remove the part from the side grooves of the body, and then remove it by pulling it towards you. This will require physical effort, but a car enthusiast can handle it.
6. The last stage of work is to disconnect the wires for the parking sensors and fog lights.
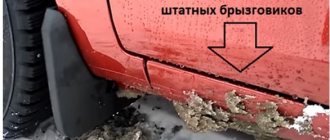
It should be remembered that splash guards can seriously complicate the process. They block access to many fasteners, so they will have to be removed before work.
To install the standard rear assembly in its original place, you need to perform all the steps in reverse order.
Dismantling
The fourth way to remove chrome from Lada Vesta. Removing the elements is not difficult, you just need to work carefully so as not to break the clamps that secure the moldings to the bumper. You can also remove the LADA letters from the trunk lid.
As for the rook in the front bumper, it is not recommended to remove it, since the oval seat will remain. If you want to get rid of the boat, but not lose the appearance of the car, you will have to buy a tuning radiator grille.
As you can see, you can remove chrome from Lada Vesta in various ways. Everyone chooses their own option.
Bumper protection for Lada Vesta
The buffer is an important part of car protection during an accident. It determines the type of car. Therefore, some models are equipped with an overlay. It makes the car much more stylish and emphasizes its individuality. You can purchase the cover yourself. Most often, buyers order a red overlay, but it can be painted in any color. Red color is preferred because it gives the car a certain sporty spirit.
The cover is made of fairly high quality plastic. It is attached to the car with double-sided tape. Installing the cover does not take much time, so you can do it yourself. This usually takes about 15 or 20 minutes. No special vehicle preparation is required.
Vinyl film
This is probably the best option. After all, the film can always be removed if you want to see the shine of chrome moldings again. In addition, stores offer a lot of films with a wide variety of characteristics:
- Anti-gravel;
- Matte;
- Glossy;
- Texture;
- Under the skin;
- Camouflage, etc.
However, there are differences in color, thickness and other parameters. Therefore, you can always choose the most suitable option, and if you wish, you can easily change your image. Cost varies depending on the type of material. The table provides examples with prices per linear meter - 152/100 cm.
The need for overlays
The need for the Vesta overlay is due to the desire of many car enthusiasts to distinguish their car from the “gray mass”. The pad is a beautiful accessory and a useful addition to the buffer. When you put heavy things in the trunk, you can accidentally scratch the paint - the cover will prevent this from happening.
We also note that the cover (bumper reinforcement) will increase the level of car safety. It is installed to protect against minor damage. The amplifier is required to protect against small stones flying from under the wheels. They can scratch the car's paintwork.
Overlays
To hide the chrome on the Lada Vesta, you can use plastic trim.
Overlays for Vesta moldings
They can be ordered in one of many colors, which allows you to choose an accessory to match the color of a particular sedan. The table shows the most popular sites with prices.
| Online store | vendor code | Price, rub.) |
| https://lada-vesta-shop.ru/shop/tyuning/nakladki-na-iks-moldingi-dlja-lada-vesta.html | VS-NXMD-A | 950-1300 |
| https://ladatuningshop.ru/krashennye-moldingi-bampera-lada-vesta | 900-1200 | |
| https://ladatorg.ru/krashennie-moldingi-bampera-lada-vesta.html | 950-1250 | |
| https://nvs-car.ru/product/moldingi-bampera-okrashennye-dlya-lada-vesta-komplekt-4-sht/ | 1200 |
Cost varies depending on color. The set contains a total of 4 components made of durable ABC plastic. Fastening is carried out with 2-sided tape. Before installation, the surface of chrome moldings must be degreased with anti-silicone.
Rear bumper trim
In order to protect the body from scratches that inevitably occur during the loading and unloading procedure, an accessory such as a rear buffer pad was invented. This useful part can withstand even the most serious mechanical damage. In some cases it is not possible to do without it. It can withstand temperatures from -45 to +60 degrees Celsius. The pad also boasts the highest resistance to all kinds of chemicals. It has a very durable and corrugated surface, which will be a serious obstacle to any threats to the car's paintwork. The color of the rear bumper trim can be any (at the Vesta owner's choice).
Photos of Lada Vesta and XRAY without chrome
Still undecided whether it is necessary to remove chrome from the car body? These photos clearly show how two new AVTOVAZ products in different colors will look without chrome elements on the bumper.
Heat marathon or how to close the radiator grill of a Lada Vesta: a review of handmade solutions
The single resolution of experiments and reasoning is to insulate. Combining the operation with the morning warm-up ceremony is not the best idea: you can’t put the cardboard in a second, there are no cracks. Generally speaking, a sheet of cardboard in front of the grill is impractical advice:
- Installation involves removing the bumper.
- Thick paper gets wet quickly and hardly dries out.
- It is necessary to ensure a gap between the heat exchanger and the insulation.
With an eye to accuracy
Horizontal fins, wide spacing between them, recessed radiator honeycombs – this is not an exemplary platform. Select a material of a nondescript color, cut it into pieces and insert it between the edges - simple and inconspicuous. It is not at all necessary to hide the modification - the tone in the color of the car adds presentability.
Technically, there are no difficulties. Minimum amount of funds:
- An ordinary isolon or travel mat of a suitable color.
- 15-20 plastic clamps of a certain tone.
- Stationery knife.
- A long, straight piece of wood.
The preliminary dimensions of the strips have already been taken and estimated (windows are numbered from top to bottom):
The trapezoidal shape is not typical for all windows. The nameplate extends slightly onto the first and third platforms, and in the fourth opening under the license plate a narrowing is applied over a very long segment. It is not necessary to cut out a stencil for problem areas - careful adjustments on the spot will do. For fastening, 4-5 ties are used per strip.
Limiting air cooling to 100% is acceptable at ambient temperatures less than -25°C. During the thaw, it is recommended to open one of the windows, since in traffic jams the cooling fan may turn on. It is optimal to remove the second strip of two parts: the appearance will not be affected.
Fast and practical
A hastily cut sheet of foiled polypropylene is certainly a quick solution, but not an aesthetically competent one. Another thing is to close the openings in the Vesta radiator grill with Flex tubes. The dimensions are known, cut, cut lengthwise and insert. The exterior is a C grade, but it’s simple, fast and cheap. Pre-painting can increase the beauty index.
Branded plugs are of poor quality and expensive. Who needs cheap shiny plastic for 1,000 rubles, which frankly spoils the pretty expression of the front end. And what will happen to him after meeting with stones from hitchhikers? An almost similar situation with 17 discs on Cross versions: a test of winter tires for the Lada Vesta SV Cross explains the problem in detail and gives a recipe for solving it.
Exclusive
Full-length faux leather covers or raincoat fabrics stitched with decorative stitches are a stylish feature. It’s also practical - make the windows fold down and the weather won’t thaw. There is no way to hide the fasteners. However, you can make them an integral part of the design idea by adding plastic eyelets in the required places.