Replacing the clutch of Lada Priora
Lada Priora is perhaps the most popular model in the Russian automobile industry, which, according to statistics, experiences constant clutch problems. Replacing it is a rather painstaking procedure, especially if you do it yourself. Let's try to understand this issue in more detail using a complete guide to replacing the clutch.
Sharp gear changes and increased engine speed without increasing speed are a sure sign of a worn and slipping clutch.
Replacing the Lada Priora clutch with your own hands can be completed at home using car racks for lifting the car and a trolley jack. It is highly recommended to use a clutch alignment tool, otherwise you may spend too much time aligning the clutch plate and input shaft spline. The procedure itself will take about 5-6 hours.
Step by step guide
What you will need
- Replacement clutch
- Clutch Alignment Tool
- Brake fluid
- Various screwdrivers
- Ratchet
- Switch rod
- Trolley jack
- Stands or ramps
- Wheel chocks
Step 1 - replacing the cable and clutch pedal of Lada Priora
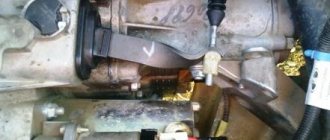
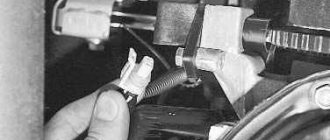
Disconnect the battery, unscrew the interior shift lever (two bolts), and with the car off the ground, disconnect the clutch cable from the fork lever in the dust boot. The cable and clutch pedal must be loosened by reducing the pressure of the adjusting nuts on the firewall in the engine compartment.
Step 2
Next, disconnect the sensor wires from the transmission and loosen and then disconnect the handbrake cable so that the transmission can be removed.
Step 3
Loosen part of the exhaust pipe by unscrewing the bolts located in the inside of the Priora. They tend to be difficult to remove due to dirt, rust, and the constant expansion and contraction of the hot exhaust pipe. A penetrant such as WD40 can help weaken the structure.
Step 4
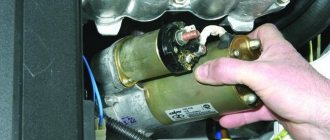
Remove the starter and bell tower bolts. You will need additional tools (extensions, breakers, swivel joints) to get to the farthest bolts themselves. Then remove the gearbox.
Main part
Step 5
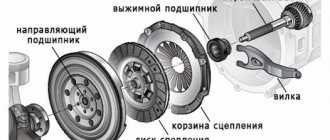
Remove the old pressure plate and flywheel. To prevent the engine from rotating when removing the flywheel bolts, use a large screwdriver inserted into the teeth and secured to the housing. Clean the inside of the bell tower thoroughly.
Step 6
Install the new flywheel and pressure plate and tighten them. A dab of locknut must be used on all flywheel and pressure plate bolts. Note the use of the clutch alignment tool.
Photo – pressure plate
Step 7
Proceed directly to the conversion. A transmission conversion is a reverse process that involves reconnecting all the cables and wires. The clutch cable is adjusted on the firewall by turning two bolts (the second is locked opposite the first). Clutch telemetry should find the friction point after about 14cm of pedal movement. Place a jack under the transmission and lift it slightly to relieve excess pressure.
Step 8
Remove the transmission mount from the crossmember and remove the crossmember if clearance is required. Next, remove the bolts that secure the transmission bellhousing to the engine. Then carefully move the transmission away from the engine until the input shift clears the pressure plate. Remove the pressure plate and clutch disc.
Step 9
You can now remove the gearbox. First, carefully inspect the flywheel for scratches, heat marks, cracks, or anything unusual. Any damage warrants machining or replacing the flywheel.
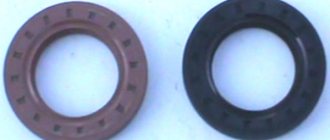
Note: Machining the flywheel will not eliminate heat spots. You may need it. This is also a good time to check the rear engine main seal for leaks and repair as necessary.
Replacing the Clutch
Step 10
Install the new clutch disc and pressure plate. Tighten the pressure plate according to the manufacturer's recommendations. (Note: The clutch disc can only be installed one way. If it is installed incorrectly, the clutch will not work. In most cases, the replacement disc will have a sticker that says "flywheel on the side" if you do not pay attention to how the old one was installed disk). Install the release bearing with a thin layer of grease onto the bearing sliding surface.
Using the transmission jack, push the transmission back into position. Carefully move the transmission forward until the input shaft fits into the clutch disc spline (center). Once the transmission and engine are aligned and connected, replace the bellhousing bolts and any items you removed from the transmission. Adjust the clutch assembly as necessary.
If you require more detailed instructions, use detailed videos from the company itself on replacing the Lada Priora clutch cable. A more detailed step-by-step guide is described there.
Conclusion
As a result, you can get a completely replaced gearbox, as well as the clutch. However, this is a rather painstaking process that requires practical knowledge. We wish you success!
Mechanics
Mechanically, the clutch operation process is extremely simple. Let's analyze it from the moment the movement begins. After starting the engine, the car is in neutral gear (starting the engine in gear is bad manners). The clutch is depressed all the way - this means that it is turned off, the driven and pressure plates have separated, that is, a moment is created to change gear. The gearshift lever is moved to position 1, and first gear is engaged.
The pedal is smoothly released (the clutch is engaged), at this moment the most important thing happens: the distance between the pressure plate and the driven one is constantly decreasing, and the force transmitted by the engine has already set one disk in motion, which makes the moment of “collision” of the two disks become difficult. If the pedal is released abruptly, they will quickly touch, which means that the disc will pause (imagine walking and tripping over a stone - much the same thing happens with an engine).
The engine may stall, or in the best case, the car will simply “bite.” At such moments, the “petals” on the driven disk suffer greatly - the more “flattened” they become, the closer the time for replacing the “hitch” is. If the discs come into contact smoothly and the driven disc is slowly set in motion, the car starts from a standstill.
AMT Robot
Priora with a robotic transmission was installed only on restyled versions (2013-2018), and the choice of car enthusiasts was not always in favor of the “robot”. But the robotic automatic transmission was developed based on the design of the new manual transmission, so there is nothing to be afraid of - everything is reliable. The computer or, in this case, the “robot” itself controls the engagement and disengagement of the clutch and changes gears itself (except in cases where the driver takes responsibility for manual gear shifting).
A Priora with a “robot” can also bite when starting and changing gears. The reason for this may be either an electronic error or wear of the “clutch” mechanism - if it’s time to change some part, then no matter how much the “robot” wants to smooth out the next peck, it will not be able to do so.
Replacement without removing the gearbox
This process is not too different from the first, as it seems at first glance.
The preparation and tools are the same. However, in this case there is one big advantage - there is no need to move the rather heavy gearbox. This is especially true if one person is responsible for replacing the clutch. In this case, the analysis should begin by removing the left wheel and placing the car on a jack. It is best to do this in a box where there is an inspection hole. In addition to the first points indicated in the first case, it is necessary to remove the air filter, unscrew the corrugation, disconnect the DMVR, and loosen the starter fastenings.
You will have to unscrew the gearbox, but there is no need to touch the CV joints. Since in the process of disconnecting all of the above, the bolts holding the engine will be loosened, you need to place bricks under it so as not to break the hoses. Likewise, you will have to move the gearbox slightly onto the brick stand.
Now the clutch can be changed as described above. As you can see, there is nothing complicated about this.
Standard clutch - article number and price
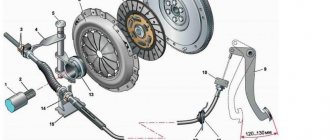
The VAZ 2170 Priora comes from the factory with a clutch manufactured by LUK. Catalog number (article): 21703-1601130-00. You can find it at a price of two thousand rubles, and if you do not need the entire set of the mechanism (not counting the drive mechanism), you can find the parts by catalog numbers:
- Clutch assembly (release bearing): 21703-1601180-10;
- Driven disk: 21703-1601130-00;
- Pressure plate assembly: 21703-1601085-00;
- Bolt: 21080:1601207-00.
The “native” LUK kit is considered “softer” than its analogues and, moreover, comes with a reinforced basket.
Symptoms of a problem
Any component in a car wears out gradually. The sensor, which signals the occurrence of a malfunction, informs the driver that repairs can no longer be postponed. As a rule, the clutch requires adjustment or complete replacement. The driver should not ignore the following phenomena:
- Incomplete engagement or disengagement of the clutch;
- Increased noise when turning on or off;
- Jerks during work.
In each case there is a malfunction that arose due to improper operation or excessive loads. According to statistics, cars driven by young drivers require repairs and unscheduled maintenance more often. The fact is that an unconfident driver unconsciously keeps his foot on the clutch pedal. In this half-on position, the driven disk slips and wears out quickly. Exactly the same as the release bearing. And when the sensor on the panel lights up, it means that some clutch parts need to be adjusted or replaced.
Before starting repairs, it is necessary to conduct a thorough diagnosis of faults. The clutch on the Priora is installed taking into account the fact that the car is equipped with an electronic engine control system.
The sensor, which is installed in the basket, signals the position of the clutch - whether it is engaged or not. If it is faulty, the control system receives a false signal. As a result, the engine runs at high speeds while the gearshift lever is in neutral. Even novice drivers notice this feature. In this case, timely replacement of the faulty sensor is required.
