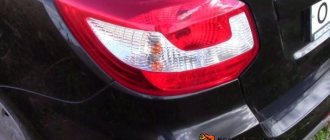
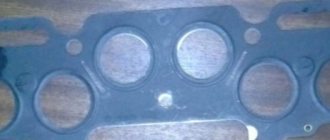
What and how can you change the standard lights?
The easiest way is to change the appearance of your car - replacing the light fixtures with more original ones. The range of flashlights for the VAZ 2114, of course, is not particularly wide, but there is plenty to choose from. And the simple way is because all tuning comes down to “removing the standard ones, installing the purchased ones.” Let's wander around the shops and see what we can find for our VAZ 2114.
Osvar flashlights are the most popular option among car enthusiasts. They are relatively inexpensive and finding them is not a problem. The only thing is that the manufacturer uses ordinary light bulbs in it, but if desired, you can replace them with LED ones yourself. Although for most car owners this is not relevant.
Tail light “Osvar” on VAZ 2114
Skyline style. Also a “lamp” option, but it looks completely different.
Tail light Skyline style for VAZ 2114
ProSport RS-02020. This is already an LED option. True, the light bulbs responsible for the different signals in them are clearly not in their places, which may not please other road users, and the traffic police inspector will definitely not understand you.
Tail light ProSport RS-02020
ProSport RS-02020-T. The same “ProSport” with mixed up signals, but with tinted windows. A real gift to the traffic police!
Tail light ProSport RS-02020 with tinted glass
ProSport RS-07490. Option with light bulbs. Same manufacturer, same misunderstanding - the turn signal is located between the marker and the brake light. You can't make it up on purpose.
Tail light ProSport RS-07490
"Zigzag" 0013L. This LED miracle is offered by manufacturers from Togliatti, the birthplace of the VAZ car. Here at least the signals are more or less in place.
Tail light "Zigzag" 0013L
We'll finish our shopping trip here, although there are still many miracles there. Just watch a short video about a flashlight with red turn signals and move on to the next point.
How to remove tail lights
It's time to figure out how to remove the stock lights to install new ones. To work, you will need an 8 socket wrench with an extension and a Phillips screwdriver. We open the trunk door, use a Phillips screwdriver to dismantle part of the upholstery so that, by bending it, you can gain access to the entire rear part of the lamp.
The upholstery is attached to the body using self-tapping screws
We find 4 nuts around the perimeter of the light fixture and unscrew them with a wrench
The lamp is secured with four nuts
Carefully remove the connector by pulling it towards the central axle of the car. We don’t swing it, we just pull it, trying not to twist it!
Removing the power supply
Pull the light from the outside of the car toward you and remove it.
Now the lamp can be removed
We install the new light fixture in the reverse order.
Causes of breakdowns
The most common reasons for node failure:
- the narrowest point in the entire structure is the elastic board;
- in second place, banal burnout or mechanical damage to light bulbs;
- the third reason is a problem with the fuse or relay;
- oxidation of contacts;
- broken wiring.
First of all, it makes sense to check those elements that do not require removing the entire headlight (for example, fuses, relays). Then check the quality of the connections, the presence of oxidation and the voltage supply level to the illuminator. The last step is to disassemble the taillight, remove and inspect the board.
Why don't FZH work?
There are several reasons why FZHs can fail. Let's try to understand them.
Cause of malfunction
What to do
Replace the burnt out bulb with a new one, check the condition of the contacts
Check, replace if necessary. A fuse can lead to loss of functionality of the entire contact circuit
There is no ground on the board
The board is located under the lamp. Simple repair to fix the problem
The contacts have oxidized and become coated
How to check the functionality of the frog?
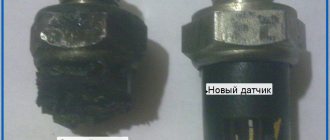
The contacts from the sensor are removed and clamped together, after which the ignition is turned on. If there is light, then you need to replace the sensor. And if not, then the problem is in the circuit, but the frog is fine.
When the reverse lamp does not light up, it is often necessary to replace the old sensor with a new one.
What should be done:
- place the car on the overpass;
- install the handbrake;
- remove protection;
- remove the contacts of the old sensor;
- place the container and remove the frog;
- Unscrew the faulty device and replace it with a new one.
Then let it sit for a while and check the oil in the gearbox. Fill it up to the required level and put the entire structure back together.
Attention, the price of a new sensor is within 250 rubles.
The next option is if the reverse light does not light up on a VAZ 2114, then the problem is in the light bulb. To replace it, you need to disconnect the wiring block, remove the plastic contact panel from the flashlight, while squeezing the side fixing elements.
We rotate the light bulb counterclockwise and, pressing slightly on the socket, remove it. Now we install a new one, check the contacts and put the entire unit back together.
We visually assess the condition of the wiring; if necessary, we strip the wires, check for breaks using the ringing method, and check the contacts on the headlight film.
Why aren't the reverse lights on yet?
A blown fuse is a common cause, which means you need to know exactly where they are located and how they change.
The products are located in the fuse box, which can be found under the steering wheel on the left side. It can be easily removed with just one touch of your hand. There is no need to unscrew anything.
When the reverse light does not light, you need to check the condition of the fuses. How to do this? You can visually look at the fuses and determine the breakdown - the integrity of the middle part.
But the burnt jumper is not always so clearly visible, so you need to turn on the dimensions and, without removing the fuses, check the voltage; if one end is lit and the other is not, the device is faulty.
Attention: when such a breakdown often occurs, you need to check the entire electrical wiring system, which causes such malfunctions in the car.
To replace the product, you don’t need tools, just take tweezers, remove the old unit and install a working one.
Key conclusions and recommendations from professionals
You can find out where the VAZ 2114 reverse sensor is located very simply by looking up at the gearbox, and if the driver cannot get under the car, then the hood opens and thus the condition of the frog is checked.
To completely verify that the brake gearbox is damaged, you need to turn the wheels to the left and look at the gearbox from the driver’s side. There is a protection with contacts inside on the side, remove it, close the contacts on the DZH and turn on the ignition. When everything is in order, a white light appears.
If not, then use a tester to measure the voltage on ground and on the orange wire that comes from the frog. If voltage is present, then we check the flashlight board itself and clean the contacts.
There is also a chance that the contact between the frog and the fuse block has “frozen”; you need to find it and check its condition.
Attention: when everything is normal, but the lights do not light, the reason may be the contact of the lamp, so even when screwing in a new one, you must check its functionality. As the people say, it’s no joke, because a breakdown can be the easiest, but it can lead to a lot of troubles.
This is why the reverse light on the VAZ 2114 does not light up, as you can see, there can be many reasons, and for the motorist it is important to carefully check the integrity of all frog mechanisms, identify the malfunction and repair the functionality of the lighting
This is why the reverse light on the VAZ 2114 does not light up, as you can see, there can be many reasons, and for the motorist it is important to carefully check the integrity of all frog mechanisms, identify the malfunction and repair the functionality of the lighting.
Have a nice journey, good fellow travelers and a smooth road!
Breakdowns
If the rear headlight unit fails, it is often due to a broken bulb from a particular light, or a problem with the fuses.
A rarer type of failure is a broken wiring.
It should be understood that each element of the rear optics plays its own irreplaceable role, therefore it is necessary to maintain the required level of performance of the optics and promptly respond to emerging malfunctions.
Before long trips, be sure to make sure that all the lamps in your car are working properly. In the event of an accident caused by non-functioning taillights, do not count on insurance. She won't act.
Search form
We will talk about modified nines. These lights are much more reliable and beautiful than regular headlights. In some cases, they may even be numbered at the end of the block. VAZ coolant temperature gauge Often, in the event of a voltage drop, it may be necessary to remove and replace the fuses.
Thanks to this, electrical wires can be directly connected to existing electrical circuits.
The luggage compartment has become more spacious and convenient due to the increase in the trunk lid. Instrument lighting switch.
We pay attention to the normal fit of all parts of the housing, the absence of play or the pressed brass contacts dangling in the sockets, we check the threads and the condition of the fastening screws on the terminals. The new heater design provides efficient heating of the interior.
If the procedure is carried out incorrectly, it will create new problems. Windshield wiper relay for VAZ Front and rear headlights are glitchy - Scheme for turning on headlights for VAZ-2113, 2114 and 2115 (Discard relay K 4)
Read more: Snip laying underground cable lines
Ideas for tuning or modification
And finally, a few tuning ideas. One of them is the inclusion of conventional ultra-bright LEDs in a cylindrical housing. The photographs below illustrate the idea quite well and do not require any special explanation. The beauty of such modernization is complete freedom of action and completely new solutions that have no “doubles” on the road.
1
2
3
Algorithm for tuning rear lights using LEDs
Possible result of the work
Instead of individual LEDs, you can use a multi-color LED strip.
In the store you can find ribbon of any color
Of course, you can’t “fashion” anything out of it, but you won’t have to assemble a complex circuit with quenching resistors and mess around with connecting LEDs. I cut off the required piece, and it is ready to connect to the on-board network.
Tuning lights with LED strip
And of course, LED modules.
Tuning with LED modules
Now tinting. The easiest way to do this is with tinting paint. We cover the “back” of the car with newspaper and masking tape. We tint, following the instructions on the bottle.
Tinting the rear lights of VAZ 2114
We wait until the paint dries, if necessary, apply another layer (without fanaticism - the lanterns should shine!). We remove the newspaper and get the result. Obviously, it is not necessary to tint with red (red is just undesirable) color. The glass can simply be darkened.
Tinting result
So you got acquainted with the rear lights of the VAZ 2114 car, learned how to repair them, change light bulbs, and even considered several ideas for tuning these lighting devices.
Tail lights of VAZ 2114. Replacement, diagram, connection
One of the most problematic places in domestic cars is the rear lights of the VAZ 2114. In most cases, the problem lies in low-quality, unreliable rear light circuit boards. As a result, contact with incandescent lamps disappears or is lost over time.
Often the problem is solved by using brute force, by striking the body or base of the lamp. However, such actions do not completely eliminate the problem; periodic failures in the operation of the turn signal, side lights or brake lights occur.
