What should happen as a result?
There are two ways to get navigation in the stock radio: install an altmenu with a navigation program (and void the warranty on the device), or you can install the driver and applications yourself. In the second case, it seems like the guarantee remains. In addition, at any time it will be possible to remove all traces of the modernization. Only the GPS receiver driver will be installed in the radio itself, the file of which can be erased if desired.
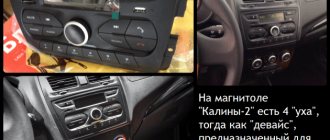
Kalina-2 radio, GPS navigator, Navitel software
Let's say the specified receiver was purchased, the driver for it was downloaded (from the usglobalsat website), and the functionality of the device was checked. The driver for Windows CE 6 ARM has a “cab” extension, you need to write it to a USB drive. You will also need an SD card on which the navigation program will be installed. You need to format the card in FAT32 (this is important). The radio menu will not change, but you will have to launch the program by going to the Windows “Desktop”. Actually, the map image appears on the screen after two or three clicks, but it’s still not very convenient.
Firmware for radio Kalina 2 with navigation
If you have been told that the standard player installed in your Lada Kalina Sport needs firmware, do not be alarmed. And feverishly go over in your memory which of your friends knows how to operate a sewing machine or remember the address of a nearby studio. This of course applies to older people. Modern youth know very well that changing the current operating control system installed in a computerized device, in order to improve the quality of already installed options and connect new ones, is called firmware.
Firmware in iPhone style
Preparing the radio
Connecting a GPS device to a USB port is a proven and so far the only option to get a navigator that will be built into the radio. The software for this “navigator” will consist of two parts – a driver and an application. Let's look at how to install the driver.
While in the main menu, press the "Settings" button and hold it for 10 seconds or more. The LADA screensaver will appear, then the “Desktop” will open. It has a “My Device” icon, corresponding to the “My Computer” folder in standard versions of Windows. Double clicking on the icon will provide access to all connected drives.
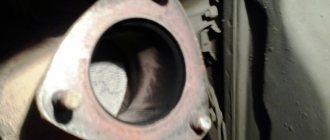
Driver request, virtual keyboard, GPS navigator in the glove compartment
To install the driver, follow these steps:
- When the “Desktop” is open, connect the navigator to the USB port (a window asking for a driver will appear);
- Disconnect the navigator, close the request window, connect the USB drive, go to it through “My Device” and double-click on the cab file icon;
- Click “OK” and wait, and then go to the “Windows” folder and find the usbser.dll file;
- Copy the found dll file to the “Static Store” folder (use the “copy” and “paste” buttons located at the top).
After installing the driver, no messages are displayed when the device is connected to the port. After rebooting the radio, the window will appear again, but we will specify the correct path to the file (Static Store\usbser.dll) once, and nothing else will be needed.
DIY navigation
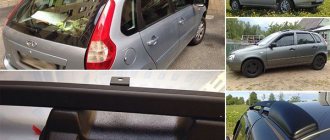
Navigation on Lada Kalina 2
The Lada Kalina 2 radio uses Windows CE 6
To exit the radio shell to the desktop, you need to press the settings button on the touch screen and hold it for a few seconds. The screen will blink and show the Windows desktop.
Return back by double clicking on the Home
Attention! Everything written below is done at your own peril and risk.
Installation description:
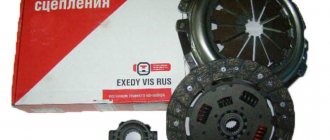
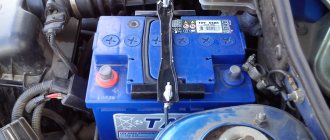
1. Buy a GPS receiver BU-353S4!
GPS receiver Lada Kalina 2 does not have a GPS receiver. Therefore, even when the factory releases firmware with navigation, after installing the firmware we will only get a map, without navigation.
Therefore, we go to aliexpress (or any other convenient place) and buy a USB-GPS receiver BU-353S4. I bought it for $38. here is the link clck.ru/8vtbj
2. Download and install the driver. Copy the installed driver (usbser.dll) to StaticStore. When next prompted by the driver, specify \StaticStore\usbser.dll
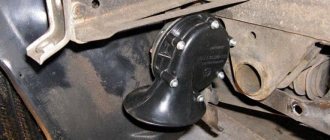
Since after connecting the GPS receiver to the USB connector in the glove compartment, it will ask for a driver, so in advance, while still at home, go to the official website and download the driver for Windows CE: usglobalsat.com/s-172-bu-353-s4-support.aspx
Copy the driver for WinCE 6 ARM to the flash drive (file WINCE6_USBSER.ARM.CAB)
Let's go to the car. Go to the Windows desktop.
To make sure that the radio receiver sees the GPS receiver, connect the GPS receiver and see the driver request
We take out the GPS receiver from the USB, close this window and install the driver - we find the *.cab file recorded on the flash drive and poke it twice. When asked whether to install it in the Windows folder, confirm by clicking OK.
Since the next time you turn on everything unnecessary from the Windows folder (including our installed driver) will be deleted, we go to the Windows folder, find our installed driver there (it’s called USBSER.DLL) and copy it to the StaticStore folder (copy items - insert are in the menu above).
Reconnect GPS to USB. No errors or driver prompts are displayed. We check the operation after a reboot - launch the standard shell by double-clicking on the Home icon. After it has successfully downloaded, we return to the Windows desktop. At this point my system again asked for a driver. But since we have everything prepared, we don’t need to install it again. Simply indicate in the driver request window that appears the path and name of our DLL, which we copied 5 minutes ago: \StaticStore\USBSER.dll. This should help and the driver issue will no longer bother you.
3. Download and burn to an SD flash drive Navitel, patched for com5 speed 4800.
Navitel
On the official Navitel website it is written that the version for Windows CE is not for sale.
This means you can’t buy it, so you’ll have to download it from torrents. Version 5.0 is old and I didn't like it. Version 8.5 did not work for me at the time of writing this document. So I downloaded and am using version 7.5. To be more precise, 7.5.0.202,
downloaded from rutracker: rutracker.org/forum/viewtopic.php?t=4417951
In order for Navitel to see our GPS receiver, it needs to be patched to work with Com5 at a speed of 4800. For this, patches are included. We launch them one by one. First patch on Com5, then at speed 4800
We write Navitel to an SD card. On the same card, write the NavitelContent folder to the root (the map and speedcams are there). We insert the card into the radio, launch Navitel...
And after a few seconds you will hear “Connection with satellites established.”
That's it, you can go.
A short video of how it works
New firmware for Lada Kalina 2, in iOS style
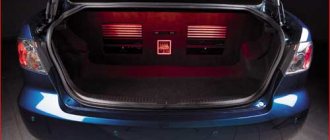
Preparing an SD card with the program
It seems that by the end of this year the City Guide application should appear in AvtoVAZ radios. We, in turn, are considering the option of using another application - Navitel 7.5.0.202. Another suitable version of the program can be considered revision 5.0. Please note that the Navitel application, which can operate under Windows CE, is no longer for sale.
Important note: the Navitel program in its standard version will not be able to see the specified GPS receiver, since it works with the “wrong” hardware ports. Before you can write an application to an SD card, you need to patch it. We install a patch to work with the COM-5 port, then apply another patch that reduces the port speed to 4800 bps.
Navitel 7.5.0.202 in action
By saving the modified Navitel application on the SD card, you can use it. The “Navitel Content” folder contains the two most necessary directories (“Maps” and “Speed Cam”). The application is launched by double-clicking on the exe file icon located in the “Navitel” folder. By the way, no one bothers you to create a shortcut for this file directly in the root directory. Happy setup!
How to update map files
In short, the update looks like this: the drive is installed in the slot while the application is idle. Then click the “Navigation” icon to select one of the items:
- Updating the program and maps;
- Update maps;
- Deleting all previously downloaded maps.
Map files are posted on the website probki.net/vaz. The files of the application itself are also available there. The downloaded archive must be unzipped, then the map files are written to an external drive, creating a CGMAPS subdirectory in the UPDATE directory. The files of the program itself must be placed in the UPDATE directory.
Map update screen
The storage device can be an SD card, the format of which is FAT32. This option is recommended. Happy update!
How to return to the regular menu
On the “Desktop” screen, in addition to the “My Device” icon, there is another interesting icon called “Home”. Double clicking on the “ Home” icon always returns us to the main menu of the VAZ radio. There is no other way. Before returning to the menu, be sure to close the application. You won’t be able to use Navitel’s voice prompts anyway if you turn on the radio, video, or sound.
Let us note another interesting feature of the Navitel program. You can turn on the radio or play music in the main menu, then open the “Desktop” and launch the application. So, in this mode, only music will sound in the speakers, and not voice prompts from the navigator. Maybe in the firmware modified by AvtoVAZ everything will look different. And we note that another tuning option without reinstalling the firmware is connecting a rear view camera. The driver is also installed here, and that’s it.
Technical characteristics of the radio
The standard radio for Lada Kalina 2 from the manufacturer NaviFly is manufactured on a modern technical base, which ensures its high performance and functionality. The Android 8.1 Go operating system is installed - today this is the best solution in car radios, offering literally unlimited customization options.
The head unit of Lada Kalina 2 received the following technical characteristics:
- form factor: 2 din radio;
- touch capacitive IPS display with a resolution of 1024x600 pixels and a diagonal of 7 inches;
- 4-core Cortex TX A9 processor with a clock frequency of 1600Mhz;
- 1Gb DDR3 Samsung RAM and 16Gb internal memory;
- presence of 2 USB ports;
- support for Wi-Fi and Bluetooth 4.0 wireless connections with A2DP/Hands Free with hands-free calling and music playback;
- OBD scanner support for engine ECU diagnostics;
- support for rear view camera with automatic activation;
- support for DVRs with video recording capabilities;
- 4 output channels for speakers with a power of 50 Watts each;
- Dual Zone feature that allows you to play music when you launch and use other applications.
Like the original GU, the Lada Kalina 2 head unit optionally supports control buttons located on the steering wheel. Moreover, it allows you to program the purpose of each button for maximum convenience.
The standard radio for Lada Kalina 2 received a warranty from the manufacturer for a period of 12 months. But given the high build quality and the fact that the main components from top manufacturers Cortex and Samsung are used, we can safely say about the stable and uninterrupted operation of the PG for many years.