Design and operation of the Kalina clutch
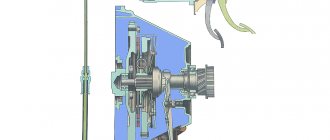
The unit is a dry-type mechanism, single-disc, with a central pressure spring.
Switching off when pressing the pedal is carried out by a cable equipped with a ratchet. This part allows the cable to automatically change length depending on the wear of the disc linings and ensures a constant backlash-free fit of the clutch with the release bearing to the basket. The pressure plate together with a diaphragm-type spring are enclosed in a casing. All together is usually called the clutch basket. Between this mechanism and the flywheel there is a driven disk. Its hub is connected to the gearbox input shaft.
When you press on the pedal, the cable tightens, turning the fork. Its lower bushing is pressed into the clutch housing, the upper bushing is removable. The force when turning the fork is transmitted through the clutch and clutch release bearing to the pressure spring and pressure plate, turning off the mechanism.
When the pedal is released, the clutch must fully transfer the engine torque to the transmission. Pressing the pedal normally completely disconnects it from the engine. Signs of the need to adjust the clutch on Kalina include:
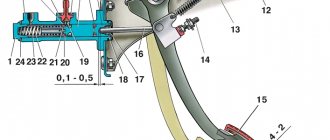
- exceeding the full pedal travel (normally 146 mm from the lowered position to the stop on the floor) - adjustment of the clutch cable is necessary;
- when the pedal is pressed, the gear shift occurs with a grinding or crackling sound - the clutch does not disengage completely;
- when starting the engine, you can hear a howling sound in the crankcase - wear of the release bearing;
- jerking when starting to move indicates insufficient smoothness of clutch engagement;
- When driving in 3-4 gears, when you press the gas, engine speed quickly increases, and acceleration slows down - disc slipping, possibly due to wear on the linings or insufficient cable length.
As a rule, it is necessary to adjust the operation of the clutch after it has been repaired to bring the automatic adjustment mechanism into working condition.
In such cases, the wear compensator may lose some of its functions and cannot cope with adjusting the length of the cable.
Replacing the Priora clutch pedal sensor, photo and video instructions
On the presented Lada Priora, the following problem occurred: when you pressed the clutch pedal while changing gears, noticeable jerks appeared, and the Check Engine light came on on the dashboard. The owner went to a service station, where diagnostics revealed a faulty clutch sensor, or rather a break in its wire. The service offered to replace it, which would involve dismantling the pedal assembly, but they did not have this sensor in stock. On the way to the store, I decided to replace it myself.
What is a clutch sensor used for?
In a car equipped with an electronic gas pedal, the clutch sensor helps the ECU make the correct decision when the car is moving; a smooth start from a place depends on its operation; it eliminates jerks when changing gears. If the sensor is faulty or its wire is broken, it begins to twitch when the speed changes. The sensations are similar to when at first speed we raise the speed to maximum, and then suddenly release the gas pedal.
Mechanism malfunctions
To understand what kind of clutch malfunctions there are on the mechanism side, you need to understand its design. The single-disk mechanism consists of a basket with a drive disk, which is rigidly mounted on the flywheel. The drive disk has the ability to move inside the basket, but it is pressed against the flywheel by a spring diaphragm or cam springs. Between them there is a driven disk with friction linings, which is connected via a spline connection to the gearbox drive shaft. There is also a release bearing, the task of which is to act on the spring of the drive disk due to the force obtained through the drive.
Clutch malfunctions are often associated with deformation or breakage of components. Common ones are:
- wear or destruction of the friction linings of the driven disk;
- breakage of the diaphragm spring petals;
- damage to the driven disk;
- deformation of the drive disk or flywheel working surface;
- release bearing wear.
Symptoms of clutch malfunction
| List of faults | |
| The clutch "drives" | 1. The drive is out of adjustment or malfunctioning 2. Damage to the diaphragm spring 3. Damage to one of the disks or flywheel surface |
| Clutch slipping | 1. The drive is misaligned or malfunctioning 2. Wedging of the release bearing 3. Severe wear of the driven disk linings 4. Damage to the diaphragm spring |
| Increased noise | 1. Misadjustment of the drive or malfunction of its operation 2. Wear of the release bearing |
| Clutch won't disengage | 1. Damage to the cable (mechanical drive) 2. Depressurization of the system or air entering it (hydraulic drive) 3. Failure of sensors, control or actuator (electronic drive) |
| After pressing the clutch the pedal remains in the floor | 1. Jumping off of the return spring of the pedal 2. Jumping off of the return spring of the shift fork 3. Wedging of the release bearing |
| Jerks when moving | 1. Wear or damage to the driven disk linings 2. Deformation of the diaphragm spring 3. Wear of the damper springs 4. Damage to the drive disk |
If any malfunctions occur, you must contact a specialized service station for inspection and possible repairs. Tightening can lead to even more serious consequences, including destruction of the entire clutch mechanism.
Broken driven disc
Clutch design and functionality
The unit belongs to a cohort of mechanisms whose functioning is based on dry friction. The clutch mechanism in this model is single-disc and requires a pressure spring, which is structurally designed as an integral part of the basket. The cable is used to release the clutch. This action is activated when the advising pedal assembly is pressed. The cable transmission has a ratcheting device that allows it to autonomously change its length in accordance with the level of wear of the driven disk linings. This solution allows for a tight fit of the release bearing to the spring petals. Inside the basket there is a driven disk, through which rotation is directly transmitted from the flywheel to the input shaft of the transmission unit.
Pressing the designated pedal causes the cable to tighten, causing the special fork to rotate. Its lower bushing is integrated into the clutch housing. The upper element of the part, which is also presented in the form of a sleeve, is removable. During rotation, the fork, through the clutch and release bearing, acts directly on the petals of the pressure spring, which in turn opens the driven disk from the flywheel. In this way, the process of disengaging the clutch is implemented, which is necessary to ensure the ability to change gear in a mechanical transmission unit.
If the pedal is fully released, the disk tightly adjacent to the flywheel transmits torque to the input transmission shaft to its full extent.
In some cases, deviations from the correct functioning of the clutch assembly are observed. Among the signs characterizing this negative phenomenon are the following:
- Increasing pedal travel when its value exceeds the regulated 146 mm.
- Engaging the gearbox with the clutch pedal fully depressed is accompanied by characteristic grinding sounds of the shafts in the transmission, which indicates incomplete disengagement of the clutch.
- Starting and subsequent operation of the Lada Kalina engine is accompanied by a howling sound coming from the clutch housing (release bearing wear).
- The beginning of movement is characterized by jerks and insufficient clarity of gear switching.
- Moving at 3-4 speeds, the owner presses the accelerator and observes the following picture: the speed of the power plant increases vigorously, and acceleration is accompanied by sluggishness. This indicates clutch “slippage,” that is, a loose fit of the disc to the flywheel, caused by increased wear of the linings or excessive cable tension.
All these signs overwhelmingly hint to the owner that it is necessary to adjust the cable drive. How to adjust the clutch? You should also be inclined to such a procedure after replacing the clutch mechanism, the compensator loses its functionality (lack of the ability to autonomously adjust the length) or the Lada Kalina car has been idle for a long time.
Pre-installation diagnostics
Before buying a new product and installing it to replace a seemingly faulty old sensor, try diagnosing and troubleshooting it yourself. So, on the body of the product there are two special nuts, one on top, the other on the bottom. The top nut adjusts the gap of our sensor. As mentioned earlier, in some cases the gap is set incorrectly, which disrupts the normal movement of the button. Your task is to find and set the optimal gap so that nothing interferes with the operation of the button. After the adjustment work, reset the ECU error, start the car engine and let it run for 15-20 minutes (the error does not register immediately). If the error does not appear, it means that the reason for the incorrect operation of the internal combustion engine is incorrect settings of the Granta brake sensor. Otherwise, you should replace the faulty device with a new, working one.
Replacing the knock sensor
If it requires replacement, then it is necessary to purchase a new device and install it as soon as possible. All car enthusiasts are primarily interested in the price of a new device. It is low and depends on the make of the car and on the country in which the part was manufactured.
You might be interested in this article -
Thus, the knock sensor is a simple device, yet very useful for an electronic control system. It is not difficult to determine its malfunction; you can check it yourself, even in rural areas.
It will also be inexpensive to replace the sensor.
It doesn’t matter whether this is done by a specialist or independently
What is an electronic clutch
Electronic clutch or also known as eCS - Electronic Clutch System is considered a promising development by Bosch. According to the manufacturer, such an electronic clutch brings a manual transmission closer to an automatic transmission. Unlike an automatic transmission, when using the eClutch system, only the clutch operates in automatic mode.
Thanks to the design and operating principle of the electronic clutch, it can be used not only on conventional cars, but also on the manual transmission of hybrid cars. Unfortunately, Bosch is still keeping many of the nuances of how the electronic clutch works secret.
From the name itself we can conclude that the mechanism is easy to use, does not require much effort to change gears and smoothes out the moment of gear engagement as much as possible. Thus, jerks between gears are eliminated.
Clutch system on Kalina
Manufacturing plant
I installed one dry disc clutch with a central pressure spring. The interaction is carried out using a pedal and a cable to it, which is the weak link in this chain. Adjustment is carried out using a ratcheting mechanism (threaded rod and control nut).
Over time, or more precisely, depending on driving style, the linings on the disc wear off and become much thinner. For those who like to hold the clutch at traffic lights or tear it, I want to immediately disappoint you for a long time in this way it will not last. Get ready for renovation
. A ratcheting mechanism will help compensate for the thinness of the disc, with which you can adjust the degree of tension of the clutch cable.
Operating principle and prevention:
The release fork compresses the springs, which are located in the adjustment sleeve, which in turn tightens the tip clamps in the basket. But it should be immediately mentioned that tension is possible up to a certain point, as long as the tolerance of the clutch disc is acceptable, otherwise there will be a break, which will entail replacing the disc. And to do this, you need to drive the car onto an overpass, disconnect the flywheel and gearbox.
You can check the functionality like this:
- By systematically pressing the accelerator pedal, analyze its movement, the presence or absence of noise or squeaks, smoothness and freedom of movement. The presence of the above reasons will be the basis for carrying out repair work;
- Using a ruler, measure the distance from the pedal along the outer contour to the floor. If the distance is more than 14-14.6 cm, then the cable should be slightly tightened;
- The distance to the floor may be a little less, but not more, the free play of the pedal should be no more than 2.5-3.0 cm.
Causes and symptoms of release bearing failure
The reason for the breakdown of this part is uneven loads on it at the moment when the clutch is depressed, and it goes back along with the driven disk. For this reason, holding the clutch pedal for a long time while the gear is engaged is strictly not recommended. In principle, this is a reliable and durable part, and it most often fails among novice motorists.
The most important symptom of bearing wear is the appearance of a slight knocking sound when the clutch pedal is depressed. If the sound appeared in the summer, this is almost a guarantee of future problems, but if it came along with frost, there may be an elementary change in the linear dimensions of the bearing cup due to a drop in temperature outside. The release bearing in most cars has an undeniable advantage - high strength, so even if noise appears, you can afford to do nothing for a while and watch to see if it gets worse.
How to repair and replace the clutch pedal sensor
What is needed to repair or replace the clutch pedal sensor:
- a screwdriver (with a short arm), as well as flat and Phillips bits, with which you will unscrew the screws;
- the device itself;
- a lamp or flashlight so that you can clearly see the work area.
How to replace:
- The car is parked on flat asphalt.
- The front doors are easy to access.
- You need to move the front driver's seat all the way back, then open the hood, disconnect the battery so that there is no short circuit.
- Now you have to climb under the steering column and remove the sensor.
- After this, use a Phillips screwdriver to unscrew the board. It is attached to the bracket with two screws.
- Then you should remove the latch, which is located at the other end of the block.
- Now you need to remove the pad holder.
- After troubleshooting the spring mechanism, you should check the condition of the board fastening. If everything is in order, you can insert the block of the new device into it.
- It is necessary to reassemble the mechanism in reverse order.
As you can see, you can replace the clutch pedal sensor yourself.
Note! Before installing the new sensor, use a multimeter to make sure it is in working order. You will spend a few seconds checking, and you will know for sure that the mechanism is working properly. In most cases, you can repair the sensor without replacing it.
In most cases, you can repair the sensor without replacing it.
First of all, you need to make sure that the limit switch and the pedal pusher are in contact. Otherwise, when it does not press on the limit switch, you should adjust the position of the sensor relative to the pedal.
The next malfunction is that the wires that go to the contacts are broken. It is not difficult to understand that this happened. Manually check how securely they are fixed. If a breakdown is detected, you will need a soldering iron, solder, and rosin. We dismantle the sensor and solder the wires to the contacts. Even a beginner can handle this job.
It turned out that everything is fine with the wires, but the limit switch does not reach the pusher? Most likely, the limit switch has failed or the contacts are faulty. For example, they are oxidized, deformed or broken. You can check the contacts using a multimeter. We connect it to the terminals, look at the change in resistance between them by pressing the limit switch.
If the contacts are oxidized, we clean them so that the device works normally. Did this procedure not help? Then we replace the clutch pedal sensor. Its cost is small; you can purchase the part at a specialized auto store.
➤ Granta clutch sensor - replacement and troubleshooting
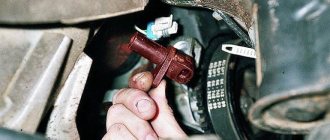
The clutch pedal position sensor on the Lada Grant is fixed on the clutch pedal bracket. To see it, just look under the steering column at the base.
Clutch sensor
Violation of vehicle operating conditions leads to premature wear of the sensor and incorrect engine operation.
Pedal under the steering column
To restore the machine's performance, it is necessary to replace the clutch sensor (hereinafter referred to as DS).
The process is not complicated, but it requires increased attention and precision from the repairman. Do not damage the vehicle's electronic control unit.
Sequence of actions to independently replace the clutch sensor on a Lada Granta car
Necessary tools, materials:
- screwdriver with a short arm, flat and Phillips bits for unscrewing screws;
- new sensor;
- flashlight, other device as additional lighting.
Clutch sensor replacement algorithm:
- We install the machine on a flat platform. We provide unobstructed access to the front doors.
- Move the front driver's seat back all the way. We open the hood, “reset” the battery terminals to avoid a short circuit in the circuit.
- We climb under the steering column and remove the DS (chip).
The chip is fixed
- Use a Phillips screwdriver to unscrew the base – the board. It is fixed to the pedal bracket with two screws.
- Remove the latch; it is located on the opposite end of the sensor block.
- Remove the DS block holder.
Pad holder bolts
- We troubleshoot the spring mechanism and inspect the integrity of the board fastening. If there are no defects or damage, insert the new DS block.
- We assemble the structure in reverse order.
Self-replacement of the clutch pedal position sensor on the Lada Grant is completed.
Note to the driver!!! Before installing a new sensor, check its functionality with a multimeter. The process will take a minute, and you will be confident that the equipment is in good working order.
Malfunctions: symptoms, diagnostics, elimination
| Malfunctions | Diagnostics | Elimination |
| When changing gears the car “stops” | Disconnecting the block with wires, checking for changes after disconnecting the DS | Replacing the DS with a new one, since the structure cannot be repaired |
| Uncharacteristic increase/decrease in engine speed when the clutch is disengaged | Connecting a new, working DS | Replacing the DS with a new one |
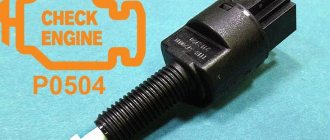
| P0830 "Check Engine" - clutch sensor error on the dashboard | Connecting a new, working DS | Replacing the DS with a new one |
Frequent causes of failure of the clutch sensor on the Lada Grant
Dashboard faults
- defects in vehicle manufacturing;
- short circuit in the circuit;
- damage, abrasion of the cable insulating layer;
- third-party mechanical damage resulting in circuit malfunction;
- overestimated, underestimated clutch pedal height.
Software disabling the clutch sensor on the Lada Grant
After replacing the DS with a new one, reset the error code. This can be done either with a standard on-board computer or with an ELM-327 scanner (version 1.5).
The standard on-board computer does not always remove system errors. For high-quality car prevention and diagnostics, purchase a modification of the ELM-327 scanner.
The process of self-adjusting the clutch on a Lada Granta car
On domestic cars of the Lada Granta family, in addition to the electronic clutch unit, a cable mechanism is installed. One end is fixed at the base of the pedal, the other on the gearbox drive lever.
In addition to the automatic tensioner on the cable, the manufacturer has provided a mechanical nut adjuster.
- We place the car on a flat platform, open the hood, and squeeze the parking brake lever.
- We remove both terminals from the battery to avoid a short circuit in the circuit.
- We remove the adsorber - air flow sensor, block - air filter module.
- On top of the starter in the engine compartment we find the clutch fork.
- Use pliers to pull the tip forward.
- Using a caliper, measure the distance from the fork to the plastic disk - the rim. Ideally, the distance is 27 mm. If there is a discrepancy, we make an adjustment.
- Press the clutch pedal 4-5 times and repeat the measurement for objectivity.
- We measure the free play of the clutch pedal; it should not exceed 146 mm. If the distance is increased or decreased, the cable must be replaced; it is stretched.
Note to the driver!!! We carry out maintenance of the clutch mechanism on a Lada Granta car every 20,000 km.
Technical parameters of the roller: 100 x 60 x 20 mm, weight 0.05 kg.
| Manufacturer | Price, rub.) | Resource (Thousand km) |
| VAZ 11180-1602266-00 cable lead | From 250 | 25 – 35 |
| 11180-1602210-00 cable assembly | From 300 | —/— |
| 21901-1602210-00 cable assembly | From 300 | —/— |
| 1118-3720015-00 DS | From 370 – 450 | —/— |
*prices are current as of October 26, 2018.
Equipment:
- Toad - switch 1118-3720015 – 1 piece;
- Housing 1118-3720024-10 – 1 piece;
Source: https://remont-avtovaz.ru/zamena-datchika-scepleniya-na-lade-grante/
Grants clutch sensor: how to find out if the element is broken and how to replace it?
A color Check Engine indicator is installed on the front panel of the Granta, which notifies the car owner about a breakdown of the clutch sensor.
The element lights up orange or reddish and indicates the need to check the operation of the pedal and its addition. Problems may also be noticed during sudden changes in speed during gear changes. Such phenomena will indicate one of the following breakdowns:
1. Incorrect position of the pedal relative to the floor (the need to adjust its height).
2. Damage to the pedal sensor.
3. Disturbances in the circuit, incorrect closure of contacts.
Some car owners even complain that the clutch pedal on the Grant clicks
So it’s not the pedal that clicks, but the sensor.
In this video you can see the sensor larger (and the play near it)
The alarm can be replaced independently, but the contractor should remember to be extra careful in performing the work and purchasing the correct sensor. There are two types of elements installed on Lada 4X4 and Grant/Kalina/Priora.
When repairing Granta, you will need part number 1118-3720015, so when purchasing you should follow the index from the catalog. It is worth considering that spare parts can not be purchased from all suppliers, so it is better to immediately contact official dealers.
Once a new Lada Granta clutch sensor has been purchased, you can begin replacement. First you need to remove the terminal from the battery for safe repairs.
Next, you will need to remove the wire clamp from the hole on the pedal bracket (it is pulled out of the hole with some force). Then the front panel harness block and the sensor block itself are disconnected. The spring on the bracket supporting the sensor is pryed up and removed from the element.
Unscrew the two screws on the pedal bracket that secure the signaling device. After removing the side support of the sensor, it is removed from the bracket along with the holder plates.
They will need to be reinstalled on the new meter, after which the previously purchased Grant clutch pedal position sensor can be mounted in the reverse order. The work is not difficult, but requires careful removal of both the spring and the holders themselves.
If performed carelessly, the integrity of the structure may be damaged and the purchase of lost or damaged parts may be necessary.
Problems and solutions of Lada Granta
Today we will talk about error P0830 (clutch pedal switch, circuit faulty) in the Lada Granta. The mistake is that when we are driving in second gear, we begin to depress the clutch and shift to third gear, at this moment the engine speed increases. No matter what gear, downshift or upshift, the revs increase. Let's try to figure out the problem.
Raise the steering wheel to the maximum position and also move the seat back. Near the clutch pedal we see the following picture:
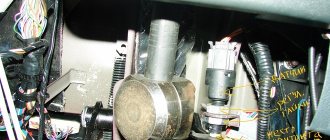
The clutch sensor is marked in red, next to it is a green harness that needs to be disconnected in order to remove the sensor itself and check its functionality. The sensor is also secured with two screws on the side that need to be unscrewed; for these purposes, use a small screwdriver; it will be difficult to get another one in there. We remove the clutch sensor and test it using a multimeter. In our case, “ringing” is carried out but the readings “jump”; in the video you can see the diagnostics of the new sensor, there these readings are stable. After installing a new clutch sensor, the error disappeared, the problem with increased speed when switching gears disappeared.
Video solving the problem with error P0830, replacing the clutch sensor in a Lada Granta:
Backup video on how to solve the problem with the clutch sensor and replace it, error P0830 in Lada Granta:
Well, the widespread computerization of cars has reached such a unit as the clutch. No, the electronic unit does not yet control the process itself, but it already controls this process. To do this, a sensor is installed under the clutch pedal to monitor the progress of the clutch.
Clutch pedal sensor for Granta, Priora, Kalina, Datsun
Dear customers, in order to avoid errors when sending the clutch pedal sensor, please indicate your car model and year of manufacture in the “Comment” line.
Modern cars are equipped with special electronic clutch pedals, which ensure ease of gear shifting and normalization of the transition to a new engine operating mode.
The clutch pedal position sensor is one of the elements of the engine management system with an electronic gas pedal. This sensor provides a more flexible control scheme for engine modes. It simplifies the process of starting to move, eliminates “drops” and jerks of the car when changing gears in the manual transmission, and also allows for a reduction in fuel consumption.
By providing information to the engine controller about the moment the clutch is engaged and disengaged, the clutch pedal position sensor allows it to reduce or increase engine speed at the right moment, as well as adjust the ignition timing.
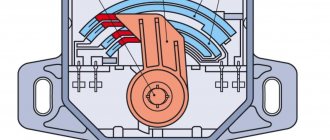
The clutch pedal position sensor is an ordinary limit switch with two positions - “on” and “off”. The circuit consists of a normally open sensor, a clutch pedal position sensor signal circuit, and a sensor ground circuit.
Its normal position is open, that is, it turns on only when the clutch pedal is pressed.
The clutch pedal position sensor kit 1118 –3720015 includes:
— switch 1118-3720015-00 — 1 pc.;
— protective casing 1118-3720024-00 — 1 pc.;
— fastening screw 1-0076690-01 — 2 pcs.;
— spring 1118-1602179-00 — 1 pc.
The clutch pedal position sensor on VAZ cars is installed directly on the clutch pedal bracket; it can be seen by looking under the steering column.
It would seem like a simple sensor, but how much it can complicate the life of an ordinary car owner.
The following symptoms may indicate a malfunction of the clutch pedal position sensor:
— car “pecks” when changing gears;
— a sharp increase or decrease in engine speed when the clutch is disengaged;
— error 0830 “Clutch pedal sensor error” is recorded in the engine controller and the “Check Engine” light in the instrument cluster turns on.
Error 0830 is detected if the engine controller does not receive a signal from the clutch sensor:
— within 2 seconds after changing gear while driving;
— after four gear changes at speeds above 10 km/h and engine speeds above 1000 rpm;
The main reasons for error 0830:
— malfunction of the clutch sensor itself;
— short circuit or open circuit;
- Incorrect clutch pedal height.
There are two types of clutch pedal position sensors for VAZ cars:
For Kalina 2, Granta, Datsun, Kalina and Priora cars with an electronic gas pedal - 1118-3720015-00
For Lada 4×4 cars with electronic gas pedal 21214-3720020-02
They are not interchangeable with each other.
Other articles of the product and its analogues in catalogues: 11180 372001500.
VAZ 1117-1119, VAZ 2170, VAZ 2190, Kalina 2, Datsun, Largus.
Any breakdown is not the end of the world, but a completely solvable problem!
How to independently replace the clutch pedal sensor on a car of the Lada Granta, Kalina 2, Datsun family.
AvtoAzbuka online store, repair costs will be minimal.
Just COMPARE and BE SURE.
Don't forget to share the information you find with your friends and acquaintances, because they may also need it - just click one of the social networking buttons located above.
Functionality, types, design and principle of operation of speed sensors
Speed sensors, regardless of type and design, generate signals that can be sent either directly to the speedometer or to the engine controller and associated electronic control units. In the first case, the sensor is used only to visually determine the speed of the vehicle. In the second case, the data is used by automotive electronics to control the engine and other systems, and the signal to the speedometer is supplied from the controller. On modern vehicles, the second connection method is increasingly used.
Installing a contact speed sensor on the gearbox
Measuring speed using DSA is quite simple. The sensor generates a pulse signal (usually rectangular), in which the pulse repetition rate depends on the speed of rotation of the shaft and, accordingly, on the speed of the vehicle. Most modern sensors produce from 2000 to 25,000 pulses per kilometer, but the most commonly used standard is 6000 pulses per kilometer (for contact sensors - 6 pulses per revolution of its rotor). Thus, measuring speed comes down to the controller counting the repetition rate of pulses received from the DSA per unit time, and converting this value into understandable km/h.
Speed sensors are divided into two large groups:
- Directly driven from the shaft, or contact;
- Contactless.
The first group includes sensors to which torque from the gearbox shaft, axle or transfer case is transmitted through a drive gear and a flexible steel cable (or a short rigid shaft). The sensor contains a device that reads the angular rotation of the shaft and converts it into electrical impulses. Sensors of this type are widely used, since they can be installed instead of a mechanical speedometer drive (which makes it possible to modernize old vehicles without extra costs) and are highly reliable.
Contactless speed sensor master disk
The second group includes sensors that do not have direct contact with the rotating shaft. To measure speed with such sensors, an auxiliary device is installed on the shaft - a drive disk or rotor. Contactless devices are becoming increasingly popular; they are also installed on many current models of domestic cars.
All sensors operate on different physical principles. Contact devices most often use the Hall effect and magnetoresistive effect (MRE), as well as optocouplers (optoelectronic pairs). At the heart of non-contact sensors, the Hall effect is most widely used, and MRE is much less commonly used. The design and operating principle of each type of sensor is described below.
Clutch position sensor in Priora, Kalina - AvtoSovet
DetailsCategory: Repair 02/11/2015
On the latest models of VAZ cars equipped with an electronic gas pedal, a clutch pedal position sensor . Let's consider why it is needed, the principle of operation and possible malfunctions.
Where is the clutch sensor installed?
The clutch pedal position sensor on VAZ is installed directly on the clutch pedal bracket; it can be seen by looking under the steering column.
What is a clutch sensor used for?
The clutch pedal position sensor is one of the elements of the engine management system with an electronic gas pedal. This sensor provides a more flexible control scheme for engine modes. It simplifies the process of starting to move, eliminates “drops” and jerks of the car when changing gears in the manual transmission, and also allows for a reduction in fuel consumption.
By providing information to the engine controller about the moment the clutch is engaged and disengaged, the clutch pedal position sensor allows it to reduce or increase engine speed at the right moment, as well as adjust the ignition timing.
Working principle of the clutch sensor
The clutch pedal position sensor is an ordinary limit switch with two positions - “on” and “off”.
Its normal position is open, that is, it turns on only when the clutch pedal is pressed.
Clutch position sensor malfunctions
The following symptoms may indicate a malfunction of the clutch pedal position sensor
- car "pecks" when changing gears
- a sharp increase or decrease in engine speed when the clutch is disengaged
Also, if a malfunction occurs in the clutch pedal position sensor , error 0830 “Clutch pedal sensor error” is recorded in the engine controller and the “Check Engine” light in the instrument cluster turns on.
Error 0830 is detected if the engine controller does not receive a signal from the clutch sensor:
- within 2 seconds after changing gear while driving
- after four gear changes at speeds above 10 km/h and engine speeds above 1000 rpm
The main reasons for error 0830:
- malfunction of the clutch sensor itself
- short circuit or open circuit
- Incorrect clutch pedal height
We encountered error 0830 while preparing the material “How to get there without a clutch?” We recorded video instructions on how to change gears without a clutch. After several gear changes without disengaging the clutch, the “Check Engine” light came on on the panel, which went out only after several dozen gear changes in normal mode.
Clutch sensor price
On many VAZ cars with an electronic gas pedal there is a connector for this sensor, but there is no sensor itself. It is not clear whether they forget to install it at the factory, or whether careless dealers remove it. The second option is also quite possible, since this sensor is still in great short supply. It costs an average of 350 rubles, but finding it on sale is almost impossible.
of clutch pedal position sensors for VAZ cars:
21214-3720020-02 for Lada 4×4 cars with electronic gas pedal
1118-3720015 for Kalina, Grant and Priora cars with an electronic gas pedal.
They are not interchangeable with each other.
It would seem like a simple sensor, but how much it can complicate the life of an ordinary car owner.
Source:
Clutch sensor on Priora
The popular Priora was designed in the spirit of the times, so the computer even controls such a unit as the clutch.
The electronics do not control the process of turning the clutch on and off, but the clutch sensor on the Priora, installed under the clutch pedal, collects information about the position of the pedal.
This data enters the electronic engine control unit and is used to optimize engine operation depending on the driving mode, and also makes it possible to use cruise control on the car.
How does the electronic engine management system work?
The electronic engine control unit controls most of the vehicle's components, excluding the steering and suspension. ECU programs include presets (tables), according to which optimal operating modes are calculated.
Many sensors installed on the car read information about speed, movement, engine speed, activated mechanisms and units.
Based on the tables, the ECU changes the ignition mode, turns on additional functions and regulates the composition and amount of the air-fuel mixture entering the cylinders.
Functions of the Priora clutch sensor
Data about the current mode of the clutch mechanism is important for engine control. If the clutch is open, it is necessary to reduce the fuel supply and reduce engine speed. It is optimal to do this in accordance with the current speed of the vehicle, without switching to idle mode.
A driver, especially an inexperienced one, may make mistakes, which leads to increased load on the engine and clutch. The on-board computer, based on the readings of the clutch sensor, adjusts the engine operating mode, setting the optimal speed.
Also, the clutch sensor on the Priora, in combination with the speed sensor, allows the computer to evaluate the performance of the unit and signal problems.
Installing a clutch sensor on a Priora allowed:
- reduce fuel consumption;
- make driving easier and more enjoyable;
- control the serviceability of the coupling;
- extend clutch life.
Therefore, the serviceability of the sensor affects the service life of the units, fuel consumption and is extremely important for the correct operation of the ECU.
Operating principle of the Priora clutch sensor
What is a Priora clutch sensor? The operating principle of the device is no different from a simple limit switch. When the pedal is not pressed and the clutch is engaged, the sensor contacts are open. When you press the clutch drive, the limit switch closes, sending a signal to the computer to separate the clutch disc and basket.
The clutch sensor is installed on the pedal mounting assembly so that the tip of the pedal touches the limit switch.
The sensor design is simple and reliable, but this does not exclude the possibility of breakdowns and malfunctions in its operation.
Signs of a malfunction of the Priora clutch sensor
This sensor is connected to the car’s ECU; accordingly, the first sign of a breakdown is the reaction of the control unit in the form of the appearance of a corresponding signal on the dashboard. The nature of movement and operation of the car engine also changes. Symptoms of malfunction are as follows:
- The “Check Engine” light is on;
- when starting to move the car jerks;
- When you press the clutch pedal, the engine speed rises or falls sharply.
The warning lamp on the instrument panel lights up if the computer does not receive a signal from the clutch sensor within 2 seconds from the moment the vehicle starts moving or within 4 seconds when changing speed while the vehicle is moving.
The sensor has a very simple design, so there are few reasons for failure:
- faulty sensor contacts;
- break or short circuit of the wires going to the sensor;
- Incorrect installation of the sensor near the pedal.
Replacing the Priora clutch sensor
To dismantle the Priora clutch sensor, you just need to unscrew the two screws holding it to the clutch pedal. But to get to them, you need to do a lot of operations. Removing the Priora clutch sensor is done as follows:
- remove the windshield wiper blades;
- remove the left casing (jabot);
- remove the rubber casing covering the clutch pedal;
- unscrew a pair of screws securing the clutch sensor;
- remove the clutch sensor.
After removing the sensor, you can replace it with a new one or repair it.
The sensor is installed like this:
- secure the sensor with self-tapping screws;
- install the rubber clutch pedal cover;
- install frill;
- secure the windshield wiper blades.
Repair of the Priora clutch sensor
Often, sensor malfunctions can be easily resolved without replacing it.
First you need to check whether the sensor end reaches the clutch pedal pusher. If the pusher does not press on the limit switch, it is necessary to adjust the position of the sensor relative to the pedal.
Another common failure is a break in the wires going to the sensor contacts. This malfunction can be easily detected by checking that the wires are securely fixed with your fingers. To fix this problem, you need a soldering iron, solder and rosin. When the sensor is removed from the car, soldering wires to its contacts is not difficult.
If the sensor wires are not broken and the limit switch reaches the pusher, the problem may be a faulty sensor contact or a broken limit switch.
They may oxidize, become deformed or break. The functionality of the contacts can be checked using a multimeter.
To do this, you need to connect the device to the sensor terminals and check the change in resistance between them when you press the limit switch.
Oxidized contacts can be cleaned, restoring the functionality of the sensor. If this does not work, it should be replaced. The price of this part is low, and you can buy it at most auto stores.
Source:
Oil pressure sensor for Lada Granta
The oil pressure sensor should indicate the level of oil pressure in the engine. In the event of a drop in oil pressure, the sensor reports the incident to the BC, after which this data will be reflected on the BC or on the dashboard screen.
The principle of operation of this part is simple - the measuring membrane located inside it bends depending on the oil pressure, thereby closing or opening the contacts. A drop in the oil level in the engine causes the contacts to open, after which the warning lamp lights up.
Lada Granta error 0830 clutch pedal position sensor
The DDM includes three components: a housing, a measuring membrane and a transmitting element. The sensor is located behind the cylinder head, next to the timing belt guard.
If you suspect a malfunction of the oil pressure sensor on the Grant, you need to check the circuit going from it to the warning lamp. The test involves disconnecting the sensor terminal, which must then be placed against the engine. If everything is normal with the circuit, the lamp will stop lighting; if this does not happen, it means there has been a break or the circuit has been damaged.
Clutch sensor on Priora
The popular Priora was designed in the spirit of the times, so the computer even controls such a unit as the clutch. The electronics do not control the process of turning the clutch on and off, but the clutch sensor on the Priora, installed under the clutch pedal, collects information about the position of the pedal. This data enters the electronic engine control unit and is used to optimize engine operation depending on the driving mode, and also makes it possible to use cruise control on the car.
