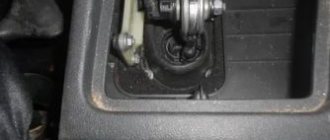
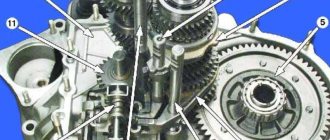
On modern cars there is no gear shift lever at all. The VAZ 2109 rocker mechanism mechanically transmits force to the gearbox actuator, and on modern cars even the manual transmission is controlled by a selector - a joystick. Its sensors transmit signals to the electronic control unit, and it, taking into account the readings of other sensors, generates commands to the actuators.
Is it possible to independently manufacture a short-stroke rocker?
Despite the fact that the cost of a short-stroke rocker is not so high, many people prefer to make and install it with their own hands, which, in general, is not so difficult to do. You will need very little to get the job done:
- a piece of pipe having a diameter of exactly 15 mm;
- the gear shift knob from the car for which the rocker is made;
- ball nut;
- backstage repair kit with axle and bushing;
- cardan from the steering mechanism.
The work itself on making a short-stroke link takes about two hours. The ball from the gear shift lever is cut off, its lower edge is adjusted so that a pipe can be installed, which will have to be properly welded. A nut is welded to the lower edge of the pipe and a ball nut is installed. After this, the cardan can be mounted to the gearshift lever.
Perhaps the whole process will seem somewhat difficult to some, but if it takes place under the “supervision” of an experienced mechanic/car mechanic, the success of the endeavor is guaranteed. It is possible to turn a car's standard rocker into a short-stroke one without the need to dismantle it. To do this, you will need to lift the fasteners of the “piece of iron” that extends from the gearbox to the shift lever itself. This is not to say that this procedure will make gear shifting truly sporty, but the free play of the lever will be somewhat reduced.
Reasons for replacement
There are several situations when the owner of a VAZ 2109 has or wants to get into the design of the gearbox and specifically work with the rocker:
- Oil is leaking due to a damaged rocker seal. It must be replaced;
- The old drawstring was out of order;
- I would like to exchange the long-stroke for a short-stroke in view of its advantages.
Now to the question of when replacing or repairing the backstage is a necessary measure.
- The backlash of the gearbox selector has increased significantly.
- Gears change with difficulty, and when changing speed, extraneous sounds appear.
- It is possible to change gears, but with a lot of effort.
- Speeds change incorrectly. Instead of one, a completely different one turns on.
- It is impossible to turn on all or part of the gears at all.
Even if the resulting play is still insignificant, it is advisable to immediately begin repairs or completely change the drawstring.
Replacing the oil seal
If you find that the oil in the gearbox is gradually disappearing, you can suspect the rocker seal. There is nothing else left to do but change the element.
- First, buy a new shift rod seal. It costs about 70-100 rubles.
- Drain the oil from the box, having prepared a clean container in advance. This is in case you refill the same oil. Although this is an excellent reason for you to change the transmission lubricant at the same time.
- To make sure the oil flows out better, first unscrew the filler plug or remove the speedometer gear. After draining the oil, screw the cap back on.
- We climb under the car and disconnect the fasteners of the gearbox lever driveshaft.
- Pull the boot off the cardan, unscrew the bolts securing it to the gearshift rod. Problematic fasteners that you will have to tinker with.
- After removing the cardan shaft, remove the rod boot.
- We remove the damaged oil seal using an awl or suitable available tools. The main thing here is the stock itself.
- We install a new one in place of the old oil seal and press it with a tube of the appropriate diameter.
- Put the boot back in place and rotate the driveshaft.
- Please note that the bolt securing the cardan to the rod is an adjustment bolt. Therefore, screw it in exactly the same way as before dismantling. Otherwise, some speeds may not turn on.
Oil seal
After the work done, do not forget to check the result.
Replacing the cardan
Practice shows that if problems arise with the slide, it is not at all necessary to completely change it.
Kardanchik
The instructions for replacing the cardan are as follows.
- Using two 13mm spanners, unscrew the clamp that relates to the speed switch drive rod.
- Pull the boot off with a screwdriver, moving towards the box. If you want, remove it completely. So it definitely won’t interfere with the repair process.
- Using a 10mm wrench, unscrew the fixing bolt on the cardan.
- Apply several gentle, not strong blows with a hammer to knock the cardholder off the shaft. Remove the boot to the side if you have not done so before.
- We replace the old cardan with a part from Kalina. It is more reliable, efficient and durable.
- For reassembly you will need the help of a friend. Do not rush to tighten the clamp immediately at the end.
- The assistant will set the position of the gearshift lever at the optimal points from inside the cabin. First you need to catch the center, then move the lever a little to the right while you tighten the clamps from below.
- Check if the gears engage well. If yes, then we continue assembling the unit and check the updated gearbox under real road conditions.
The experience of VAZ 2109 owners shows that when there are problems with the rocker, the essence often lies in an unsuccessful factory cardan. By replacing it with an analogue from Kalina, you will be able to get rid of discomfort and continue to confidently operate your car. By replacing the cardan shaft, the design of the gearbox will improve significantly.
Gear shift drive rocker from Priora on VAZ 2110
| After the start of production of the Priora, the plant constantly refined the design of the car. So, starting around 2011, AvtoVAZ began equipping cars with a new type of gear shift drive. Thus, the Priora got its own gear knob (and not like on the “ten”), a rocker, a lever axis and other elements of the shift drive. Let's figure out what this modernization of the Priora gave and why this design is installed on the VAZ 2110. |
What are the scenes in a car?
| 1 | Gear shift knob cover | 21700-1703124-00 |
| 2 | Lever | 21700-1703088-00 |
| 4 | Hinge bushing | 21700-1703226-00 |
| 5 | Thrust washer | 21700-1703371-00 |
| 17 | Control drive assembly | 21700-1703010-00 |
| 18 | Lever arm | 21700-1703082-00 |
| 19 | 21700-1703219-00 | Lever axis |
- No vibrations on the gearshift knob;
- New design of the gear knob with a gray insert to match the interior style.
- Owners who have installed new parts notice a gap between parts 17 and 20. The metal disks 16 are not pressed against the spacers 16 and the lever 20 tightly enough due to the bushing 18. The problem can be solved by shortening the bushing by 1-2 mm.
- Vibrations on the gearshift knob become less, but they do not disappear completely. They say that only cable shifters have no vibrations, but even there there is a rattling of the gearshift knob.
What feedback can you give about the new design of the gear shift drive? Does it make sense to modernize the design or sufficiently modify the existing one (for example, to get rid of the rattling of the gearshift knob, you can install a backlash-free universal joint and a fluoroplastic bushing)? By the way, look at other modifications of the VAZ 2110 in Priora.
| Is it worth installing an N/O shift drive from a Priora on a VAZ 2110? |
How to replace the oil seal
If you detect an oil leak from the gearbox, carefully inspect the crankcase.
The leak will reveal itself. Lubricant usually leaks out through the CV joint seals and rocker panels. In the latter case, to replace you will need to perform a number of actions:
- Purchase a new VAZ-2109 gearbox seal. Its price is about 100 rubles.
- Drain the oil completely from the gearbox by unscrewing the plug from the bottom using the key “17”. If necessary, you can replace the lubricant later. It is recommended to pull out the upper dipstick to facilitate oil drainage.
- Disconnect the cardan from the rocker arm.
- Remove the boot, use a 10mm wrench to unscrew the bolt securing it to the gearbox rod.
- Using an awl or a thin screwdriver, remove the old oil seal. Inspect it for damage.
- Install the new oil seal using a pipe or large washer to press in.
After replacement, install the boot. Assess the condition of the cardan: if it has too much play, it will need replacement. After carrying out all the work, be sure to check that the speeds are turned on correctly.
The work on installing a short-stroke rocker on the Lada Priora takes place in several stages
Lada Kalina hatchback Sport Logbook Replacing handbrake cables on the Luca ZTD
The decorative cover from the car gearbox lever and the knob are removed. Moreover, the knob is not attached to the lever in any way; it just needs to be pulled with some force. Remove the PP gearbox lever rod from the propeller shaft, to do this, first loosen the clamp using a key set to “13”. Next, you need to release the lever, having first released the locking ball (blocks the engagement of reverse gear). To do this, remove the locking ring (when removing, under no circumstances should you pull up on the lever). Remove the retaining ring and lever with ball and spring inserted into the plastic housing. The lever and rod are removed through the vehicle interior. If you wish, you can disconnect the lever from the rod for convenience, but this is not at all necessary. In order to remove the cardan, first pull off the rubber boot, after which the fastening bolt on the left of the cardan is unscrewed with a “10” key. We replace the removed Priora driveshaft with Kalina's driveshaft. Kalina's cardan has a longer rod, which must be shortened taking into account the type of short-stroke rocker being installed. In some cases, the cardan shaft may not go in completely, which will cause the gearbox lever to shift towards the handbrake. When shortening, about 1-2 cm is sawed off. Before installing a new cardan, lubricate it from the inside with lithol
The bolt, which has a cone shape, is easy to screw in; it is important not to overtighten. Next (preferably with someone's help) install the rod. The rod is also installed through the interior: one holds it in the cabin by the elastic band, while the second one carefully pulls it through. Reassembly sequence: - Place the rod on the rod of the new cardan. Assemble the reverse gear locking mechanism, lubricate the ball with lithol. Adjust the gear lever. Tighten the clamp on the rod. Important: Please note that if you start by assembling the reverse gear locking mechanism, then you may not be able to put the rod on the rod of the new cardan. This problem can be solved by shortening the cardan. Do not forget to put the rubber boot on the cardan.
Adjust the reverse gear locking mechanism
This is due to the fact that the link is adjusted, the locking mechanism may not coincide with the plate it clings to. To do this, the plate is removed and the engagement is painstakingly adjusted. The plate mounting bracket has a cutout into which the mechanism clings. Using sandpaper or a file, it is necessary to adjust and refine the hook for free engagement. Put the cover back on the gearbox and knob.
Also read with this article:
DIY guide for replacing spark plugs on a VAZ Lada Priora
We change the steering tips of Lada Priora
Replacing the air filter Lada Priora
Changing the filter and oil in the Lada Priora engine
Backstage chattered 2109
#1 Oracle
Users 8 posts
- City: St. Petersburg
- Car: VAZ-2109 1997 carburetor 24x24, gearbox 18-4.3
The curtain began to dangle. At first I thought - well, it’s a bummer, of course it’s a bummer, but what can you do. But then I noticed that the handle began to dangle a little more and then even more. It got so bad that it was impossible to engage reverse gear. I removed the console. The rear one started to turn on. But then she already ran into the gray. He began to move the seat away to turn it on. After a few days, namely yesterday, even with the sedukha removed, it stopped turning on.
I’m a moron, I know I should have climbed onto the overpass right away, but as always there was no time, well, there really was no time! Well, okay, that's not the question. I'm sinning, of course, on the cardan. But maybe you have other options? Just to climb an overpass alone, you need to be prepared with spare parts, because from the overpass to the nearest store is like cancer to China.
#2 shnappi
Users
127 messages
- City: Yubileiny
- Interests: cars
- Auto: korchukha
clamp on the cardan, right?
well, or the platform under the gearshift lever, there is a plastic clamping mechanism, it may have broken off
#3 Oracle
Users 8 posts
- City: St. Petersburg
- Car: VAZ-2109 1997 carburetor 24x24, gearbox 18-4.3
well, or the platform under the gearshift lever, there is a plastic clamping mechanism, it may have broken off
Of course, I don’t remember the last state that remained in my memory, but I’ll probably buy it just in case.
The plastic “holder” is in order, the ball stands without any play.
#4 shnappi
Users
127 messages
- City: Yubileiny
- Interests: cars
- Auto: korchukha
The plastic “holder” is in order, the ball stands without any play.
the plastic “holder” is what I was talking about. look at the clamp, and if not, then what about the choice of gear mechanism?!
#5 bozzo
Users
14 messages
- City Novosibirsk
- Car: Taz 2108
#6 Woolif
Users
173 messages
- City: Tot-ge
- Auto: Ik-vach
It’s better to inspect everything and immediately purchase it, right down to the nuts.
There is an assumption, if any, that the rubber bands on the stabilizer rod could have worn out.
The handle will dangle from side to side and up and down.
Do-it-yourself tuning of a VAZ 2109, manufacturing and installation of a short-distance rocker on a VAZ 2109
Lada 2101 Logbook Repair of master and slave cylinders of clutch VAZ 21011
The short-throw rocker is quite popular among car enthusiasts. This modern tuning is, first of all, good because, thanks to its size, it allows you to reduce the travel of the gearbox lever when changing gears. At the same time, gear shifting becomes much clearer.
The result of installing a short-stroke rocker gives an excellent result: clearly, quickly, pleasantly. But there are also two disadvantages: the price of a new rocker and the increased effort required when changing gears. Today, a short-throw rocker for the VAZ 2109, like for other cars, can be purchased at almost any auto store.
Moreover, the rather steep price does not stop car owners - many prefer to overpay once, but then enjoy the ride. In principle, the short-throw rocker in its design is not very different from the standard one, and after carefully studying its essence, making a short-throw rocker with your own hands will not be difficult. Moreover, this will take no more than half an hour.
Diagram of the operating principle of the VAZ 2109 short-stroke rocker
Let's look at the diagram. The OF points indicate the gearshift lever in neutral. To engage the gear, you need to move the rod (the point of attachment of the rod to the lever - point B) to the distance AB.
In this case, the knob of the gear shift lever (point F) will travel a distance FE and move to point E. Our task is to reduce this distance of movement of the lever handle. To do this, the lever OF is increased in length to point H. This is done in the place under the hinge by the length BD.
Since the PP box remains the same, the distance by which the hinge moves remains the same: AB = CD. Judging by the diagram, distance FE is much less than distance HG, which means a decrease in the distance of movement of the lever handle.
Now you don’t need to search around the cabin, both for the gear knob and then for the gear itself. Now about manufacturing and installation. You will need:
a welding machine, a grinder with a cutting wheel (or a hacksaw for metal), two metal fragments for extending the lever, a cardan from Kalina.
The work on installing a short-throw rocker on a VAZ 2109 takes place in several stages
Prepare a “Kalinovsky” cardan.
Remove the standard rocker from the vehicle.
Use a grinder to make cuts in two places.
Next, two fragments of the required dimensions are installed and welded: a piece of pipe and a piece of sheet metal. The short-stroke link is ready. Before installing it in place in the car, the rocker must be sanded and painted. When installing, adjust the position of the gear shift lever. By installing a short-throw rocker on your VAZ 2109, you will get convenience and comfort with your own hands and at minimal cost.
Other interesting materials:
Comparison of short and long stroke
Car enthusiasts describe the difference in options as fantastic. The renovation dramatically improves ergonomics. The amplitude of movements of the gear shift knob decreases by two to three times, but the force on its tip increases. The increase is quite acceptable, since gear shifting occurs in an unloaded state with the clutch depressed and does not require any serious effort.
Some experts believe that an increase in the shoulder leads to an increase in forces on the gearbox rods and to additional wear on the gearbox. There is no statistical confirmation of this point of view yet. Unfortunately, it is not possible to order a short-stroke configuration from the factory. You must install it yourself at your own risk. AvtoVAZ does not approve of such changes in the design of the Nine.
Independent modernization of the design associated with welding the levers lengthens them, and the height of the gearshift knob above the tunnel increases by about 5 cm. Such alteration requires welding work and the involvement of an experienced specialist, for whom cutting the levers using a grinder, installing a pipe and a strip of the appropriate section , and also welding the levers is not difficult.
The adjustment changes the ergonomics, but due to the reduction in the strokes of the shift knob, it is not perceived as a deterioration.
Adjusting and installing a short-stroke rocker on a Priora
- VAZ 2110
- VAZ 2114
- Lada Priora
- Video publications
- VAZ tuning photo stream
- Operation and repair manuals
Tuning does not always mean installing a new body kit or shortening the Priora springs. Sometimes modernization helps improve driving comfort. An excellent example would be a short-throw rocker. VAZ owners know the “features” of the gear shift lever (GSL), which is not so easy to direct to the desired gear. The short-throw rocker on the Priora solves this problem, but we will tell you how to install it on the Priora and adjust it correctly.
The instructions in our material are also relevant for motorists who want to know how to repair and replace a conventional rocker. The instructions describe in detail the process of dismantling and adjustment, which is carried out for a factory part according to exactly the same principle.
Principle of operation
Study the diagram below to understand how the short throw rocker works. The lever is installed in the neutral position, here it is indicated by the points “O” and “F”. To start the transmission, you need to move the rod - it will connect to the control gear at point “B” - at point “A”. After this, the handle will move to point “E”. Repairs and subsequent replacements are carried out in order to reduce the distance.
This can be done if the lever extends to point “H”. This move will increase the distance. On the diagram, "A" and "B" will become points "C" and "D". Replacing the standard rocker with a short-stroke one allows you to reduce the movement of the handle. We've sorted out the theory, now we can start the repairs.
Replacing the gearbox slide
First, you should decide whether you will buy a ready-made short-stroke part or make it yourself. For Lada Priora drivers who have not upgraded components, we recommend choosing the first option. The instruction will be carried out taking into account modifications.
For work we will need:
- Two metal plates.
- Kardanchik from Kalina.
- Welding machine.
- A set of keys, including spanners.
- A grinder with a cutting wheel; alternatively, you can use a hacksaw.
Short walker
Many people are still wondering whether it is worth changing their standard factory long-stroke linkage to a short-stroke one.
Make your decision purely on the basis of individual reflections and do not “be fooled” by statements regarding a significant increase in dynamics with the transition to a short-stroke.
The real difference between short-stroke and long-stroke is shown in the table.
Draw your own conclusions from here - do you need such a drawstring or not. There is nothing complicated in terms of replacement. The only question is the purchase.
Is the shift rod seal leaking? How to replace the rocker seal?
Today we will figure out how to change the oil seal with our own hands and we will be able to save N amount of money. There are only two ways to replace the rocker seal of the VAZ 2108, 2109, 21099, 2113, 2114, 2115. The first is to replace the rocker seal in the inspection hole by knocking out the bushing along with the seal. The second method does not require an inspection hole, but will require you to have a certain manual dexterity, body flexibility and the presence of one (two) long self-tapping screws.
We will need: - two 13mm wrenches, - a 10mm wrench, - a wrench or screwdriver for knocking out the oil seal sleeve, - a small hammer, - a 22mm socket, - silicone sealant.
Spare parts: – gear shift rod oil seal – cardan shaft boot
Let's start replacing!
Using two 13mm wrenches, we loosen the clamp of the transmission control rod (the connection between the rod and the driveshaft can be marked in advance, so as not to have to deal with regulating the gear shift later) and disconnect the rod from the driveshaft. If it doesn’t unscrew well, spray everything with WD-40.
Pull the boot back and use a 10mm wrench to unscrew the bolt securing the cardan to the gearshift rod. Remove the cardan and boot. Using a screwdriver, knock out the bushing from the gearbox.
Using the same screwdriver, we knock the oil seal out of the bushing and with a 22mm head, press the oil seal in until it stops. Lubricate the bushing with sealant and press it into the gearbox with gentle hammer blows.
The process of replacing the gearbox rocker
Dismantling the old rod
First you need to loosen the clamp on the main rod and remove the hinge from it. To do this, use a 13mm wrench. Next, remove the boot and, using a 10mm wrench, unscrew the bolt on the desired cardan. Usually it is fixed almost tightly, so here you will need a hammer to loosen it a little with gentle blows. By the way, you can immediately check the condition of the oil seal and, in case of any defects, replace it with a new one.
New drawstring and cord from Kalina
Installation of a modified backstage
Having removed the old cardan, you can begin installing the new one. To do this, you must first put on the boot. Next, we place a new cardan on the gear selector rod and secure it with a fixing bolt. Be sure to make sure that the bolt fits into the special recess on the rod. Also, do not forget to apply thread locker to the bot so that it does not unscrew due to vibration.
The next step is to put the drive rod on the rod. For some models, the stem from Kalina will have to be shortened by about 1.5 cm.
Adjustment
Next, you must carefully adjust the position of the lever so that it is centered with a slight offset to the right. Here we will need an assistant who will have to monitor the placement of the lever in the cabin. After installation is complete, tighten the clamp, while an assistant must hold the lever from moving.
