What is needed to install a new pump on a car?
Alas, many cars, regardless of the manufacturer, do not withstand any criticism in the harsh Russian conditions in matters of interior heat supply. Simply put, the performance of the stove does not live up to the expectations placed on it, and in the car, even with a big minus outside, it is simply cold. But it turns out that everything can be fixed, and with our own hands. The main thing is to have a head on your shoulders and instructions for use.
Modernizing a car's heating system involves installing an additional electric pump. Let's look at the example of the tenth VAZ model, since most often the owners of these cars complain about the lack of sufficient heat in their cars, especially when the engine is idling. To carry out the operation you need:
1. Electric pump from Gazelle. It is this model that is better suited to this role of an additional heat pump into the cabin. It is a simple centrifugal pump in which the fluid flow is rejected from the center to the periphery by means of blades.
2. Relay. It is best to take the starter or ignition relay, where the contacts are best open.
3. Small pieces of aluminum and reinforced hose.
4. Coolant in a volume of at least two liters.
5. Clamps, six pieces are enough.
Benefits of installing additional equipment
Installing another pump in a VAZ car will help increase the benefit of the stove at idle speed. If warm air comes from the deflectors, and hot air when moving, this means that there is poor circulation of antifreeze in the system. Installing an additional part will allow the antifreeze to move more actively through the system, which will allow you to get hot air, regardless of whether the car is driving or standing.
It is interesting to note that this is not just another guess from domestic car owners. The installation of pumps is actively used by such auto giants as BMW, Mercedes, etc.
Pump installation process
Before starting work, cool the engine naturally. Then drain the coolant into a clean container. We will need it later, so we have to worry about its cleanliness.
After this procedure, take a new pump and, on the side where the impeller is located, unscrew the four screws. The gasket made of rubber material, which is found in this place, is lubricated with conventional sealant. Next, we reassemble the pump, but instead of the removed screws, we install elongated thin bolts under the nuts. Only this approach ensures the best sealing of the connection.
The next step is to determine where to install the additional electric pump. There are several possibilities for this:
— on the washer reservoir mounting stud;
— on a pin near the battery;
— on the mounts of the standard Shumka, located on the engine shield.
Usually, preference is given to the standard approach, which is described in the instructions included with the electric pump, that is, the second option. Therefore, the pump must be positioned in such a way that its horizontal pipe faces the block, for which the iron fastening clamp must be loosened.
The next step, after installing the pump in the selected position, is installing the hoses. To do this, remove them from the stove and from the tube coming out from under the manifold. Next, take a reinforced hose of sufficient length and try it on in place. The main thing is that it reaches from the collector brass tube to the pump tube without kinks or stress.
To attach it to the tube from under the manifold, you first need to install an adapter corner on it (to prevent the hose from bending) with a small piece of hose (at least 10 cm); we fasten the structure with clamps (4 pieces are required).
The process of connecting the pump to the hose from the stove is much easier, since it does not require the installation of adapters; you just need to pull out the required size and make the connection. Also secure with clamps (2 pcs.). In order to finally secure everything, it is recommended to put an aluminum corrugated pipe on the installed hoses in the area of the exhaust manifold so that the hot air does not melt the hoses. We finally secure everything and move on to connecting the electrics.
When installing the pump, the ground wire of the winding must be grounded, the power wire of the relay is connected to the pump wiring, the positive wire from the relay is passed through a fuse that is connected to the battery positive. The control from the plus relay is pulled to the start button in the interior along with the battery plus. The button in the cabin is placed in any convenient place.
The final stage is checking the pump in action. To do this, you need to return the antifreeze to its homeland, and if necessary, add more, start the engine and wait a little while the engine warms up. Then use the button to start the additional pump.
It would seem that it’s not the season to talk about the pump. But, as they say, prepare your sleigh in the summer. Moreover, there is a difference between poking around under the hood in the sun in the summer and draining the coolant, or during the first frosts. By the way, I managed to dig deeper in the cold, but first things first.
There are a whole bunch of descriptions of installing an additional pump, there is something to compare with, if anything. Plus there is always a choice of what to follow. I will not make a holivar about the need or not need for this modification. We will assume that the person reading this entry himself came to the conclusion that he would install a pump in his car. I will describe my experience, the difficulties I encountered and their solutions.
The purpose and general design of the pump in the Lada Priora car
An auto water pump (VP) or pump is structurally included in the liquid cooling system (LCS) of a modern car and is its key element. The main function of this part is to ensure intensive circulation of coolant (coolant) through the engine's fluid circulation system.
Thanks to this constant movement, the temperature of the liquid decreases and its ability to cool other parts and systems of the car is restored. As a rule, the water pump on a car engine is structurally located in front of the cylinder block. Its drive is carried out from the crankshaft through a special wedge-shaped belt or from the gas distribution mechanism (timing) using a toothed belt.
A special toothed belt ensures the functioning of the car's water pump.
General pump structure
The Lada-Priora pump is a fairly simple mechanical unit, which consists of several main parts.
The pump design consists of several elements, one of which is the obligatory gasket
The main components of an engine water pump are:
- product body;
- a shaft with an impeller and a special self-regulating oil seal, thanks to which the coolant is securely retained in the structure during operation;
- pump shaft bearing on which the pump shaft is mounted;
- drive pulley;
- radiator fan (this part can be attached to the pump drive or in a separate electric drive version, without any connection with the car’s water pump);
- gasket made of cardboard or special material.
Operating principle of the device
The operation of the coolant pump is as follows:
- with the engine running, the coolant that has cooled in the car radiator moves to the pump (in particular, to its impeller);
- the gaps between its blades are completely filled with coolant;
- due to the action of centrifugal force, the coolant is thrown by the impeller into different directions of the internal cavity of the HV;
- through the technological hole, the liquid goes into the channels of the cooling jacket of the motor elements;
- constant circulation of the cooling medium in the liquid cooling system is ensured.
Design Features
To prevent possible leakage, the pump body is installed on the engine cylinder block through a special gasket (for example, made of cardboard). The cooling fan, which is sometimes structurally located on the car pump pulley and driven simultaneously with it, is usually made of metal or durable plastic. To reduce operating noise, the blades of the structure are located at certain angles, in an X-shaped position, which corresponds to 110/70 degrees.
In order to reduce the power required to drive the fan, designers use a special electromagnetic clutch. This device can turn off the fan when the coolant temperature drops to a level of 78–85 degrees Celsius. In this way, the operation of the engine cooling system is optimized, and the noise level during operation of the unit is also reduced.
Pump installation
The gazelle pump will still have to be modernized, so initially we will consider a simpler option, namely, how to install an additional pump on a VAZ 2114 from a German brand.
When all the necessary spare parts have been purchased, the algorithm of actions is as follows:
- We assemble the above-mentioned structure from two hoses and the pump itself.
- In fact, our unit will have to act as a drain for antifreeze, so it must be assembled with high quality.
- We put the car on the handbrake and drain the coolant (it’s also better to disconnect the battery).
- We find two hoses from the stove according to the diagram, remove the right hose.
- Instead of the removed hose, we mount the structure we assembled, and attach the pump itself to the manual transmission housing. It is best to use a screw that secures the ground wire.
- We fill the system with antifreeze, after which the car can be used.
see also
The version with the Gazelle pump is somewhat different from the previous one, but the principles are similar. First, such a pump must be upgraded. It is disassembled and coated with sealant; if this is not done, antifreeze will ooze out of all the holes. When reassembling, it is better to replace standard screws with high-quality screws. After good treatment, the mechanism is left for two days, during which it will dry and be ready for installation.
By the way, you can connect the knock sensor plug to the pump connector.
The indisputable advantage of the Gazelle pump is that it does not need to be connected, you can simply assemble it and everything will work as before, unless of course you want to install a control button. In addition to the need for modernization, you will have to work extra hard during installation. It needs to be installed in the upper corner of the manual transmission, therefore without additional. parts from the VAZ 2101 are indispensable.
Cooling system
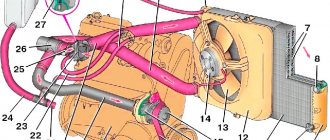
According to the standard cooling system diagram, we will embed our additional pump into hose No. 19, which is connected to part No. 20 (supply pipe).
Please note that we are not interested in supply hose No. 21, although it is closest to the thermostat (No. 29). If you look under the car and look at the partition, we will see two hoses; we need the right one (more precisely, the one closest to the right wheel). It will need to be replaced with a prefabricated part consisting of this hose (article 21083-8101010-01), a hose connecting to pipe No. 20 (article 2101-8101204) and the electric pump itself (additional pump for VAZ 2114), which you will purchase.
Installing an additional pump on a VAZ 2114 will require you to purchase several additional parts. Initially, we will look at a general kit that may be useful to you, and later, based on the method you choose, it will become clear to you what exactly you need to buy in your case:
- The pump itself can be either a Gazelle pump (article 32.3780-01) with 18 mm nozzles, or a good German BOSCH pump (article 0 392 020 034).
- Electrical equipment – 4-pin relay, 3-pin toggle switch, wires, terminals for “mother” and “father”, as well as corrugation for the wire.
- Hoses and clamps, fasteners and related bolts.
- If you choose the option with a pump from BOSCH, a bracket for the clamp and the exhaust pipe clamp itself will also come in handy. They are worth buying from a VAZ 2101 car.
- If you choose the option with a Gazelle pump, then a sealant will come in handy.
Since there is no space on the panel for an additional button, it will either have to be drilled into the dashboard, or, as an option, the panel backlight brightness control buttons will be replaced (no one uses it anyway).
Installing a button
If you decide to acquire additional control for this modification, you will have to fool yourself further.
Voltage + can be taken directly from the battery, but we must not forget about the fuse on the wire where the sealed holder hangs.
In short, the installation is simple:
But in practice, everything is not so simple and this algorithm requires several clarifications:
- We remove the rheostat (in principle, you can throw it away, it is no longer needed).
- The wiring is heat-shrinkable and attached for convenience to the rest of the wire bundle.
- We prepare the negative (we look for it in the area of the dashboard) and positive (you can take it from the ignition) terminals.
- We find a vacuum booster, install a relay in its area, and then pull the wire from it into the interior to the button.
- The electrics are connected, we connect everything on the button, and then we put the dashboard back together.
There are examples of craftsmen who do not drain the antifreeze, they simply plug the pipe during the work, the latter’s costs are only 1.5-2 liters.
Job
You should start replacing the pump with preparatory work. To do this, drive the car into the inspection hole. This option is more convenient compared to the overpass. Drain the antifreeze. Remove the terminals from the battery, this is done to prevent an accidental short circuit. You also need to remove the belt from the generator. Some drivers remove the wheel and fender liner, but this is not necessary:
- The first cylinder is installed at top dead center. To do this, remove the right mudguard. At the same time, the front cover is dismantled. After which the crankshaft is turned (strictly clockwise) so that the marks on the pulleys and the engine coincide. Then remove the plug from the clutch housing. The mark on the flywheel must completely coincide with the one located on the motor;
- The crankshaft pulley is removed; to do this, an assistant must keep it from turning by inserting a mounting blade into the hole in the clutch housing. To unscrew the pulley you will need a 17 key;
- After which the camshaft is removed, to do this you need to hold the pulley with a special device. You can do without devices. Shift into fifth gear and press the brake pedal. Thus, you can remove the camshaft pulley without any problems;
- Remove the bracket;
- The back cover is removed;
- Next, use a hexagon to unscrew the pump. Then it is removed using a slotted screwdriver;
- Be sure to ensure that the old gasket is removed. Sometimes the gasket may burn. Cut off the remains and clean the pump landing area;
- Next, the installation site needs to be lubricated with sealant and a gasket is installed. Afterwards it is lubricated with sealant again. Install the pump. It must be placed with the number facing up;
- Reassembly is in progress.
During the assembly process you need to pay attention to some nuances. First, you need to pay attention to the installation of the pulley according to the marks
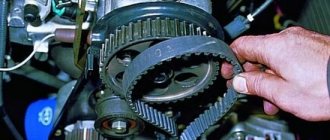
This is an extremely important point. You should also carefully tighten the timing belt. To do this, use a special key to turn the roller until it is offset with a mark - a rectangular protrusion. Next, the bolt is tightened with a torque wrench with a certain force. Article on the topic “How to set timing marks.”
What does it give
An additional VAZ 2114 pump provides warmth and comfort in your favorite car. You can save a lot on warming up your car if you like comfort. In practice, the car will noticeably heat up within 5 minutes after turning on the heating system, which cannot be achieved using a standard heating system.
Speaking of pros and cons: firstly, the domestic pump has only a plus, and the minus is the unit housing itself, and secondly, it is better not to leave a plus on the battery, despite the fuse, it is better to look for another point to connect it.
Useful video You can find an example of installing an additional pump below:
Replacing Priora Pump 16 Valves
replacement
pumps for 16 valves Prior
The engine cooling system prevents overheating and creates comfortable working conditions. In the event of a malfunction, the belt breaks, the valve bends, and repairing these parts will be expensive.
Starting to notice outside noise while driving? Coolant leak? It's time to get under the hood and check the condition of the pump.
water pump
water pump
. the part in which a shaft with an impeller and a bearing are installed on it. A car pump or water pump provides engine cooling; a circulating medium is created for this water. Replacing a pump from PRIOR 16 valves with our own. To prevent your car from overheating, it is often necessary to check the operation of the pump.
Basic faults
The main cause of pump failure is bearing failure. Replacing a VAZ 2112 radiator with 16 valves. everything about. The following disadvantages can be identified:
How to determine the need to replace your pump
Replacing the Priora water pump. Warning! Do not turn the crankshaft or camshaft after the camshaft drive belt has been removed, otherwise the piston may hit the valves. Wear of the pump bearing (indicated by increased noise during operation) and leakage of coolant from the pump are the main defects of the water pump.
Description
| STEP # | |
| 1 | You need to disconnect the wire from the negative terminal of the battery. |
| 2 | Next, you should drain the coolant. |
| 3 | Then the piston of the first cylinder is set to the top dead center position. |
| 4 | Then the tension roller is removed. |
| 5 | The camshaft toothed pulley is removed behind the tension roller. |
| 6 | It is necessary to unscrew the 4 bolts and the fastening nut and start removing the rear cover of the camshaft drive belt. |
| 7 | Insert a screwdriver into the groove, carefully separate the pump from the block and remove it. |
| 8 | Then you need to remove the gasket from the pump. If it is damaged, it needs to be replaced. |
| 9 | Then, if the coolant leaks through the drain hole, then you need to replace the water pump (if the seal is damaged). |
| 10 | If the pump shaft exhibits noticeable axial play (or the bearing is damaged), replacement is also required. |
| 11 | If chips, cracks, or chipping are found on the toothed pulley, impeller and pump housing, it is also replaced. |
| 12 | You need to check the tightness of the pump bearing locking screw. The screw must be tightened if necessary. |
| 13 | Next, you need to install the pump in the reverse order of removal. In this case, the number on the part must be directed upward. |
| 14 | And finally, you need to install the remaining parts in the reverse order of removal. |
Water pump Luzar
In this case, the camshaft pulley must be installed with the protruding part of the hub facing the engine. Then you need to check the alignment of the top dead center marks on the rear drive belt cover and the camshaft pulley. The last step is to adjust the tension of the camshaft drive belt, and only after that add coolant.
A water pump can fail for two main reasons - wear of the bearing or oil seal. When the bearing wears out, a distinct hum will be heard, which is a sign that the bearing is humming and the pump needs to be replaced. If a pump with a faulty bearing is not replaced in time, this can lead to it jamming.
The second reason for pump malfunction is leakage from under the seal. If you notice that your antifreeze or antifreeze has begun to run out, one of the reasons is precisely the pump. Check for fluid leaks in the area where the pump is located.
If so, the pump is most likely leaking. In this case, operating the car is not advisable, but is possible provided that you have to constantly add coolant.
Another sign of a pump malfunction is a worn timing belt. If the bearing is broken, the pump may “walk” slightly, which will cause the belt to eat up, and as a result, the timing belt may break and then you will have to deal with the capital of the motor, since the valves will bend.
When choosing a pump, be sure to purchase one that is suitable for your motor. A pump for a 16 valve engine is not suitable for an 8 valve engine. The difference in replacing the water pump is that on an 8 valve engine there is 1 pulley, and on a 16 valve engine there are 2 pulleys. . By the way, from this article you can learn how to replace the fuel pump on a Lada Priora.
After draining the liquid, remove the upper decorative cover, the alternator belt, and then the front timing cover, it consists of two parts.
Now you need to set the timing marks so that during assembly you do not make a mistake with the ignition setting.
If you have a car with air conditioning, you need to use a 13 mm socket wrench to unscrew the bracket for the generator belt tensioner pulley and air conditioner with steering wheel.
The next step is to remove the crankshaft pulley. To do this, remove the right front wheel and mudguards. Next, engage 5th gear again and press the brake. The pulley will be fixed and can be safely unscrewed. Remove the pulley and timing belt.
Next, unscrew the 6 bolts securing the cover and then carefully remove it from the engine.
We unscrew the 6 bolts securing the pump, carefully pry it up with a screwdriver and pull it out. When installing a new pump, it is necessary to coat the gasket with a thin layer of sealant and screw the pump into place. Next, we reassemble in the reverse order, taking into account the timing marks.
Symptoms of malfunction
- Noise from the pump when the engine is running. Extraneous sound appears due to bearing wear. It is recommended to replace the cooling system pump after one or every replacement of the timing belt kit. If you neglect service intervals, wear appears on the rolling elements, inner and outer races, which leads to noise and whistling. Often the cause of accelerated wear is antifreeze, which, due to a leak in the oil seal or rubber cuff, gets to the rubbing vapors.
- Antifreeze leak. Like the pump bearing, the oil seal and rubber seal have a limited service life. The appearance of play due to bearing wear will significantly increase the risk of seal leakage.
- Misalignment with respect to timing gears and rollers (the pump becomes askew). Uneven tension distribution leads to accelerated wear of not only the bearing, but also the oil seal. Incorrect installation or a manufacturing defect, in which the pulley rotates misaligned, leads to accelerated wear of the loaded part of the belt. Such a defect, even with low mileage, can cause the timing belt to break and the valves to meet the pistons.
- Engine overheating. When the impeller blades break off, the pump's performance decreases, as a result of which less coolant passes through the small circulation circuit.
If the liquid has not clogged the coolant drain channel in the housing, then pouring sealant will not lead to a malfunction of the water pump. But you can’t do without removing the pump and flushing the system.
What kind of pump is installed on Priora
The original pump TZA 21126-1307010-75 is installed from the factory. The cost of the pump at the moment is from 800 rubles and more, depending on the region. If for some reason you cannot find a TZA pump, you can choose a water pump from other manufacturers.
Pumps for 16 cl motor
- LUZAR LWP 0127
- FENOX HB1005P1
- HOFER HF033024
- LADA IMAGE 21126130701082
- SOATE (St. Oskol) 021126-1307010
- LUZAR LWP 01274 TURBO-2
All of the above pumps are designed for a 16 valve engine. When choosing a pump, we advise you to purchase a high-quality analogue or an original pump, so that you do not have to change it again after 20-30 thousand kilometers.
The original pump TZA 2109-1307010-75 is installed on the 8-valve engine. Its cost ranges from 900 rubles and above. Several types of analogues are also offered at lower prices.
Pumps for 8 cl motor
- HOFER HF 033031
- OberKRAFT KT 059346
- AMT-Miass AM2109-1307010
- LADA IMAGE 21114130701082
- LUZAR LWP 0108
Choose a pump not only based on reviews from friends, but also based on the quality and cost of the water pump. Beware of counterfeits, as there are quite a lot of counterfeit parts these days.


