Introduction
Over time, any mechanism begins to wear out greatly; quite often, car owners are faced with wear on the linings that are installed in the rear brake pads.
No less often, problems arise with pulling out the drive cables, which is why the vehicle owner has to periodically adjust the handbrake stroke. The material below provides step-by-step instructions, strictly following which every car enthusiast will be able to independently tighten the parking brake lever on a VAZ-2110 car, without resorting to the help of experienced specialists and, accordingly, saving a significant amount of money. It is worth noting that adjusting the handbrake using the method described below allows you to perform an identical manipulation on almost all front-wheel drive cars that have domestic roots. Many VAZ-2110 owners would like to know how to tighten or loosen the handbrake
The VAZ-2110 is a very common vehicle (if we consider it within Russia); experienced car enthusiasts and mechanics note the ease of pulling the handbrake in this car, as well as the ease of replacing it. Even novice drivers know how important it is to monitor the serviceability of this element of the vehicle. A malfunctioning part can cause the car to move independently. There is no need to even talk about the possible consequences, since they can be different.
The parking brake lever should be tightened immediately after detecting defects in its operation. The car owner must periodically check the system himself in order to be able to prevent troubles in time.
Modernization
Many modern owners modernize their cars and install so-called hydraulic handbrake here. As a lyrical digression, we note that in this case it is necessary to replace the rear brakes with disc brakes without fail.
Very serious design changes are required - such as installing a hydraulic system in the parking brake. No cables are used here - the parking brake lever is connected to the master cylinder.
After the driver lifts the lever, the brake fluid in the system presses on the cylinders. Most often, hydraulic systems can be found on sports cars - after all, such a brake holds much better.
The main advantages that the hydro system gives:
- Full confidence that the hydraulic handbrake will work;
- There is no need to tighten the cable.
- It is quite difficult to bleed the brakes when replacing the standard cable system and installing a hydraulic handbrake;
- The hydraulic handbrake holds the car for several hours, after which the pressure in the system drops and the car can start moving.
The handbrake is the colloquial name for the parking brake. It is available in any car - the VAZ 2110 is no exception. It is the handbrake that is used when parking for a long time (more than 5 minutes). You also cannot do without it when stopping on sloping surfaces. And of course, in an emergency (for example, when conventional brakes fail), it is the parking brake that allows you to quickly and effectively stop a moving car.
Design and operation of the VAZ 2110 parking brake
The parking brake consists of two parts:
- Braking mechanisms.
- Brake drive - it is with its help that the driver of the VAZ 2110, acting on the handbrake lever, transmits force to the brake mechanisms. This lever is located to the driver's right in the space between the seats. The design of the handbrake has a ratcheting mechanism (it makes characteristic clicks when used) - with its help the lever is fixed in the working position. In addition, there is a special button on the lever - it turns on the illuminated icon of the activated parking brake on the dashboard.
Next, the lever, with the help of three cables - the front one (the return spring is located on it) and two rear ones (they are connected to the wheel brake mechanisms) exerts a direct effect on the braking devices directly on the rear wheels of the car.
The rear wheels of the VAZ 2110 are equipped with a drum-type brake mechanism. One of the rear brake cables, connected to a special lever, acts on the brake pad. It moves towards the brake drum. As a result, the wheel stops and braking occurs.
Indications for replacing the brake cable on a VAZ 2110
During operation, even if there are no complaints, after every 30 thousand kilometers it is necessary to carry out a full inspection of the parking brake system.
Aspects indicating the need to adjust the handbrake
There are several ways that will help any car owner, without exception, to help with the question of whether it is advisable to adjust the handbrake. It is worth noting that there is no need to check the handbrake every day; it is important to pay attention to this detail every 30 thousand kilometers.
To find out whether the handbrake needs to be adjusted, you need to park your car on a slight slope, then leave the car on the handbrake and put the gear in neutral. If the vehicle slowly but surely begins to move down an incline, then the vehicle's parking brake may not be working properly.
Of course, this problem can be solved by replacing the VAZ-2110 handbrake rod, however, as practice shows, it is quite enough to make a very simple adjustment of this part.
How to fix a simple parking brake problem yourself
If the handbrake is not adjusted correctly, it needs tightening. This is not difficult to do and does not take long. To eliminate this main malfunction of the parking brake, stock up on a 13mm wrench and pliers; you also cannot do without an overpass or inspection hole.
To troubleshoot the parking brake, you must:
Place the car in a viewing hole or drive it onto an overpass.
Step-by-step instructions that allow you to independently tighten the handbrake on a VAZ-2110 car
If the car owner does not know how to tighten the handbrake on a VAZ-2110, he should familiarize himself with the recommendations below, and, first of all, it will be necessary to drive onto a viewing hole, lift or overpass, in other words, you need to position the car so that the owner can easily get to the necessary mechanisms and components.
List of actions by which the VAZ-2110 handbrake will be adjusted:
- the car is positioned in a way that is convenient for the owner (placed on an overpass, raised with a jack or driven into a ditch);
- the handbrake lever is placed in the lowest position;
- the lock nut is loosened using one wrench, when a second standard tool tightens the adjusting nut at the same time (it should be tightened until the car owner is confident that the handbrake cable is properly tightened). As practice shows, pliers can help the vehicle owner cope with the task, which are convenient for supporting the rod while tightening the adjusting nut;
- those adjusting the lever must check its full stroke, which should be about 2–4 clicks;
- then the equalizer locknut is tightened (do not forget that the second adjusting nut must be supported at all times by a second tool);
- the handbrake goes down, and the rear wheels, using the power of human hands, turn in the desired direction. If everything is done correctly, the wheels will “walk” without jamming.
The adjustment of the handbrake is considered a very simple and quick procedure; the only thing you should pay due attention to is the handbrake drive cable. If during the process it was not possible to tighten it properly, this element should be completely replaced in the near future.
After the adjustment of the VAZ-2110 handbrake is completed, it is necessary to again check the quality of the functioning system. It is preferable to park the car on a section of the road where there is a slope of at least 25%, then put the car on the handbrake in the “neutral” position. With reliable fixation (correctly adjusted lever), the car will remain in place, which will be direct evidence of a job well done by the car owner.
The principle of operation of the VAZ 2110 hand brake
The fixation of the brake drums and wheels of the car occurs as a result of pressing the brake pads against them. They are driven by a lever through a system of cables, brackets and springs.
The tension of the cables (8) is set by a lever (2), and its fixation at a certain tension is set by a ratchet (11). You can remove the cable from the working position by pressing the button (1), disengaging the pawl (10) from the ratchet and lowering the lever to its lowest position.
Since the cable adjustment mechanism is located under the bottom of the car, a rubber seal (3) is installed on the rod (4), which prevents dirt and dust from entering the passenger compartment from the outside. For the same reason, the cables themselves are in a protective braid (9).
The tension of the cables (to the left and right wheels) of the hand brake is carried out simultaneously by moving the divider (5) along the rod (4) by tightening the nut (6) and fixing it with the lock nut (7).
What to do next if adjustment does not help?
There are situations when a car owner knows how to tighten the handbrake on a VAZ-2110 and strictly follows the algorithm, however, the manipulations he has carried out do not change the situation and the handbrake also works poorly. Most often, this problem occurs when the parking brake lever cable breaks. As practice shows, owners of old VAZ-2110 cars find themselves in this situation more often than others. You should not assume that under intense load the cable will function for too long even on newer domestic models.
The cable in a VAZ-2110 car should be changed if the tips are significantly weakened, its threads are strongly stretched and this part is difficult to move in its shell. It is worth noting that the car owner can do the work of replacing the cable on his own; you just need to have an assistant and some free time. It is very difficult to replace the cable alone.
Causes of malfunction
Handbrake lever VAZ 2110 in a leather case
Let's consider the principle of operation of the parking brake (handbrake) on a VAZ 2110 car.
It's pretty simple. One of its main elements is a special cable. When the driver pulls the parking brake handle, this cable is tensioned, which evenly distributes its effect on the brake pads of each wheel of the car. During operation, the rear brake pad linings wear out, the cable stretches, and as a result, there is a need to adjust or repair the handbrake. Also, very often drivers, especially beginners, drive with the handbrake raised, which leads to premature wear of the handbrake cable. If the driver does not carry out preventive maintenance or repair of this mechanism in a timely manner, the car may independently start moving from a standstill or will slow down, even stopping, on an uphill slope.
External view of the parking brake cable on a VAZ 2110 car
You can adjust the handbrake not only in a car service center, but also with your own hands at home. But first you need to familiarize yourself with the manual parking brake diagram in order to know its main elements for setting up this system.
Handbrake diagram for VAZ 2110
In this diagram the following elements are indicated by numbers:
1 - button that fixes the handbrake lever; 2 — hand brake lever; 3 — protective cover; 4 — handbrake rod; 5 — cable equalizer; 6 — adjusting nut; 7 - lock nut; 8 - cable; 9 — protective sheath of the cable
VAZ 2110 why the handbrake does not work
Dear visitors of the “Cars” website! We will be very grateful for your comments on the video clip “VAZ 2110 why the handbrake does not work”; registration is not required for this. We also ask you to let us know if you have any problems playing the video.
The parking brake is not intended for emergency braking, which is clear even from its name - PARKING
09/18/2017 – 10:51 wolkodaw wot
I bought myself a 2115, it was the same thing, I changed the fittings, the spacer bars, the hooks, etc. I didn’t change the pads, it became normal, you can’t move it on the handbrake, but it doesn’t jam while driving anyway, I think I can put the whole system back from 2141, the spacers are adjustable and it jams while driving anyway at least there's nothing left of the pads
02.09.2017 – 08:22 Ruslan
anti advertising according to European standard
08/23/2017 – 12:11 Ilkin Rakhmanov
When replacing the rear pads to bleed air on the rear cylinders, one presses the brake and holds it and the other bleeds air until fluid appears
08/12/2017 – 16:25 Georgy Bulanov
you need to drive for everything to get used to it, it won’t brake right away as it should
07/21/2017 – 06:59 Andrey Demidov
On the cable itself on the spring, carefully bite off a couple of turns and everything will hold and slow down
07/11/2017 – 02:21 Andrey Demidov
Yes, and I see the drums are from viburnum; they are larger in diameter; install original drums
How does the handbrake system work?
Applying the parking brake activates the rear brakes and ensures that the vehicle does not roll, even on a relatively steep incline. However, if the handbrake does not hold the vehicle, there is a problem that must be corrected to ensure the safety of the driver and others.
Parking brake systems vary greatly from one automaker to another and even between different makes and models of cars. In general, they are divided according to the type of brakes and the method of their use.
It is immediately necessary to understand that in the vast majority of cases in passenger cars, parking brakes use the rear wheels and are divided into two types:
- drum - consisting of two semicircular blocks that are located inside a cylindrical drum. If, on one side, they are rigidly fixed, then on the other there is a special piston mechanism that forces the pads to move when using the handbrake;
- disc brakes - consisting of a special brake disc mounted on the car axle and two pads. When you use the handbrake, the pads compress and prevent the car from moving.
The car's braking system can also be mechanical or hydraulic. If in the first option, braking is carried out using a system of cables and the force of a person who puts pressure on the handbrake, then a special piston is used in hydraulics.
Important! Depending on the type of braking system, the reasons why the handbrake does not hold may vary significantly.
VAZ 2110 why the handbrake does not work
Dear visitors of the site “Everything about cars”! We will be very grateful for your comments on the video clip “VAZ 2110 why the handbrake does not work”; registration is not required for this. We also ask you to let us know if you have any problems playing the video.
The parking brake is not intended for emergency braking, which is clear even from its name - PARKING
08/22/2017 – 23:04 wolkodaw wot
I bought myself a 2115, it was the same thing, I changed the fittings, the spacer bars, the hooks, etc. I didn’t change the pads, it became normal, you can’t move it on the handbrake, but it doesn’t jam while driving anyway, I think I can put the whole system back from 2141, the spacers are adjustable and it jams while driving anyway at least there's nothing left of the pads
07/30/2017 – 21:24 Ruslan
anti advertising according to European standard
07/10/2017 – 08:55 Ilkin Rakhmanov
When replacing the rear pads to bleed air on the rear cylinders, one presses the brake and holds it and the other bleeds air until fluid appears
04.07.2017 – 17:37 Georgy Bulanov
you need to drive for everything to get used to it, it won’t brake right away as it should
06/13/2017 – 13:12 Andrey Demidov
On the cable itself on the spring, carefully bite off a couple of turns and everything will hold and slow down
05/30/2017 – 23:24 Andrey Demidov
Yes, and I see the drums are from viburnum; they are larger in diameter; install original drums
05/21/2017 – 10:29 Alexander Bystrykh
how many clicks does the handbrake take?
05/07/2017 – 23:03 Alexander Bystrykh
I just heard so much and I pull 3-4 silks myself, but you can hear a lot, this also plays a role
04/23/2017 – 00:30 Alexander Bystrykh
I tighten it 3-4 clicks
04/21/2017 – 09:03 Alexander Bystrykh
and if it changes quickly, it means the cable is stretching
04/10/2017 – 22:56 Max
I've been driving a VAZ for many years. and when replacing the cables I noticed this thing. when you lift the handbrake. the cable goes into the braided tube, the plate moves the pads apart, and the spring on the cable is compressed. Well, often this very spring is compressed to its very best. There is nowhere to compress it further... and the plate has not yet fully spread the pads. I just cut off a quarter of the length of the spring with a grinder. so that the cable travel increases.. the main thing is not to rip the cable. and also hang the cables before installation and pour oil into the synthetic braid with a syringe. not much. let it drain. You can use the cable while you pour. it will slide normally and the beard will appear much later. In short, he will live many times longer. verified
I don’t know how 14 but on the classic there is also a cable for the handbrake stick itself, it also stretches if anything
03/15/2017 – 03:27 Sergey Nikonorov
How to remove the handbrake button and make repairs using the example of a VAZ
If the button on the handbrake of a car of the “tenth” family does not work (the latch does not work), and the lever itself is not bent and the teeth on the ratchet are not worn out, then the following operation should be performed:
- Remove the handbrake button. This is very easy to do without using any tool, since it simply unscrews counterclockwise;
- Remove the spring. It is simply removed from the rod;
- Straighten the spring and stretch it slightly (about 3-5 centimeters);
- Return the spring to its place;
- Screw the button. This will be somewhat more difficult to do, but the latch will work accurately.
If the spring is faulty, it must be replaced.
VIDEO INSTRUCTIONS » alt=»»>
Is adjustment necessary?
First you need to determine whether the adjustment will really solve the problem of the handbrake malfunction.
Adjusting the parking brake
To do this, a small test is carried out. Moreover, it is recommended to do a similar procedure after every 30 thousand kilometers, even if you are sure that the parking brake works well.
Pulling up the handbrake
It is likely that you just need to tighten the parking brake on the VAZ 2110 to fix the problem.
- Drive to the inspection hole, from where it is most convenient to make adjustments. Another option is a lift. You'll find something here. This way you can easily get to the necessary nodes.
- Make sure the brake lever is in its lowest position.
- Take two keys. You will loosen the lock nut first and tighten the adjusting nut second.
- Tighten the adjustment nut until the cable is properly tensioned.
- It is strongly recommended to hold the rod when tightening the adjustment nut with pliers.
- Now make sure that the lever makes full travel in 2-4 clicks, no more.
- If after checking everything turned out to be good and the working stroke is correct, tighten the equalizer locknut while holding the adjustment nut with a second wrench.
- Release the handbrake lever down and turn the rear wheels by hand. Rotation should occur evenly without any jamming.
- But if the adjustment did not allow the cable to be tensioned, then the element must be replaced.
How much does it cost to tighten the handbrake and can you do it yourself?
Actually the question is rhetorical, as you understand in different regions, the cost can range from 200 to 1000 rubles. For example, in the capital, the price is often 500 – 1000, but in the regions you can raise it for 250 rubles.
And to be honest, the work itself only takes a few minutes, the main thing is to find a hole or a lift, a key of 10 and off you go. You need to tighten the middle bolt, the one that is in the middle, it is the handbrake, tighten the nut and thereby tighten the cables.
Of course, if they are rusty or torn, then everything is much more complicated; it is better to trust the master, because replacing the cables from the rear drums is not at all an easy task.
That's all, read our AUTOBLOG, I think it clarified the situation.
Similar news
- How to unscrew a brake pipe. If it has soured and the edges are torn off...
- Uneven pad wear. Let's look at the front and rear - basically...
- Traction control system, TSC, TRC, ASR. What is this, what principle...
If the adjustment does not help
There are not many cases when adjusting the parking brake did not have any effect. However, this is no reason to despair.
Device diagram
There are several situations in which it is necessary to replace the parking brake cable:
- The cable broke;
- The tips gave way;
- The cable threads have stretches, which over time can turn into a full-fledged rupture;
- The cable is difficult to move inside the sheath even after abundant lubrication.
Handbrake on rear disc brakes
In order to pay more attention to the adjustment process and not go into the intricacies of the operating principle of a mechanically driven parking brake on disc brakes, we will list only the main types of device.
- The brake disc is held by an additional pad, which, when the handbrake is raised, is pressed against the working surface of the disc by means of a rocker arm.
- The brake disc design allows individual brake pads to be placed in the internal cavity. The operating principle is similar to that of drum brakes.
- Design with mechanical support of the working piston. In the cavity of the brake piston there is a ratchet (for automatically bringing the pads together), into which a pin with a trapezoidal thread rests. The curved rod drives the pin by turning the shaft with a concentric groove.
Replacement
There is one important condition - you will need an assistant. His task will be to pull the cable tightly, which will allow the equalizer to be installed correctly.
The sequence of work to replace the cable is as follows:
- Lower the handbrake lever as far as possible;
- Remove the brake disc from the wheel where the element is being replaced;
- Remove the muffler from the suspension cushions and the resonator from the rear suspension;
- Lower the exhaust system down;
- Remove the adjusting nut and locknut;
- Remove the equalizer;
- Now remove the cable ends from the equalizer;
- Remove the tip of the equalizer shell from the bracket, which is located on the car body;
- Bend back the brackets that secure the cable;
- Remove the rear brake pad and remove the cable end from the lever;
- Slightly loosen the nut that secures the cable holder to the rear axle;
- Remove the cable from the holder, then from the bracket, and then pull it out through the brake spike;
- Place a new cable in its new location and perform the assembly procedure, following the reverse order of the indicated processes;
- Make sure that the cables in the bracket are positioned crosswise;
- After completing the installation of the new element, adjust the handbrake.
As you can see, the task does have certain nuances, but it is not difficult at all if you have some experience and rely on the VAZ 2110 operating manual. As a rule, everything is spelled out there.
It wouldn’t hurt to supplement your skills and knowledge with video tutorials or consultation with a friend from a service station. But if you are not confident in your own abilities, you should not risk replacing the handbrake cable yourself. It is better to spend more money, but entrust the work to specialists.
Checking status
Normal PT adjustment ensures that the vehicle is held on a slope. This corresponds to 3-8 clicks of the handle on newer nines or 5-7 clicks on a VAZ 2109 produced before 1995.
To carry out the test, follow a few simple steps:
- Replacing the Priora parking brake cable
- Find a slope that has about 25 degrees;
- Turn the handbrake to the required position;
- If the car starts to roll, the handbrake does not hold, adjustment is required;
- If there is no such slope nearby, the check is carried out in a garage;
- Place the car on a flat surface, raise the handbrake handle all the way;
- Approach from behind and try to push the car with maximum force;
- If the car begins to move, the RT requires adjustment;
- Check the operation of the handbrake at 2 clicks on newer versions of the VAZ 2109 and not reaching 5 clicks on versions before 1995. If the handbrake is working at full strength, the cable will be tightened. It will also need to be adjusted.
Operating a car with a tightened PT cable is also dangerous, as this leads to overheating and wear of the rear brake pads.
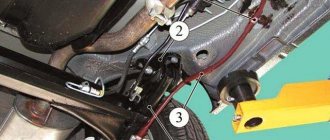
Bottom view
Adjustment
To adjust the PT cable you will need a pit, overpass or lift. Next we proceed according to the following algorithm.
How to properly adjust the handbrake.
- Raise the handbrake handle 2-3 clicks from the passenger compartment.
- Get under the car and loosen the locking nut of the parking brake cable equalizer. Before doing this, it is better to treat the nut with a wire brush to remove all dirt.
- Then act according to the circumstances. If the cable is overtightened, it must be loosened by appropriate manipulation of the nut. If the cable holds too weakly, the nut must be tightened more tightly.
- If tensioning the cable does not produce any result, then the element is already at the limit of its capabilities. Therefore, the only solution to this situation is replacement.
- When adjusting the degree of tension, be sure to evaluate the adjustment of the cable along the PT lever. As you remember, normally it is 3-8 clicks for more recent versions of the VAZ 2109, or 5-7 clicks for nines that were produced before 1995.
- Check the freedom of rotation of the rear wheels. If you overtighten the cable, the wheels will spin with difficulty and not as freely as they should.
- After making the adjustment, tighten the locking nut back and check the operation of the handbrake again by driving up a slope or pushing the machine with the PT on.
Adjustment process
Replacement
In some cases, heavy movement of the cable in the sheath is due to lack of lubrication. To eliminate this defect, fill the shell with transmission or engine oil. Pour until grease flows out of the opposite end of the cable casing. Remember to move the cable while adding lubricant.
Cable replacement procedure
But lubrication is more of a temporary measure. If signs of cable wear are detected, it is better to replace it with a new one. This is done as follows.
- Loosen the tension on the PT cable locking nut.
- Unscrew the equalizer adjusting nut, which will loosen the handbrake drive cables.
- Raise the rear of your VAZ 2109 using a jack, then remove the brake drum and brake pad.
- Unscrew the drive cable end from the drive arm.
- Disconnect the fastening nut, and then remove the PT cable holder on the rear suspension beam of the vehicle.
- Remove the shell bushing from the hole in the brake shield.
- Pass the end of the PT cable through the hole in the brake shield.
- Remove the PT cable from all holders on the body of your car.
- Disconnect the end of the PT cable from the equalizer.
- Push the cable end out of the bracket to remove the cable.
- Install a new, tested cable, proceeding in the reverse order.
- Do not forget to adjust the cable tension and the performance of the restored RT at the final stage of assembling the unit.
