Paint the car in camouflage color
Camouflage-style paintwork decorates many cars today. These types of colors are becoming increasingly popular and are no longer associated exclusively with military or hunters.
UAZ camouflage painting
It is impossible to carry out painting in a factory; usually only a single-color paint coating is applied there, so many car owners arm themselves with the necessary shades of paint and try to do the painting work themselves.
Painting in camouflage can be done in different ways, so before starting work and purchasing paints and varnishes, you need to carefully familiarize yourself with them and select the appropriate color.
To apply camouflage to a car you need to have good imagination and design skills . In order for the design to look organic, you must adhere to the rule of the golden ratio and distribute the spots evenly over the body of the vehicle. There are the following painting options:
- Forest camouflage.
- Desert (shades of sand or brown; camouflage on cars of this type has small and abstract spots).
- Winter version (the pattern has a white-gray-black color scheme and the spots on the body are larger in size).
- Hunting or military (all spots are large, seem to merge into each other and at the same time have blurred edges).
Recently, digital camouflage has become more and more relevant - the spots in this case have clear edges in the form of huge pixels. Typically this design is used to decorate racing and sports cars.
Painting a car in camouflage
Despite the fashion, most often hunters or military personnel paint their vehicles in this color. Painting a UAZ camouflage with your own hands can be done with minimal time and labor costs, since such cars often have a khaki or grayish tint. Therefore, you do not need to carefully select shades to complete the work.
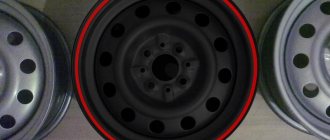
Niva in protective color
To carry out the work, you must purchase the following materials and tools in advance:
- Newspapers and magazines to protect unpainted surfaces.
- Painting tape of different widths in rolls.
- Aerosol paint of the desired shade in cans.
- Spray gun (if the work will not be done manually).
- Solvent.
- Clean cloth.
- Primer and putty (if it is necessary to eliminate some defects on the body).
- Degreaser.
- Varnish and polish for finishing.
It is recommended to apply camouflage to a car in a specially equipped room with a good ventilation system. This will not only avoid defects in the newly applied paintwork, but will also be helpful in ensuring that the applied layers of paint dry as quickly as possible.
It is imperative to work in a protective suit and a respirator, since the fumes from paints and varnishes are very toxic. It is also advisable to equip the room with good halogen lamps that provide glare-free lighting. This allows you to better inspect the surface of the vehicle and apply paint.
The car must be thoroughly washed and dried, and the interior must be covered with film so that no paint gets inside during the work. It is also necessary to protect the glass and optics of the vehicle with newspapers or old magazines and masking tape (if possible, it is better to remove the headlights altogether).
If the car does not have any chips or uneven surfaces, you can immediately treat it with a degreaser and begin applying camouflage. If paint swelling or rust is detected, these places need to be cleaned down to metal, treated with putty, sanded thoroughly and coated with a primer.
Car wrapping with vinyl film
A fairly common way to apply a camouflage coating to a car is to use vinyl film. This approach does not require highly professional skills and abilities. All you have to do is purchase the film at your nearest store and go ahead.
Despite the ease of the presented method, in order to obtain the desired result, it is necessary to adhere to a certain sequence of actions:
- Carry out a full car wash with water;
- do not start applying the coating until the body is completely dry;
- dismantle all third-party elements;
- degrease the body surface;
- Apply the film evenly to the selected body element.
This method has also gained enviable popularity due to the fact that vinyl film is available in a wide variety. In addition to the traditional coloring, all kinds of camouflage are offered, some of which even copy the coloring of wild animals of the African prairie.
Once an attribute of military camouflage, camouflage, due to its unusual design, began to be widely used by owners of civilian cars. It is believed that it best emphasizes the character of the owner - a strong-willed, selfless person.
One way or another, a car with such a unique surroundings will undoubtedly attract the attention of passers-by, and if necessary, it will certainly help to hide in the folds of the terrain from a potential enemy.
DIY car camouflage
There are three ways to paint a car:
- Drawing drawings of leaves, reeds and various grasses (a plotter is used for this work). This type is considered the most expensive because it is very difficult to depict.
- Camouflage with blurred edges of spots.
- Camouflage with clear contours of spots.
How to paint it camouflage? All work, regardless of what color and type of pattern needs to be applied, begins the same way - the vehicle is carefully prepared and washed from dirt. Before starting work, you must choose the shade of paint that will be used to paint the top layers.
This type of painting can also be called camouflage
Here everything depends solely on the imagination and wishes of the owner. You need to prepare specially cut newspapers or self-adhesive film if it is necessary for the pattern on the body to have clear boundaries. After treatment with a degreaser, you need to wait for the car to dry completely in a chaotic manner and, in accordance with your imagination, the film is applied to the body.
You need to make sure that the pieces fit on all parts of the body and do not form kinks. If you do not follow this rule, the paint may lie unevenly in broken areas, and the entire vehicle body will look inorganic after painting. Then a layer of the chosen paint is applied (it is better to start with dark shades).
Painting a car in camouflage is a long process and cannot be rushed. You need to wait until the paint layer is completely dry and only after that the car is covered with film again so that the spots slightly overlap each other. Now you can apply a light shade of paint.
When all the colors have been applied and dry, you can remove all the film. To avoid damaging the edges of the stains, the surface must first be slightly warmed up using a halogen lamp. This way the tape will come off on its own and will not damage the paintwork.
If you want to improve the camouflage a little, you can soften its contours using a black shadow edging. To make car camouflage look more advantageous, some car owners cover the surface with a layer of varnish.
But most people prefer to leave the car as is; the matte finish gives it an unusual appearance (in this case, for additional protection of the paintwork, it is recommended to apply a layer of varnish with a matte effect to the vehicle).
Types of camouflage and methods of applying it to a car
Camouflage can have not only different colors, but also patterns. Some of its types do not even resemble what is commonly called military colors. Therefore, first you need to choose something from all this variety, and only then start painting.
There are two key factors when choosing a camouflage pattern: color and pattern type. The first must correspond to the scope of use of the car and its purpose. For example, hunting camouflage does not have bright colors, but it allows you to move as unnoticed as possible. After all, in hunting, chic design is not important - it requires secrecy and caution. It will take more than one article to review each type of camouflage. So let's take a look at the most popular and interesting options.
The camouflage pattern on a car can be varied
How to paint a car camouflage correctly and why do it?
Many motorists dream of making their car unusual and more attractive in appearance. Painting in camouflage is a real way to stand out from the gray mass. This coloring is perfect for both SUVs and smaller cars, emphasizing their brutality and individuality.
It is recommended to familiarize yourself in advance with the types of camouflage colors, types of paints and varnishes, nuances of technology, and only then get down to business.
Types of camouflage painting
Camouflage is a method of camouflage inherent in military uniforms, weapons and equipment. It is precisely for the ability to camouflage a car against the background of the environment that camouflage coloring is highly respected among those who like to hunt and fish: a car can literally blend into its surroundings.
Despite the existence of traditional brown-green-yellow colors, there are other camouflage options - winter, urban, forest and many others. They differ in color, type of pattern, and method of application.
For the final coating, varnishes with the following effects are used:
- glossy - gives shine in the sun, which eliminates camouflage, is often used to comply with fashion trends,
- matte - ideal for creating camouflage coatings for hunting, fishing, and military purposes.
It’s worth taking a closer look at the options for camouflage colors and pattern types to choose the one that’s right for you.
Traditional camouflage
This is a pattern in the classic khaki style, combining non-staining, discreet dusty earth tones with marsh and brown. Gives the car a real military look, ideal for camouflage, but poorly suited for urban conditions and everyday driving.
Geometric camouflage
This pattern is often called chopped. It provides an original design effect - “crushing” the silhouette of an object into parts. Most often, geometry is used on sports cars with a low body height. Also, a similar color is used by the US Army on fighter aircraft. Traditionally, gray, black and white colors are used to create decor, but in unusual versions you can even find pink and purple inserts.
Urban camouflage
Intended for driving in city conditions, it has a number of specific features: the predominance of gray, blue, white, the presence of angles and straight lines.
Digital or pixel camouflage
This design is incredibly stylish, rare, it resembles a combination of small squares that imitate digital pixels, which are noticeable when you magnify the monitor screen. The appearance of the car will look blurry relative to the terrain, despite the angular outlines of the decor. Color combinations can be similar in tone or contrasting - at the request of the owner.
Forest or hunting camouflage
Forest camouflage is a pattern based on dark green, beige, black spots with smooth, soft lines. It is most often chosen by hunters; it is also used to paint military equipment. A type of forest camouflage includes images of grass, vines, shrubs, and savannas.
Winter camouflage
The pattern within winter camouflage imitates nature during the cold season. The most popular colors are gray, white, blue in the form of blurry spots on a light background. Corners and edges can also be used, but in a minimal amount.
White camouflage
It is a subspecies of winter camouflage with the difference that the predominant color is white. It is usually applied by those who hunt in the taiga forest in winter, as well as for military purposes in the North.
Sand camo
Sand camouflage is also called “desert storm”. The main shades here are brown, yellow, and beige. The coloring is popular in the prairies, used by the military in the corresponding area. For application, they resort to the technique of spraying layers in different ways, and then they make the final finishing of the pattern with an airbrush.
Camouflage colors
There are seven basic colors offered by different camouflage paint manufacturers. This:
In addition to standard tones, brighter colors are also used in the camouflage technique: white, blue and even pink, although they are intended only to add style to the car, but not to camouflage it. Typically, three colors from the list are selected to paint one car, although there may be more if desired by the owner. Masters also use other shades to give the drawing originality:
- light gray dust,
- beige,
- yellow-olive,
- brown skin,
- bronze green,
- anthracite,
- gray-olive,
- bitumen black,
- dark grey,
- bright gray etc.
What colors to use for camouflage?
Krylon offers 6 basic colors for painting camouflage:
- black,
- khaki,
- brown,
- olive,
- sand,
- light green.
In addition to the standard colors used when painting camouflage, you can use other brighter colors (pink, orange, blue, white and others). In this case, the meaning of camouflage is lost, and style comes to the fore.
Usually you need to choose three different colors, but you can have more if you wish.
Stencils for camouflage
How to paint a car camouflage with your own hands? For this purpose, the easiest way is to use special stencils. No less often, blanks are used in specialized services and tuning studios, although the price of professional painting in camouflage will be quite high. You can find a variety of stencils on the Internet, print and cut them out:
- blurry spots,
- animal outlines,
- grass,
- branches,
- net,
- cells,
- "blots"
- leaves,
- stripes,
- geometry, etc.
Painting using film
Replacing spray paint with vinyl film will not save money, but the process will go faster and the quality of the design will be better. It is impossible to use film instead of a base layer, therefore, if the driver does not decide to repaint the car completely, the same factory paint will act as the basis for the camouflage. In this process, film is needed to remove paint after all layers have been applied, i.e. It’s better to choose cheap options that came to us from the conveyors of the Middle Kingdom.
The film needs to be cut in advance, and you can decide on the design before all the rolls are cut. The technology is simple: the car is painted, the car is pasted, painted again, pasted again, etc. Once you are tired of painting and pasting, the film is simply torn off, resulting in the formation of camouflage. The film should be applied randomly and overlapping, and as for the levels, three layers of paint are enough, i.e. two levels of film. A little modification with an airbrush will be required if the owner is not satisfied with the hard edges left by the film.
Choice of colors for camouflage
It is most convenient to use paints in cans, produced by many companies specializing in auto enamels. There are even special series of camouflage colors from which you can choose the right ones. Most paints have a matte finish when dry, although glossy options are also easy to find. The most popular paintwork materials for camouflage painting are described below.
Paint Motip Enamel camouflage
The Motip Camouflage aerosol line is sold in 400 ml cans and includes specially designed colors to create a “military” look on any surface. The paint helps to camouflage a car for hunting and fishing; it is also suitable for hunting equipment and accessories that a person carries in the forest. The finished coating is resistant to gasoline, other chemicals and atmospheric factors.
Painting "Raptor" in camouflage
Painting with "Raptor" - a high-quality polyurethane paint - is widely used among lovers of off-road driving. This material provides reliable protection of the body from salts, aggressive chemicals, mechanical stress, temperature changes, and UV radiation. The “military” coloring gives the equipment a memorable, but at the same time camouflaging design. The coating will adhere remarkably well to plastic, bumpers, mirrors, radiator grilles, and will prevent water and dirt from getting into the gaps between plastic and metal parts.
Gun paint KRYLON Camouflage
Krylon Camouflage is a matte anti-reflective paint designed to simulate protective and camouflage finishes. It is intended for creating coatings on cars, sports, hunting or fishing equipment and inventory. All shades of this harmoniously selected range are close to nature and therefore guarantee perfect camouflage.
The paint has excellent adhesion to plastic and metal even without prior priming. The finished coating will be resistant to water, durable, and can withstand mechanical loads well. The paintwork dries in just 15 minutes, which is very convenient for use outside a car repair shop. A second coat can be applied after a day. Final polymerization occurs after 7 days.
Preparation of paint, materials and surface
Typically, a camouflage pattern is applied to the factory body coating, which will serve as a base. Paint consumption is 5-6 cylinders for a medium-sized car. In addition to paint, you need to prepare the following tools and consumables:
- sandpaper,
- painting spatula,
- soft rags,
- construction tape,
- solvent, gasoline, alcohol,
- newspapers.
It is best to paint a car in a well-ventilated garage or outside, and then only on a clear sunny day. As preparation, cover with newspapers and seal with masking tape all elements that cannot be painted - glass, handles, rubber seals, headlights. Afterwards, the surface of the car is degreased using solvents, after making sure that they are safe for existing paint (it is better to use regular alcohol or gasoline).
Drawing with a stencil
You can also draw camouflage on a car using a stencil. We will need all the materials listed in the previous section. But in addition, you need to stock up on special vinyl films or thick cardboard - they will be needed to make the stencil.
Preparing the machine for work and the principle of applying enamel are no different from those described in the previous section. But we do not form the spots with tape and newspapers, but use a stencil. We glue vinyl films or cardboard with spots cut out onto the body, and then apply paint, color by color.
Applying paint
Stencil painting is the easiest way to apply camouflage, although in this case all the spots and patterns will be exactly the same. There is an option to use different stencils, although this method will increase the time spent on painting. The procedure for painting a car is as follows:
- stick the stencil on the surface of the car,
- apply aerosol paint, placing it 20 cm from the body (movements should be smooth and have a diagonal direction),
- wait until the paint dries,
- remove the stencil, repeat all manipulations in the following areas.
Masters advise applying dark spots first, which will serve as a basis for lighter ones. When applying a stencil, it is important to avoid creases and damage to the paper - in this case, the paint will end up under the workpiece, and the design will look untidy. The decor looks original, in which large spots extend from one part of the body to another.
Method of painting camouflage without a stencil
This method is more difficult; it requires skill and patience from the performer. First, choose a pattern and color scheme. After preparing the machine, painting is carried out as follows:
- using narrow construction tape, form large spots on the surface of the body, making sure that the strips lie without creases,
- cover the spots with newspapers, giving the lines smoothness, and also glue them with tape,
- apply the darkest color from the can, let the paint dry,
- remove the tape, newspapers, form spots to match the second color (they should overlap the first),
- apply paint in the same way,
- repeat the work a third time, applying the lightest shade.
After painting, the body is varnished. To do this, car varnish is combined with a solvent and the body is sprayed in several layers. After the varnish has dried, you can begin operating the car, making full use of the masterpiece you created with your own hands.
How to apply camouflage to a car
Now you have come to the most important thing. There are several methods for covering a car with camouflage. They are all different from each other, so they need to be considered separately.
If you decide to work without a stencil, then be careful and do everything carefully according to the following instructions:
- To begin, use narrow tape to apply the design you want to see on the body. Cut off the tape at the bends and apply new tape. There is no need to bend the tape, as paint may get underneath it.
- Now you will need paper that needs to be placed around the spots to give shape. Secure it securely with tape as well.
- First you need to apply the darkest shade of all that you have chosen.
- Wait for the paint to dry and apply a second coat. This will strengthen the coating and make the color more saturated.
- Again, wait for it to dry completely and remove all excess from the body. All paper and tape must be removed completely, and then new, clean ones must be applied, but for stains of a different color. It is advisable to make one color slightly overlap another - this will make the overall design more cohesive.
- Next, take a different shade and apply the paint again in two layers. Remember to wait for the first one to dry.
- Continue all this until the end of applying the camouflage, gradually moving from the darkest shade to the lightest.
- Upon completion of work, remove all paper and tape and carefully inspect the body. If you find uneven places where the paint has gone a little further than necessary, use a solvent.
- Next, apply varnish over the entire surface to create a more even color. Apply also in two layers, if necessary, in three. It is better to add a solvent and a fixative to the varnish.
Painting a car under camouflage
The principle of working with a stencil is almost the same, but much faster. Here you don't have to cover your car with paper and tape to create a design. All you need to do is glue the stencil onto the body and fill the required recesses with paint. This way you will create an attractive camouflage, but it will not be unique since it is a stencil that many people have already used. Also, in such templates, usually all the drawings are the same in shape and size, which also does not add individuality. You can create your own stencil to create a truly exclusive design.
You can also apply camouflage in other ways. There is one simplest and fastest - vinyls. The film will not only give the car a spectacular appearance and provide camouflage, but will also provide a greater level of protection from bad weather or accidental scratches.
To apply vinyl wrap to your car, do the following:
- Before applying the film, try it on your car. Don't stick it on, just lay it on and secure it with tape. Next, mark the sections and those where you will need the most material (recesses, bumps, etc.). This way you can trim the vinyls if they end up being too big before you start gluing. If you have already started this process, simply tape off the areas that do not need to be painted.
- Now you need to apply a special spray to the areas of the body where the vinyls will be applied, and then attach the sticker itself.
- Use a rubber squeegee to smooth out any bumps.
- Use heaters to help the film adhere better at joints and corners. But be careful not to melt it.
- Take a good look at the areas where the film is bending. Level everything and you can go through it again with a heater or a hair dryer.
- A felt squeegee will help make sure everything is glued nice and even. Use it to line everything up.
- Cut off any remaining vinyl with a utility knife.
- For greater reliability, you can use sealant around the edges so that the film lasts better and longer.
When the work is completed, the vinyls should be allowed to dry and harden. This requires at least 12 hours. After that, you can use your car, but you don’t need to wash it for another seven days.
Pasting film on cars camouflage
We paint our car in camouflage
There is a common belief that “camouflage” is a concept related only to military topics. Contrary to such reasoning, it should be noted that automobile camouflage can be called any painting in the form of heterogeneous color spots. Recently, such a non-standard “color” of a car has become especially popular, and not only among military people or hunters. Camouflage cars are no longer a curiosity; they have long since “moved” from forests and rural areas to the streets of big cities. Naturally, it is almost impossible to order such a specific color at the factory, so there is no other choice but to paint the car in camouflage with your own hands.
Hunting civilian camouflage
Do not confuse hunting camouflage with forest camouflage. In some cases they can be interchangeable, but not always. This drawing, as you already understood, was created for hunters and contains mainly green, yellow and gray colors. Disguise to match the color of foliage and grass. This coloring looks best on large SUVs, emphasizing their style. There are even several subtypes of hunting camouflage that are designed for different terrain: steppes, savannas, jungles, and so on.
This is not only practical, but also an attractive design that will camouflage you in the forest and make you stand out in the city. For urban conditions, there is even a separate drawing in which not the entire car is camouflaged, but only some of its parts. It looks even more stylish, but, as you understand, it’s not so good in terms of stealth.
Hunting civilian camouflage
Types of camouflage
Before you think about purchasing painting materials and equipment, you need to decide which option is best to choose. It is necessary to use the help of a computer, carefully studying all possible options. Remember that the competent selection of a color palette, as well as the size and location of spots, is a task from the field of high art, the implementation of which will require maintaining certain proportions. Let's consider the most popular camouflage options: “Military” (hunting) - a combination of large brown, dark and light green, white and black spots of a blurred shape, as if “shading” into each other.
What you need for work
To ensure that painting a car in camouflage with your own hands does not cause much trouble and is done correctly, we will need the following: 1. Compressor. 2. Spray gun (if you decide to repaint the car). 3. Halogen lamp (1000 W). 4. Abrasive materials (sandpaper), spatulas. 5. Primer, putty, degreaser, solvent. 6. Car paint for spraying with a spray gun (complete repainting of the car). 7. Spray paint (2-3 colors depending on the option). Required when applying camouflage to the main color. We calculate the quantity based on the dimensions of the car - for example, to paint a VAZ 2121 Niva, 4 cans of each shade are enough. 8. Polish, car varnish. 9. Masking tape (2 and 4 cm wide), self-adhesive film. 10. Old newspapers or wrapping paper, polyethylene (for packaging discs and interior), clean rags. IMPORTANT! Painting should be carried out in a spray booth or enclosed area with good ventilation with a downdraft hood. It's not so much a matter of dust that can settle on the paint (spotted paint will perfectly disguise this), but rather the layers of paint applied multiple times - they must dry well.
Required tools and materials
To carry out such a process as painting a car in camouflage with your own hands, it is worth purchasing and preparing the following materials and tools:
- High-quality aerosol paint, which is sold in special cans and applied to the car. You need to purchase four cans of green, black and brown shades;
- You will need a special vinyl film;
- Sponge and polish;
- Varnish that creates a matte effect on cars;
- Solvent grade 469 in the amount of half a liter;
- 200 ml gasoline;
- An ordinary painting spatula, the width of which is 7 cm;
- A certain amount of clean flannel rags;
- Halogen lamp with a power of 1 thousand watts;
- A large number of old newspapers;
- Special masking tape made of paper, 5 rolls of wide and narrow.
How to prepare a car for painting
Before painting a car in camouflage, it must be properly prepared for this “event”: 1. Wash the car thoroughly, remove all dust from the interior. 2. Cover the interior and rims with film. Cover mirrors, glass, “optics” with paper, seal with tape or pack with film. 3. Treat the car body for painting. When the paint layer is in satisfactory condition, it is enough to simply degrease it by wiping it with gasoline. If there are problem areas on the body with chips or paint defects, clean them down to the metal, apply a layer of putty, sand with a fine abrasive and coat with a primer. If the car is properly prepared, you can safely begin painting it. There are two options for performing this work: applying camouflage to the main color or completely repainting the body.
How to paint over a base color
So, our car is ready, the surface of the body is degreased, problem areas are cleaned, puttied and coated with primer. Let's start the painting process: 1. Using a compressor, blow off the dust from the surface to be painted. We paste the tape, forming the outline of the camouflage spots, according to the intended pattern (it will help prevent paint from flowing onto other areas). 2. Painting in camouflage begins with applying the darkest color of the “paint”. After the layer has dried (we use quick-drying types of paint), we position the outline in a new way. We paint the areas with lighter paint, wait for it to dry, and repeat the procedure with a different location of spots and color shade. 3. Remove the tape, fix the design with varnish (optional), and carefully polish the surface. A little trick - to remove the tape without spoiling the paint layer, heat it with a halogen lamp, it will expand slightly and “come off” on its own.
How to paint a car in a camouflage uniform?
The military style has spread not only in the fashion world. Today, the color of protection is often found in automotive infrastructure. Officers, former military men and simply drivers, who are not indifferent to military regulations, choose an unusual exterior in the form of spots of various shades for their iron friend. Everyone can learn how to paint a car in camouflage on their own.
For painting work you will need:
Also useful for work:
After the working kit is prepared, you need to select the type of painting in camouflage color:
Depending on the type of drawing applied, there are paintings of varying degrees of complexity:
The last option is notable for its complexity.
For those who do not have painting experience, it is better to entrust painting under camouflage to professionals or watch a video of how specialists carry out this task. A car painted in metallic color will look very nice. But this, as they say, is a matter of taste.
Painting a car in camouflage - video tutorial.
Detailed instructions
The first step is to choose what color scheme to decorate the car with. Here it is worth mapping out the location of the colors and in what order they should be applied. According to technology, the spots should overlap, covering the edges of other colors.
In practice, painting a car in camouflage begins with preparing the body: degreasing, priming.
The entire car body is covered with a base color using quick-drying nitro paint (complete hardening - 20 minutes).
After the coating has dried, you can glue the pre-prepared plotter film molds. Here it is worth choosing materials made in China that have weak adhesive ability. After its removal, no traces remain on the paintwork.
The second color, lighter, is applied in the middle layer. It dries up.
Then the stencils are applied again, the procedure is similarly repeated from the third stage another 3-4 times with different colors.
To preserve the effect, the freshly applied paint coating is varnished.
If you are unable to get a plotter, you can use masking tape. However, you will have to be patient.
When painting camouflage, it is undesirable to apply small spots.
For a small SUV, the norm is 5-6 marks of different shades.
It is unacceptable to paint more than half of the body surface with camouflage without indicating changes in the car’s registration certificate.
How to paint a car using vinyl film?
The paintwork has an alternative - polyvinyl chloride film with a military pattern. If you have no painting experience, but still want to get taiga camouflage, then you need to do the following:
Those who are interested in car restyling will be able to continue the military theme inside the cabin.
So, having studied the methods of creating camouflage paints, making your own car unique, noticeable in the city and invisible in the forest is easier than it seems at first glance. A detailed description and video materials will help in performing painting work. It remains to wish good luck to those who really set themselves the goal of restyling to a camouflaged car.
Expert: Andrey Volkov.
Administrator
How to completely repaint a car
How to complete a complete body repaint? First you need to degrease its surface, clean it, and putty all problem areas. After the putty has dried, we clean it with “fine” sandpaper, prime and degrease these areas again. 1. We cover the body with film or paper, fixing its edges with tape - we form the contours of our camouflage. 2. Apply a layer of paint using a spray gun. The darker paint is usually applied first. After it has completely dried, the film can be removed and another one can be pasted, forming the next color range. 3. We repeat this procedure several times, applying other layers of paint in accordance with the intended design. IMPORTANT! We paste the film so that the spots slightly overlap each other. As a result of these activities, we will apply high-quality camouflage to the car with our own hands, with minimal effort and maximum savings of money.
Some rules, subtleties and nuances of work
Painting must be done in protective clothing and a respirator, since the fumes from paints and varnishes are very toxic. The room should be equipped with good lighting fixtures (preferably fluorescent lamps), which provide glare-free lighting and allow a better inspection of the surface being painted. Applying camouflage to a car is a lengthy process that cannot be rushed. Be sure to wait until the paint is completely dry before starting to apply the new film.
The contours of the picture can be softened by applying a border in the form of a black shadow. If you want the edges of the spots to be blurred, warm the surface of the body with a halogen lamp - they will spread slightly. You can also use an airbrush for these purposes. To correctly apply such a beautiful, complex pattern on a car, you need to have good imagination and design skills. The coloring should look organic - be sure to adhere to the “golden ratio” rule, distribute the spots evenly over the body. In conclusion, I would like to add a few more words about how to paint your favorite car in camouflage with your own hands. The most important thing in this matter is to have a great desire. Simply put, you need to really, really want it, then any of your dreams will come true.