About the peculiarities of engine temperature in Lada Granta and Kalina
Many former owners of Lada Priora, Samara or Lada Kalina cars have switched to newer AvtoVAZ models Lada Granta and Lada Kalina 2nd generation.
During operation, they began to notice that the operating temperature of the Lada Granta and Lada Kalina 2 engines was 7 - 10 degrees lower than on cars of previous years. In theory, the engine “underheats”, which can cause increased fuel consumption and wear of engine parts. Is it really? If you compare the cooling system of the Lada Granta/Lada Kalina 2 with the cooling system of VAZ cars of the previous generation, you can notice a number of differences:
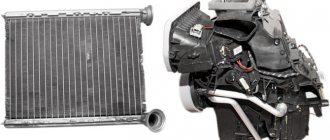
- A single-pass (and not a two-pass, as before) heater radiator with reduced hydraulic resistance and thermal efficiency is used. The radiator is built in series (and not in parallel, as before) into the “small circuit” of the cooling system;
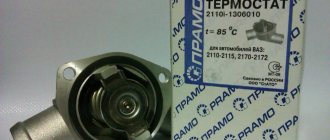
- thermostat 2190-1306010 has one (and not two valves, as before) and controls only the flow of coolant through the radiator of the cooling system;
All these changes allowed the new generation cars to gain a number of advantages:
- by removing more heat from the heater core, it was possible to improve the performance of the stove;
- it was possible to achieve more accurate engine temperature control;
- fuel consumption decreased and vehicle dynamics improved, this was achieved by increasing the ignition timing.
These improvements cause a lower average temperature of the Lada Granta and Lada Kalina 2 engines. Such “underheating” does not lead to increased fuel consumption, wear of engine parts or other negative consequences. Official dealers are ready to record complaints about engine “underheating” only if, along with this, there is any additional accompanying negative manifestation. Otherwise, this is considered a feature of the cooling system of the Lada Granta and Lada Kalina 2 engines. You can learn more about the feature of the cooling system of the Lada Kalina 2 and Lada Granta engines from the documentation on our website.
Source
Diagnostics and replacement of the fan switch sensor without outside help
The fan switch sensor is a special device that activates the fan located at the bottom of the radiator. This happens if the temperature of the antifreeze (coolant) rises and the engine overheats.
DTOZH and the fan switch sensor are two different regulators. The DTOZH gives the ECU temperature readings, and the ECU turns on the fan itself. The second regulator, as a rule, is a power regulator, closes the contacts at a certain temperature - turns on the fan relay and is located mainly on the radiator, since the DTOZH is located on the engine.
Determinant device
More details about how the fan sensor works, what functions it has, and how to diagnose this device are below.
Purpose and functions
The radiator fan switch improves the cooling system's properties, including auxiliary air flow without external driver intervention. To perform these manipulations, a special element is installed in the device body that responds to changes in liquid temperature.
In ordinary language, we can conclude that the determinant that turns on the cooling fan is a real switch. It is triggered when the temperature rises for a long time, when the plate bends and then the contacts close, supplying current to the fan power circuit.
Operating principle and location
It, as mentioned, is located at the bottom of the radiator and turns on when the temperature reaches a certain point.
This happens as follows:
- The plate, which is located at the bottom of the device, begins to change as the temperature increases.
- By bending, it exerts pressure on a special piston, which moves forward and, as it moves, closes the contacts: both movable and stationary.
- If the antifreeze remains cold, the plate will not heat up and, as a result, the contacts will not close, causing the fan to turn on.
Appearance of the device and location
Each machine is individual and so is its temperature, so there are no specific indicators at which the device is triggered. The difference is also present in the rotation speed: there are two-speed and single-speed. The two-speed switching option is more rare, but it also occurs. It differs in that when the peak temperature is reached, a pair of contacts closes, and the fan rotates at low speeds.
It can often fail in a domestic car. If this happens, if you notice that there is a malfunction in the system, you need to immediately drive the car into the garage and change the device. You can also find out where the fan switch sensor is located from the video from the author of Avto-Blogger.ru.
How to check the sensor yourself?
Checking the fan switch sensor is not difficult.
Regulator check
- If there is a need to diagnose it, you must first find out its functions and operating principle.
- After this, you can test the system by heating the most vulnerable part of the sensor housing. To do this, you need to remove it from the radiator, carefully inspect it, check the contact pads, inspect the wires, and, if necessary, clean it.
- Next, you will need a tool that you can make yourself from a regular light bulb and battery, or use a special tester.
- Bring water to a boil, then connect the tester and sensor contacts and lower its vulnerable side into the water.
- After this, a short circuit should occur. This action will cause the lamp to ignite, or the characteristic sound signal of the tester to appear. If the device shows that the contacts closed before colliding with boiling water, then the sensor is undoubtedly faulty. The author of the video, Mechanical Technician, will tell you how to check the fan switch sensor.
Instructions for replacing the regulator
Replacing the fan switch almost always follows the same pattern:
- We need to prepare the “ground”. In some cars, this happens as follows: you need to rid the system of cooling liquid if the fan is installed at the bottom of the radiator, or, if the system has enough, remove water from the expansion tank. If the antifreeze needs to be completely drained, then you need to open the heater tap so that there is no residue. Important: do not pour the remaining liquid onto the ground, because antifreeze is quite poisonous.
- After this, you can remove the sensor by disconnecting the connected wires. Then, using the key, you need to remove the housing and unscrew it by hand. The new fixture must be tightened by hand, then a wrench can be used to apply the finishing touches. To prevent leakage, you can use a special thread tape, which will make the connection tighter and more reliable. After this, you can restore the contacts by returning all the necessary wires to their place, and fill the system with coolant.
At what temperature should the fan on the Lada Granta operate?
Car : Lada Granta. Asks : Semyon Novokshonov. The essence of the question : At what coolant temperature does the fan on the Lada Granta turn on?
Good day, hello! Please tell me at what temperature the radiator fan should operate? My temperature is already rising to 100 degrees, but he still doesn’t want to work! Maybe it's just broken for me?
VAZ fan switch sensor: features and replacement
With the change of the mechanical fan drive came an electric one, and with it the VAZ fan switch sensor. It performs an extremely simple function - when the engine temperature rises above the limit, it turns on the electric fan. However, if it fails, the consequences may not be very pleasant.
Installing this sensor has several advantages:
- faster engine warm-up at low temperatures;
- reduction of operating time at inefficient temperature conditions;
- more optimal fuel consumption.
Fan operation is completely unnecessary when driving at high speed, because cooling occurs naturally. At the same time, on a hot day under limited speed conditions, for example, when a traffic jam occurs, the engine quickly overheats, and a cooling fan switch is simply necessary. Typically this element is mounted on the lower pipe coming out of the radiator. The device should operate when the coolant temperature rises.
Of the entire cooling system, it is the bimetallic thermal switch that most often fails, creating the risk of engine overheating. This entails serious consequences, including jamming. In order to prevent this, you need to constantly monitor the temperature on the dashboard. You have no more than 5-10 minutes to react and turn off the engine.
Checking the functionality of the sensor
If the temperature indicator stubbornly creeps up, most likely the sensor has failed. To check, it is not necessary to immediately go to a service station. The question of how to check the fan switch sensor can be answered by performing a very simple test:
- Firstly, it is worth checking the fuse that controls the operation of the fan. If it burns out, then you just need to install a new one and not waste money on a bimetallic thermal switch.
- Secondly, you can close 2 contacts of the device; if the electric fan starts working, most likely the problem has been found and a new sensor is needed.
- Thirdly, it doesn't hurt to check the wiring. There are often cases when there was simply no power or there was a breakdown to ground.
Another way is to use a multimeter. To carry it out, you will need a relatively small container of water, as well as a heat source that will heat the liquid. The principle of this method almost completely repeats the thermostat test.
The multimeter terminals must be connected to the contacts of the bimetallic thermal switch and the device must be turned on in the so-called “ringing” mode or measuring the resistance value. Next, the radiator fan switch sensor should be placed in water with the part on which the thread is located.
You can turn on the heat source and wait for the water to heat up. As soon as the thermometer shows a temperature of 92-95°C, the multimeter will make a characteristic sound. If this does not happen, the non-working element must be replaced.
Replacing the bimetallic thermal switch
Replacing the fan switch sensor begins by removing the terminal with the “-” sign from the battery. After this, you can begin to drain the coolant from the system. At the end of this process, you need to turn off the power to the sensor and unscrew it from the radiator housing. Assembly is carried out according to the same algorithm, but in the opposite direction. It is imperative to check the sensor for functionality.
Table of operation of the cooling fan on the Lada Granta depending on temperature and ECU types
In order to find out at what coolant temperature the fan on your car turns on, just look at the table below and find your type of ECU and car.
January 7.2 software A\I201CO56\57\58 T=101 degrees
| Cable throttle system | 8-valve internal combustion engines | 16 valve internal combustion engines | 8-valve internal combustion engines | 16 valve internal combustion engines |
| B101CR01 T=103 degrees | В173CR03 T=101(1) degrees T=105(2) degrees | A\I303CD04\CE05\CF06 T=101(1) degrees T=105(2) degrees | A\I373CA01\02 T=101(1) degrees T=105(2) degrees | |
| Bosch 797 software B1C02Q05 T=103 degrees | В102СR06 T=103 degrees | В174CR03 T=101(1) degrees T=105(2) degrees | ||
| Bosch 797+ T=103 degrees | B104CR02 T=101(1) degrees T=105(2) degrees | B11KSS01\B13KSS02 T=101(1) degrees T=105(2) degrees |
Cooling fan diagnostics
In order to diagnose the performance of your fan, you just need to disconnect the connector from the thermostat sensor. In this case, the sensor must work forcibly.
Changing values
You can change the factory switching settings through the system of almost any on-board computer ( STATE or MULTITRONICS ), the recommended values should not be lower than 95-97 degrees.
Is the absence of an engine temperature sensor a cost-saving measure?
An interesting point is the absence of an indicator on the instrument panel indicating the fluid temperature and engine condition. As the developers themselves say, this indicator does not correspond to the price category of the car and is too expensive for it.
The solution to the problem was to install a special light bulb on the panel, which lights up red in case of overheating. If the system is working properly, in this case, the fan automatically turns on, and the problem is resolved without driver intervention.
Despite everything, the Lada Granta, whose cooling system is very well thought out, works well and rarely causes breakdowns. This is a proven car, albeit of a budget class.
What is the cooling system on the Lada Granta
On the VAZ-2190 or simply Lada Granta, although a modernized engine cooling system was created and installed, the design similarity with the predecessor Lada Kalina still remained.
Since the cooling system in Grants, as on all Russian cars, is a closed type system, the liquid through it is evenly distributed over all its closed areas.
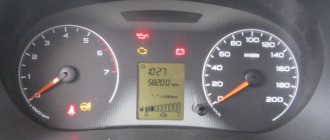
It is worth noting separately that in the new Lada Granta models, the developers removed the engine (coolant) temperature indicator from the instrument panel. Instead, a special warning lamp is provided - signaling the maximum temperature of the antifreeze and the moment the radiator fan turns on.
Fan switch sensor
Refusal of constant rotation of the fan using a belt drive made it possible to reduce the engine warm-up time. The electric drive, which consists of a motor, relay, switching sensor and battery, allows the fan to turn on only when the engine temperature exceeds the optimal value. Thanks to this approach, the cooling system of internal combustion engines has become more efficient. Periodically turning on the fan made it possible to reduce fuel consumption, because the engine warm-up time was reduced and power losses due to the constant rotation of the blades disappeared.
What to do if the fan does not work at all?
Look for a breakdown. The most common culprit is the cooling fan fuse.
Fuse box (painted numbers all day)
F1 - fan switch fuse; K1 - fan relay.
Source
At what engine temperature should the fan on the grant turn on?
Before I installed the on-board computer, I didn’t see the temperature and didn’t bother, but now I want to discuss it. Moreover, I have seen discussions here on various topics. So, our fan turns on at 103-105 degrees, drops the temperature by 4 degrees and then in a circle. Now I don’t understand why exactly this temperature? Not in the sense that I’m afraid of boiling (with a normal plug, antifreeze can easily withstand), but simply - what is the justification for heating the engine to above 100 degrees? When driving, the operating temperature is significantly lower (mine is 85 degrees), what does this warming up give an extra three degrees per hundred when standing in a traffic jam? As I understand it, if you lower the switch-on temperature, the fan will not turn on more often - it will still work in a traffic jam with the same frequency, the decrease in temperature is the same. Unless in situations where you were driving, stopped at a traffic light for a short time and heated the engine to 100 degrees, it will not turn on again if the temperature is set to 103. But these are very rare situations.
I was just completely confused by the AvtoVAZ document, where it is written about the reduced temperature of Granta engines. That the cooling is now improved, the operating temperature is lower - hence the engine is good, the efficiency is higher and in general. And with all this, the temperature at which the fan turned on was left the same and in a traffic jam they forced the engine to run at a very high temperature. Why was this done anyway?
There about the thermostat, the fan temperature has already become offtopic (when the discussion went sideways, one might say they showed a yellow card).
Added after 10 minutes
As I understand it, if you lower the switch-on temperature, the fan will not turn on more often - it will still work in a traffic jam with the same frequency, the decrease in temperature is the same. Unless in situations where you were driving, stopped at a traffic light for a short time and heated the engine to 100 degrees, it will not turn on again if the temperature is set to 103. But these are very rare situations.
I was just completely confused by the AvtoVAZ document, where it is written about the reduced temperature of Granta engines. That the cooling is now improved, the operating temperature is lower - hence the engine is good, the efficiency is higher and in general. And with all this, the temperature at which the fan turned on was left the same and in a traffic jam they forced the engine to run at a very high temperature. Why was this done anyway?
Most likely, to be able to equip it with a thermostat without modifying the ECU because The thermostat is purely mechanical and the ECU is not aware of its capabilities. And in principle, in the urban cycle, in an environmental sense, extra power means extra emissions, also an option.
Based on the turn-on time, I tested +90C and +101C (when set to +102C, both fans turned on at the ECU command at speed 2 and the test did not work). To turn on the fan in BC tests, I chose channel 1+2 - i.e. immediately at high speed.
Fan operating time at +90C: 37sec - cooling, 1min 30sec heating from 84 to 90. The fan turned off at +86C, the temperature drop dropped to +84C.
Fan operating time at +100C: 31sec - cooling, 1min 50sec heating from 94 to 100. The fan turned off at +96C, the temperature drop dropped to +94C.
During the work time of 10 minutes, the difference was 10 kopecks according to the bookmaker (the cost of the trip at a price of 32-40).
Those. in the end, I left for myself a value that my engine never reaches +92C in the city. By and large, it wouldn’t be possible to change anything at all, but under my hood I have thermal insulation for the intake (which doesn’t like heat) and if I’m still destined to get into traffic jams, then it’s better to let it blow more often - everything dries out from the heat. The fan (at least in my experience) has never died, and even when working with the air conditioner it spins without turning off. It stays at +85C. And the hoses and rubber bands fell apart on the road (worn out from the heat) - the rubber quickly becomes dull. Considering that many people already had complaints about rubber products by the 30,000 mileage - you don’t really want to change a bunch of rubber bands that will fall apart at 50,000 - it’s better to change the car with still living rubber bands at 75,000.
At a temperature of +101C, after several fan activations, I got a smell of burning plastic - in fact, something in the engine compartment is heating up more than +101C - the area of the catalytic converter at 8v is both the fuel rail and the wires coming from it. And the thought flashed through my mind: tie the Air sensor (which I have included with the BC) to the fuel rail (during the summer) to evaluate what’s there.
Source
Elements of the Lada Granta cooling system
On Lada Granta cars with an injector, a closed liquid ODS with forced circulation of antifreeze is used. It removes heat and acts as a lubricant and does not freeze in severe frosts in winter. In a working system, the temperature of the Lada Granta engine is maintained at 95-100 degrees. Regardless of the body type, configuration, or the presence of air conditioning, the cooling system remains the same, without any changes. The SOD diagram is clearly shown in the photo.
The standard SOD that comes with the Granta motor consists of a number of parts:
- radiator;
- electric fan;
- expansion tank;
- thermostat;
- temperature sensor;
- coolant pump;
- heater radiator;
- water jacket;
- connecting hoses.
Forced circulation is carried out along a small and large circuit.
Thermostat
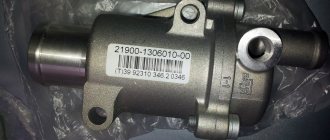
One of the main elements of the SOD, which performs the functions of a valve, redirecting the flow of coolant from a small circle to a large circle. For the Lada Granta, the normal operating temperature can be 100 degrees +/- 2 degrees. If the antifreeze temperature is less than these values, the thermostat valve is in the closed position, the antifreeze circulates in a small circle, bypassing the main radiator - this way the engine warms up faster.
After heating the coolant (coolant) to 60 degrees, the valve begins to open slightly, and the antifreeze passes in a large circle, cooling through the radiator. In an SOD, the thermostat is the weakest link; it fails most often. The malfunction is explained by the valve jamming in the open or closed position, as a result of which the engine takes a long time to warm up or, conversely, overheats. The part cannot be repaired and must be replaced with a serviceable one.
Water pump
The water pump, or simply pump, forces antifreeze to circulate through the system. The unit is located in the cylinder block and participates in the operation of the timing belt, since it has a common drive with the gas distribution system.
The service life of the part is no less than 80 thousand km, but due to its poor quality, it is recommended to replace the pump together with the timing belt.
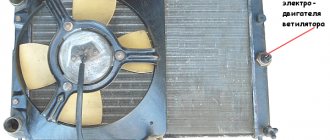
Radiator and fan
The radiator is designed to cool antifreeze. The fan is connected for the same purposes, triggering when the temperature exceeds 100 degrees. The radiator is cooled by the counter flow of air when the car is moving. In the summer heat, this is not enough, and an electric fan comes to the rescue.
The operation of the electric fan depends on the temperature sensor. The latter continuously monitors the engine temperature and, if the indicators are exceeded, transmits information to the control unit, which closes the circuit, connecting the fan. A sensor malfunction can cause the motor to overheat, since the fan will not turn on at the right time.
Connecting hoses and water jacket
Hoses connect all elements together, forming a closed system. Their malfunctions are associated with seal failure and leaks, and a lack of coolant leads to overheating. The engine water jacket is designed to circulate antifreeze and remove excess heat. Damage to this element will result in water hammer. This rarely happens when using antifreeze, but if water is used, which provokes corrosion, a similar result is expected.
Expansion tank
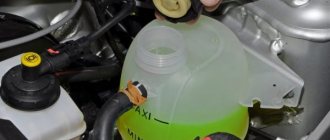
The volume of coolant increases or decreases depending on the temperature; an expansion tank is used to compensate for its amount. It is made of translucent plastic. To control the liquid level, maximum and minimum marks are placed on the tank. At the top there is a neck with a sealed cap, which combines the inlet and outlet valves. When the pressure in the system increases to 1.1 kgf/sq. cm the exhaust valve opens, allowing the boiling point to increase and preventing steam formation. As the liquid cools, the volume of the liquid decreases, and to prevent vacuum, the inlet valve opens and allows the lack of air into the tank.
Design of the engine cooling system on Grant
The cooling system on Grant is liquid, closed type. The design involves forced distribution of coolant to all engine elements that need it. The fluid flow diverges evenly.
Despite some differences in Granta engines of various configurations, the cooling system works the same on all.
Let's look at the main elements of ODS on Grant:
Liquid pump.
The regular and uniform supply of antifreeze or antifreeze (coolant) to the heated engine elements depends on it.
The pump is located on the front surface of the cylinder block. As soon as the gas distribution mechanism is activated, under the action of the toothed belt, the water pump begins pumping fluid. The pump does not require lubrication, as it is equipped with closed bearings.
If it breaks down, the liquid pump cannot be repaired. For the continued functioning of all parts of the cooling system, the old pump must be replaced with a new one.
Thermostat.
Equipped with a solid heat-sensitive filling, which helps maintain the required coolant temperature.
When operating a vehicle, this system significantly reduces the time spent warming up the engine.
The thermostat design implies the presence of a main and additional bypass valve. If the coolant temperature does not exceed 85 degrees, the thermostat is closed, preventing fluid from moving through the radiator. Due to this, the time for warming up the engine is reduced. The thermostat directs fluid to the radiator at temperatures above 85 degrees.
Radiator and expansion tank
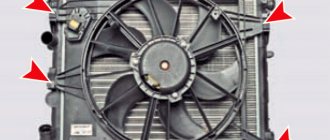
The radiator device is equipped with plastic tanks and hoses leading to the engine water jacket and expansion tank.
The radiator on Grant is manufactured by a French manufacturer. The design and operating principle of the device is similar to the performance of radiators installed on Renault Logan.
The expansion tank has the function of compensating and smoothing the amount of liquid evaporating due to temperature changes.
Electric fan.
Made of plastic and has the function of cooling the radiator with air flow.
Usually, the radiator is cooled by a natural, oncoming flow of air when the car is moving, but sometimes it happens that this is not enough.
Problems caused by malfunctions in the Lada Granta engine cooling system
In a Lada Granta car, the cooling system in the operating scheme is quite typical. Accordingly, the problems associated with it are often typical.
Let's look at some known problems associated with the Lada Granta ODS, as well as their possible solutions:
The engine gets very hot.
This problem can be caused by several reasons:
– there is not enough coolant in the system (needs to be added);
– the thermostat does not open (you need to buy and install a new thermostat);
– the pump does not function (the liquid pump needs to be replaced);
– the valves in the expansion tank are faulty (check, replace).
The heater in the car blows a cold stream of air.
This problem is often accompanied by engine overheating. Most likely it's a bad cylinder head gasket. This leads to coolant leakage and the formation of vapor locks in the cooling system.
To resolve the problem, it is necessary to replace the cylinder head gasket.
The engine takes a very long time to warm up.
The problem is most likely a faulty thermostat. When broken, it hangs in a closed or open state (in this case, open).
A new thermostat needs to be installed.
Rapid decrease in coolant level in the tank.
The problem can be caused by several reasons:
– leaky connection between the radiator and expansion tank (check for integrity and tightness of the connection);
– hoses are damaged (check integrity, replace);
– leakage through the cylinder head gasket (check, replace).
Fogging of windows, oil stains on the windshield, decreased coolant level.
These problems together indicate a leaky stove heater. It is necessary to check all connections from the radiator for leaks.
You should regularly flush the elements of the engine cooling system, otherwise the accumulation of dirt and dust will cause clogging of the installation, which will also lead to engine overheating or other problems.
The principle of operation of the cooling system
Lada Granta cars use modified ODS. When the engine starts, the thermostat is in the closed position, the antifreeze is forced to move by the water pump in a small circle: pump, water jacket, heater radiator - an expansion tank is also built into the system in parallel. On the first Granta models, the stove radiator was also installed in parallel, but at the moment its inclusion in the system is sequential - the liquid in the small circle necessarily passes through it.
For this reason, the radiator has a single-pass design, meaning coolant circulates in only one direction. As the antifreeze heats up at a temperature of 60 degrees or more, the thermostat valve begins to open slightly, and the coolant begins to circulate in a large circle: pump, water jacket, radiator, heater core. The liquid begins to circulate through the radiator, a small circle works in parallel with the expansion tank. The pressure in the system is maintained by two pipes and points on the top of the radiator in place of three return pipes: from the radiator, from the heater and from the pump.
After the coolant warms up above 110 degrees, the fan is activated, forcibly cooling it to operating temperature - 95-100 degrees. An indicator above 110 degrees is considered critical - the motor overheats.
The series-connected heater core, thanks to its single-pass design, increases the efficiency of heating the interior. There is an improvement in circulation and a decrease in hydraulic resistance. If previously the coolant was mixed in the thermostat housing, now it flows from the jacket directly to the control valve. It always opens at the right moment, reacting not to the general, but to the real temperature of the antifreeze. Overheating is practically eliminated; on the contrary, insufficient heating is noted, but this does not affect engine operation and fuel consumption.
Signs and causes of malfunctions of ODS Grants
There are not many elements involved in the cooling system, and therefore the list of faults is small. Signs of ODS problems:
- The engine gets very hot. Since the coolant temperature indicator on the Lada Grant was removed to reduce the cost, the driver will be able to track the temperature increase only after reaching a critical point. In this case, the warning indicator on the instrument panel will light up. Overheating is indicated by constant operation of the electric fan. Another reason is the failure of the temperature sensor, which transmits inflated readings to the ECU. Systematic overheating of the engine can also be determined by white carbon deposits on the spark plugs.
- The engine cannot warm up or takes a long time to warm up. In this case, the stove will blow cool air, the radiator pipe from below will be warm, but not as the engine warms up, but almost immediately after starting. A faulty thermostat is to blame. If the engine is in a constant state of insufficient heating, operation for a long time is prohibited, since it cannot be subjected to loads.
- Antifreeze leak. The problem can be determined by inspecting the elements of the ODS. On a hot engine, you can see fumes from antifreeze, and traces of coolant will also be visible under the engine. The most dangerous internal leak occurs when antifreeze enters the combustion chambers. Visually there are no leaks on the engine, but the coolant level in the tank is still decreasing.
Another characteristic sign of ODS problems is an increase in the oil level and white smoke from the exhaust pipe. This situation is dangerous due to the complete failure of the internal combustion engine, since the entry of antifreeze into the cylinders deprives the elements of the lubrication system.
Motor oil mixed with coolant completely loses its properties. Operating a vehicle with such a malfunction is prohibited.
Engine repair will be required, as the problem is related to a broken cylinder head gasket, a damaged water jacket, or a crack in the block.
The most common reasons are:
- natural wear and tear of parts;
- mechanical damage;
- violation by the owner of engine operation requirements.
The use of low-quality antifreeze, mixing different types of coolant, and installation of low-quality parts are also causes of malfunctions of the elements of the power plant cooling system. Repairs carried out without the appropriate knowledge, skills and experience lead to breakdowns. SOD problems require an early solution, as they affect the resource of the power plant.
No less dangerous are hidden problems, for example, engine detonation caused by overheating. Clogged radiator honeycombs prevent normal cooling, and the antifreeze temperature does not have time to decrease, causing the engine to overheat. Fuel detonates in the combustion chambers, the cylinder head gasket burns out, the plane of the cylinder head is disrupted, and the engine subsequently “jams”—there is a need for major repairs or replacement. The cooling system requires constant monitoring - you need to monitor the level of antifreeze in the expansion tank and periodically change the working fluid.
A pump malfunction is characterized by coolant leaks at the pump installation location, disruption or cessation of antifreeze circulation through the system. In this case, the engine overheats, but jamming of the pump bearing is even more dangerous, since on the Grant this leads to a broken timing belt and damage to the valves. Engine repair will be required. Malfunctions of the electric fan in most cases are associated with a violation in the electrical circuit, malfunctions of the thermal relay and the electric motor. Lack of forced cooling of the motor by a fan leads to overheating.
The most unpleasant malfunction for car owners is damage to the cylinder head gasket or a defect in the surface of the head at the point of contact with the cylinder block. Cracks in the cylinder head and cylinder head are less common. This causes coolant to leak into the oil sump. The tightness of the cooling system is also compromised if there are problems with the connecting pipes - cracks, blockages and loose connections.
Failures of the SOD can also include electronic malfunctions. In the case of Granta, this is a malfunction of the warning light warning of overheating and failure of the engine temperature sensor. As a result, the electric fan does not turn on at the right time, and the engine temperature exceeds critical values - overheating occurs.
Checking the fan switch sensor
As we all know, the electric cooling fan on the radiator turns on at a certain temperature, cools the liquid and turns off when it has cooled down enough. It is controlled by a sensor screwed into the radiator, usually in the place where the liquid already leaves the radiator cooled. These sensors are still used in foreign cars to this day. The domestic auto industry, apparently having had enough of problems with this simple element of the cooling system with the transition to electronic injection systems, entrusted the work of turning the cooling fan on and off to the electronic engine control unit, the “brains”. They say this is a complete plus - the controller can be reprogrammed for different on and off temperatures, and most importantly, this very sensor is no longer in the radiator. But the global auto industry continues to install these sensors. Well, okay, we’re talking about Zhiguli cars with a carburetor, and there are still a lot of them.
Everyone probably knows what the sensor looks like, but if anyone has forgotten, I stole a photo from the Internet: -
So, the principle of operation of the sensor is simple, it should turn on at a certain temperature, and then turn off, also at a certain, but lower temperature, and so on in a circle. On foreign cars, many people don’t remember these sensors for years, but for some reason it doesn’t work out that way for us. In addition, the manufacturers have added problems to us - on some machines they have simplified the circuit for connecting the sensor to the system - without a unloading relay, that is, the fan is switched directly through the sensor, there is no relay and a rather high current passes through the sensor, by the way, I have exactly such a machine. In the fuse block of such a machine, there is a metal jumper in place of the fan relay; you cannot simply take and install the relay - it will not work, since there are no control contacts (the circuit is simplified). In addition, for different car models, the designers also provide different switching and switching temperatures, but the sensors are all the same in appearance. Let's figure it out.
For a long time, sensors labeled TM108 were on sale, and in general they are still available. They have several options for switching temperature - 92-99 degrees (off/on), these sensors are recommended for front-wheel drive VAZ models and a bunch of other cars - Tavria, Moskvich-2141, Izh-2126. And there is a variant TM-108-10, it has a temperature of 87-92 degrees, it is recommended for the “classics” - VAZ-2103 and beyond. Let me remind you that the VAZ-2101/2102 has a belt-driven cooling system fan that sits on the pump pulley, so there is no need for a sensor there. To put it simply, a “cooler” sensor is recommended for classics. If you have a hot climate, such a sensor can also be installed on a front-wheel drive - the fan will operate earlier, and replacement is not recommended. The operating temperature range is usually stamped on the side of the sensor.
But, these sensors are designed for a maximum load current of 1A, which means they work only through a relay. If there is no relay, then there are two options - you can install the relay yourself (it’s not very difficult and there are diagrams on the Internet), or you can buy a sensor with index 66.3710 or 661.3710. They operate at the same temperatures, but are designed for a maximum current of 16A, which allows them to work directly with the fan - without a relay. Sensor 66.3710 goes to front-wheel drive, and 661.3710 to “classic”. These sensors can be safely used instead of TM108 in circuits where there is a relay, but the other way around is not possible - a sensor designed for a maximum current of 1A quickly fails under direct fan load, sometimes immediately after the first operation. Another motorist, not knowing these nuances, changes several sensors in a row until he finally accidentally comes across the right one, designed for high current (often this is an imported analogue, since after replacing several of ours, a person decides that they are all junk and buys an imported one, with which everything immediately becomes normal) and then curses begin to fall on domestic manufacturers for total defects, although the fault is not defects, but confusion! Often, even salespeople in car dealerships are not aware of these nuances with current, although everyone knows about temperature.
Our main manufacturer of these sensors is Kaluzhsky, it has been producing these sensors for a long time and as it states itself (link to the article “Winter Cherry” from “Behind the Wheel” at the very end) - the defect rate for them is less than 1%, but there are many fakes on the market, I hope that this was relevant at the time of writing this article - 15 years ago, but now there should be fewer fakes, since there is no shortage, and the price of the sensor is not high, there is no point in counterfeiting. But the plant itself also contributes to the confusion; here is a table from the official website:
Please note that the TM108 and TM-108-10 sensors have switched on and off temperatures; the 661.3710 sensor has the same on-off temperature as the 66.3710 sensor, although it is lower. In terms of applicability, it generally feels like everything was written “out of the blue.” As I wrote above, “hot sensors” for “classics” are not recommended, at the same time 66.3710 can be installed on both Tavria and AZLK... In general, the plant has problems with official information, I hope that this is not the case with production. Here's the link, you can check it out.
So, everyone probably knows what happens when the sensor fails - the fan does not turn on and the motor overheats. In this case, the diagnosis is simple - we remove the contacts from the sensor and close them, if the fan is working... then the thermostat may also be to blame (they often write about this on the Internet), I will not describe all the ways to check the thermostat, indirectly it can be done this way - if there is a traffic jam you temperature rises, and having escaped from it into the open air, the temperature drops and the pointer goes to the left and rises to some normal position, which means the thermostat is working, otherwise the engine would heat up even more under load.
In general, the sensor is to blame. (This is without even touching on the fact that the pump may be faulty, for example, a cracked impeller slips on the axle). But that is not all! The sensor may turn on and not turn off, then your fan will work constantly, this happens by the way when a sensor designed for 1A is installed in a system where there is no relay - when turned on, a large current passes through it, the contacts burn and cannot open, in this case the reason is clear. And there is a third option, which is exactly what I came across - the sensor works as it should, but gradually starts to turn on at a higher temperature; in traffic jams this is clearly visible from the temperature indicator on the instrument panel. If at first the indicator arrow stood strictly vertical and the fan turned on, then I noticed that the fan began to turn on at a higher temperature, then at an even higher temperature, and at the end the arrow was already at “one o’clock in the afternoon”, even a little further, almost at the red zone (which for some reason it’s white on the dashboard) and turning on the fan was accompanied by the start of antifreeze boiling when the radiator cap was in good working order! I also observed such an effect that sometimes the fan turned on and worked much longer than usual, cooling the motor to normal temperature, then it stopped again and the motor again heated up almost to red. This indicates that the characteristics of the sensor have “floated”, which means that its service life is coming to an end. This most likely happens due to burnt contacts; in any case, such a sensor definitely needs to be changed, which is what I did today. After replacing the sensor, the fan began to turn on again when the temperature indicator was in a vertical position, as it should be, and the liquid did not even come close to the boiling point.
How to fix breakdowns
Repair of ODS elements is not considered as part of troubleshooting. In most cases, replacement of failed parts is necessary.
Replacing the thermostat
Lada Granta is available with two types of engines: one of them is 8-valve, the other is 16-valve. The location of the thermostat on these power plants is somewhat different, which means that replacement is carried out with certain differences.
To replace the thermostat on an eight-valve engine, you will need a small set of tools: socket wrenches, screwdrivers, a Torex wrench and a container for draining the coolant.
The replacement procedure is simple; to do this, you need to follow a number of steps:
- Place the car on a level surface and use a jack to raise the front end.
- After unscrewing the bolts securing the engine protection, remove it.
- Place a suitable container under the plug to drain the coolant from the radiator.
- Unscrew the cap from the expansion tank neck.
- Unscrew the drain plug and wait until the liquid drains.
- Loosen the thermostat pipe clamp from the rear and disconnect the hose.
- Loosen the clamp on the front thermostat pipe and disconnect it.
- The ground wire is secured with a nut on the thermostat stud - unscrew it and disconnect the wire.
- Unscrew both nuts that secure the thermostat to the studs and remove it.
- Remove the O-ring and, unscrewing the three nuts, remove the thermostat cover.
- Press and rotate the locking plate to remove the cover.
- Remove the spring with the valve mechanism.
Installing a new thermostat is carried out in the reverse order. If the hoses will not be changed, then to prevent possible leakage of antifreeze, it is recommended to lubricate them from the inside with a small amount of sealant before installation.
After installing the thermostat, all pipes are tightened with new clamps, and coolant is poured into the expansion tank.
Then you need to start the engine and check the operation of the cooling system, if necessary, remove the air lock. To replace the thermostat on a 16-valve engine, the same set of tools is used, steps for an 8-valve engine are repeated from 1 to 6, then the process is as follows:
- Disconnect all pipes through which coolant is supplied to the thermostat by loosening the clamps.
- Unscrew the fastening bolts and remove the thermostat cover from the seat.
- Remove the sealing ring, turn the fixing plate by pressing and remove the spring with the valve mechanism.
Installation of a new thermostat is carried out in the reverse order. All hoses are connected, antifreeze is poured into the system, the engine is started, and if necessary, the air lock is removed, after which antifreeze is added to the tank to the mark between the minimum and maximum. There are many fakes and low-quality parts on the car parts market, so it is advisable to check the thermostat before installation. To do this, you need to heat water in a container to a temperature close to boiling and place a thermostat there; if the valve begins to open slightly, it means the device is working.
Replacing the thermostat can be done with your own hands in a regular garage. There are no difficulties, but you will have to spend money on a new part, pipes, if changed, and coolant. To save time, you can contact any car service center, where within 20-30 minutes the technicians will change the thermostat for 200-300 rubles.
Replacing the coolant pump
To replace the pump on a Grant you will need a set of sockets, wrenches and screwdrivers. Many car owners combine pump replacement with timing belt replacement. At the initial stage, the process is identical for both procedures:
- Disconnect the negative terminal from the battery.
- Using a 17 mm wrench, rotate the camshaft pulley by the fastening nut until the mark on the pulley matches the mark on the rear casing cover. So the piston in the first cylinder will be at top dead center.
- The nut securing the timing belt tensioner roller is unscrewed and the tension is weakened.
- Drain the coolant through the drain hole on the radiator.
- Unscrew the bolts securing the pump to the cylinder block and remove it together with the sealing gasket.
- The new pump must be installed with the number facing up, and it is recommended to replace the sealing gasket.
Next, installation of the belt and pulleys (if the timing belt has been changed) is carried out in the reverse order. In this case, you need to ensure that the marks are not knocked down, otherwise the valve timing will be disrupted.
A car service center will charge from 800 to 1,500 rubles for such work, depending on the type of engine (8 or 16 valves).
How to repair an expansion tank
During engine operation, the expansion tank is constantly deformed from increasing and decreasing pressure in the system, as well as from temperature changes. Over time, the material wears out, and at peak pressure, microcracks form on the walls. In most cases, no one repairs this part - the tank is replaced. But there are also those who try to repair it with their own hands. The material from which the tank is made is incompatible with most adhesive bases, so it will not be possible to seal it. For repairs, you can use two available methods:
- soldering with a soldering iron using metal reinforcing mesh;
- repair cracks with epoxy resin or cold welding.
Compositions based on epoxy resins and similar substances act temporarily, so for high-quality repairs it is recommended to solder the tank. The crack site is thoroughly cleaned with fine sandpaper, degreased and dried. A thin metal mesh is placed over the hole and a continuous layer is sealed into plastic with a soldering iron.
The treated area is cleaned, puttied and, if necessary, primed and painted. The car service center does not do such things and offers to replace a cracked tank - the cost of the service is no more than 200 rubles.
Connecting hoses, electric fans and radiators should be replaced if they fail. The latter can be soldered, but no one is responsible for the quality, since the process is labor-intensive and requires equipment and experience. Considering that soldering costs about 800 rubles, then it is more logical to purchase a new radiator.
Replacing coolant in the SOD
The antifreeze level in the tank is checked only after the engine has cooled down. You cannot add coolant to the maximum mark - during operation the liquid heats up and increases in volume, after topping up the valve cover is screwed on tightly.
It is necessary to constantly monitor the level of antifreeze; a sharp decrease in its volume can cause a malfunction of the cooling system, which should be eliminated immediately. Every motorist can add antifreeze to the expansion tank:
- The car must be on a flat surface, all work is carried out with the engine cooled down.
- Unscrew the cap of the expansion tank.
- Check the condition of the antifreeze; there should be no oil film or other contaminants on it. If the color of the coolant is dark or rusty, the ODS needs to be flushed.
- If the fluid level is below the minimum level, all connections should be inspected for leaks. If they are missing, add antifreeze between the two marks and tighten the valve cover tightly.
The procedure is simple and can be performed by anyone without seeking help from a car service center. The price of the work does not exceed 100-200 rubles, depending on the region.
Preparing for replacement
According to the regulations, the coolant is replaced after reaching 75 thousand km or after 5 years of operation. In other cases, the procedure is carried out when antifreeze is contaminated or leaks. Lada Granta engines use ethylene glycol-based coolant without the addition of borates, silicates and other synthetic additives. To change the entire coolant, you will need to purchase at least 8 liters of fluid. It is not necessary to use the antifreeze used at the factory for this. As an alternative, you can take products from the brands Sintek, Felix, G-ENERGY.
For work, a 13 mm wrench, screwdrivers, rags, a container for draining the coolant and new antifreeze are used.
How to drain coolant
First of all, the engine must cool down. Then, by unscrewing the cap of the expansion tank, relieve pressure in the system. The engine protection is removed. A suitable container is placed under the radiator drain plug, and the valve cover is screwed on - this way the antifreeze will drain more slowly and will not flood everything around. Then the drain plug is unscrewed and the coolant is drained into the container. This way, not all the liquid comes out - you also need to drain it from the water jacket.
On an engine with 8 valves, the container is placed below the ignition module under the front part of the BC. Using a 13 mm wrench, unscrew the drain nut on the block and wait until the antifreeze drains from the jacket. Then tighten the nut.
On an engine with 16 valves, due to design features, the starter prevents the fluid from draining from the jacket. For this reason, you must first remove it and only then unscrew the drain nut. If this is not done, the coolant will flood the starter, and this will lead to the failure of the starter. The drain nuts use tapered threads so no O-ring is required.
