Interior ventilation on a VAZ of the tenth family is supply and exhaust: air is supplied into the cabin through holes in the windshield trim (spontaneously - when the car is moving, or forced - when the heater fan is operating) and exits through the cracks between the upholstery and the inner door panels and beyond through the holes in the ends of the doors. These holes have valves that allow air to come out, but prevent it from getting inside the car. This design improves the thermal insulation of the cabin.
Heater air ducts and controls: 1 — heating air ducts for the rear part of the cabin; 2 — floor tunnel lining; 3 — air ducts for heating legs; 4 — central cabin ventilation nozzles; 5 — side nozzles for interior ventilation; 6 — nozzles for heating the windows of the front doors; 7 — control lever for the interior heating system; 8 — air distributor housing; 9 — foot heating damper; 10 — windshield heating flap; 11 - heater.
The principle of operation of the stove heater on the VAZ 2110 2111 2112
On VAZ 2110, 2111, 2112 there is no heater valve. The temperature in the cabin is controlled by an air damper, which regulates the flow of hot air into the cabin. Antifreeze also flows into the stove in the summer, because of this, some car enthusiasts additionally install a tap to shut off the supply of antifreeze during the summer period of operation. The VAZ-2110 heater control system is automatic, the temperature is maintained with an accuracy of 2 degrees Celsius. In addition, it is preferable to control the air damper than the tap (it can become sour or jam).
The air entering the cabin is heated, if necessary, by passing through the heater radiator and distributed in accordance with the position of the air flow control handle. The main part of the air is directed to the windshield and, through deflectors blocked by flaps, to the side windows and into the central part of the cabin. Air is also supplied to the feet of the driver and the passenger sitting in front through two pairs of deflectors (one pair at knee level, the other at the floor) and to the feet of the rear passengers through the lining on the floor tunnel and two air ducts under the front seats.
To speed up the heating of the cabin and prevent the entry of outside air into the cabin (when crossing gas-filled, smoky, dusty sections of the road), an air recirculation system is used. When the recirculation button is pressed down (on the instrument panel), the electro-pneumatic valve opens, and under the influence of vacuum in the intake manifold, the recirculation system flap blocks the access of outside air to the car interior. Thus, the operation of the recirculation system is possible only when the engine is running. At the same time, if the fan is turned on, the air in the cabin continues to circulate, passing through the heater air ducts.
The fan has three operating modes: low speed, medium and automatic speed selection (determined by the control unit). The fan electric motor is a DC commutator motor, excited by permanent magnets. Current consumption at maximum speed is 14 A.
Depending on the selected speed, the electric motor is connected to the vehicle’s on-board network directly (maximum speed) or through an additional resistor. The latter has two spirals with a resistance of 0.23 Ohm and 0.82 Ohm. If both spirals are included in the circuit, the fan rotates at low speed, if only one (0.23 Ohm) rotates at medium speed.
It is not recommended to press the fan wheel from the electric motor shaft - it can upset the balancing. The electric motor cannot be repaired (except for cleaning the commutator); if it fails, it should be replaced as an assembly with the fan wheel.
Heater parts (VAZ 2110 2111 2112): 1 - electro-pneumatic valve; 2 — front housing of the heater air intake; 3 — water deflector air intake flap; 4 — recirculation damper control valve; 5 — air intake recirculation damper; 6 — rear heater air intake housing; 7 — heater channel damper; 8 — heater control damper; 9 - radiator; 10 — heater radiator casing; 11 — fitting for steam hose; 12 — supply hose fitting; 13 — outlet hose fitting; 14 — electric heater motor with fan; 15 — electric motor housing; 16 — support platform for the heater control damper drive lever; 17- heater control damper drive lever; 18 — micromotor gearbox for damper drive; 19 - resistor; 20 — heater casing cover.
The heater (stove) radiator is installed horizontally under the instrument panel, in a plastic casing, and consists of two plastic tanks (the left one has a steam outlet fitting) and two rows of aluminum tubes with pressed-on plates. Depending on the position of the dampers, part of the intake air passes through the radiator (in the extreme positions of the dampers all the air passes or does not pass at all), while the rest of it bypasses the radiator. Unlike previous VAZ models, there is no valve that shuts off the flow of coolant through the heater radiator, thus, when the engine is running, the heater radiator is always heated. This design ensures low inertia of the system at start-up (the set air temperature is reached faster) and the absence of leaks associated with leaks in the valve. The heater is controlled by commands from the electronic control unit.
How to repair the heating system of a VAZ 2112
An indispensable device for any car in cold weather is the stove. Sometimes it is necessary to replace the radiator heater on a VAZ 2112 with all the elements. The interior of the VAZ 2112 has built-in supply and exhaust ventilation. Air enters the cabin through special holes made in the windshield linings. Air can be supplied spontaneously or forcefully. In the second case, the supply is provided by the heater fan. It can exit the passenger compartment through cracks between the panels located inside the doors and holes in their ends. Built-in valves allow air to pass out and prevent it from getting in, which improves thermal insulation in the cabin. If necessary, the heater radiator preheats the air before entering the cabin.
What are the features of the VAZ 2112 heater radiator?
- The heater radiator of a VAZ 2112 car is located in a plastic casing under the dashboard in a horizontal position.
- The design consists of two rows of tubes made of aluminum with two plastic tanks pressed onto them. On the left there are two fittings: one for draining, the other for supplying coolant.
- The position of the dampers regulates the flow of part of the air that is taken in by the radiator. Its main flow passes by the radiator. If the damper is in its extreme positions, no air flows at all.
- A design feature is the absence of a tap, which should shut off the flow of coolant, which ensures constant heating of the heater radiator when the engine is running. In this case, the required temperature in the cabin is achieved faster, and the absence of a tap reduces the number of joints, places that can leak and create a lack of tightness in the entire system.
Dismantling the heater radiator of a VAZ 2112 car
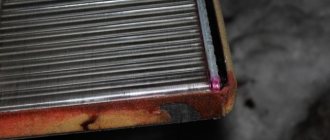
If the heater radiator leaks, it must be replaced. Replacing the heater radiator in a VAZ 2112 begins with dismantling the entire dashboard and steering column. The work must be carried out carefully, which is due to the manufacture of most connectors from fragile plastic latches and clamps that can easily be broken. The radiator can be removed without dismantling the panel. Replacing the heater radiator on a VAZ 2112 is easier to do with the evaporator removed, but this requires preliminary depressurization of the main air conditioning system and removal of the refrigerant. The radiator removal instructions suggest:
- Disconnect the battery.
Tip: Before dismantling the heater radiator of a VAZ 2112 car, you need to drain the antifreeze.
- Disconnect the hoses installed on the heater bulkhead from the engine compartment side.
- Push the rubber seal on the partition into the interior of the cabin. To do this, you need to disconnect the edges of the seal from the edges of the hole in the partition.
- Remove the cover, the ashtray, the receiver, for the center pillar, and the front panels.
- Remove the heater and air conditioning control panel.
- Remove the electronic control unit without disconnecting it from the connector block.
Tip: To ensure sufficient space for the heating system under the radiator housing, the control unit must be moved to the side.
Dismantling the control unit of a VAZ 2112 car
- Unscrew the bolts securing the left pillar to the base of the body and the bolts securing the ground wires; you do not need to completely remove the pillar.
- Unscrew the bolts that hold the right strut, then it is removed from the car.
- Use a Phillips screwdriver to unscrew the self-tapping screws that secure the stand to the front plastic panel from its reverse side.
Tip: In order to avoid distortions, you need to press the screwdriver tightly. Otherwise, the heads may break.
- Remove the central air duct duct.
- Above the heater core, slightly shifted forward, there is a dividing damper, which must be removed along with the air duct section to increase the working space.
- Loosen the nuts on the studs that secure the left side of the evaporator housing.
- Unscrew the nut on the stud located near the upper pedal lever for controlling the throttle valve.
- Remove the bolts holding the lower right corner of the heater housing.
- Remove the heater lugs from the studs.
- Move part of the air conditioner evaporator housing to the side.
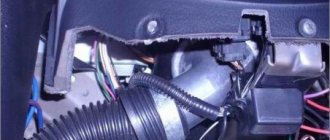
- Remove the heater from under the front panel; its general appearance is shown in the photo.
General view of the heater of the VAZ 2112 car
Tip: Before removing the heater, you first need to move it away from the engine compartment until the ears come off the studs, then move the device to the left, lower it down and remove it from the car.
- Remove the clamps holding the heater pipes to the housing.
- Remove the radiator from the housing.
Installation of a new heater radiator for a VAZ 2112 car
Replacing the VAZ 2112 heater radiator is done in the reverse order of removal. So:
- The nuts that secure the evaporator housing and heater housing to the engine compartment bulkhead are designed for one-time use. Therefore, they need to be replaced with new ones. The price of parts is relatively low, and reliability increases.
Tip: When assembling, you must ensure that the seal is correctly positioned on the dashboard - on the windshield side in its place. The central nozzle body was installed without distortion, the wiring went into the right openings, otherwise everything would have to be reassembled.
- When the VAZ 2112 16 heater radiator is replaced, you need to tighten the drain plug.
- Fill with coolant.
- Warm up the car until the radiator fan starts running.
- Check the tightness of the system, the operation of the heater, and the dampers.
- Check the operation of electrical equipment and instruments on the panel.
In this way, you can replace the heater radiator of a VAZ 2112 car with your own hands. All details of the work can be seen in the video. Reliable operation of the heater radiator creates comfortable conditions for the driver and passengers while driving a VAZ 2112.
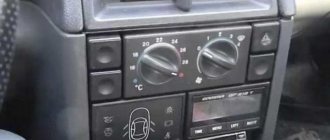
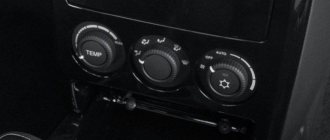
Heater operation (stove) in manual and automatic mode
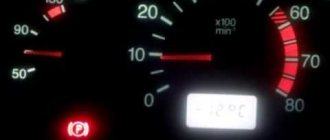
The air temperature in the cabin is set by setting the controller knob (temperature sensor) to the appropriate scale division (from 16°C to 30°C, with an interval of 2°C). The unit reads information about the temperature in the cabin from a temperature sensor located on the ceiling and equipped with a microfan. Then, depending on the temperature difference, it turns on the micromotor that controls the heater dampers. The micromotor is equipped with a heater damper position sensor (ring resistor). The signal from the sensor is sent to the control unit, which turns off the micromotor as soon as the damper reaches the set position. Automatic mode, that is, position “A,” on the control unit adds to the adjustment of the gearmotor also adjustment of the fan rotation speed.
How to change the radiator of the VAZ-21124 heating system on old and new stoves
Interior heating systems on different vehicles have a similar design. In a VAZ-21124 car, the heater functions as follows:
- the stove control unit controls the set air heating temperature with an acceptable error of about 2 degrees;
- Air heating for interior heating is carried out in the heater radiator. It has a standard design and is made of copper or aluminum alloys;
- To supply air into the cabin, special deflectors are provided that regulate the direction of its flow;
- On the heater control panel there are: a fan operating mode switch with sliders that control the heater dampers.
One of the most common problems with the heating system on the VAZ-2112 is its depressurization, which is characterized by leakage of coolant from under the central panel. One of the reasons for this is the failure of the radiator, in which case it needs to be replaced.
Setting the temperature of the supplied air from the heater
To fine-tune the control unit, it has an adjusting screw. To check the accuracy of temperature control, close all doors and windows and place a control thermometer next to the temperature sensor. Set the fan control knob to position A, and the temperature knob in accordance with the temperature measured by the control thermometer. If after 15 minutes the actual temperature in the cabin does not correspond to the set temperature, remove the controller from the socket and turn the adjusting screw clockwise to increase the temperature and counterclockwise to decrease it. After adjustment, check the operation of the control unit again. The control unit, temperature sensor with microfan, micromotor and heater damper position sensor cannot be repaired and must be replaced with new ones if they fail.
Malfunction of the interior temperature sensor and controller in VAZ 2110 2111 2112 cars
1. If the interior temperature sensor is working properly, the heater operation algorithm should be as follows: at maximum (red dot) - movement to open the damper; at minimum (blue dot) - movement to close the damper, other positions are fixed depending on the temperature set by the interior temperature sensor. To see if the damper is moving, it is better to remove the front deflectors; they have two plastic latches on the right and left (be careful not to tear off the backlight wire when removing). After removing the deflectors, you can clearly see whether the damper is moving or not, i.e. air flows through the heater or not. In addition, you can check the resistance of the interior temperature sensor.
Checking the interior temperature sensor on VAZ 2110 2111 2112 cars.
Temperature characteristic - the resistance of the temperature sensor should be as follows: at 22 C - 20 Ohm; at 16 C - 25 Ohm.
Checking the controller with a heater (stove)
Checking the controller is as follows. We take out the controller from the socket. Turn on the ignition, turn the temperature knob and measure the voltage on the pink and brown wires (long controller connector). If the voltage changes (should turn on after changing the position of the temperature knob and turn off after about 13 seconds), then the controller is working, if not, then the controller needs to be changed.
Checking the micro-gearbox VAZ 2110 2111 2112
We check whether voltage is supplied to the micro-reducer. It's not that simple here. To get to it you need to remove the frill. Open the engine compartment. We unscrew the sound insulation, unscrew the two screws for 10 fastening the frill, remove the wiper drives and unscrew the three fastening screws that are under the round plugs and move away the frill, which prevents the washer hose from being completely removed. We see two connectors. One is a damper position sensor, and the second is a micro-gear drive, to which the brown and pink wires fit. We remove the connector, turn the temperature knobs and measure the voltage. If it changes, it means the wire is not frayed anywhere; if it doesn’t change, then it means the wire is broken somewhere in the harness. Checking the micro-gearbox. We supply 12 volts from the battery to the micro-gearbox connector. If it doesn’t spin, then definitely change it; if it spins, then the contacts in the connector have simply oxidized. To be absolutely sure that the gearbox is working, you can remove it by unscrewing the three screws that secure it (be careful not to drop the screws inside) and move the micro-gearbox to the right. Unscrew it, take it out and check it. If it's faulty, we buy a new one. There is a position sensor on the micro-gearbox. So don't worry during installation, you don't need to configure anything. The controller itself will set the damper according to the sensor.
Trouble-shooting
Checking the cabin air temperature sensor
You can check the serviceability yourself; special skills are not required. Carefully remove the sensor from its original place. We find the contacts on the back side. Using a multimeter, apply a voltage of 1.2V. We set the regulators of the automatic heater control system to the “Min”, “Max” positions. The motor should not be activated.
The second method is to turn off the cabin air sensor. Check fan speed settings. The first speed (“A”) should be inactive.
Video: Heater VAZ 2110, 11, 12. Design and principle of operation.
Checking the proper operation of the automatic control system
The proper operation is checked with a multimeter. The voltage at the terminals of the pink and brown wires is measured, the ignition is activated. Smoothly turn the temperature regulator; the arrow on the multimeter display should show an increase in voltage.
On old-style heaters, at maximum voltage, the controller value remains unchanged. Take this into account so as not to make hasty conclusions about the malfunction of a particular unit.
The cause of controller malfunction may also be deformed dampers. To verify this and eliminate the breakdown, we disassemble the heater.
Prevention of the damper of the heating system of VAZ 2112
To be precise, two dampers are subject to inspection; this is the number of them present in the VAZ 2112. The cold air intake is regulated in the upper part. In the lower part, warm (hot) air is supplied to the car interior. Due to wear on the drive mechanism, the damper opens halfway or partially, the air flow is reduced, and the interior is not heated sufficiently.
Reasons for failure:
- biting, jamming during operation, due to the lack of a sufficient amount of lubricant;
- a lot of debris, moisture, sand, dirt, which contributed to jamming;
- failure of the gear motor damper cable;
- numerous layers, rust, corrosion.
The old and new dampers differ only in the type of sealing ring. In the old ones it is plastic with foam rubber, in the new ones it is a metal seal with rubber. If you can’t hear the movement of the “curtain”, move it, set it in motion, after first removing the deflectors from the central part of the dashboard with a flat-tip screwdriver. Be careful, as the plastic casing of the console is damaged.
Metal ones are better and more practical, but they are afraid of moisture, rust, and deposits. Plastic ones, on the contrary, are deformed from heat and elevated temperatures.
The second way to check the performance of the damper: if the windshield heats hot air, but the sides or legs are warm, there is a malfunction. There is no air flow - the microdetector has failed. This is the drive mechanism.
Defective damper micro-reducer
Diagnostics is permissible if you have a special device - an ohmmeter. It is designed to measure resistance in an electrical circuit. In old-style controllers, the indicators are in the range of 750 - 1250 Ohms, in new ones - 3400 - 5100 Ohms.
Troubleshooting occurs as follows: we start the power unit, set the temperature to o, wait 15 - 20 seconds, turn it off. We disconnect the controllers, measure the resistance with the ignition on between contacts X1.4 and X1.1.
At maximum temperature, the ohmmeter shows up to 5.0 Ohms on the new one or 1.6 Ohms on the old one. The absence of resistance indicates a malfunction: failure of the micro-gear sensor. More often, the tracks wear out, the wiring becomes damaged, and the fuse blows. To replace the micro-reducer, the stove is disassembled.
Fan runs at one speed
If the motor rotates only in the first two speed modes, then look for the reason in the resistor. It's faulty. Activation only at the third speed indicates “direct” operation, bypassing resistors. The reason is worn tracks on the switch, temperature controller.
Diagnosis of resistance resistor
The resistor design contains two spirals: the first with a resistance of 0.23 Ohms, the second with 0.82 Ohms. When both spirals are activated, the fan operates at the first speed; when one is activated, the motor operates at the second speed. When starting directly without a resistor, third gear is activated.
The most common causes of breakdowns of the VAZ 2112 stove are low levels of antifreeze, air in the system, malfunctions of the thermostat and pump.
Typical malfunctions of the heater (stove) VAZ 2110 2111 2112 and their possible solutions
The VAZ 2110 heater only works in one position, for example “2”. What could be the problem?
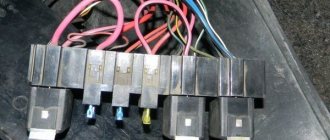
Most likely, the following malfunctions are possible. 1. An additional resistor on the heater body has burned out, which allows you to regulate the speed - a fan is connected through it in position “A” and “1”. In this case, you need to get to the heater (this is only possible from the engine compartment) and replace the resistor. 2. The wires inside the controller are burnt out (to fix it, you need to disassemble the controller and replace them). 3. The wire has come loose in the relay block located on the right under the hood.
Slightly warm air blows from the dampers (the micromotor reducer and the recirculation damper are working properly).
It is necessary to check the cabin air temperature sensor and the antifreeze level, since its low level affects the temperature regime (antifreeze, antifreeze may not get into the “stove” or it may become airy due to the low level). You also need to check the thermostat. In addition, additional information about the heater and its controller can be found in the article “Electric motor of the heater VAZ 2110 2111 2112, setting up the heater control system”
If during the operation of a VAZ 2111 car you notice a leak, the smell of antifreeze or the appearance of steam from the wind blowing holes, most likely the problem is a leak in the heater radiator or in the connecting hoses of the system. For repairs, you do not have to remove anything or disassemble the dashboard. All work is performed in the engine compartment. The heater radiators of these Zhiguli models are divided into two types: new type and old. The latter were installed until 2003. The difference in repair work is small, but you need to know some nuances. This is especially true for old-style VAZ 2111 radiators.
It is important to choose a high-quality new radiator to replace the old one.
Modern stores offer a fairly wide selection of radiators for the VAZ 2111, so you need to approach your choice very responsibly. You can consult with owners of cars of this brand on specialized forums and find out which brands of products last longer.
Possible heater malfunctions and ways to eliminate them
What symptoms can you use to identify a malfunctioning heating system:
- antifreeze consumption has increased, the volume of liquid in the expansion tank is constantly reduced;
- the interior of the vehicle practically does not warm up;
- traces of antifreeze leakage began to appear under the bottom of the car, in the area where the radiator assembly was installed or the location of the pipes, and traces of refrigerant may also appear in the passenger compartment;
- greasy marks began to appear on the inner sides of the glass, the glass itself began to sweat a lot;
- the smell of refrigerant in the car interior (the author of the video is the channel In Sandro’s Garage).
For what reasons does the VAZ 2112 stove not work:
- One of the most common problems is the failure of the radiator; there are two ways to solve the problem - either repairing the radiator device or replacing it. Repair is relevant if the damage to the device is not serious and its case can be soldered. But often the repair does not produce results, so the unit has to be replaced.
- Failure of the gearmotor, that is, the stove itself. As for fixing the problem, here you need to act in accordance with the malfunction. If possible, then, of course, you should try to repair the motor itself, but usually it is replaced.
- Antifreeze has run out. This problem is usually caused by a leak. A leak can occur through the radiator assembly, thermostat, or damaged pipes. If the radiator and thermostat are intact, then you need to check the condition of the hoses and especially their connections. If the pipes are cracked and show signs of damage, they must be replaced.
- Thermostat failure. For this reason, although the liquid will partially circulate through the system, the stove will not be able to heat the interior. If the thermostat is not working, the device is usually replaced.
- The heater control unit does not work, in particular, we are talking about the module located on the center console. If the control model refuses to work, the stove simply will not be able to receive signals about activation, shutdown and mode switching. If the problem lies in the unit, then it will need to be replaced, but often such malfunctions are caused by damage to the electrical circuit or poor contact of the device with the system.
Carrying out repairs
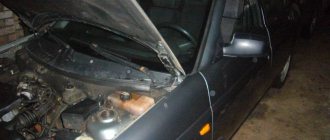
First you need to drain the antifreeze. Looking ahead, we note that if the drained liquid is clean, it can be refilled. You will also need a container to drain the coolant - at least four liters. You can drain the liquid from the engine block through a special plug or from the expansion tank. In the first case, you need to unscrew the expander cap and unscrew the drain plug located behind the ignition module. The second option, which involves draining the liquid from the expansion tank, requires first removing the hose from the stove.
Further, the options for replacing the old and new type heater radiators diverge. First, let's look at replacing the updated product that has been equipped with the VAZ 2111 since 2003.
Replacing a new heater radiator
The heater is attached to the body with several bolts and nuts. One screw is located in the middle at the bottom end of the windshield, two nuts are located above the exhaust manifold and one nut is in the left corner near the filter.
If your car has a rear window washer reservoir, it must be removed. The air filter is pressed against the heater with a plastic cover, which is held on by four screws. The filter must be removed.
New heater models consist of two parts connected by three screws. An air supply hose bent in the shape of the letter L is connected to the heater fan. Looking through it, you will notice a large self-tapping screw that needs to be unscrewed along with two smaller screws on the front of the heater.
We disassemble the stove into two parts, moving the right part to the right as much as possible, and removing the left one as follows: take the left side of the heater with your left hand, and the right side with your right hand and slightly scroll it upwards from you, first removing the right side, and then the entire part.
Removing the right side will not cause problems. It is necessary to dismantle the steam exhaust hose through the hole located in the right half of the sound insulation of the front panel.
The right side of the stove also consists of two parts connected by metal brackets. We remove them and the part will separate into two parts with a seal in the middle. This will give you access to the damper. It is better to use a new covered aluminum damper.
Important subtleties
- When installing a plastic flap, sometimes you have to grind and adjust the flap into place so that it moves freely. It is also allowed to do a little extra work near the aluminum damper.
- After installing the damper, you should set it by hand to the cold air supply position. In this position, the heater radiator will be covered with a damper.
- Move the temperature sensor to the MIN position and turn on the ignition. The sensor will begin to rotate and take the correct position. This will make it easier for you to insert it into place, since the damper and gearbox will be in the MIN position.
- Buy a double for the washer hose, as this will simplify the installation and removal of the wind cover in the future.
As you can see, there is nothing difficult in removing the heater core if you know what to do.
When the car starts to drip, drivers try to delay replacing the car's heating radiator as long as possible, but sooner or later repairs become inevitable. After all, what flows out is nothing more than antifreeze, without which it is impossible to imagine the stove in working condition.
Stove design
This unit includes several devices. The radiator is the main element of the stove - it heats the air entering the cabin. It is located under the hood. The next component is the air distributor, equipped with special pipes that run through the cabin of the 2110.
If we compare the “ten” with previous models, an important innovation has appeared in its heating system - an evaporator (the diagram includes it in the list). The device is installed in an air conditioning system. Not all owners know about its existence, since it rarely fails.
To control the operation of the heater, an SUAO unit is installed in the VAZ 2110 car, which is called a controller in the technical operating manual. The unit works in conjunction with a temperature sensor in the cabin; it is also called a ceiling sensor. The sensor reports the temperature to the unit, then this indicator is compared with the set temperature on the handle. If the indicators differ by more than 2°, warm or cooled air is supplied to the VAZ 2110 interior.
It’s worth taking a closer look at the handle, or more precisely at its extreme positions – MAX and MIN. If the heater knob is set to one of these indicators, heat is supplied without the operation of the temperature sensor in the cabin. The scheme includes all of the above elements.
The device of the “tens” heater includes another unit - a gearmotor, which is responsible for opening and closing the damper. The miniature electric motor performs an important task in the operation of the heating system, as evidenced by the diagram. If the gearmotor is faulty, the system will only produce cold or hot air. If the gearmotor fails when the damper is closed, the system will stop functioning. We have described the main components of the VAZ 2110 heater; the diagram contains a more detailed list.
Let us highlight the main components of the system:
- Radiator.
- Air distributor.
- SUAO block.
- Ceiling sensor.
- Lever.
- Damper.
- Gearmotor.
Radiator
In the heating system, a radiator is installed for heating, which enters the VAZ 2110. It is also called a heat exchanger. Heating is carried out by the heat of the antifreeze. This component is connected to the engine cooling system by pipes and hoses. Antifreeze constantly circulates through the heat exchanger of the stove. The damper, based on the commands of the unit, directs the incoming air to the radiator or directly into the passenger compartment. If the heater damper is in an intermediate position, then one part passes through the heat exchanger, and the second bypasses the radiator. If we compare this part of the stove with previous generations of the VAZ, it has a number of useful improvements, as the diagram demonstrates.
SUAO and ceiling sensor
These components of the VAZ 2110 heater are connected and operate according to the following principle:
- The sensor determines the temperature inside the car;
- This data is sent to the SUAO block;
- The block compares the temperature with the position set on the handle of the VAZ 2110 stove;
- After comparison, the position of the damper changes or remains the same - it depends on the indicator;
- This way the temperature in the cabin is controlled;
- If the heater handle is set to MAX or MIN, then the data from the ceiling sensor is not taken into account.
All these actions are demonstrated by the diagram. The block is a set of microcircuits; the normal operation of the stove depends on its serviceability. Both the sensor and the control system can be replaced.
Damper and gearmotor
The heater gear motor changes the position of the damper, due to which air is supplied to the cabin. This component is controlled by the control system block. If the device is faulty, the damper will not move. The unit is a miniature electric motor. When it breaks, it is usually replaced, since repairing it will be problematic. This also applies to the damper. The diagram shows the connections between the gearbox and the block.
How to install an old-style stove
Let's start by installing the old model heater radiator on the VAZ-2110. For correct installation, repeat the following sequential manipulations:
- Detach the rubber material that serves as a frill seal.
- Feel under the main cylinder for the brake for the screw that allows you to attach the frill, and unscrew it.
- Pay attention to the right side of the frill - this part also contains screws, get rid of them.
- Now that the frill is not fixed by anything on this side, unhook the 2 clamps supporting the hoses and wires.
- Remove the terminal with the “+” sign and the “-” cable coming from the fan.
- It's time to push the left edge of the frill forward. Remove some screws again.
- Get rid of the windshield.
- If the VAZ 2110 is equipped with a terminal for a sensor that reflects the antifreeze level, unfasten it and remove the hose from the expansion tank, which is designed to remove steam.
Replacing a new type stove radiator
The new heater model has a number of nuances, which, first of all, take into account the nuances of attachment to the body. You can remove the housing by unscrewing the following parts:
- a middle screw located at the bottom of the windshield;
- a pair of nuts screwed in above the intake manifold;
- nut located near the filter on the left;
- If there is a reservoir where the washer fluid is located that cleans the rear window of the car, get rid of it too. All that remains is to disconnect the air filter.
The subtlety of the new model stove radiator is that the heater can be disconnected. How to do it correctly with your own hands is shown in the video: https://www.youtube.com/watch?v=_LMTKRwBTBY
When there is no time...
We don’t always have enough time to spend a couple of hours, which takes the usual replacement of a stove radiator on a VAZ-2110, 2111, 2112. Therefore, craftsmen have proposed their own unique method that does not involve removing the entire heating device, which, accordingly, greatly facilitates the process and saves your time.
- By connecting the pipe intended for heating the remote control, get rid of the antifreeze.
- Unscrew all pipes and set the expansion tank aside.
- Disassemble the frill step by step.
- Disconnect the brake pedal, do it together with the VUT, after which you will finally have free access to the heater.
- Pull out the old device and install the new one in its place. https://www.youtube.com/watch?v=ElXwZIN7cGk
Why does the VAZ-2112 16 valve stove heat poorly and how to fix it
The level of comfort with which you will drive during the cold season directly depends on the correct operation of the stove in your car.
After a problem with the heater in the car was noticed, many car owners begin to deal with it only when the first frost is approaching. Prudent car owners deal with similar problems at the end of summer. All problems with the stove on the VAZ-2112 occur due to the poor quality of assembly of this system at the factory. For this reason, the reliability of the heater suffers greatly.
In this case, even if you are sure that everything is in order with the stove, it is advisable to check the critical components and, if necessary, repair the faults.
The VAZ-2112 stove is significantly different from those systems that are installed on other models of the brand. “Our” heating system is separate.
The heater is the first unit that is responsible for heating the supplied air. Through the channels conducting air flows, the air flows onto the windows, into the cabin and onto the legs of the front passenger, as well as the driver. The distributor is responsible for this branching. In other words, this is a regulation block.
The stove also has an evaporator, which is not available on other models.
Absolutely any component of the system can fail, which will lead to poor performance of the heating system.