VAZ 2110 - the stove does not blow at your feet
The “tens” stove is a very special device with its own character and disposition.
And her mood and desires do not always coincide with the driver’s requirements. We didn’t come up with this, it’s enough to drive a 10 for a few cold months to form your own opinion. But those who have their hands in the right place will not put up with her character, but will begin to adapt her to normal work. We will also try to find out the main flaws in the design and figure out how to get the heater into working condition. Content:
The main reasons when the stove does not blow warm air into your feet
The heater radiator is leaking
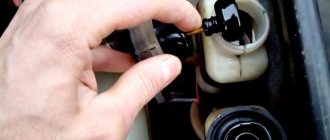
Before gutting the air ducts and air dampers, you need to make sure that the antifreeze warms up to its operating temperature.
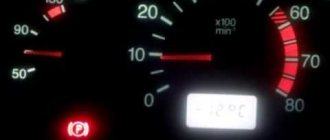
And this may depend on a lot of factors - the quality of the pump , the tightness of the system and the heater radiator , including the correct operation of the thermostat, and the quality of the coolant. If the temperature with a fully warmed-up engine is within 80-90 degrees, we look for the reasons for the lack of air in the legs in the design of the heater.
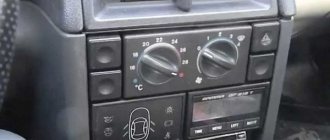
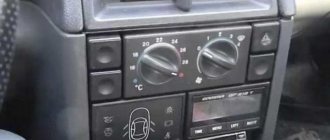
Turn on maximum heat.
A feature of the stove on a Chevrolet Niva is the absence of a heater radiator tap, that is, antifreeze circulates in a full circle in winter and summer and passes through the heater radiator. Taking this fact into account, the factory somewhat complicated the design of the air ducts and air dampers - there are two of them in the Chevrolet Niva.
Upper deflector flap.
One works for frontal airflow, the second is responsible for supplying air to the feet of the front and rear passengers and the driver. It is with this damper that problems arise that we will try to solve.
Correctly turn on the foot airflow
It turns out that even after several years of owning a Niva Chevrolet, not everyone knows how to properly turn on the warm air to blow their feet. By using fan speed controls and damper position controls, and using sound logic, we can end up with a situation where the entire flow of hot air is directed onto the windshield and into the face of the driver and front passenger. Of course, the car is warm, even hot, but your feet are cold.
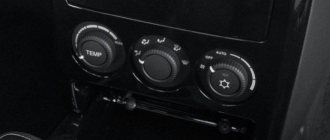
Practice has shown that Shniva has a special algorithm for supplying hot air to the legs . On most instances this is done like this:
- We warm up the engine until the flow of warm air is clearly felt by the hand.
- The fan speed switch is set to the fourth position, 4th speed.
- Turn the airflow direction knob to exactly 12 o'clock.
- Immediately return it to the 10-11 o'clock position.
Correct position of the stove blower control.
Having remembered this sequence, you will have to turn on the airflow several times, after which the damper will rub in and find the desired position itself in accordance with the pictogram on the adjustment handle.
It's all about the inaccuracy of assembling the heater assembly - backlashes and gaps interfere with air distribution and setting the damper in the desired position from the first turn on.
Modification of the air ducts of the VAZ 2110 – 2112 stove
The VAZ 2110 - 2112 has one bad feature: the heater does not work well, or rather, the flow of warm air weakly blows into the driver’s feet and onto the front side windows. For this reason, every now and then your feet freeze and the windows fog up. But as they say, there is always a way out of every situation. The solution would be to remake the stove, or, more precisely, its air duct. So, let's begin. Before starting work, you need to make sure that the stove is working well, otherwise you will have to repair it. If it works properly, then we begin work. First we will need to remove the torpedo and disassemble it into parts. All elements of the stove panel are bolted together.
There are 2 options for solving the problem with poor blowing of the side windows:
- The first option is to lay a corrugated hose for blowing glass.
- The second option is to glue all the existing cracks on the dashboard.
For better blowing of the side windows, I chose option 2. The prerequisite for this choice was that corrugation is good only for heating the legs. In general, the second option is better than the first, so let’s get to work on gluing all the seams and cracks of the air ducts. Using silicone we glue the gaps between the lower and upper parts of the torpedo, as well as the holes for fastenings.
Next we move on to modifying the furnace dampers, which direct air to different zones. From the factory, the damper does not fit well to the body, so some of the warm air disappears, getting into the cracks between the damper and the body. The air begins to flow into nowhere, or more precisely, it circulates under the panel and does not provide heat.
Let's start dismantling the damper, remove the damper and see how Auto VAZ is still worried about us, the factory seal cannot be called a seal, it does not seal anything, but only slightly covers the cracks. Once the seal is removed, you will see gaps.
Using insulation, I glued the entire valve and removed the cracks. This procedure will have a good effect on the flow coming out of the damper; the air will not be lost in the gap before exiting, but will flow into the cabin in full. If you knead the lips, you can use Bitoplast 10 on the body. We work carefully with Bitoplast 10, in some places it will be necessary to glue it in 2 or even three layers, in a word, we make it last forever.
A larger percentage of the incoming air disappears in the area where the air begins to travel to the driver's window. This gap is very large, so I decided to foam it with polyurethane foam. Perhaps someone will wonder if the foam squeaks when driving, I will answer - no, it has been tested by time.
Next, let's move on to improving the air ducts in the area of the driver's feet, front and rear passengers. The module for distributing warm flow to the feet, as you already understood, is also full of cracks.
Because of these cracks, the wind blows poorly at your feet, because half the force of the flow goes nowhere. I thought a little and a great idea came to my mind. I decided to use corrugated pipe. This pipe is doubly good, since it delivers warm air in the initial volume, but also does not take up much space during installation.
The small size of the corrugation will free up space in a pile of wires, making it easier to access the wires. I did everything this way: I removed the standard air distributor, pushed three corrugations into the remaining hole and filled everything with foam.
The central corrugation has a smooth surface inside the hose, because if you install a hose with a ribbed surface inside, the stove will whistle when turned on. The diameter of the corrugation should be 40 millimeters - no less, no more. So what do we get? One corrugation goes to the driver’s feet, the second to the front passenger’s feet, and the 3rd goes back at the rear passengers’ feet. Then we put the entire structure in place and enjoy the warmth. And so, without investing a lot of money, we modernized the stove and it warms the interior better.
Typical breakdowns
It happens that the stove on a VAZ 2110 does not heat well, does not allow you to fully control it, and so on. Let's look at the most typical breakdowns for this unit.
- The ability to control is lost, that is, the temperature of the stove on the VAZ 2110 is not regulated;
- The ceiling sensor refuses to work;
- The device does not work for heating, the stove blows cold air into your VAZ 2110;
- The flow of hot air to the feet or to the side windows is poor;
- The coolant level drops;
- The heater fan on the VAZ 2110 does not work properly;
- The stove turns on and heats up, but this is accompanied by a lot of noise.
Cold air from the stove
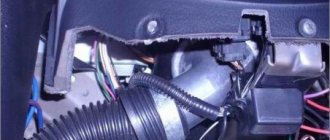
Throttle lever cable
The location of the heater damper lever near the gas pedal.
In addition to a leaky design, there may be other problems with the stove. For example, the heater is not working at full capacity, cold or barely warm air is blowing from the blowers. The stove works this way due to the weak tension of the damper control cable. We need to solve this problem by making several turns of the cable on the control lever, which is located on the heater body. The housing is located near the gas pedal.
Why does the stove work poorly and blow cold air because of this cable? The fact is that each joint of the air ducts and the damper is covered with foam rubber. Because of this material, the control lever requires a lot of force to compress the flaps. As a result, a gap of 2-4 mm appears. The damper that takes in “fresh air” through the radiator or from the street does not close well. After a few millimeters, the outside air flows directly into the side and top blowers. At speed and with the fan running, the air does not have time to heat up, so the stove operates in “summer” mode and does not heat the interior well.
Formation of air jams
If, when the antifreeze is at operating temperature and the tap is open, cold air is blowing from the deflectors, then most likely the radiator is not working properly - there are air pockets in it. The problem is solved quite simply: the VAZ 2110 is installed so that the front wheels are higher than the rear ones. That is, to a suitable height where the engine operates normally. Next, we need to fully open the tap and press the gas pedal. The engine runs for about 5 minutes - during this time we sometimes need to press the gas pedal. After this, everything needs to be returned to its original position.
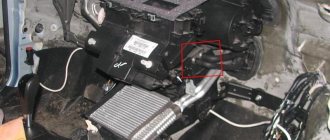
Faucet
The arrow indicates the location of the heater tap leak.
Malfunctions may be due to the faucet, which often leaks. You can check how it works manually. This element is located under the hood next to the heating element. To eliminate malfunctions when a faucet leak is detected, you just need to replace it. Some motorists decide to simply remove the tap from the VAZ 2110 system, since the stove works and blows without it. But by removing it, we will not be able to control the temperature of the antifreeze.
Repair recommendations
So, we have dealt with the causes of malfunctions of the VAZ 2110 stove, now let’s move on directly to troubleshooting the problems.
Problems with temperature control are one of the most common causes of malfunction. In most cases, this is caused by a failure of the control unit or damper.
How to proceed in this case?
Check the functionality of the temperature sensor (it is located on the ceiling, near the interior lamp).
It is because of its malfunction that the required command may not reach the damper.
Diagnosing a sensor malfunction is simple - move the control knob from one extreme position to another. In this case, it is necessary to monitor whether the temperature of the outgoing air changes.
There can be two options here - the temperature does not change at all, or the air begins to warm up only when the handle is in the extreme (maximum) position.
In the first case, repairing the VAZ 2110 stove by replacing the sensor alone will not cost you - you need to look for another reason.
In the second case, we can confidently talk about the failure of the controller itself.
Failure of the gear motor.
If, when the heating is turned on, only cold air enters the cabin, then there are obvious problems with the stove.
In 9 out of 10 cases, the cause of such a malfunction is the failure of the gearmotor. Typically, replacing this element allows the system to return to full functionality.
The sequence of actions will be as follows:
- Remove the windshield wipers;
- Remove the frill (to do this, you need to unscrew three screws);
- Disconnect the wires from the gearmotor;
- Remove the old one, install and connect the new device.
For greater convenience, it is better to hire a partner as an assistant - he will adjust the air from the cabin. By the way, some drivers additionally install autonomous car heaters.
The procedure for removing the gearmotor of the VAZ 2110 stove.
Heater failure.
Sometimes the cause of a malfunction of the VAZ 2110 stove can be the heater itself. To verify this (or refute the assumption), it is necessary to dismantle the main deflector.
This is easy to do - just bend the special fasteners and move the flap (you can crawl up to it from the side of the engine compartment).
If the radiator breaks down and needs to be replaced, you will have to disassemble the entire stove (if you wish, you can do this work yourself).
Poor quality of air heating by the stove.
If you are not satisfied with the VAZ 2110 stove in terms of the speed and quality of air heating, then you should take a few simple steps:
- firstly
, do not be greedy with money to buy a high-quality aluminum damper (it’s better to throw away the old “piece of plastic” right away). Such a replacement eliminates the curvature of the damper when switching and, accordingly, helps conserve heat;
Causes of poor foot airflow
Heater malfunction
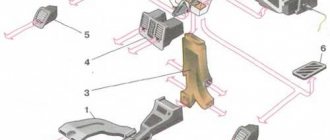
Air through the cabin filter is taken from the street by the rotating blades of the electric heater motor. Through a damper system, air is distributed through air ducts and supplied into the cabin through deflectors and non-adjustable grilles.
Air, like any gaseous medium, tends to follow the path of least resistance. Therefore, it is logical that the air flows first come out of the central and side deflectors. The feet of the driver and passengers are blown last. Structurally, the air ducts to the central deflector and the upper side airflow points have a larger cross-section, and it is much easier for air to pass through them.
Initially, you need to make sure that nothing interferes with the intake of air from the atmosphere. After all, if the air is supplied in insufficient volume, then it will not be enough to supply all airflow points with the intensity that was calculated at the design stage of the car.
Check the condition of the cabin filter. To do this, remove the wipers and frill. The cabin filter is located on the right side of the vehicle under the windshield. It is covered with a plastic casing, which is secured with four self-tapping screws. Unscrew the screws and remove the cabin filter. We start the engine, warm it up to operating temperature and check the operation of the stove. If the situation has improved, change the cabin filter and close the issue.
The second common cause is a clogged heater core. In this case, the heating of the interior will be weak, because warm air does not come out of all the deflectors well, and not just into the legs. But the fact is that when driving for a long time, your feet begin to freeze first, so it seems that the problem is in this part of the airflow.
Video: Why the stove does not blow at the feet of VAZ 2111,2110
This malfunction is easily diagnosed. We find two pipes for supplying antifreeze to the heater radiator (rubber hoses on the left side in the direction of travel of the car). With the engine warm, carefully touch the two pipes one at a time with the heater running at full power. The difference in temperature between the pipes should be minimal. If one pipe is hot and the second is cold or barely warm, we wash or replace the heater radiator.
Checking the operation of the dampers
There are nine exit points for air flows from the heater on the VAZ-2110:
- central deflector;
- two side deflectors and two windshield air vents;
- heated feet of the driver and front passenger;
- two outputs for heating the feet of rear passengers.
In an ideally operating system, the pressure generated by the heater motor is sufficient to create an effective flow to warm the feet. However, over time, gaps form in the joints of the air ducts, and the dampers of the VAZ-2110 heater begin to fit loosely to the body. This leads to atomization of the air flow. As a result, a minimum amount of air reaches the distant exit points.
First, dismantle the panel with the central deflector. It is held in place by four plastic clips. To remove it, simply pry it off one of the sides with a suitable object, such as a flat-head screwdriver. Be careful: the clips are fragile.
Evaluate the damper's performance
In older cars with a manual damper drive, pay attention to the play in the linkage of the rods. A broken rod system will not allow the damper to fit tightly to the body in the extreme position, which will cause air to leak from the cold circuit
The problem is corrected by adjusting the damper. In a mechanical drive, it is possible to shorten the rod due to a movable lock on a gear rod or a threaded tip. During the adjustment process, check that the position of the switch on the panel corresponds to the actual position of the damper.
Another reason why the VAZ-2110 stove does not blow into your feet is a malfunction in the operation of the automatic heater control system (AHC) unit or the gear motor of the VAZ-2110 stove. In this case, there is usually insufficiently warm or even cold air from the stove operating in maximum heating mode. This is due to the incorrect position of the damper in which the gearmotor sets it.
Evaluate the operation of the gear motor of the VAZ-2110 stove. To do this, visually check how it closes the damper when switching modes. The easiest way to do this is to remove the panel with the central deflector. Move the temperature knob to the extreme position (for example, set the minimum temperature), then sharply switch to the opposite mode. The damper should completely block the channel visible from the driver's position. If this does not happen, the problem lies in the gear motor or the automatic control system unit. Check the serviceability of the gearmotor and unit.
Let's sum it up
Minor factory deficiencies of the VAZ-2110 stove can be eliminated by almost every car owner without significant effort and serious investment. If the stove does not heat with the intensity required for complete comfort in the car interior, it is enough to carry out a high-quality modernization of the heater elements responsible for supplying warm air.
The problem when the heater in the area of the driver’s feet does not heat well can be eliminated by eliminating cracks in the air ducts, the heater valve, and the dashboard. Minor modifications to the heater air distribution unit and air ducts will significantly improve the quality of heat supply to the cabin. Thus, not only the problem of heating the driver’s feet is solved, but also complete, high-quality heating of the car interior is ensured, and the level of comfort will increase.
Poor heating of the lower zone and side windows
The windows sweat and your feet get cold. Simple symptoms, but restoration of heating may take a long time, since in this case there may be several reasons:
- The electromechanical part of the heater does not work.
- Heat leaks from air ducts.
- The intake air duct is clogged.
- Incorrect operation of the control damper.
If everything is in order with the electrics and mechanics of the heater, most likely the problem is the correct distribution of heat throughout the interior space. Many carry out serious modifications to the deflectors and sealing casings, seal all connections with polyurethane foam, and extend the air duct for the rear row of seats. Sometimes this gives results. But most often the culprit is the damper, which is assembled poorly from the factory and directs half of the warm air into the space of the front panel instead of the air duct. To eliminate the malfunction, the damper is sealed, the factory seal is removed and a new one is installed, which would ensure a tight fit of the damper to the body.
Structurally, the heating system 2110 is designed competently and, with high-quality components and high-quality assembly, is capable of heating the interior even in cold winters. But if factory deficiencies are identified and eliminated, the stove will not work worse. Don't freeze while driving, and have a warm journey!
Troubleshooting the stove on the VAZ-2112
The most common cause of a malfunction of the stove on a VAZ is a breakdown of the automatic temperature control function. The system must be checked in order:
- Check the temperature sensor. It should change resistance based on the temperature in the cabin. Accordingly, at 22 degrees Celsius its resistance should be 20 Ohms. At 16 – 25 Ohms. If the indicators do not match, it is recommended to replace the sensor.
- If the stove does not work in automatic mode, the controller may be the reason. It is also tested with a multimeter. After turning on the ignition and rotating the adjustment knob, the voltage at the long terminal is measured 10 seconds after switching the mode. If this does not happen, you need to replace the controller.
- When the heating system does not respond to changes in the position of the regulator, the reason may lie in the relay block. It is located under the hood on the right. The heater relay is indicated by the corresponding picture. If the load was too high, the contacts may simply burn out. To do this, remove the controller and visually inspect the condition of the contacts.
- The next step is to check the resistor that is connected to the heater motor. You can access it from under the hood.
- A low level of coolant in the system also affects the stable operation of the heater. In this case, it is possible that air will enter the heater radiator and form a plug. Thus, the radiator simply cannot heat up.
- If everything is fine with the antifreeze, but the radiator does not warm up, check the thermostat. The element may not open completely and coolant cannot enter the radiator.
Fixing the problem
We can immediately say that the easiest way to ensure access to heat to the legs is to muffle the central hose that supplies heated air to the cabin. The only trouble is that in this case, the main problem will not be eliminated, and the overall heating of the cabin will stop
It doesn't work properly, which is also not very good.
The second method will be much more effective. Its essence is to improve a poorly functioning damper. It is necessary to ensure that it blocks the central air sleeve well and redirects heat directly to the legs.
Work order
In this case, it is not necessary to disassemble the stove. It is enough to simply dismantle the torpedo, and then the upper flap, to gain access to the problem area.
A rectangle of 50 by 120 millimeters is cut out of foamed self-adhesive polypropylene. It is best to take the one produced by the STP company (the required type of the most suitable material is called “Accent”).
The workpiece is installed directly inside through the upper hole without removing the protective coating. If you do this right away, it will be much more difficult to place the rectangle, because it will begin to stick to all surfaces. After laying it from below, a narrow slit is cut into the material, approximately 10 mm wide and long to the edges of the hole. Now the flap will fit as tightly as possible.
After this, you can return the torpedo to its place, additionally sealing all its edges with “Accent”, cut into narrow strips. They also need to turn off the air supply to the rear seats. This heating option is installed on cars with a high panel. In older models there is no need to do this.
Do-it-yourself modernization of air ducts of the VAZ-2110 heater
Very often, car owners do not stop at sealing the heater cracks to increase the level of warm air supply. Refinement of the air ducts that go from the air distribution unit to the driver’s feet, the front passenger’s feet and to the rear seats has a good effect on improving the heating of problem areas. The fact is that the plastic block has large gaps, and the quality of the air ducts also leaves much to be desired.
For modification, you will need polyurethane foam and three pieces of corrugation with a diameter of forty millimeters. When purchasing corrugated tubes, it is important to pay attention to their inner surface. It is desirable that it be smooth. In this case, when the stove is running, the whistle will not be heard inside the cabin. The modification involves dismantling the standard air distributor. Instead, new corrugated tubes are attached to the air supply holes using polyurethane foam, which are laid to the feet of the driver and front passenger, and the longest to the rear seats.
This modification will ensure a direct flow of warm air to the required purposes. The result will exceed absolutely all expectations. The flow of warm air without loss will flow efficiently both to the feet of the driver and to the feet of all passengers of the vehicle.
If the heater does not blow into the driver's feet, another effective method of increasing heating is to block the flow of warm air to the rear seats. However, this method is only suitable for those car owners who only in extremely rare cases carry rear passengers. To do this, it is necessary to completely block the central air duct using polystyrene foam or other material that can withstand high temperatures. In this way, you can ultimately achieve the strongest possible air flow to the feet of the driver and front passenger.