How to remove the speed sensor VAZ 2107
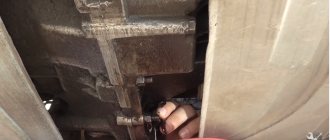
To remove the speed sensor, you must perform the following operations:
- install the car above the inspection hole;
- engage the parking brake;
- place wheel chocks under the wheels;
- from the inspection hole, using a slotted screwdriver, unscrew the nut of the speedometer drive cable;
- disconnect the cable from the gearbox;
- loosen the plastic clamp that tightens the wiring harness coming from the speed sensor;
- press the spring clips and disconnect the block from the speed sensor;
- Using a 22mm wrench, unscrew the sensor from the speedometer drive;
- remove the speed sensor.
The VAZ 2107 speed sensor can be checked using a multimeter or “control”. To install the sensor, you must do the above steps in reverse order.
Best synthetic oil
Mobil 1 FS 0W40
The most famous synthetic motor oil, Mobil 1 FS 0W40, has improved performance characteristics; previously this product was called Mobil 1 0W40. He passed many different tests successfully. The most indicative is the test project conducted by ExxonMobil in the Russian capital in 2014. This project lasted a year and a half and consisted of testing oil on taxi engines operating in extreme conditions. The tests involved Mobil 1 0W40 and Mobil 1 ESP Formula 5W-30 lubricants. Both products performed great. After inspecting the engines, experts noted the excellent condition of the internal combustion engine parts. For evaluation, a scale from 0 to 10 was used, where 0 is a new motor, and 10 is the most slagged unit. Motors filled with Mobil synthetics received 0.5 points. After disassembling the internal combustion engine, experts noted the high cleanliness of the parts.
Advantages of Mobil synthetics:
- reliable protection of engine parts from wear;
- excellent cleaning characteristics prevent the formation of deposits as a result of oxidation and corrosion;
- the oil retains its characteristics even over long distances up to 25,000 km;
- increasing the power and efficiency of the power unit;
- reduction of fuel consumption;
- stable performance characteristics under overloads and temperature changes;
- reduction of emissions into the environment.
Like other well-known brand motor oils, Mobil 1 is often subject to counterfeiting. To protect yourself from purchasing counterfeit products, you should buy products only from official dealers who have all the necessary certificates.
Shell Helix Ultra 5W40
The popular synthetic motor oil from the well-known manufacturer Shell constantly ranks first in various ratings. In 2018, the synthetics of this brand received the status of a revolutionary product. The test results confirm the opinion of car enthusiasts that Shell oil is one of the best products. This is the only synthetic that is officially recommended by the Ferrari concern, which confirms its highest level. We did not give Shell Helix Ultra synthetics the first line of the rating only because of the high price, but we note that the excellent characteristics of this lubricant allow us to turn a blind eye to the price tag.
Advantages:
- reliable protection of engine parts from wear even with an extended oil change interval;
- high degree of stability of performance indicators;
- increased engine performance, smooth operation;
- increasing the service life of the motor;
- ensuring the cleanliness of the piston group at the factory level;
- easy engine starting in cold weather (up to -40 °C);
- stable structure of components even under high loads and temperature changes;
- low waste consumption;
- economical fuel consumption.
The disadvantages of Shell motor oil include its high cost, but this is compensated by the corresponding quality. In addition, it is worth noting that Shell products are often counterfeited.
Motul 8100 X-cess 5W40
Universal synthetics from the French brand Motul are always at the top of the motor oil ratings. Motul 8100 X-cess 5W40 can be used in lubrication systems of various types of internal combustion engines (gasoline, diesel, equipped with gas equipment, etc.). This engine oil is especially suitable for powerful power units with direct fuel injection, turbocharging and exhaust gas aftertreatment systems (catalysts and particulate filters).
Advantages:
- reliable protection of engine parts from wear;
- high degree of stability of performance indicators;
- high pumping speed through the lubrication system and complete coverage of engine parts;
- protection against oxidation;
- stability of performance characteristics during temperature fluctuations;
- increase in engine life;
- economical fuel consumption;
- gentle care of exhaust gas neutralization systems;
- environmental friendliness;
- admissibility of mixing with different types of motor oils.
It may seem that Motul synthetics are very expensive. In addition, counterfeits of this product are quite common.
Lada 2107 Lɑ Bᴇʀᴇnϳᴇnɑ › Logbook › Memo to the driver of the VAZ 2107
This is a reminder for drivers of the VAZ 2107 (also relevant for other classics), I decided to create it because minor technical questions often arise, and it takes a lot of time to find the answer.
And here everything is in one place. Save this reminder in your bookmarks or on your page on a social network, and use the social network buttons under the article for your health. So, VAZ 2107 technical characteristics, dimensions, parameters.
VAZ 2107 was produced from March 1982 to April 2012. It has been produced in Egypt since 2006 to this day. It has a 5-seater sedan-type body, in-line 4-cylinder gasoline engines, paired with a 4 or 5-speed manual transmission. It is included in the class of subcompact cars, according to the European classification - class “B”. And not C, as they say on the forums. C class is Ford Focus, KIA Ceed, etc. Wheel formula 4x2, rear wheel drive. The ancestor is the Italian Fiat 124.
General parameters of the VAZ 2107
Length - 4145 mm Width - 1620 mm Height - 1446 mm Base - 2424 mm Front wheel track - 1365 mm Rear wheel track - 1321 mm Ground clearance - to the front suspension cross member - 159 mm, to the rear axle beam - 154, up to muffler housing - 120 mm. Not bad, for example in the Opel Zafira, only 150 mm to the highest point. Load capacity - 400 kg Trunk volume - 385 liters Curb weight - 1060 kg Gross weight - 1460 kg Towed trailer weight, without brakes - 300 kg, with brakes - 600 kg.
VAZ 2107 engines
The VAZ 2107 was equipped with several engines (for Russia and the USSR), these are:
VAZ 2103 engine (8 cells, 1500 cm3, 71 hp, carburetor) VAZ 2105 engine (8 cells, 1300 cm3, 64 hp, carburetor, timing belt drive) VAZ 2106 engine ( 8 class, 1600 cm3, 79 hp, carburetor) VAZ 2104 engine (8 class, 1500 cm5, 68 hp, central injection) VAZ 21067 engine (8 class, 1600 cm3, 74 hp, distributed injection) RPD engine (rotary, 1300 cm3, 140 hp) Piston
diameter and stroke:
- for 1300 = 79 mm x 66 mm - for 1500 = 76 mm x 80 mm - for 1600 = 79 mm x 80 mm - for 1700 = 82 mm x 80 mm Compression ratio for all engines - 8.5 Cylinder operating order: 1-3-4-2 For carburetor VAZ 2107, DAAZ 2107-1107010 carburetors and their modifications were used.
A-92 gasoline is used as fuel. The injector for Euro-3 standards is already designed for A-95 gasoline. Spark plugs for VAZ 2107:
- for carburetor engines - A17DVR or A17DV-10;
- for injector - A17DVRM. Oil for VAZ 2107:
For all classic engines, the optimal choice is semi-synthetic 5W40. If your region has severe frosts, and most of the time it is below minus 30, then choose 0W40. If your frosts are not severe and the summer is hot, then the oil is better than 10W40. Oil change is done once every 10,000 km
All-metal, load-bearing, with 4 doors. Body rigidity - 7200 Nm/deg. The width of the interior of the VAZ 2107, and all the classics in general (from the rear door trims at the seat level) - 1250 mm Between the central pillars of the cabin, at a level of 80 cm from the floor - 1234 mm The length of the front door opening of the VAZ 2107 (and all the classics) - 889 mm , rear door - 819 mm.
Electrical equipment VAZ 2107
Wiring type: single-wire, negative on the car body (ground). Battery: 6ST-55, capacity 55 Ah. Batteries with a capacity of 60 and 65 Amperes are also suitable, but you need to check the dimensions. Typically it is 242mm x 175mm x 192mm. Operating voltage in the network: 13.6 -14.6 volts. The generator (G221) must deliver a current of no more than 1/10 of the battery capacity, i.e. approximately 2 to 5.5 Amps. Ignition coil - B117 or B117-A (for carburetor engines) Starter - ST221 Lamp type:
— low and high beam lamp: H4 or AKP2-60+55 (in Russian) — side marker lamp and side turn signals: T4W or A12-4-1 — turn signal lamp in the headlight, fog lights, reverse and brake lights: P21W or A12-21-3 - license plate and interior lighting lamp: C5W or AC12-5-1
Fuel tank (including a reserve of 5 liters) - holds 39 liters of gasoline Lubrication system (including oil filter) - holds 3.75 liters of oil Engine cooling system (including interior heater) - 9.85 liters of antifreeze Washer reservoir - 2 liters Gearbox housing - 1 .35 liters of transmission oil (semi-synthetic GL-5 75W90) / for a 5-speed gearbox - 1.59 liters Rear axle housing - 1.3 liters of semi-synthetic GL-5 (75W90) Clutch hydraulic system - 200 ml Brake system 660 ml
Suspension and wheels of VAZ 2107
Front suspension: independent, double wishbone, with anti-roll bar and hydraulic shock absorbers. Rear suspension: dependent, with a rigid rear axle beam and 5 reaction rods, on hydraulic shock absorbers. Standard VAZ 2107 wheels: 5Jxl3H2 with an offset of 29 mm, mounted on 4 bolts with a hole diameter of 98 mm, hole diameter for the hub - 58.5 mm) Tires: tubed or tubeless 175/70R13 or 165/70R13 Recommended tire pressure: - front wheels - 1.7 kg/cm2 - rear wheels - 2.0 kg/cm2 For a softer and more comfortable ride, you can reduce it by 0.1 kg/cm2
Maximum speed:
from 4 speed
Gearbox - 145 km/h with 5 speed. Gearbox - 152 km/h Acceleration to 100 km/h:
with engine. 1300 - 19 seconds from the engine. 1500 - 17 seconds from the engine. 1600 - 16 seconds Fuel consumption, highway/city: 6.9 / 9.6 liters for all models, approximately the same.
Reasons for the glowing indicator. Remedies
There are several reasons why the indicator light is on. Let's look at each one separately and how to eliminate them.
Insufficient level
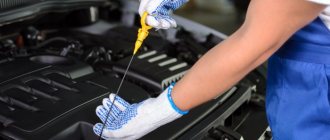
It is quite possible that the engine oil level is insufficient. Every VAZ car owner knows how to check. It is necessary to top up to the permissible level and re-check with starting the internal combustion engine.
Checking the level is carried out on a cold engine or 10 minutes after it has been running.
Internal fault
To check the sensor, you must perform the following steps:
- Turn on the ignition.
- Make sure the indicator lights up.
- Disconnect the wire from the sensor. The indicator should go out.
- “Lock” it with the engine housing. If the indicator on the dashboard lights up, then the wire is working and the cause of the malfunction is in the sensor. It cannot be repaired and should be replaced.
Wiring fault
During vehicle operation, electrical wiring is often exposed to high temperatures, friction with metal parts, drying out, and loss of integrity.
The check is carried out according to the electrical diagram of the VAZ 2107 car using a multimeter for conductivity and resistance of the wire.
Wear of engine parts
During operation of the internal combustion engine, oil circulates through its piston system and gas distribution mechanism through special channels. If the rubbing parts wear out, the tightness and alignment of these channels is disrupted. Due to this, the pressure drops.
The solution to this problem is to overhaul the engine.
Pump fault
In this case, the oil pressure in the line is checked using a pressure gauge.
A pressure gauge must be screwed into the technical hole in the internal combustion engine cylinder block for the sensor and the internal combustion engine must be started. At idle speed the value should be about 1.5 kg/cm2. As the engine speed increases, the pressure should increase, reaching 5–6 kg/cm2.
Operating standards for technical fluids
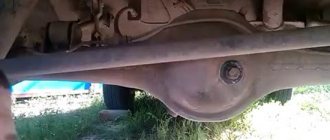
Already at the development stage, the manufacturer determines the parameters of the machine, which are refined during the testing process. So, in the described car, model VAZ 2107, the volume of the fuel tank corresponds to the size of the niche in the trunk behind the right wheel arch. Crankcases of other mechanisms contain the following quantities of operating fluids:
Operating standards for the VAZ 2107 car were developed by the manufacturer for organizations and enterprises. Knowing the volume of fuel that the tank or crankcases of other mechanisms hold, it is easy to calculate the amount required for travel.
Replacing the oil pressure sensor VAZ 2107
Repair work will require the following set of devices from the car owner:
- spanner set to “19”;
- clean rags;
- new sealing gasket for the sensor.
Before starting work, read the operating manual to remember the location of the part. If a book with a description is not at hand, then the picture below will help.
Before starting maintenance, you need to “de-energize” the car by disconnecting the battery terminals. Before dismantling the old sensor, you need to clean the space around the part with a rag so that dirt does not get into the oil channels. In addition, on clean panels it will be easier to detect the presence of grease leaks.
Algorithm for replacing the sensor with a new one:
- Remove the battery terminals;
- Using a key “19”, unscrew the DDM along the thread, pull it out, having previously dismantled the contact wire of the sensor;
- Replace the sealing ring with a new one;
- Install a new sensor and connect the wiring to it.
Logbook VAZ 21074 (2006)
Hi all! So, let’s finish with the bottom; before all the work, I jacked up the car and washed it with a mini pressure washer with chemicals. In general, the factory plastisol coating is still in place, but is already cracked in places and there are small chips with rust.
In the back, where there are niches for the spare tire and the gas tank, not everything is so rosy; under the previous owner, the rear was involved in an accident. At the very least, the wing and tailgate were replaced, although, judging by the tacks from welding, it seems even both. On the right, where the gas tank is basically intact, there are only a couple of “extra” holes.
On the left, where the spare tire is, corrosion has noticeably taken its toll, you can see the wheel through the gap, and the “skirt” is well caught (more on that next time). I had already processed the inside of the niche for the spare tire a year earlier.
Since there was no time left for repairs, I decided to leave these places for next year; I may have to weld another patch or even completely cut out and change the wheel well.
First of all, I decided to paint over the burn marks by welding - there are four of them: two in front and two in the back near the jacks, one more in the rear left wheel arch.
I cleaned everything with a grinder with a petal wheel,
I degreased it and, since the metal was clean, painted it according to the scheme: epoxy primer - insulating primer - rust paint, although ordinary enamel would have been suitable, but I had a can of green paint lying around.
After complete drying, instead of anti-gravel and plastisol, I coated these places with a hybrid sealant, which was used in the anti-corrosion test: it resembles a thick paste, has good adhesion, let’s see how it behaves on the bottom.
Well, in addition I went over it with bitumen mastic from a spray can.
At the rear left, the threshold had rotted outward at the place where the jack was welded, so it was only possible to weld it from the inside of the cabin, but there was no way to get through from the outside unless you cut off the jack itself. Therefore, I decided not to touch it for now, and also paint it, maybe I can cover it with something later so that the dirt doesn’t get into the threshold.
Since touching up every chip on the bottom is a futile exercise, and everything is covered in microcracks, I decided to treat it with fully heated gun lard, in theory it should soak the whole thing.
I’ll say right away that it’s a rather dirty task, and since the lard hardens quickly, it’s better to warm the bottom with a hairdryer or heat gun, but they weren’t available. I think it’s normal, it should spread.
Then I removed the rear fender liner and also processed the arch. Oddly enough, the butyl tape with aluminum tape that was glued two years earlier to the hole in the threshold did not come off, so I did not remove them.
Here, too, the rust began to take its toll; I didn’t paint it, I just removed the loose rust and also coated it with pushsal.
A wheel rubbed a hole in the fender liner - I degreased it and sealed it with the remaining piece of vibra from the gluing.
Well, to prevent dirt from getting clogged again in the cavities of the bottom reinforcements, I inserted rubber plugs from the “8” with a diameter of 3 cm into the holes, they fit perfectly.
I moved the spars last year, so I didn’t process them.
I will write separately about the “skirt” and body work.
So, let's do the math:
- Pushsalo 1kg - 50rub
- Brush - 40 rub.
- Paint, sealant - 200 rub.
- Bottom plugs 2108-5112090 2 pcs. — 30r
Total: 320r
Subscribe! Good luck on the roads!
All compatible oils for VAZ 2107
A selection from Shell
Helix Super 10W-40
Selection from Omskoil
Lux 5W-30 Lux 5W-40 Lux 10W-30 Lux 10W-40 Lux 15W-40 Lux 20W-40
Selection from Novoil-Sint
Novoil-Sint 5W-30
Selection from LUKOIL
Lux 5W-40 Lux 10W-40 Lux 15W-40 Super 5W-30 Super 5W-40 Super 10W-40 Super 15W-40
Selection from Rosneft
Maximum 20W-50 Standard 20W-50
Selection from GAZPROMNEFT
Standard 20W-50
Selection from Motul
6100 SYN-NERGY 5W-30 6100 SYNERGIE+ 10W-40 4100 TURBOLIGHT 10W-40 4000 MOTION 10W-30 4000 MOTION 15W-40 8100 ECO-LITE 5W-30 8100 ECO-NERGY 5W-30
Compilation from Kixx
D1 A3/B4 10W-40
Valvoline selection
VR1 Racing Oil 20W-50
Selection from TNK
MAGNUM SYNTHETIC 5W-40 MAGNUM SEMISYNTHETIC 5W-30 MAGNUM SEMISYNTHETIC 10W-40 MAGNUM MINERAL 15W-40 MAGNUM SUPER 10W-40
Which manufacturer is better, what to choose?
I have prepared many thematic ratings for my site, based on comparing reviews by brand and comparing laboratory analyzes of each model. I recommend checking it out. It's better to see once than to hear 100 times. There is never a clear answer.
Oil ratings, I recommend reading them
- Car oil rating 5w-30
- Rating of oils for winter 0w-20, 0w-30, 0w-40
- Rating of the best Russian oils of 2021
- Rating of the best mineral oils of 2021
- Rating of the best semi-synthetic oils 2021
- Rating of the best oils for turbocharged engines 2020
- Rating of the best oils for diesel engines 2021
- Rating of the best synthetic oils of 2021
- Rating of the best 10w-40 motor oils of 2021
- Rating of the best 5w-40 synthetic motor oils of 2020
Filling volumes and brands of oils and liquids LADA (VAZ-2107 Zhiguli)
Filling/lubrication point
Filling volume, liters
Name of oil/liquid
Fuel tank 39 (42) Motor gasoline with octane number 92 - 95
Engine cooling system, including interior heating system 8.65 Coolant with a freezing point not exceeding -40 C
Engine lubrication system, including oil filter, at ambient temperature:
from -35 to +30 °C
3.75 Motor oils (with API quality level: SG, SH, SJ)
SAE 0W-40
Gearbox housing 1.6 Transmission oils with API quality level GL-4 or universal GL4/GL5 and viscosity 75W-90, 80W-90
Rear axle housing 1.3 Transmission oils with quality level according to API GL-5 and viscosity 75W90, 80W-90
Steering gear housing 0.215 Transmission oil 75W-90
Hydraulic brake system 0.382 Brake fluid DOT-4
Hydraulic clutch release system 0.18 Brake fluid DOT-4
Windshield and tailgate washer reservoirs 2.0 or 5.0 A mixture of water with a special liquid REVIEW, GLASSOL or windshield washer fluid ASPECT
Starter drive drive ring - Lubricant Litol-24, AGIP GREASE 30, ESSO UNIREX No. 2
Front wheel bearings - Litol-24 lubricant
Bearings of cardan joint crosspieces - Lubricant FIOL-2U, No. 158
Spline connection of the front propeller shaft - Lubricant FIOL-1, CV joint-4
Door opening limiters - Grease CV joints-4
Seat moving slides - Lubricant FIOL-1
Steering rod joints and front suspension ball joints - ShRB-4 lubricant
Battery leads and terminals, trunk lid torsion bars, door keyholes and trunk lid - Auto-lubricant VTV-1 in aerosol packaging, CIATIM-201, -221, Litol-24
Door locks, hood, trunk lid - FIOL-1 grease
Pressure regulator - Lubricant DT-1
How much and what to fill in VAZ 2107
Fuel tank volume – 39 l. The manufacturer recommended using gasoline with an octane rating of 92 or 95.
The quality of operation of components and assemblies depends on the regularity of replacing lubricants. Engine oil lasts no more than 10 thousand km. After which it is necessary to change it to a new one. Lubricant fluid (with API quality level: SG, SH, SJ) is suitable for the VAZ 2107. During the procedure, a new oil filter must be installed. The same oil is used for the engine crankcase as for the power plant.
The service life of antifreeze is 60 thousand km. Even if the car is not used, the fluid loses its properties after two years, so it needs to be replaced.
The transmission oil is changed every 60 thousand km. At the same time, its level is periodically monitored. After 20 thousand km it may decrease, which will negatively affect the operation of the unit. The defect must be eliminated and oil must be added to the edge of the filler hole. This also applies to the rear axle housing. The gearbox filling volume is 1.6 liters.
Brake fluid should be replaced once every two years regardless of the vehicle's mileage. Domestic DOT-4 or a foreign equivalent is recommended.
Source
VAZ 2107 refueling tanks: technical characteristics of the tank
For almost thirty years, the Volzhsky Automobile Plant produced the “Seven” - one of the most common cars in our country. VAZ 2107 is a luxury sedan version of the previous fifth model. By the standards of the end of the last century, the car is quite reliable, comfortable and, most importantly, inexpensive. The technical characteristics of this car were at a fairly high level for its time.
The car was equipped with a one and a half liter gasoline engine, and its tank volume of 39 liters allowed it to travel over 534 km with a minimum consumption of 7.3 liters per 100 km. When driving around the city, this distance decreased to 379 km. The power unit was filled with motor oil, and the crankcases of other mechanisms were filled with special transmission oil. The filling tanks of the VAZ 2107 car had a sufficient volume to ensure trouble-free operation of the engine and other systems.
Operating standards for technical fluids
Already at the development stage, the manufacturer determines the parameters of the machine, which are refined during the testing process. So, in the described car, model VAZ 2107, the volume of the fuel tank corresponds to the size of the niche in the trunk behind the right wheel arch. Crankcases of other mechanisms contain the following quantities of operating fluids:
- engine – 3.75 liters of engine oil;
- cooling jackets, radiator and expansion tank - 9.85 liters of antifreeze;
- manual gearbox housing – 1.35 liters of TAD-17 oil;
- rear axle - 1.3 liters of the same oil;
- hydraulic clutch – 0.2 l of brake fluid;
- steering gear housing – 0.215 l of hypoid oil;
- closed container for windshield washer - 2 liters of water or special liquid.
Operating standards for the VAZ 2107 car were developed by the manufacturer for organizations and enterprises. Knowing the volume of fuel that the tank or crankcases of other mechanisms hold, it is easy to calculate the amount required for travel.
Possibilities for upgrading the machine
In the nineties of the last century, many owners of VAZ 2107 cars, not particularly counting on gas stations, installed an additional tank in the car. This is much more convenient than pouring fuel from cans. Typically, such a container was located behind the rear seat in the trunk. It could have different sizes, and accordingly they had the appropriate capacity.
The driver in those days often encountered empty gas stations, and the additional volume of the fuel tank greatly expanded the capabilities of the car. Knowing the required amount of technical fluids is necessary for routine maintenance of the engine and other systems.
comments powered by HyperComments
Types of DDM
Oil pressure sensors are divided into two types:
- Mechanical. They are used on cars that have become legends in the automotive industry, in particular, VAZ 2101, UAZ, Moskvich 401/407/412/, 2141 and others.
- Electronic. Installed on all modern cars, for example, domestic VAZ 2114, Kalina and other Lada models, as well as foreign cars.
Mechanical sensors
Mechanical sensors by design are divided into:
- Devices with two rods and a capillary tube.
- Devices with a rheostat.
The first ones consist of a body, a membrane, two rods, and a sealed tube.
As the pressure in the lubrication system increases, the membrane bends, putting pressure on the first rod, thereby increasing the pressure in the tube. The second rod takes this pressure and transmits it to the differential pressure gauge (located on the instrument panel).
The pressure increases - the arrow of the device deviates in a larger direction, falls - the arrow goes down to the left. The principle of operation is the same as that of a pressure gauge.
The mechanical oil pressure sensor with rheostat consists of:
- Cases.
- Membranes.
- Slider.
- Nichrome winding (resistor).
The device operates on the principle of a voltmeter. The rheostat and slider play a key role here.
The rheostat changes its resistance depending on where the slider is moved. The latter, in turn, shifts in one direction or another as the membrane bends or straightens.
When there is no pressure, the membrane is not deformed and the slider does not move, the current passes freely without encountering any resistance along its path.
As the pressure increases and the membrane deforms, the slider moves along the rheostat, thereby increasing the resistance in the circuit; accordingly, the current readings change, which is displayed on the device in the driver’s cabin.
All this is recorded by the ECU, to which the sensor is connected. It is programmed in such a way that only one period of current values is equal to the standard oil pressure. Exceeding this interval is equivalent to an incorrect value.
This is clearly visible on dial analog pressure gauges, which, in fact, are ordinary voltmeters.
Electronic sensors
Electronic DDM is much simpler than its mechanical counterpart, so it is considered more reliable.
Essentially, this is an emergency sensor that does not show the pressure in the system, but only notifies the driver when it is within normal limits and when it is not.
Principle of operation. When pressure is not applied to the sensor membrane, it is not deformed. The rod is in a position in which the circuit contacts are closed and current flows through them. At this moment, a lamp is lit in the cabin, which is monitored by the driver.
When the engine starts, the oil pressure in the system increases, the membrane bends, the rod moves, opening the circuit. The light goes out.
If after starting the engine the lamp does not go out within 1-2 seconds, you must immediately turn off the engine and do not start it until the cause of the malfunction is determined.
Read more here - what to do if the oil pressure lamp is on https://autotopik.ru/remont/1062-gorit-lampa-davleniya-masla.html.
Based on the above, we can conclude that the basis for checking the oil pressure sensor on modern cars is measuring the resistor resistance with a multimeter and checking the DDM for opening and closing the circuit.
To do this, the multimeter is switched to resistance or continuity measurement mode. It depends on what type of sensor is being tested with or without a resistor.
But there are other verification methods, which we will discuss below.
Stages of replacing lubricant VAZ 2105
On classic Lada cars or the more familiar Zhiguli, a convenient drainage of used oil from the engine is provided. The oil filter is also easily accessible and can be reached from the engine compartment.
During the production of the VAZ 2105, a large number of modifications were produced, which were equipped with various engines. Experienced drivers note good maintainability, unpretentiousness in maintenance, as well as consumables.
Before starting to replace the lubricant, precautions should be taken. Please note that the drained waste will be at a high temperature.
Since the replacement is carried out on a warm engine.
Draining waste fluid
Before starting the draining procedure, you should prepare tools, empty containers, as well as new liquids for subsequent filling. If additional protection is installed under the engine, it can also be removed for convenience.
Next, we perform the procedure for draining the liquid from the VAZ 2105:
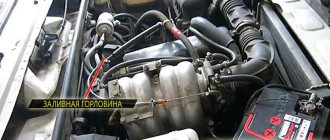
- We lift the hood, under it we find the filler neck on the engine and unscrew the plug (Fig. 1).
To unscrew the filter element, it is advisable to have a special puller. If it is not available, you can try to unscrew the filter using improvised means. In this case, you can use, for example, an old alternator belt, a regular belt, a bicycle chain or a simple screwdriver.
Using this method, you can drain the maximum amount of used oil, after which you can proceed to further actions. The main thing is not to forget, everything that we unscrewed must be put back in place.
Flushing the lubrication system
Flushing the engine on a VAZ 2105 should be carried out only in exceptional cases, which include:
- Purchasing a used car when you cannot know about the quality, as well as the regularity of lubricant replacements.
During operation, the service replacement interval was repeatedly exceeded.
Engine operation with constant frequent overheating, which contributes to coking and other deposits. In cases of switching to another type, for example from synthetics to semi-synthetics.
There are several types of flushes for the VAZ 2105 engine:
- Five- or seven-minute, capable of cleaning even the most difficult deposits. They must be used very carefully and strictly follow the instructions printed on the packaging. It is recommended to use them only when absolutely necessary. Since there is a high probability of causing premature wear of the sealing seals. And also clog the oil channels with particles of washed away carbon deposits.
- Special compounds that are added to the oil several hundred kilometers before the expected change. They are more gentle, but there is also a possibility of clogging of the oil channels.
- Flushing oil is the most gentle method of cleaning the engine from the inside. This composition is poured after draining the waste, the engine runs for 15-20 minutes, after which the liquid with deposits is drained. The absence of aggressive additives in the wash composition gently cleans the engine, but is not able to remove heavy contaminants.
- Regular oil that you are going to use when changing. This method is not so popular due to its high price.
Installing a filter, filling in new engine fluid
If the VAZ 2105 lubrication system is sealed and does not require repair work to eliminate leaks, you can proceed to filling in fresh engine oil. In addition to the oil itself, we may need a new drain plug, its part number 14325301. As well as the original oil filter 2101-1012005.
When everything is ready, let's move on to the bay:
- Replace the drain plug and replace it with a new one if necessary.
- We tighten and put the oil filter in place. Pre-lubricate the rubber sealing ring with fresh oil.
- Pour new oil into the filler neck.
- We check the level on the dipstick; it should be between the MIN and MAX marks.
- We start the engine, let it run for 10-15 seconds, then turn it off.
- After 5 minutes, check the level with a dipstick and top up if necessary.
For injection system
Forced fuel supply in the "seven" for the Russian market began to be used in 2006. In these car models, the fan operation and other functions are performed by the ECU. On the VAZ 2107 injector, the signal about the antifreeze temperature comes from the coolant temperature sensor, which is located on the right side of the engine cylinder block.
The data is processed by the ECU, which outputs a signal to the control relay to turn on the cooling - circuit diagram. The fan switching sensor is not needed on VAZ 2107 injection systems; it is replaced by a thermistor sensor, and control functions are assigned to the controller.
In any “seven”, to protect the fan from short circuit, there is a fuse F7 located in the mounting block.
Operation of the coolant temperature sensor for the injection system
Usually, turning on the fan on a VAZ 2107 is accompanied by a noise that the driver hears while sitting behind the wheel. A prolonged absence of sound from the device when driving around the city in the summer may indicate a malfunction in the cooling system, which can lead to antifreeze boiling and damage to engine components. The driver must react quickly to such defects so as not to spoil the “heart” of his car.
One of the possible malfunctions in the engine cooling cycle may be a breakdown of the coolant temperature sensor. In addition to the cooling system, it is responsible for the correct supply of the air-fuel mixture to the engine and its inclusion in idle mode.
The sensor that affects the operation of the VAZ 2107 injector fan consists of a semiconductor thermistor with two terminals, soldered into a housing with a thread that is screwed into the wall of the cylinder block. A constant voltage of 5 V is supplied to the device. As the temperature of the antifreeze increases, the resistance of the thermistor decreases and vice versa. At the input to the computer, passing through a resistor, the voltage drops as the coolant temperature increases to a certain level, after which the controller gives a signal to turn on the cooling.
How to check and install a new one
Checking the sensor responsible for turning on the fan does not require much effort. The following signs may serve as grounds for verification:
- The “Check Engine” light on the instrument panel is on.
- The fan operates continuously or is turned off.
- Low idle torque.
- Coolant overheating.
The cause of the malfunction may be outdated wiring. To find out for sure, you need to check it, and then move on to the sensor.
For this:
- The negative cable of the battery is disconnected.
- On a cold engine, the antifreeze drains to a level below the temperature sensor socket.
- The protective layer is shifted and the wiring from the temperature sensor is disconnected.
- Use a key to unscrew the sensor from its socket.
Next, check using a multimeter and boiled water. The multimeter is connected to the outputs of the temperature sensor and set to resistance measurement mode. The threaded side is placed in boiling water. If the resistance tends to zero, then the sensor is working. Otherwise, if increased resistance readings appear, the sensor requires replacement.
To replace it, it is better to purchase the same model that was installed when purchasing the car. Installation of a new sensor occurs similarly in the opposite direction.
How to change coolant
Before replacing the coolant, you need to figure out how to fill it correctly, where, what quantity is needed and what brand. The draining and filling of this substance occurs in the expansion tank, which is located in the engine compartment on the left side of the mudguard on a bracket and secured with clamps.
You will need a volume of 10 liters of antifreeze or antifreeze. Which is better for you? According to reviews, the first one slightly exceeds the indicators; it is also sold in a ready-made form, or it needs to be diluted in a simple proportion (50 to 50). Choose a high-quality and reliable brand.
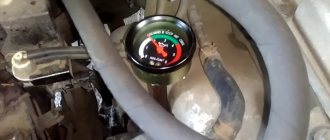
Before replacing, do not forget to check the temperature indicator (sensor). It is the first criterion that signals immediate replacement.
If the temperature is above normal, then start measuring the level. For this:
- Unfasten the rubber strap.
- Unscrew the tank cap and look at the mark (it should be 3-4 mm higher than “min”).
If the level is below normal, then it’s time to start replacing.
Replacing the oil filter on a VAZ 2107 car
To replace the oil filter on a VAZ 2107, no special tools are needed.
- After the old oil has been drained from the engine and it has been washed, the filter is unscrewed from its niche manually (in very rare cases, the device cannot be unscrewed by hand. In this case, it is recommended to use an oil filter puller).
- The new oil filter is removed from the packaging. A little motor oil is poured into it (the housing should be approximately half filled).
- The rubber ring on the filter housing is also lubricated with engine oil.
- After this, the filter is installed in its regular place (and you will have to screw the filter into the socket very quickly, otherwise the oil with which it is filled will spill out onto the floor).
So, changing the oil on a VAZ 2107 is not a very complicated technical procedure and can be done even by a novice car enthusiast who has held a socket and wrench in his hands at least once. All you need to do is follow the above recommendations exactly. And of course, you shouldn’t skimp on engine oil and filters.
Elimination of illiteracy
If you are interested in what kind of oil the engineers of the Volzhsky Automobile Plant recommend to fill into the power units of classic Lada cars - mineral, semi-synthetic or synthetic, then you are formulating the question incorrectly. The manufacturer's recommendations relate only to the quality standards that the engine oil being poured must meet.
Many people notice that product canisters usually have markings like API SH or API SJ/CF
You should pay attention to it first of all, since it is this marking that informs about the quality of the product
API is an acronym for the American Petroleum Institute. This institute checks whether motor oil meets certain quality standards based on a large number of indicators, including:
- the amount of deposits remaining on engine parts after a standard period of operation;
- washing ability;
- temperature characteristics;
- toxicity;
- corrosivity;
- effectiveness of protecting engine parts from friction.
The abbreviations SJ or CF are deciphered as follows.
- S and C are the categories of engines for which the oil is intended. Lubricants for gasoline power units are designated by the letter S, and lubricants for diesel engines by the letter C.
- J and F – quality of oil performance characteristics. The farther the letter is from A in alphabetical order, the higher the product characteristics.
Engineers at the Volzhsky Automobile Plant require that the engine of the VAZ 21074 injector be filled with lubricant that at least meets the API SG/CD standard. Moreover, if you come across a product that meets the API SH, SJ or SL standard, then it is better to fill it.
Recommended VAZ 2107 oils according to SAE classification:
- Lukoil Lux – 5W40, 10W40, 15W40.
- Lukoil Super - 5W30, 5W40, 10W40, 15W40.
- Novoil-Sint – 5W30.
- Omskoil Lux – 5W30, 5W40, 10W30, 10W40, 15W40, 20W40.
- Norsi Extra – 5W30, 10W30, 5W40, 10W40, 15W40.
- Esso Ultra – 10W40.
- Esso Uniflo – 10W40, 15W40.
- Shell Helix Super – 10W40.
REPLACING ANTI-FREEZE SENSOR ON A VAZ 2107
First of all, it should be said that the temperature sensors on the VAZ 2107 cannot be repaired. The reason is simple: this device does not contain parts and materials that the driver could purchase and replace himself. In addition, the body of the temperature sensor is not dismountable, so it is simply impossible to get to the insides of this device without breaking it. Here's what you need to replace it:
- new temperature sensor VAZ 2107;
- 30mm socket with a long wrench (or a regular spark plug wrench);
- container for draining coolant.
SEQUENCE OF OPERATIONS
- The car is placed on a viewing hole or on an overpass. Place a container under the drain hole, unscrew the plug, and drain the antifreeze.
- The contact wires are removed from the sensor. They must be carefully pulled towards you.
- The sensor is unscrewed with a socket by 30 (remember that under the sensor there is a very thin o-ring that can be easily lost).
- A new one is screwed in place of the unscrewed sensor (and when screwing in a new sensor, you should not use too much force, especially if the driver of the socket head is very long: the thread in the sensor socket is easily torn off).
- The cap with the contact wires is put back on the sensor, and new antifreeze is poured into the expansion tank.
Methods for replacing antifreeze
Many beginners do not know how to drain antifreeze from a VAZ 2107. Since it is a toxic substance, it must be treated with extreme caution, and it is better to adhere to general safety rules. Immediately before draining the liquid from the car, you need to prepare some kind of container or simply use an unnecessary basin . The following steps are followed:
- To begin with, the car is put on the handbrake, then a container is placed under the engine to drain the used fluid.
- Then you need to open the hood, find the expanded tank and unscrew the cap so that the pressure drops. Such actions are carried out to speed up the process.
- The lid on the radiator also opens.
- The lid on the stove opens from inside the car. To drain the remaining antifreeze, you need to set the lever to the warm position.
- The next step is to unscrew the bolt plug from the cylinder, or rather, from its lower part.
- Then the cap on the radiator drain hole is opened.
- The antifreeze begins to gradually flow into the container, the process of its release takes about ten minutes.
- Afterwards, you need to make sure that all the liquid has come out; if anything remains, it needs to be drained.
In order to correctly fill the liquid and it does not leak out, you need to check the integrity of the pipe. If the pipe is damaged even slightly, it should be replaced. Replacing the coolant in the injection VAZ 2107 is carried out as follows:
- First, you need to unscrew the sensor between the third and fourth spark plugs to prevent air locks from appearing in the cooling system.
- The solution must be poured through the hole located in the radiator; it must be poured until everything is filled. The volume here reaches five liters.
- The sensor turns on, but the antifreeze continues to fill.
- The liquid must be filled completely until the radiator is filled to the brim.
- When the entire procedure is completed, the radiator is closed with a lid. The remainder is added to the cooling system in the expanded tank to the maximum mark.
It is very important to remember that replacement occurs when the radiator has cooled down. A VAZ 2107 or 7 may have injectors or a carburetor. The carburetor operates using a simplified cooling system.
The operation of the injector depends on the system of installed devices and temperature sensors. All screwing of the lids can be done with a simple thirteen key. Why do you need antifreeze:
- Maintaining engine temperature during operation.
- Maintaining a low temperature of the liquid in the automatic transmission.
- For heating the interior. The liquid provides heat to the car by circulating through the heater. The motor heats the liquid, and the fan moves the heat into the cabin.
Antifreeze has many advantages, the main one is the continuous operation of the engine. If the cooling system operates without interruption, the liquid will not boil and the engine will continue to operate for a long time. Antifreeze is safe for the car; it does not contain substances contraindicated for cooling systems.
Replacement of gas tank and major repairs
Regardless of what type of fuel injection is used on your vehicle, the process for removing the tank will be the same. First drain all fuel from it. Next, carry out the following work:
- Remove the plastic casing from the container. To do this, you will need to unscrew several screws using a Phillips screwdriver.
- Disconnect the wires from the contacts leading to the fuel sensor.
- Use pliers to pry off the fuel hose.
- Unscrew the bolt of the tension plate that secures the gas tank.
- Remove the cap from the neck and carefully remove the tank.
Assess its condition. If there are several leaks or they are too large, then it will be easier to replace the entire fuel container. To do this, simply take a new tank and reassemble it in the reverse order.
If you do not have the opportunity to buy a new container, then stock up on:
- fiberglass;
- epoxy resin;
- acetone;
- sanding paper.
Motor oil for VAZ 2107 engine
VAZ-2107 is a rear-wheel drive sedan from the classic AvtoVAZ family, produced from 1982 to 2014. It is a modernized version of the VAZ-2101, 2102 and 2103 cars. The development project for this model began in the early 70s with the aim of updating the outdated model family with the Fiat 124 design. As a result, AvtoVAZ released a whole family of cars, including the 2107 and the 2104 station wagon. Sedan 2107 is considered to be a redesigned VAZ-2105, which was produced in parallel with the “Seven”. The car was exported under different designations: Lada 1500, Signet, Riva and Nova. The successor to the VAZ-2107 in 2012 was the Lada Granta.
When do you need to change antifreeze in a VAZ 2107 car and how much will it be needed?
The standard antifreeze, which most VAZ 2107 car owners use, has a short service life - 2 years or 60,000 kilometers. When using other coolants, these figures may vary, so you must follow the recommendations of the manufacturers of such materials.
Answering the question of how much antifreeze is in the VAZ 2107, it should be said that the mentioned figure will be the same for the entire model range of classic Zhiguli cars - 9.85 liters.
The following fluids can be used for replacement:
- In models produced before 1998, you can use regular antifreeze or G11 class antifreeze
- In the "sevens" produced from 1998 to 2002, you can use regular antifreeze or G12 class antifreeze
- For “sevens” produced from 2003 to 2012, it is best to use G12+ or G12++ class coolants
Check and replacement
If you suspect that the engine is overheating and there is no sound from the fan for a long time, it is necessary to determine the malfunction. If the wiring is shorted, the device may fail or the fuse may blow.
Checking the device is easy. You need to remove the wiring from the sensor, turn on the ignition key and connect the ends. If the cooling works, then there is a problem with the device and it needs to be replaced. It happens that cooling turns on at temperatures higher than those indicated on the sensor body, which also indicates its malfunction.
To replace it, you will need to drain the antifreeze or rush to screw in a new sensor, spilling a little coolant. The engine must be cold. You can unscrew it with a wrench or an adjustable wrench. It is better to substitute some kind of container and use a wrench to undermine the housing nut. Then carefully unscrew the thread by hand, pressing it against the socket. Move the old device aside and quickly press it with your finger, maybe some kind of plug, on the hole in the radiator. Carefully screw in the purchased sensor and connect the wiring.
Volume of brake fluid in the car
When a brake system repair is planned or a planned replacement of brake fluid is planned, the car owner thinks about how much brake fluid needs to be purchased to replace and completely fill the brake system. In a classic passenger car that is not equipped with ABS, TJ usually contains from 550 ml to 1 liter.
Information about what kind of liquid needs to be filled in, in the vast majority of cases (on Priora, Grant and other models popular in our country) can be found either on the body of the expansion tank or on its cap.
Where is the sensor located
The most common places where it is found are near the oil filter, in the upper part of the engine near the camshaft block, or pump.
Let's look at specific models:
- VAZ 2108/09/099. Located on the top right side of the engine (when viewed in the direction of travel) next to the timing belt cover. There is only one wire coming from it. This arrangement is also typical for 8-valve engines on the VAZ 2110/11.
- VAZ 2110/11 16 valve engine. Located on the left side of the engine (when viewed in the direction of travel) on the driver's side on the camshaft block between the air filter, ignition module and oil filler neck.
- VAZ 2112, 16-valve engine. It is located on the top left side (look along the way). To find it you need to remove the air filter.
- VAZ 2114. Located on the right inner side of the engine on the cylinder head next to the timing belt. It is clearly visible from above. To dismantle it, remove the protective cap, the terminal and turn it out with a 21 key.
- Lada Kalina. Located on the right rear of the engine near the timing belt, one wire comes from it. To get to it you need to remove the plastic cover of the cylinder block.
- Lada Priora. Located on the left (when viewed along the way) on top of the cylinder block under the intake air manifold. To dismantle it, you must first remove the protective plastic cover of the engine, move the air manifold and unscrew it with a 21 mm socket wrench. It sits very tight.
- Lada Granta 8 and 16 valve engine. Located on the top right side of the engine near the timing belt cover. To remove it, you can use a spark plug wrench or a 21 open-end wrench.
- GAZ "Gazelle" (engine ZMZ-405). Located on the BC, top right. There is only one wire coming from it.
The most common wrench size for removing the sensor is 21. You can use a spark plug wrench. But it all depends on the specific brand of car.
After the pressure sensor has been removed, the seat is tightly covered with a clean rag so that dirt does not get there and oil does not leak out during possible engine operation.
It would be a good idea to measure the oil pressure in the system at idle, medium and high speeds. To do this, use a pressure gauge, which is screwed in instead of the DDM
To take accurate readings, it is important to ensure a tight connection
For each car model, the values may differ. These can be found in the instruction manual.
For example, for a VAZ 2112 there are 16 valves, the standard engine oil pressure is:
- at idle speed 2 BAR.
- at 5 thousand revolutions from 4.5 to 6.5 BAR.
If all the readings are normal and the light is constantly on, then the information does not reach the ECU or gets distorted. This may be due to the sensor, which needs to be checked.
Device for applying liquid anticorrosive
The problem faced by car enthusiasts who decide to process hidden cavities on their own is the lack of necessary equipment. They can use a relatively simple device that operates on the principle of air spraying of drugs under a pressure of 4-6 kg/cm2.
The simplest design of such a device is as follows: a nozzle for it can be made from a cologne spray bottle by drilling out the nozzle in its tip to a diameter of 1.2 mm. A brass tube must be soldered to the inner wall, through which the anti-corrosion agent will be supplied.
The pump is connected with a hose to the spray tube going to the container with Movil. To supply the drug to the tube, you can use a polyvinyl chloride tube lowered into the vessel. For greater clarity, a diagram of such a device is shown below.
With the constant creation of air pressure by the pump, the torch emerging from the Movil nozzle is ensured within 14-20 cm, which is enough to apply it inside hidden cavities.
Before applying Movil to hidden surfaces of cavities, it is necessary to ensure that the sprayer has access to the required areas. For this:
- remove the seals of the front wings, headlights and their rims (VAZ - 03, -02);
- remove the spare tire, tools and floor covering (VAZ - 013), upholstery (VAZ - 03, -07 and -06) from the trunk;
- open the rear door (VAZ - 02) and remove the carpet, trim, spare tire and its cover;
- remove the door signal lamps (VAZ - 03, -06) and the reverse signal lamp (VAZ - 03).
Then you should perform a somewhat unpleasant, but technically necessary operation - drilling holes (9 mm) in the sills, and for VAZ-013, -21 and -05 - also in the end surfaces of the rear doors.
If possible, accessible treatment areas should be washed with water, blown with air and dried. In garage conditions, where it is impossible to carry out effective drying, it is enough to limit yourself to wiping them with a damp cloth, followed by natural drying. Considering that the largest number of points requiring treatment are located in the bottom area, it is advisable to carry out all work on a lift or overpass.
To process the sills, the place of the spare tire and the cross member of the front part, you need to pull out the plugs. Two plugs are installed on both sides under the front fenders, a plug on both sides in the rear arches, in the center in the spare tire niche, and one on both sides in the cross member under the front seats. The drainage holes also need to be cleaned.
Frequency of oil changes for VAZ 2107
The lubricant in the VAZ 2107 engine should be changed after 6-10 thousand kilometers. This difference is explained by the fact that the frequency of engine oil changes depends on the operating mode of the engine, the type and quality of the oil being poured. Mineral oil needs to be changed more often than semi-synthetic or synthetic oil. The type of fuel also affects the life of the oil, which becomes contaminated much more slowly if the engine is converted to run on gas. Under such conditions, high-quality oil can last up to 15 thousand kilometers.
You can determine when the oil needs to be changed by monitoring the pressure readings in the lubrication system. As the oil is used, it thins out and the operating pressure drops. And we must not forget about the manufacturer’s recommendations. Even if the pressure of the lubrication system has not dropped and the oil is not visually very dirty, it must be changed no later than 15 thousand kilometers.
Replacement frequency, what antifreeze to fill
According to the manufacturer's recommendation, it is necessary to replace antifreeze or antifreeze on VAZ 2104 cars every 2 years or after a mileage of 60 thousand kilometers. If the car is used in more severe conditions, then it is advisable to replace it more often - every 30-40 thousand kilometers.
In all cases, it is necessary not only to replace, but also to check the entire engine cooling system for serviceability.
As a coolant for the VAZ 2104, you can use good Lukoil antifreeze. Or a lesser-known but high-quality product from Gazprom Neft. When replacing, you can also fill in antifreeze, preferably with G12 approval, it is safer for the entire system. You can also use original Lada G12 antifreeze, which is suitable for all cars of this manufacturer.
Source
Cleaning and preventing plaque in the system
The injector device is very sensitive to large inclusions in gasoline. If you are using a cheap brand of fuel, be prepared to change your injectors soon. So the first thing you should do for your VAZ fuel pump is change the brand of fuel. The power supply system of the VAZ 2107 should become cleaner; the possibility of plaque formation in the system is still not excluded. Since the flammable liquid in the channels occasionally stagnates and sometimes even freezes, an early breakdown can be prevented only in one way - regular cleaning.
Approximately every 35-40 thousand km it is necessary to carry out preventive cleaning work on the fuel system. You need to wash the channels with your own hands. The performance of the engine will depend on the quality of cleaning. If this procedure is carried out irregularly, then soon you can say goodbye to one injector and look for a new one, and then you will have to change the remaining elements of the VAZ fuel pump.
In 4-cylinder types of injection engines, different intensities of injector clogging are observed. The temperature in the area of cylinders 2 and 3 is always elevated, so sediment accumulation occurs there faster.
A special admixture of polyetheramine is considered a prophylactic agent in such cases. It prevents the accumulation of burning for a long time.
