Negative and vice versa positive toe-in on a VAZ car (front-wheel drive). If the toe-in is very positive, the rubber will wear out from one edge. And if the toe is on the contrary, very negative, will the rubber wear off on the opposite side? Interesting, I'd like to figure it out
- How to replace the front springs without causing wheel alignment on a VAZ 2112? – 4 answers
- If the front suspension extension is bent, does the wheel alignment go astray? – 3 answers
- The car pulls left and right - 3 answers
- Moves to the right VAZ 2112 – 3 answers
- Plucks the rubber of a VAZ 2112 – 3 answers
Wheel alignment angles of your VAZ 2112 car, in running order:
Camber angle 0°30'±30'
Toe-in 0°15'±10' (1.5±1 mm)
Angle of longitudinal inclination of the axis of rotation 0°20'±30'
Well, in fact, any deviation from these dimensions will cause increased wear on the rubber of the front wheels. This is especially true for toe-in.
Well, for example, do not 1.5 mm, but 3 or 5 mm, plus or minus, and you will be guaranteed to eat up the rubber. It will also squeak when turning.
To ensure good stability and controllability, the front wheels of the VAZ 2110 are installed at certain angles relative to the body and suspension elements. Three parameters are adjusted: toe-in, wheel camber angle, and the longitudinal inclination of the steering axis.
The longitudinal inclination angle of the rotation axis is the angle between the vertical and the line passing through the centers of rotation of the ball joint and support bearing of the telescopic support of the VAZ 2111, in a plane parallel to the longitudinal axis. It helps stabilize the steered wheels in the direction of straight motion. This angle is adjusted by changing the number of shims on the extension ends. To decrease the angle, washers are added, and to increase it, they are removed. When installing/removing one washer, the angle changes by approximately 19′. Symptoms of deviation of the angle from the norm: pull to the side when driving, different forces on the steering wheel in left and right turns, one-sided tread wear.
- Angle of longitudinal inclination of the axis of rotation
Wheel camber angle is the angle between the plane of rotation of the wheel and the vertical. It promotes the correct position of the rolling wheel during operation of the VAZ 2110 suspension. The angle is adjusted by turning the upper bolt securing the telescopic strut to the steering knuckle. If this angle deviates greatly from the norm, deviation from straight-line motion and one-sided wear of the tread are possible.
Do-it-yourself wheel alignment of VAZ-2110
Probably all car owners, even without experience, are well aware that one of the most important factors for safe movement in a car of any brand, including the VAZ-2110, is the correct geometry of the wheels, relative to the plane of the ground and the car body. If the wheel alignment is not adjusted correctly, it can damage the tires and even increase fuel consumption. It is quite possible to avoid such unpleasant situations if you do the gathering correctly, taking into account the advice of professionals.
Of course, you can also contact a service station for help. But if you have the skills, even small ones, in car repair, every car owner, without exception, can do this process. How to do the wheel alignment of the VAZ-2110 with your own hands, and in what sequence, we will analyze later in the article.
Camber and toe angles
Tire tread wear, depending on the position of the wheel alignment angle.
When you have finished familiarizing yourself with the theoretical part, you can proceed directly to practice. To begin with, it’s worth understanding about camber and toe specifically for the “ten”.
For the VAZ-2110 (as well as the rest of the series, such as 2111 and 2112), the wheel alignment should be set to “zero”. That is, the indicators must correspond to: 0 degrees +-30 minutes for camber and 0 +-10 minutes for toe-in.
Wheel alignment and caster.
Changing the normal wheel alignment angle leads to negative consequences, especially wear on the tire tread or the inability to drive the car normally. Adjustment can be made using a thread and a weight.
Tires with different camber and toe.
Zero camber corresponds to the fact that the values of A and B are equal (Fig. below).
Changing the camber angle using a thread.
To accurately determine the toe angle, you will need special equipment, such as a chain with a dynamometer or a sliding ruler.
Changing the toe angle.
Step-by-step adjustment
Before you start adjusting the camber, you should first check the pressure in the car tires and make sure that the car's chassis is in full working order. Making adjustments when the steering is faulty is a pointless exercise. Therefore, this system is checked first. If its operation is fully adjusted, proceed to adjusting the alignment in the following sequence:
- The car is installed on a perfectly flat area.
- Two lines are drawn on the rim of the wheels with ordinary chalk, one at the top and the second at the bottom.
- Using a caliper, measure the distance from the wheel rim to each of the previously drawn marks. If positioned correctly, this figure should not exceed 3 mm.
- Having turned the wheel 180°, the measurement process is repeated, and the results are recorded.
- After removing the wheel, you should unscrew the two fixing bolts of the strut bracket that connect this element to the steering knuckle. For this process, it is recommended to use two 19-size wrenches.
- Using the same tool you need to move the steering knuckle. You can move the element both inward and outward, choosing a distance that will help you achieve the correct angle adjustment.
- The wheel is installed in its original place, the clamps are tightened.
- You need to “rock” the car several times, as they say, with your hands, lightly pressing on the wing, in order to take measurements again.
The correct camber angle on rear-wheel drive cars can vary from +1 to +3 mm. Normally, this indicator for front-wheel drive vehicles is from -1 mm to +1 mm.
Adjusting wheel alignment angles
Checking and adjusting wheel alignment angles is carried out on special stands in accordance with the operating instructions for the stand.
ATTENTION !
Replacing or repairing suspension parts may result in a change in wheel alignment, so checking the wheel alignment is mandatory.
For a new, run-in car in running order with a payload of 3136 N (320 kgf) [4 people and 392 N (40 kgf) of cargo in the trunk], the wheel alignment angles should have the following values:
| camber | 0°±30′ |
| convergence | (0±1) mm |
| caster angle | 1°30’±30′ |
Before adjusting wheel alignment, check:
– air pressure in tires;
– radial and axial runout of wheel disks: it should not exceed 1 mm for axial, 0.7 mm for radial;
– free play (play) of the steering wheel;
– free play (play) in the bearings of the front wheel hubs;
– technical condition of suspension parts and assemblies (absence of deformation, destruction and wear of rubber-metal hinges, unacceptable settlement of the upper support of the suspension strut).
Correct any defects you notice.
After installing the car on the stand, immediately before checking the corners, “squeeze” the car’s suspension, applying a force of 392–490 N (40–50 kgf) 2–3 times, directed from top to bottom, first on the rear bumper, and then on the front. In this case, the wheels of the car must be parallel to the longitudinal axis of the car.
When checking and adjusting wheel alignment, first check and adjust the caster angle, then the camber angle, and lastly, the wheel toe.
Angle of longitudinal inclination of the axis of rotation. If the angle does not match the above data, change the number of shims installed on both ends of the suspension braces. To increase the caster angle of the steering axis, reduce the number of washers on the extension in the front or rear part. And, conversely, to reduce the angle, add a number of washers, but only in the rear part of the stretcher, since this is not always possible in front due to the short threaded part of the stretcher.
When changing the number of washers on the brace, make sure that the chamfers on the washers are facing towards the thrust end of the brace. Observe the same rule when installing the internal thrust washer of the rubber-metal hinge when the adjusting washers are completely removed. Failure to comply with these requirements may result in loosening of the nuts securing the guy wires.
The number of adjusting washers on the extension should not be more than two in front, four in the rear.
To ensure that the position of the brace relative to the suspension arm does not change when adjusting the longitudinal inclination of the steering axis, use a special device that fixes the brace relative to the lever, thereby preventing the brace from rotating under the influence of forces when tightening the nut securing the brace to the lever. This requirement must be observed in order to prevent premature wear of the rubber-metal hinge and rubber cushion on which the ends of the extension rest.
When installing or removing one shim, the caster angle of the steering axis changes by approximately 19′.
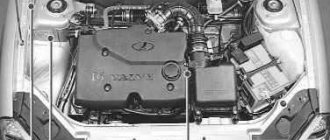
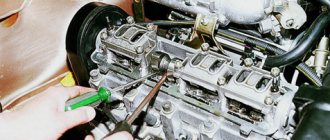
Front wheel camber angle. If the camber angle is different from the norm, then adjust it. To do this, loosen the nuts of the upper and lower bolts and, turning the upper adjusting bolt 3
(see figure Front suspension assembly), set the required camber angle. After completing the adjustment, tighten the nuts to a torque of 88.2 N·m (9 kgf·m).
Front wheel alignment. If the toe-in is not within the standard, loosen the tie rod end bolts with wrench 67.7812.9556 and, rotating the rods 4
(see figure Steering gear assembly with drive), set the required toe-in.
Then make sure that plane C of
the ball joint
2
is parallel to plane
D
of the supporting surface of the swing arm
3
, and then tighten the tie rod end bolts to a torque of 19.1–30.9 N·m (1.95–3.15 kgf·m).
Step-by-step traction adjustment
After adjusting the camber, you must make sure that the distance between the wheels is normal. If this indicator is less or, on the contrary, greater, it is necessary to adjust the steering rods:
- using a size 21 wrench, loosen the locknut clamp holding the steering rods;
- using a size 24 key, you need to start rotating the clutch to change the incorrect distance;
- when rotating the clutch, you should carefully ensure that the steering wheel spoke is positioned strictly in a horizontal position;
- Having slightly rolled the car back, check the distance between the wheels using a ruler with a moving scale;
- If during the test the measuring device gives an indicator that can vary from -1 mm to +1 mm, the process of adjusting the toe angle can be completed.
More about the block
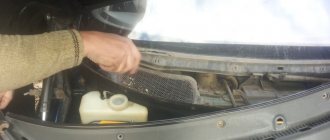
- Coolant level;
- Washer fluid level;
- Oil level in the crankcase;
- Indicator of non-working lamp;
- Brake pad wear indicator;
- Seat belt indicator;
- Indicator of the front left door not closed;
- Indicator of the front right door not closed;
- Indicator of the rear left door not closed;
- Indicator of the rear right door not closed;
Open doors
This function works thanks to limit switches in the door. When the door is opened, the switch contacts close and the door open lamp lights up. Each limit switch is responsible for the door in which it is installed.
Quite often it happens that due to oxidation of the limit switch contacts, the indication does not operate. This problem is solved by removing the end switch and cleaning its contacts with sandpaper.
Low oil level
A special oil level sensor is installed in the engine crankcase, which informs the driver when the level drops to a minimum value. The sensor is a reed switch with a float; the contacts of the reed switch close when the oil level drops, which leads to the lighting of the corresponding lamp on the display unit.
Low antifreeze level
This indication system is similar to the oil level design. A sensor is installed in the expansion tank, operating on the principle of an oil level sensor. When the coolant level decreases, the contacts on the sensor close and the low antifreeze level indicator lamp lights up.
Low washer fluid level
The principle of operation of this indicator is to measure the windshield washer fluid level. There is a level sensor in the washer reservoir, the same as in the expansion tank. It measures the level and, when the minimum mark is reached, lights the lamp on the display unit.
Front pad wear
This indication informs the driver about the wear of the front pads; this occurs using a sensor that is connected to the pad itself. It is important to note that in order for this indication to work, it is necessary to use special blocks in which this sensor is built-in.
Unfastened seat belt
This function has long been known on cars of foreign origin, but it was used for the first time in AvtoVAZ. The sensor built into the seat belt buckle closes its contacts when the belt clip is inserted into it. If you start driving without a seat belt fastened, the display unit will begin to emit a sound warning of danger.
Burnt out lamp indication
The essence of this function is to inform the driver about one of the burnt-out lamps in the headlights or taillights. This function works by measuring the resistance in the power supply circuit of headlights or flashlights. As soon as the lamp burns out, the power circuit is interrupted, which causes the indicator on the unit to light up.
Forgotten key in the ignition
After stopping the engine and turning off the ignition, if you open the door while the key is inserted into the lock, the display unit will emit a sound signal that will last 10 seconds and will stop if you close the door again or remove the key from the lock.
Adjusting the camber angle
Adjusting the camber angles is performed in the following order (we remind you that in our case the actions are described for a VAZ 2109 car):
- Before adjusting the camber, the machine must be on level ground.
- We put two vertical marks along the diameter of the wheel rim with chalk - one on top, the other on bottom.
- We apply the cord with a plumb line to the wing, and along the marks with a ruler or caliper we measure the distance from the rim to the cord at the top mark, and then at the bottom. The difference should be ±3 mm.
- The rim may not be perfect, so it is advisable to roll the car by turning the wheel 90° and making 2 more vertical marks. We take measurements again.
- Do the same on the second wheel and write down the result.
- After this, turn the car 180° and take measurements again, write them down and compare them.
- Then remove the wheel and use two 19mm wrenches to loosen the two bolts securing the shock absorber strut bracket to the steering knuckle.
- Move the steering knuckle with a wrench to 19 due to the eccentricity of the bolt head inward or outward to the required distance, thus achieving the required camber angle.
- Tighten the bolts, put the wheel in place, lower the car and rock the fender several times. Take measurements.
- Move some distance away from the car and look at the position of the front wheels, comparing them with the plane of the rear wheels.
On rear-wheel drive cars, the camber angle should be within +1/+3mm, and on front-wheel drive cars, camber in the range from -1 to +1mm is considered normal.
When is a wheel alignment performed on a VAZ 2110?
- The car has traveled a sufficient amount; different cars have different mileage.
- It is difficult to control and the tires have worn out.
- The steering wheel cannot turn after turning.
- Work was carried out on the suspension.
- After an accident, the car must be sent for diagnostics of the chassis.
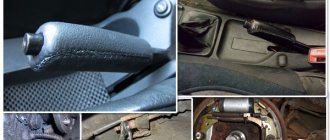
It is also worth remembering that before all work, check the serviceability of the suspension components, that is, the hub and bearings in it, and other elements of the front suspension.
Equipment and materials for adjusting wheel alignment yourself
Types of wheel alignment faults
To carry out the adjustment, you will need a platform, it should be level, and it is also advisable to have an inspection hole.
Clue! If the wheel alignment is adjusted in the field, then to create the effect of a flat surface, you can place flat boards under the wheels.
In order to perform
a wheel alignment with your own hands you will need :
- rope with a plumb line,
- telescopic ruler,
- wrench.
Clue! Instead of a telescopic ruler, you can use any device that resembles a fishing rod, or a curtain holder for a bathroom, or a home horizontal bar. In fact, these should be 2 pipes of different diameters with extension and the possibility of fixing.
Video: what you need to know about wheel alignment
The chassis of a car is a complex component with many parameters. Any intervention in it will lead to a change in the wheel alignment angles. As a result, the behavior of the car on the road changes for the worse: cornering becomes difficult, the car can wobble when braking and accelerating, it becomes difficult to direct it in a certain direction, and skidding occurs.
To fix the problem, they resort to wheel alignment. Is it possible to make it yourself and what is needed for this?