How to identify signs of wear on stabilizer bushings?
The occurrence of the following malfunctions during vehicle operation will indicate a malfunction of the stabilizer bushings:
the first call when the bushing fails will be the appearance of noise and knocking in the suspension when the car is moving. The difference from malfunctions with shock absorbers will be that the suspension will knock not only when passing uneven surfaces, but also when entering turns with a small radius
Moreover, the road surface in this case may be in good condition and not contain any unevenness; If you do not pay attention to the knocking sound in the suspension and continue to drive the car, the situation will begin to worsen. Suspension noise will increase and will be caused by any change in suspension position
This will happen due to an increase in cracks and deformation of the stabilizer bushings; the next step will be the appearance of a large roll of the car when making turns with a small radius. The body will sway violently; In some cars, play in the steering wheel may occur. This is due to their design features; Further ignoring the situation will lead to the car's controllability deteriorating. The car may start to move from side to side when trying to make any maneuver.
You should not bring your car to this state, because this endangers not only your life, but also the safety of other road users.
If you do not have the opportunity to take the car to a service center for diagnostics, you can verify that the bushings are faulty on your own. To do this you need:
- find an overpass or pit for inspection. In this case, you should not use jacks or lifts. The fact is that the test will be accompanied by strong rocking of the car and strong physical impact on the stabilizer. Because of this, the car may lose stability and jump off these devices. At best, this can result in injury, at worst, death. Therefore, to ensure maximum safety, it is recommended to use overpasses and pits;
- Next, a visual assessment of the condition of the rubber bands is carried out. If any cracks or breaks are detected, such a part must be replaced;
- Next, you need to make a strong physical impact on the stabilizer. Tug it in different directions. Creaks and noise accompanying this action will indicate the need to replace the bushing.
Replacing the stabilizer for Lada 2107 (VAZ 2107)
If the transverse stabilizer bushings in the suspension fail, this can hardly be called a critical failure requiring immediate repair. Because of this breakdown, the car will not lose control and its wheels will not fall off. But in order to drive a car with broken bushings, the driver will need very strong nerves. Because knocking and grinding noise caused by worn bushings will be heard in any cabin. In this article, we will tell the reader how to replace roll bar bushings in passenger cars, both domestic and foreign, with your own hands.
Structural features of the mechanism.
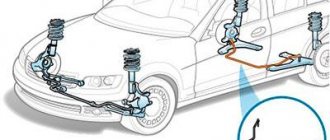
The design and principle of operation of the anti-roll bar
The strut provides a reliable and constant relationship between the wheels and the stabilizer beam; to put it simply, it is intended to create a movable connection between these suspension elements. Let's consider options for connecting struts with other suspension parts, their design and features:
- Ball joints are one of the simplest and most common connection methods, which ensures full movement of the joints. Balls are constantly under high load, as a result of which they wear out quickly. The stabilizer link, being a movable structural element, is constantly exposed to centrifugal force, due to which it can stretch, compress and twist. Often, ball joints are used in a stabilizer with a complex beam design. The element is beyond repair and requires replacement.
- The earrings have a primitive but durable design, which consists of a stud with rubber elements secured to it using lock washers. Between the rubber stops are the eyes of the stabilizer beam and the suspension arm. The earrings can withstand constant high loads and are easily repaired.
- Silent block is a rubber-metal hinge movable within one plane. It has a good service life and good maintainability, but it is not suitable for use in suspensions with a complex design.
Purpose of thrust rods on the VAZ 2107
Anti-roll bar: device, purpose, malfunctions
The purpose of the thrust rods on the VAZ 2107 is simple: to prevent the car from “walking” on the road and swaying strongly when entering sharp turns and when hitting various obstacles. This problem has been known since the days of early cars. They didn’t know about any jet thrust at that time, and the cars were equipped with ordinary springs. The result was natural: the car easily overturned, and it was incredibly difficult to drive. Over time, the car suspension was improved: a system of long rods began to be installed in it, which were supposed to take on part of the loads arising from road unevenness or due to an overly aggressive driving style.
The reaction rod system is installed near the rear axle of the VAZ 2107
This system can only be seen from the inspection hole, where all work on replacing broken rods is carried out.
Functions of anti-roll bar bushings
Made of dense rubber.
In most modern cars, an anti-roll bar is a mandatory element of the suspension. When a car turns, its roll increases and it can tip over due to centrifugal force. When the car comes out of a turn, its body begins to sway, which makes it difficult to align its trajectory. As a result, anti-roll bars appeared in car suspensions to prevent unwanted swaying. The stabilizer is attached to the suspension with steel brackets, under which there are elastic bushings made of polyurethane (or especially dense rubber). Their purpose is to dampen suspension vibration and guide the stabilizer bar when entering a turn and when driving on uneven roads .
The reality associated with the front stabilizer tuned
Procedure for replacing silent blocks of the rear suspension of Ford Focus 2
By installing a front suspension stabilizer, you will not only not improve the car’s behavior, but, on the contrary, reduce its level of comfort. The fact is that the front suspension of classic Zhiguli models is independent. A reinforced stabilizer, or double stabilizer, which gives greater rigidity compared to the factory one, makes the suspension not independent, but semi-independent, or even dependent.
Let us explain: in an independent suspension, a change in the position angle of, for example, the left wheel does not affect the position of the right one. In a dependent suspension, a change in the position of any of the wheels is reflected in the position of the wheel located on the opposite side. Simply put, by installing a double front stabilizer on a classic, you significantly worsen the performance of the suspension and limit its operation. Not only will the car become much stiffer, but its cross-country ability will also decrease.
Of course, the stabilizer will reduce the roll of the car, but again, you will have to sacrifice the comfort and maneuverability of the car for this. Is the game worth the candle?
Removal
1. Place the car on an inspection hole or overpass and hang the front part of the car (see “Preparing the car for maintenance and repair”).
2. Mark the position of the stabilizer pad clips relative to the arms for correct installation during assembly.
Attention! The right and left clips for attaching the stabilizer pads are non-interchangeable. If we replace only the cushions, then mark their position relative to the stabilizer bar
If we replace only the cushions, then mark their position relative to the stabilizer bar.
3. Using a 13 mm socket wrench, unscrew the two nuts securing the stabilizer pad cage to the lower arm.
4. Using a mounting spatula, remove the cushion clip from the lever studs.
5. Remove the pillow from the stabilizer. Similarly, remove the pillow from the opposite side of the stabilizer.
To replace the stabilizer or the pads of its mounting brackets, remove the mudguard (see “Splash guard - removal and installation”).
Attention! When removing the stabilizer bar, it is necessary that the load on the right and left front suspension springs be equal. Otherwise, when removed, the twisted rod may straighten and cause injury.
6. Using a 13 mm socket wrench with an extension, unscrew the two nuts securing the stabilizer bracket to the body side member.
7. Similarly, unscrew the nuts securing the second bracket and remove the stabilizer. We clean the stabilizer bar from dirt.
8. To replace the stabilizer bracket cushion, clamp the bracket in a vice. If the stabilizer bar does not require replacement, then mark the position of the bracket pads relative to the stabilizer bar to facilitate subsequent assembly. Lubricate the stabilizer bar with soapy water to make it easier to remove the bracket with the cushion.
9. Turning the stabilizer bar in different directions, pull it out of the bracket cushion.
10. Use a slotted screwdriver to remove the rubber cushion from the bracket.
11. Similarly, remove the cushion of the second bracket.
How to change the stabilizer on a VAZ 2107
Part - anti-roll bar for VAZ 2105, 2107 cars is designed to reduce vehicle roll when cornering. It is an elastic steel rod mounted on brackets with rubber cushions to the front arms and the lower parts of the front side members.
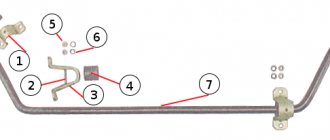
Main elements of the anti-roll bar
- Stabilizer cushion clip (2101-2906048/49).
- Internal bracket (2101-2906043).
- External bracket (2101-29060442).
- Stabilizer bar cushion (2101-3906040).
- Nuts M8 (16100811).
- Spring washers (10516670).
- Anti-roll bar (2101-2906010).
Notes and additions
Most often, rubber stabilizer pads fail. It is recommended to check and change them every 15,000 km.
On used cars, the attachment points of the stabilizer brackets to the side members often become rotten. For preventive purposes, it is recommended to periodically treat these places on the outside with bitumen mastic and spray the spars inside with a mixture of Movil and Pussala. For advanced cases, there are a couple of methods for repairing and restoring damaged areas (See “Restoring stabilizer mounts 2105, 2107”).
A stabilizer bent after an impact must be replaced, as it will tear out the fasteners.
— Knowing the catalog number of the stabilizer parts, you can easily purchase in the store exactly the part that needs to be replaced.
Signs of a broken rear stabilizer
It’s not difficult to guess that something is wrong with the rear stabilizer of the VAZ 2107. Here's what's observed:
- a characteristic grinding or creaking noise, which is especially clearly heard when entering a sharp turn at high speed;
- a significant increase in vehicle roll when cornering and a decrease in controllability when cornering;
- the appearance of play on the stabilizer. Play can be easily detected by placing the car in an inspection hole and simply shaking the stabilizer bar up and down;
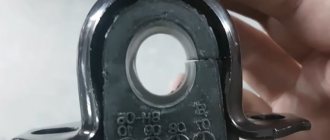
- destruction of bushings. The play mentioned above is almost always accompanied by the destruction of rubber bushings. They are squeezed out of their eyes, crack and completely cease to perform their functions. On the right is a worn stabilizer bushing, the hole in which is much larger than in the new bushing on the left
All of the above things indicate only one thing: it’s time to repair the stabilizer. In the vast majority of cases, repairing the rear stabilizer comes down to replacing damaged bushings, since the fasteners and rod rarely need repairs. Such a need may arise only in the event of serious mechanical damage, when the driver caught a large stone or curb with the stabilizer, for example.
How should the stabilizer be positioned?
A properly installed stabilizer should be able to twist under the influence of forces on the wheels, and it should do this even when the forces applied to the right and left wheels are directed at completely different angles.
On the "seven" rear stabilizers are installed only with rubber bushings
That is, stabilizers on passenger cars should never be directly welded to the frame; between the frame and the wheel mount there must always be some kind of intermediate link responsible for compensating for multidirectional forces. In the case of the VAZ 2107, such a link is dense rubber bushings, without which it is strictly not recommended to operate the stabilizer.
The stabilizer on the VAZ 2107 is usually attached at four key points
Why does the stabilizer bushing squeeze out?
As mentioned above, the bushings on the stabilizer serve to compensate for the forces on the wheels. These efforts can reach enormous values, especially when the car enters a sharp turn. Rubber, even of very high quality, systematically subjected to enormous alternating loads, inevitably becomes unusable. Severe frosts and reagents that are used to sprinkle roads in our country during icy conditions also contribute to the destruction of bushings.
The rear stabilizer bushing is worn out, torn lengthwise and comes out of the clamp
It usually starts with cracking of the bushing surface. If the driver does not notice the problem in time, the cracks become deeper and the bushing gradually loses its rigidity. At the next sharp turn, this cracked bushing is squeezed out of the eye and does not return back to it, since the elasticity of the part is completely lost. After this, play appears on the stabilizer bar, the driver hears a creaking and grinding sound when entering a turn, and the car’s controllability decreases sharply.
About double stabilizers
Double stabilizers are installed only on the front wheels of the VAZ 2107. As the name suggests, there are already two bars in this device. They have the same C-shape and are located approximately four centimeters from each other. The mounting lugs in the double stabilizers are also paired. Otherwise, this design does not have any fundamental differences from the rear stabilizer.
Front stabilizers on the VAZ 2107 are usually made of two paired c-shaped rods
Why use two bars instead of one? The answer is obvious: to increase the overall stiffness of the suspension. The double front stabilizer copes with this task perfectly. But one cannot fail to note the problems that arise after its installation. The fact is that the front suspension on the classic “seven” is initially independent, that is, the position of one wheel does not in any way affect the position of the second. After installing a double stabilizer, this situation will change and the suspension will turn from independent to semi-independent: its working stroke will be significantly reduced, and in general the control of the car will become tougher.
Of course, the roll when entering turns with a double stabilizer will be reduced. But the driver should think: is he really ready to sacrifice personal comfort and cross-country ability of the car for the sake of its stability? And only after answering this question can you start working.
What is a rear stabilizer
The rear stabilizer for the VAZ 2107 is a curved C-shaped rod installed next to the rear axle of the “seven”. The stabilizer is attached at four points. Two of them are located on the rear suspension arms, two more on the rear side members of the “seven”. These fasteners are ordinary eyes with dense rubber bushings inside (these bushings are the weak point of the entire structure).
The rear anti-roll bar for the VAZ 2107 is a conventional curved rod with fasteners
Today you can purchase a rear stabilizer and fasteners for it at any spare parts store. Some drivers prefer to make this device themselves, but this is a very labor-intensive process that requires certain skills that a novice car enthusiast simply does not have. That is why the replacement of bushings on a finished stabilizer will be discussed below.
Purpose of the rear stabilizer
The anti-roll bar on the “seven” performs two important functions at once:
- this device gives the driver the opportunity to control the tilt of the car’s chassis, while the force acting on the camber of the rear wheels practically does not increase;
- After installing the stabilizer, the tilt of the suspension between the axles of the car changes significantly. As a result, the driver is able to better control the car;
- The improvement in car control is especially noticeable on sharp turns. After installing the stabilizer, not only does the lateral roll of the car during such turns decrease, but you can also take them at a higher speed.
About the disadvantages of the rear stabilizer
Speaking about the advantages that the stabilizer provides, one cannot fail to mention the disadvantages that also exist. In general, the installation of a stabilizer still remains the subject of fierce debate among car enthusiasts. Opponents of installing stabilizers usually justify their position with the following points:
- Yes, after installing the rear stabilizer, lateral stability increases significantly. But this is a double-edged sword, since it is the high lateral stability that makes it much easier for the car to skid. This circumstance is good for those who engage in so-called drifting, but for an ordinary driver who finds himself on a slippery road, this is completely useless;
- If a car enthusiast decides to install a rear stabilizer on his “seven”, then he is strongly recommended to install a front one, and not a regular one, but a double one. This measure will help prevent excessive loosening of the car body;
- The cross-country ability of a car with stabilizers is reduced. On sharp turns, such a car often begins to cling to the soil or snow with its stabilizers. It is easy to notice that the ground clearance of a VAZ 2107 with a stabilizer decreases, which affects cross-country ability
Thus, a driver who is thinking about installing stabilizers should weigh all the pros and cons as carefully as possible, and only after that make a final decision.
About the choice of jet thrusts
Traction "Track"
The product is very popular among owners of the “Seven”. These rods are distinguished by their high reliability and high price, which starts from 2100 rubles per set.
Trek thrusters are distinguished by high reliability and high price
The main difference between Trek is the heads for the bushings. Firstly, they are large, and secondly, they are attached to the rods by welding. The silent blocks on Tracks are also made of especially dense rubber, which significantly extends their service life.
Read more: New Ford Mondeo 2017-2018 specifications and prices photos technical specifications reviews
Rods "Cedar"
Kedr rods have an affordable price and mediocre quality
The quality of Kedr is somewhat inferior to Trek. This is especially true for bushings and silent blocks. All this wears out quite quickly, and therefore they will have to be changed more often. But there is also a good side - a reasonable price. A set of “Cedar” rods can be purchased for 1,700 rubles.
Belmag rods
Despite the simplicity and reliability of Belmag rods, they have one significant drawback: they are not so easy to find on sale. Every year they are found less and less often on the shelves of auto parts stores. But if the car owner still manages to find them, then he can be congratulated, since he got a reliable product at a reasonable price. The cost of Belmag rods starts from 1800 rubles per set.
Today it is not so easy to find Belmag rods on sale
So what should a driver choose from all of the above?
The answer is simple: the only criterion for choosing jet rods is the thickness of the car owner’s wallet. If a person is not short on funds, the best option would be to purchase Trek rods. Yes, they are expensive, but installing them will allow you to forget about problems with the suspension for a long time. If you don’t have enough money, it makes sense to look for products on the shelves. Well, if this idea is not crowned with success, there remains a third option - “Cedar” rods, which are sold everywhere.
Here we should say a few words about fakes. Knowing that car owners most often choose products from the three above-mentioned companies, unscrupulous manufacturers are now literally flooding the shelves with counterfeits. Moreover, in some cases, the fakes are made so skillfully that only a specialist can identify them.
Node maintenance
During the operation of classic Zhiguli models, several malfunctions associated with stabilizing traction occur:
- wear of stabilizer bushings on VAZ 2107;
- breakage of the upper or lower pin on which the ends of the rod are screwed to the lever;
- separation of the U-shaped fastening strip welded to the lever at the factory.
Broken studs are quite rare and are the result of metal fatigue. The malfunction is characterized by sharp rolls when turning, accompanied by loud metallic knocks. This unpleasant sound is produced by the released end of the rod clinging to the side of the lower arm. It’s quite easy to fix the damage, even while on the road in the middle of a field: a regular bolt and nut are put in place of the torn stud.
The fastening U-shaped strip of thick metal comes off very rarely. Which entails a labor-intensive process of replacing the lower arm, since welding it to the old one is useless, the part will very quickly break again. If any of these two troubles occur, it is possible to drive a car, but only very slowly, especially on turns.
The VAZ “classic” stabilizer bushings are replaced when they wear out approximately once every 20 thousand km. mileage Wear is clearly visible visually; you just have to look under the front of the car and make sure that the rubber bands are cracked and do not cover the traction properly. In advanced cases, bad bushings make themselves felt while driving, when the car sways and tilts dangerously.
To install new bushings, you will have to completely remove the VAZ stabilizer. It is most convenient to carry out work from the inspection hole, although if necessary, you can do without it. To disassemble and replace, you will need a pry bar, 2 13 mm wrenches and a powerful screwdriver. Replacement is carried out as follows:
- It is easiest to remove the rod when the springs are completely unloaded. Therefore, it is recommended to hang both front wheels of the car.
- Using a 13 mm wrench or socket, unscrew the nuts on all brackets.
- Using a pry bar, remove the brackets from the studs one by one.
- Remove the rod and use a sharp tool to mark the position of the old bushings, as well as the right and left sides.
- Old rubber bands can be cut off with a knife.
When finished, the rod must be thoroughly soaped (do not lubricate it with oil!) and new bushings must be tightened, and then the assembly must be assembled. When assembling, it is undesirable to confuse the right and left ends of the stabilizer, which is why marks were placed on them. In the end, you need to check the car while driving and go to a car service center to correct the wheel alignment of the front wheels.
Purpose and design of the VAZ 2107 stabilizer
The design of the front suspension of cars of the VAZ 2101-07 family uses a front stabilizer, the task of which is to distribute the load as efficiently as possible. This is the load that the suspension of a domestic car experiences when turning and performing maneuvers on the road. Due to the presence of a stabilizer, the occurrence of a roll is eliminated, and the car is kept in a horizontal position. If you remove the front stabilizer, the driver will immediately feel how much the car will shift to one side during sharp turns or maneuvers. Moreover, the rolls are so large that the vehicle can tip over.
Structurally, the part of the suspension of the VAZ 2107 car under consideration consists of a long rod, which has the shape of the letter U. The rod is made of special steel, which has increased elasticity.
This is interesting! Springs for cars are made from similar steel, which have high strength, memory, and resistance to deformation.
The part in question is fixed using a bracket with a rubber bushing. The ends of the bar are secured to the lower control arms, and the middle area is secured to the front of the body. During operation, depending on the mileage and driving habits of the car, wear occurs on the rubber bushings or stabilizer pads. When they wear out, they need to be replaced. However, first let’s look at the design of the unit in question:
- The rod is made of steel with increased elasticity. The diameter of the part is 18 mm. It has a U-shape.
- Brackets for securing the rod in the structure of the machine chassis. Their quantity is 6 pieces.
- Rubber bushings of the same sizes and diameters in the amount of 4 pieces.
Bushings made of rubber material are needed to soften the connection of steel parts. The stabilizer is attached in 4 places, but there are 6 brackets for fixation in its design.
The bar is activated only when the body shifts when turning or maneuvering. When driving in a straight line, the device is practically inactive. When maneuvering, one end of the device bends upward and the other downward, which leads to balancing stability. The harsher the driving style, the faster the rubber bushings of the front stabilizer on the VAZ 2107 will wear out.
Stub maintenance
The part in question rarely fails, however, as soon as the vehicle becomes unstable on the road, it is time to make repairs. When operating a classic, several types of malfunctions of the VAZ-2107 anti-roll bar bar occur. Some of these malfunctions include:
- The rubber bushings, which act as a damper between the rod and the car body, wear out.
- The pins that secure the device to the levers break off.
- The U-shaped fastening comes off. Four such brackets attach the middle part of the stub to the body of the seven.
Servicing the SPU is a simple process that includes replacing the rubber bushings. To change them, you will need to dismantle the part, remove the worn rubber bands, and replace them.
It is important! It is recommended to change all rubber seals of the stabilizer so that you do not have to replace it again after a short period of time.
Most often, rubber seals have to be replaced, and cases of stud breakage rarely occur. Usually the result of a breakage is extreme driving, so in order to prolong the life of the studs, it is advisable to drive moderately. Identifying a device malfunction is quite simple. If a roll occurs on sharp turns, accompanied by the formation of loud sounds, this means that the end of the rod has become free and is now in contact with the metal of the lever.
Changing classic stabilizer bushings
We recommend inspecting the bushings every 30–50 thousand km. However, parts can last 100 thousand or more if you drive moderately and do not overload the suspension. You can detect wear visually, but to do this you should look under the front end. The presence of cracks in the rubber bands, as well as visible gaps between them and the bar, indicate that the bushings need to be replaced. The more wear the rubber bands have, the higher the chance of hearing unpleasant knocks in the suspension and experiencing a deterioration in the car's handling. To restore the original controllability and control confidence, you will need to replace the VAZ 2107 stabilizer bushings.
To replace the rubber bands, you will need to completely remove the bar from the suspension. It is recommended to carry out work on replacing the device directly from the inspection hole or by placing the car on an overpass. The algorithm for replacing stabilizer bushings is as follows:
- dismantling begins with the need to jack up the front of the car, hanging both wheels. This will relieve the rod, which will simplify its removal;
- using a ratchet wrench with a 13 mm head, unscrew the nuts that secure the clamps of the device to the suspension;
- using a pry bar, you need to remove the brackets from the studs;
- dismantle the structure and mark the location of the old bushings;
- dismantling old rubber bands is very simple, since they already sit loosely on the stub and can simply be cut off or pulled together by hand;
- We recommend cleaning the inside of the device mounting clamps from rust. You can use a round file for this;
- treat the holes of the rubber seals with a soap solution, then put them on the rod to the place where the old ones are installed;
- install the stabilizer in place;
- When installing, the most important thing is not to mix up the ends of the stabilizer, otherwise the device will not function correctly. That is why before dismantling, appropriate marks should be made;
- screw the fastening clamps into place.
At this point, the replacement process is considered complete, and all that remains is to lower the front part and test the unit in action.
Tuning the stub on the seven
Actually, the tuning principle itself is based on strengthening the standard anti-roll bar on the seven. Drivers who have installed a double front stabilizer speak only positively about it. A simple upgrade will improve the vehicle's handling when maneuvering and turning.
To implement the idea of upgrading the device, you will first need to buy a new stub rod, bushings, as well as brackets for attaching the rod to the lever. The new device is shortened by 8 cm on each side. The standard rod is dismantled, after which the process of strengthening the stabilizer is implemented.
Nowadays, ready-made double and rear stabilizers for classics are widely available on the market.
To strengthen the stabilizer you will need to perform the following manipulations:
- From the rod from the standard stub, you need to remove the bushings that are located at the edges, and also clean their ends.
- You need to put 2 middle bushings on the new rod, excluding their coincidence with the brackets on the old device. The outer rubber bands should be placed on the end parts of the rods.
- You need to install additional rubber bands on the old stub that will match the new one.
- Connect both rods and connect them with brackets that overlap the auxiliary bushings on both sides.
- The reinforced stub is ready, and now it can be installed in the car suspension structure.
How to change stabilizer bushings?
Repair of rubber bushings is cheap and can be carried out at a service center with the help of experienced specialists. This procedure should not put a big dent in your budget. If you prefer to carry out repairs on your own or you do not have the opportunity to visit a service center in the near future, then you need to perform the following steps:
drive the car to a pit or overpass. You can use a lift or jack, but these are less reliable and safe methods; loosen the wheel bolts next to which the faulty parts are located, and then remove them; the next step is to remove the nuts that secure the strut to the stabilizer
At the end of this procedure, disconnect the strut and stabilizer; Next, you should pay attention to the bracket mounting bolts. The rear ones need to be loosened and the front ones unscrewed; the next step is to remove dirt and clean the installation site of the new stabilizer bushings
Carry out this procedure carefully, because the service life of the new bushings will depend on the quality of its implementation; Lubricate the bushings on the inside. To do this, you can use silicone spray or regular soap solution; insert new bushings into their mounting location and return the vehicle to its original condition.
The most difficult part is the process of replacing the front bushings of the vehicle. During its implementation, additional difficulties may arise due to the design features.
Replacing stabilizer bushings
The procedure for replacing the outer bushings is as follows:
To replace the inner bushings, the anti-roll bar must be removed. To do this, you will have to unscrew the brackets at all four mounting points.
In the rear suspension, the role of a stabilizer is performed by the VAZ 2107 transverse link. If you need to further increase the stability of the car, it is necessary to carry out tuning by installing a rear stabilizer bar.
To work, you need a grinder, a welding machine, a blowtorch, a drill, and a vice.
About modernization of jet thrusts
Sometimes drivers decide to independently increase the reliability of the VAZ 2107 suspension and extend its service life. To this end, they are modernizing jet thrust. Typically, modernization of rods means two operations. Here they are:
- installation of dual jet rods;
- installation of reinforced jet thrusts.
Twin rods
Most often, drivers install dual rods on the VAZ 2107. The reason is obvious: for this procedure you don't have to do anything with the pulls. You simply purchase not one, but two sets of rods that are installed in a regular place near the rear axle of the “seven”. Plus, you purchase not ordinary, but elongated mounting bolts, on which this entire structure rests.
Installing double rods on the VAZ 2107 increases the overall reliability of the suspension
The obvious advantage of such modernization is the increase in the reliability of the suspension: even if one of the tie rods breaks while driving, the car is unlikely to lose control and the driver will always have a chance to notice the problem in time and stop (a break in the tie rod is almost always accompanied by a strong knock on the bottom of the car, which cannot be heard this is simply impossible).
Reinforced traction
If the car is used in extreme conditions and drives mainly on dirt roads or on roads with very poor asphalt, the car owner can install enhanced torque rods on it. As a rule, drivers make such rods themselves. But recently, large manufacturers have begun to offer reinforced rods of their own production.
The reinforced rods have nuts that allow you to change the length of the rod and adjust the stiffness of the suspension
Of course, the driver will have to pay for increased reliability: the cost of a set of Track-Sport rods starts from 2,600 rubles.
Read more: New model VAZ 2105 fuse block and its diagram » NaDomkrat
Reasons for replacing stabilizer struts
It’s not worth changing such a unit just like that, without objective reasons. Still, it costs some money and has its own resource of suitability. As long as the car behaves well, there is no point in spending extra money. But if characteristic signs of their malfunction appear, do not delay repairs.
There are several reasons for changing them:
- Characteristic knocking noises appeared in the suspension;
- There is a slight vibration feedback on the steering wheel, which worsens the process of driving and makes it more difficult;
- The front of the car wobbles a little;
- The wheels pull slightly to the side when driving straight.
If you discover such malfunctions, be sure to replace the stabilizer links as quickly as possible.
How long the new elements will last depends on two factors:
- Quality of the purchased part;
- Conditions of the roads on which you primarily drive your vehicle.
Article on the topic: Replacing and checking the hall sensor on a VAZ 2109
We'll give you some parting advice. Many who go to a service station to replace stabilizer bars send the car, on the recommendation of a specialist, to check the wheel alignment. In fact, this procedure is completely unnecessary, since changing the struts does not in any way affect the angle of the wheels on your car. This is another attempt to lure more money out of an inexperienced client. Be carefull.
The process of replacing stabilizer struts on a VAZ 2110
The stabilizer struts on a domestically produced VAZ 2110 car are replaced as follows:
- Place the car on a viewing hole or raise it on a platform. The front part must be fixed to supports.
- To avoid putting yourself in danger, put the car on the handbrake.
- If you are in a pit, then place shoes under the wheels, even if the handbrake is on.
- On both sides, alternately unscrew the nuts that secure the body to the arms of the anti-roll bar struts.
- Remove the spring washers.
- Unscrew the bolts on both sides.
- Unscrew the two nuts that hold the stabilizer bars to the body.
- Remove the spring washers from the studs.
- Remove the stabilizer brackets and rods along with the struts.
- If you need to replace the strut or bushing, unscrew the nuts securing the strut and arm, then knock the former off the bar with a hammer. The hammer must be wooden or plastic. Under no circumstances should it be a metal instrument. You will damage the element with it.
- Visually inspect the condition of the struts and bushings. If deformation, tears, wear, deterioration of elasticity, cracks, or loose fit are detected, be sure to replace the failed elements with new, high-quality ones.
- To remove bad bushings, you will need a press. Because of this, it is easier to replace the struts at the same time as the bushings.
- Inspect the assembly rod. There should be no signs of deformation on it. Make sure the ends are in the same plane.
- If the geometry deformation on the stabilizer bar is minor, it can be corrected. Otherwise, the part is replaced with a new one.
- If the stabilizer pads are worn out, torn, have lost their original elasticity or do not fit well on the bar, they must be replaced. New cushions are mounted on the stabilizer bar 350 millimeters from its center. The cuts should be located towards the front of the car.
- The struts need to be lubricated with a soapy solution, which will make it easier to put them on the stabilizer bar.
- The bar is mounted in its rightful place, the nuts that hold the brackets from the pillows are tightened. They should be tightened until the play in the cushion cuts is eliminated.
- First you need to tighten it from the side of the cut, that is, the front nuts. Only then are the rear nuts tightened.
- The nuts holding the front struts are mounted in place until there is no gap between the struts and the arms.
- Weight the suspension to finally tighten the stabilizer nuts. Place the car on a hard surface. The tightening torque for the rack components should be in the range from 4.3 to 5.3 kgf-m, and for the brackets - from 1.3 to 1.6 kgf-m.
Article on the topic: Replacing the master brake cylinder on a VAZ 2109
Replacement sequence for VAZ 2107
- The car is installed on the inspection hole, after which the crankcase protection (if installed) is removed using open-end wrenches. Then wheel chocks are placed under the rear wheels of the car, and the front wheels are jacked up.
- Now, using a 12-mm open-end wrench, unscrew the nuts on the brackets, where they are attached to the lower suspension arm. This is done on both sides of the stabilizer bar. Under the nuts there are engraving washers. They are removed manually.
Nuts are shown by arrows
- Now you can remove the staples. After removing them, you can remove the bushings. To remove them, the stabilizer bar is bent using a crowbar. The rod is held with a crowbar, the bushing is removed manually. The sleeve on the other side is removed in the same way.
A crowbar is used for this
- In addition to the two outer bushings, the VAZ 2107 has a pair of central stabilizer bushings. If you need to replace them, you will have to completely remove the stabilizer bar, which is mounted on two brackets. The nuts on the brackets are unscrewed with a 14mm open-end wrench.
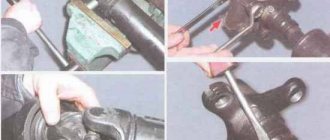
- After removing the rod, the bracket is clamped in a vice, and the rod is carefully removed from the bushing, then the central bushing itself is removed.
The bushing is located inside the bracket, clamped in a vice
- Worn bushings are replaced with new ones, after which the stabilizer bar and crankcase protection are installed in their original places.
Important points
When unscrewing the nuts on the brackets, you should be careful: the studs on which the brackets are attached become brittle over time and are easily broken with an open-end wrench.
It should be remembered: the brackets holding the outer bushings are different, although it is not always possible to see this with the naked eye. The distance between the holes for the studs in the left and right brackets differs by 3 mm
Therefore, before removing it, it makes sense to mark the staples with a marker or chalk so as not to confuse them when reassembling them.
Removing the stabilizer bar from the bracket can be difficult, especially if it is heavily rusted. To make the task easier, the rod and bracket should be generously lubricated with WD-40. If liquid is not available, liquid dishwashing detergent or plain soapy water will do.
Replacing bushings for the rear stabilizer of a VAZ 2107
Worn rear stabilizer bushings cannot be repaired. They are made of special wear-resistant rubber. It is not possible to restore the surface of this rubber in a garage: the average car enthusiast has neither the appropriate skills nor the appropriate equipment for this. Therefore, there is only one way to solve the problem of worn bushings: replace them. Here are the tools and consumables you will need for this job:
- a set of new bushings for the rear stabilizer;
- set of open-end wrenches;
- flat screwdriver and hammer;
- composition WD40;
- mounting blade.
Sequence of operations
It should be said right away that it is most convenient to carry out all work in an inspection hole (as an option, you can park the car on an overpass).
- After installation on the pit, the stabilizer fasteners are carefully inspected. As a rule, all the bolts on it are covered with a layer of dirt and rust. Therefore, it makes sense to treat all these compounds with WD40 and wait 15 minutes. This time will be enough to dissolve dirt and rust.
- The fastening bolts on the stabilizer clamps are unscrewed with a 17mm open-end wrench. It is most convenient to unscrew the fastening bolts with a 17mm L-shaped wrench
- To loosen the stabilizer bar together with the bushing, the clamp will have to be slightly bent. To do this, insert a narrow mounting blade into its hole, and using it as a small lever, bend the clamp. The clamp on the stabilizer is unbent with a regular mounting blade
- After unbending the clamp, you can simply cut off the old bushing with a knife from the rod.
- The installation site of the bushing is thoroughly cleaned of dirt and rust. A layer of lubricant is applied to the inside of the new bushing (this lubricant is usually sold complete with bushings). After this, the sleeve is put on the rod and carefully moved along it to the installation site. The new bushing is put on the stabilizer bar and slides along it to the clamp
- After installing the new bushing, the fastening bolt on the clamp is tightened.
- All of the above operations are performed with the three remaining bushings, and the fastening bolts on the clamps are tightened. If, after installing new bushings, the stabilizer is not warped and no play has arisen in it, the replacement of the bushings can be considered successful.
Video: replacing stabilizer bushings on a “classic”
So, the anti-roll bar was and remains an extremely controversial element of tuning the classic “seven”. Nevertheless, even a novice car enthusiast will not have any difficulties in servicing this part, since the only wearable elements of the stabilizer are the bushings. Even a novice driver who has held a mounting blade and wrench in his hands at least once can replace them.
How to replace the anti-roll bar on a VAZ 2101-VAZ 2107?
1. First, remove the protection (If it is installed) from the car, if it does not interfere with the removal of the stabilizer, then you can leave it alone (Where the stabilizer is located, read above), now hang both front wheels (So that the stabilizer does not twist) and on both sides unscrew the nuts securing the metal brackets to the lower arms (see large photo below), unscrew the nuts carefully, without breaking off the studs (Studs age over time and breaking them is as easy as shelling pears), then remove the nuts and the engravings behind them and pry them off with a screwdriver, remove both the brackets that hold the bushings, just keep in mind that both brackets (Right and left) are different, when installing new bushings, do not confuse these brackets with each other (Look at the small photo in which number 1 shows the left bracket, and number 2 the right) otherwise they will crush the bushings and the bushings will have to be replaced with new ones.
Note! In order not to get confused in the staples, leave one on one side and the other on the other, or make a mark on them, like the letters “P” and “L”, the letter “P” means that the staple is right, the letter “L” is the left!
2. Let's move on, when the staples are removed, remove the bushings separately, removing the bushings will be as easy as shelling pears, this is done like this, the end of the rod is lubricated with soapy water, after which, bending the lever with something (a crowbar, for example, indicated by a blue arrow), hand You will need to grab the bushing (Indicated by the red arrow) and rotating it by hand, remove the bushing from the stabilizer, as shown in the small photo below:
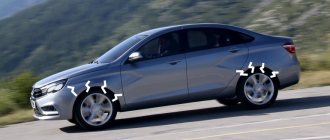
3. We’ve sorted out the outer bushings, they can be removed as easily as possible, now let’s talk about the central bushings (After unscrewing the nuts that secure the central brackets, it will be possible to remove not only the bushings, but also the stabilizer itself from the car, and by the way, the central bushings are changed on the removed one stabilizer, keep this in mind), in order to remove them you will need to unscrew the nuts securing the brackets (These are the same brackets under which the bushings are located), we will not show where the central brackets are located because we already pointed with an arrow in the second photo from the beginning of the article (These are those the very brackets that attach the stabilizer to the spar), so by unscrewing the nuts, remove the brackets and thereby completely remove the stabilizer from the car.
4. When the stabilizer is removed, you can immediately change it (To avoid pain, it is better to buy the stabilizer complete with all the brackets and bushings and install it immediately), and also change the central bushings, they are changed in two ways:
First method: The rod is lubricated with soapy water and by rotating the bushing together with the bracket, try to remove them from the rod; if that doesn’t work, secure the bracket in a vice as shown in the photo below and by rotating the rod (rotate it with both hands), ensure that the bushing is assembled with a bracket I dreamed of a barbell.
What to do if the stabilizer link starts knocking: is it possible to drive?
The main sign of a malfunction is the sound of the struts, while a number of additional signals are observed:
- constant body roll when turning;
- spontaneous change in the trajectory of the vehicle while driving over uneven surfaces;
- when driving, you can hear the stabilizer joints rattling;
- During acceleration or braking, the suspension feels loose.
If the stabilizer bar is knocking: is it possible to drive? This is the question that worries most car owners. Let us emphasize once again: it is strictly not recommended to operate a vehicle on which the stabilizer struts are damaged, since such a malfunction causes a decrease in controllability, and this can provoke a serious accident. In addition, the constant knocking of the suspension while driving distracts the driver all the time.
The deterioration of the hinges located inside the stabilizer struts is a progressive defect, since at the initial stage the malfunction does not manifest itself in anything, and then, as wear progresses, extraneous noise and body roll occur while driving. As soon as the first symptoms are noticed, you must immediately go to the nearest car service center to diagnose the condition of the suspension elements (in particular the stabilizer struts), or perform independent troubleshooting.
Important! To diagnose the condition of the suspension, it is necessary to lift the car on a lift, or jack it up on all sides, since under the weight of the vehicle it is not always possible to detect play in the hinges. Can stabilizer struts make knocking noises when they are in good condition? Naturally - yes
The cause of extraneous noise is incorrect adjustment of the stabilizer elements, which must be eliminated without fail.
Can stabilizer struts make knocking noises when they are in good condition? Naturally, yes. The cause of extraneous noise is incorrect adjustment of the stabilizer elements, which must be eliminated without fail.
To carry out the diagnostic process, you may need the help of a friend and the following set of tools:
- jack - for lifting a vehicle and inspecting and repairing suspension parts. Please note that safety regulations prohibit performing any work when the car is jacked up without placing appropriate supports under its frame;
- shoes for fixing wheels;
- frame stands;
- It would be nice to have a car stethoscope, since when the suspension is unloaded, extraneous noise from its elements can only be heard with its help.
Sequence of work
It is better to carry out all work related to replacing stabilizer bushings on an overpass or inspection pit.
Before disassembling the units, all threaded connections must be treated with WD-40 liquid: the stabilizer mounting brackets are constantly exposed to moisture from the road surface, as a result of which rust forms on them.
Next, you need to jack up the front of the car to loosen the stabilizer from twisting.
Using a wrench, unscrew the nuts securing the metal brackets to the lower suspension arms. This process must be carried out carefully: over time, the studs become fragile and break easily.
Next, use a screwdriver to pry up the staples and remove them. The design of the brackets differs from each other, so when removing it, you need to remember which one is left and which one is right. If the plates are accidentally swapped during assembly, they will crush the new bushings.
After removing the plates, the bushings are removed. To facilitate the dismantling process, it is necessary to use a soap solution, which covers the outer part of the stabilizer, after which the bushing easily comes off when turning.
Then the inner bushings are removed, which are located under the central brackets screwed to the side members of the car. The central bushings are replaced with the stabilizer completely removed from the vehicle.
To dismantle the stabilizer and remove the bushings, it is necessary to unscrew the nuts securing the central brackets.
After removing the stabilizer, you can begin replacing the bushings, which can be done in two ways:
- The first option is to remove the complete mounting bracket and bushing from the stabilizer. To do this, you need to clamp the bracket in a vice and, turning the rod, try to remove it.
- In the second method, use a slightly larger drill to drill out the mounting holes on the bracket. This will remove the beading, which will separate the bracket into an inner and outer bracket, after which the rubber bushing can be cut.
Then you need to install new bushings. To do this, the part is placed in the bracket and pulled through the entire stabilizer to its landing place. If, when removing the old bushing, the bracket was disconnected into two parts, it must also be pulled to its place, and then placed in the parts of the bracket, and then fastened together by welding.
Replacing the VAZ 2107 stabilizer bushings is considered complete after the stabilizer is returned to its place and all parts are reassembled.
Sequence of replacing bushings on Mitsubishi Pajero 4
- Using a 12-mm open-end wrench, unscrew the 4 bolts that hold the car’s crankcase protection.
If you compare the design of anti-roll bars on domestic cars and foreign cars, you will notice that on our cars it is a little more difficult to get to the stabilizer bushings. If on a Mitsubishi Pajero 4 to replace the bushings it is enough to unscrew a few bolts, and this can be done in any garage, then in the case of the “seven” you will need a crowbar and an inspection hole. However, with due patience, the breakdown can be repaired on your own.
The main task of the stabilizer is to reduce the roll of the car when passing uneven roads and when performing maneuvers.
On the seven, the stabilizer has four attachment points: two internal ones, which are located on the body spar, and two external points on the lower suspension arms. The outer bushings are subject to greater wear due to the significant load on them. But replacement of the VAZ 2107 stabilizer bushings is recommended, for all attachment points.
Causes of failure
- Physical deterioration. Most cars (especially domestic ones) are initially equipped with rubber transverse bushings, the service life of which is short. After only 2–3 years, they completely exhaust their service life, become covered with cracks and fall apart (this is why prudent car owners immediately after purchase change rubber bushings to polyurethane ones).
- Chemical exposure. Since the bushings are located close to the wheels, they are regularly exposed to deicing chemicals, which significantly reduces the life of the rubber bushings.
- Mechanical impact. If the car is constantly used on roads whose quality leaves much to be desired, even reliable polyurethane bushings will not last long (since in such conditions they are subject to increased frictional force and are constantly exposed to strong impacts).
What can cause stabilizer bushings to fail?
The main reason why these parts wear out is the strong impact on them during machine operation of the following factors:
- exposure to chemicals. It occurs due to its close location to the wheels of the car. During movement, various chemical compounds come into contact with the open parts of the bushings. The most dangerous of them are substances used in winter to remove ice on the road. They have a strong impact on the structure of the bushings, promoting their drying out and the appearance of cracks;
- strong mechanical impact. The quality of roads in each region differs from each other. However, even in the most favorable areas there are many trails whose quality leaves much to be desired. Accordingly, the more the car is used on roads with serious damage, the faster the strength of the parts is consumed. This happens due to the increase in friction that occurs when the suspension compensates for uneven road surfaces;
- the quality of the material from which the bushings are made. Typically, even the best rubber bushings have a relatively short service life. But most manufacturers install them on their cars. Therefore, when replacing old bushings with new ones, experts recommend using products made on the basis of polyurethane. These products have a significantly greater safety margin and will last you significantly longer.
