02 September 2015 Lada.Online 24 709 0
The windshield of a car is replaced if it becomes scratched, scuffed or cracked. The process is not complicated, but requires knowledge of certain skills. Replacement of fixed body glazing for all Lada cars (Granta, Priora, Largus, Kalina, Niva 4x4, Vesta or XRAY) and foreign cars is similar, the only difference is in the requirements for glue.
Design features and when it may be necessary to replace the windshield on a Priora
Unlike the Lada model range, starting from the VAZ-2101 and ending with the VAZ-2109, on the Priora the windshield is not attached with a rubber seal, but “sits” on the sealant. This method is modern and has some advantages. In addition to the aesthetic appearance, installing glass with sealant increases the reliability of its fastening. It is impossible to squeeze it out of the passenger compartment with your feet, since it is securely connected to the body part. However, in the event of an accident, you can break the glass itself to get out through the front.
The need to remove the windshield on a Priora arises in a number of the following cases:
- When it is necessary to replace a product due to the unsuitability for further use of the device installed on the vehicle. The reason for this may be damage to the glass in the form of chips and cracks.
- If the seal of the product has been broken. This can be determined by the corresponding signs of drips in the interior in the area where the device connects to the body part. Such phenomena often occur when installing a windshield without following the instructions.
- When to replace gutters. If these parts were installed poorly from the factory, they may come off during vehicle operation. To install them correctly, you will need to remove the windshield.
The need to dismantle the device may also arise if traces of corrosion appear in the front part of the roof or on the side pillars. To prevent further spread of negative consequences, the metal should be cleaned and processed. Usually in such cases, the areas of the body to which the windshield is attached are also affected.
If there is a need to replace the windshield on a Priora, then it is not at all necessary to visit a special service station for this. It is quite possible to do the work yourself, provided you have the appropriate tools. We will consider in detail what tools and materials will be needed to remove and install the windshield on the Lada Priora.
This is interesting! Often on a Priora the windshield is damaged during the removal and replacement of the windshield wiper trapezium.
What is needed to replace the windshield on a Priora
On the Priora, the windshield is mounted on a sealant, which somewhat complicates the process of dismantling work. As for installing a new product, it is much easier to do this than, for example, if it were installed on a rubber seal (like on a classic). To dismantle the windshield from a Priora, you will need the following list of tools:
- string - it is important to use a string, and not a fishing line or ropes;
- string holders - special handles;
- awl for removing the windshield. It is distinguished by a specific design - a flat surface of the knife with a cutout in the end part;
- flat-head screwdriver for removing standard glass displacement limiters.
Having such a tool at your disposal, you can not only remove the windshield from the Priora yourself, but also carry out such work at a professional level. However, as you understand, having a special tool does not mean that the work will be done correctly. That is why below are detailed instructions on how to remove the windshield on a Priora.
After dismantling, you will need to install a new product. To implement this process you need the following materials:
- adhesive-sealant on which the windshield will be glued (special set);
- kit for replacing the windshield on a Priora. It includes such elements as side gutters or edging, top sealing rubber and glass movement limiters;
- degreaser;
- new windshield.
After preparing a complete list of tools, you can resort to implementing actions. To do this, we will consider in detail the process of how to replace the windshield on a Priora yourself.
Types of windshields
The dimensions of the windshield, standard, and sensor-equipped windows are the same. Additional features and prices will vary. The most convenient way to select is by article number.
Standard
The most common glass without additional options. Installed on the factory rubber seal. The cost of the original glass model is approximately 2.5 thousand rubles; replacement will cost 2 thousand rubles if the work is done in a workshop.
Standard glass for Lada Priora may have a blue or green tint. The cost is 400 rubles higher.
Front windshield on Priora with rain sensor
The rain sensor automatically turns the windshield element and sometimes the washer system on and off. The essence of the operation of the unit is the refraction of an IR light beam. It passes through snow, mud, and water drops, coordinating the operation of a special photocell. The sensor can be rearranged after replacing the glass. The price of one product is from 5 to 9 thousand rubles, installation will cost 2 thousand rubles.
It will be useful: Maintenance (then) Hyundai Santa Fe. full regulations then 1, then 2, then 3
Heated
A product with a heating function can have different versions:
- heating of the entire working surface;
- warming up the working instrument area.
The principle of operation of the system is to heat thin filaments inside the glass. The unit operates automatically and switches off periodically, saving battery power and preventing overload of the on-board network. The ice crust thaws quickly in winter, providing good visibility and protection from fogging. Price – 6–10 thousand rubles, installation usually costs 2 thousand rubles.
There are combined models - with heating and a sensor; their installation will cost about 8-15 thousand rubles.
Instructions for replacing the windshield on a Priora: how to dismantle it
First, let's take a closer look at the process of removing the windshield. Why isn't it easier to knock out the windshield? After all, it is mounted on a sealant, and even if the main part of it is removed by destruction, you will still have to remove fragments around the perimeter. This will be much more difficult to do than cutting glass using a string.
It should also be noted that the dismantling process is not at all difficult, and it is quite possible to cope with it yourself. To do this, it is important to arm yourself with the necessary tools and get down to business. To remove the windshield from a VAZ-2170-74 Priora, you need to do the following manipulations:
- Before you begin, you should take care of safety precautions. Be sure to wear safety glasses when cutting the glass, as while cutting the glass a piece may break off and fly in your direction. In addition to glasses, it is also important to use gloves.
- Remove the hood. This will greatly simplify all manipulations. However, this is not at all necessary to remove the windshield. If you plan to carry out work without removing the hood, then it should be covered with thick fabric so as not to be scratched during the work.
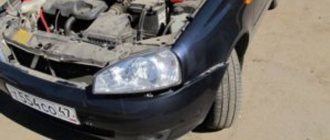
- Remove the right and left parts of the frill (plastic part under the windshield). First remove the wiper arms along with the windshield wiper blades.
- Remove gutters. It is almost impossible to remove them without damage, so you should definitely buy new ones first, which will be installed along with the glass.
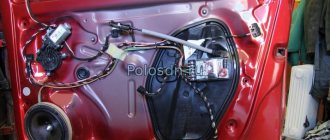
- It is also important to dismantle some elements in the interior. In particular, you need to remove the plastic trim of the side pillars.
- There is no need to completely remove the headliner, but you should definitely loosen the fastening of the front part and move it to the side.
- If possible, move all wires to the side so that they are not damaged by the string during the process of cutting the glass.
- Remove the standard glass displacement limiter with a screwdriver.
- Next, we move on to directly removing the windshield, for which you will need to first disconnect it from the sealant. A steel string will help us in this matter. We insert one part of the string into a special holder (you can use a screwdriver instead of a holder).
- The second part is attached to the end of a forked awl.
- Next, we go into the interior of the car, and using an awl, we pass the string through the glass in the lower part in the center (or in any other place on the windshield, but in its central part).
- The photo below shows what this procedure is.
- When the string is passed through the glass, all that remains is to attach the holder to its other end, and then carry out the appropriate manipulations around the perimeter of cutting or sawing out the sealant (separation of the glass from the body).
- The sealant should be cut off slowly and carefully, avoiding damage to the glass. Usually this procedure takes 20-30 minutes. In this case, it is important to move sequentially: starting from the center from the bottom, you need to reach the corner, and then, without removing the strings, reach the top. After this, cut off the sealant from the top, go down to the side and from the bottom reach the center.
- When you move in the upper part, be sure to control the position of the string so as not to cut off the paint on the roof, otherwise this will subsequently lead to the accelerated appearance of “saffron marks”.
- After successfully completing these manipulations, all that remains is to remove the windshield from the Priora.
It is recommended to invite an assistant to remove it from the car body. In addition, it should be lifted using special clamps with suction cups. This will eliminate the possibility of it slipping out of your hands.
The video below shows how to dismantle the windshield on a Priora with your own hands without outside help.
Consider the sequence of work and follow all recommendations. After dismantling, before installing a new product (or one that has been removed), you need to carefully remove the old sealant (the most difficult stage).
How to install a windshield on a Lada Priora: replacement instructions
Initially, you need to carefully remove the old sealant. To do this, we use a sharp knife, with which all residues are cleaned. It is important to clean the seat before installing the windshield until it is in perfect condition. After all, this determines not only how long it will last, but also how well it will be planted.
Before installing a new windshield on a Priora, you need to clean the seat on the car body, as well as the surface of the windshield around the perimeter using a degreaser.
After this, we move on to the actual process of installing the windshield:
- The activator from the kit is applied around the perimeter of the glass and body opening. Use tweezers with cotton wool to apply.
- Before applying sealant to the body part, you should install the sealing rubber in the upper part of the windshield.
- And secure the gutters on both sides. By the way, the correct installation of drains is carried out only by removing the windshield.
- Before applying the sealant, treat the surface of the body and glass with a primer or primer from the kit (it is black).
- The primer dries for at least 10 minutes (read the instructions).
- We apply sealant around the perimeter, at least 0.5 cm thick, always using a gun. Preheat the sealant, since unlike silicone products, glass is much denser, and even when using a gun, it will be extremely difficult to squeeze it out without preheating.
- It is important not to leave any places where the sealant layer will be missing.
- When applying it, locks should be made at the interruption points, which will prevent the possibility of a decrease in tightness.
- Next, you should lean the windshield, placing it on the sealant. You need two people to do this to position it evenly. In addition, you need to hold it not with your hands, but with special suction cups (as shown in the photo below - this is not correct).
- After this, do not forget to install stops (adjusting wedges) that limit the likelihood of the windshield moving. With their help we adjust the position of the glass.
- The photo below shows where the adjusting wedges are installed.
- At the final stage you need to fix the glass (optional). To do this, it is recommended to use zip ties and a rubber bladder. Secure the tie around the pillars, then inflate the chamber previously located on the surface of the windshield, as shown in the photo. It is prohibited to perform any actions on the car while the sealant is drying, as this may result in a loose fit of the glass (you cannot even slam the doors).
The drying time of the sealant is at least 12 hours (indicated in the instructions). At this point, the process of replacing the windshield on a Lada Priora car is completed, and using expert instructions, it will not be difficult to implement such actions yourself. At the same time, you can save several thousand rubles and spend them on consumables or spare parts. Below is a video instruction on how to replace the windshield on a Priora.
After a day, you can start checking the windshield for the possibility of a leak. To do this, you should pour water around the perimeter and pay attention to the presence of leaks in the cabin. The absence of signs of moisture only indicates that the work was performed correctly and efficiently.
This is worth summing up and noting the importance of a responsible approach to the implementation of the process. If you are not confident in your abilities, then it is better to entrust the work to professionals and pay for their work, but using the above instructions, you will understand that it is not so difficult to dismantle and install the windshield on a Priora.
Recommendations
Comments 24
I recently installed it myself! I was thinking about preparing the car for sale, but it didn’t work out and I still have it! I bought a Chinese one for 1200 wooden ones, installed it in the garage with a friend, there’s nothing complicated if the hands grow from that place! Take a string about a meter and a half in one go, I took it meter, I sawed off the remains with a piece of 10 centimeters (You take it off, clean it all, degrease it, apply the sealant with a construction gun with a flat sausage! I attached the side plastic strips and the elastic band directly to the glass, so as not to suffer later! Next, take it together, from different sides, and lay it down... Place the Christmas trees on the bottom right away so that they don’t fall down and use them to even out the gap (if any) between the glass and the roof! And that’s it, you leave it overnight... In the morning you collect everything and go to the sink! Let them wash it with a Karcher, check for leaks, if there are any, then with a transparent sealant inside, use a syringe to spray it on... I didn’t leak, but a friend who paid 2.5 rubles for installation had rain in the cabin (drove, reinstalled) Nothing complicated in general! As they say, don’t be afraid to do it yourself! - Ark built by an amateur, but the Titanic was built by professionals!;) Good luck!
yes be careful
I changed the front windshield and bought the original with a place for a rain sensor and what do you think because of the temperature difference it burst right in the center from the bottom with my family there were no such troubles
immediately install a frill of a new type, then the sealant will not allow it to be inserted
the main thing is that it is glued evenly and that it does not leak later
I probably wouldn't risk it myself))
I glued it on ten) the first time I did it, everything turned out fine) the most difficult thing was to cut off the old one
I glued it myself many times. The Priora has some special features. 1. In addition to glass, buy plastic gutters (I cut them without damaging them, but I don’t need them every time; they are not expensive, so buy them in advance). 2. After cleaning the surface and degreasing, apply the primer in one direction, do not smear it, just spread it in one direction. 3. When applying sealant to the glass, be careful the sides on the Priora where the glass is placed are quite narrow, you can miss and apply the sealant next to it. Oh yes, when you cut off the old glass so as not to damage the panel, take a piece of galvanized glass to the measurement and place it, thereby separating the string from the panel. Well, after that, in principle, you can drive the car in about three hours, just don’t slam the doors, don’t get into potholes, and it’s better not to put the car on a tilt. That's basically it. Good luck.
It will be useful: Replacing main liners without dismantling the engine, checking the cylinder head gasket
thank you neighbor) there are a lot of subtleties, I’ll probably still contact either the OD or a specialized office
+1 make sure that the mirror is strictly in the center, otherwise you won’t be able to lower the visors later.
I glued it myself many times. The Priora has some special features. 1. In addition to glass, buy plastic gutters (I cut them without damaging them, but I don’t need them every time; they are not expensive, so buy them in advance). 2. After cleaning the surface and degreasing, apply the primer in one direction, do not smear it, just spread it in one direction. 3. When applying sealant to the glass, be careful the sides on the Priora where the glass is placed are quite narrow, you can miss and apply the sealant next to it. Oh yes, when you cut off the old glass so as not to damage the panel, take a piece of galvanized glass to the measurement and place it, thereby separating the string from the panel. Well, after that, in principle, you can drive the car in about three hours, just don’t slam the doors, don’t get into potholes, and it’s better not to put the car on a tilt. That's basically it. Good luck.
Did you install the glass from Boron or China?
amidSS I installed BOR for myself. Only here is the lack of heating. The toad strangled ten to give for him ((((.
thank you, heating is too expensive
Lobach without a sensor? Maybe you should think about heated glass? I myself have been living with this issue for 2 months, the only thing that scares me away is the price, I have a sensor.
without a sensor, I’m basically already used to it, I don’t think it’s worth bothering with sensors and heating
You shouldn't think so. Install standard heated glass with a rain sensor. Replacement is not difficult, I cut it out with a string, put glue and glued it on!
No difficulties. Two people and everything according to the instructions.)
difficulty in price... stock 5r exchange
this is where these prices come from, OD is 2.5 rubles
I was hoping to keep everything within 5000. glass itself + replacement


