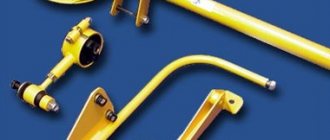
Installing a stretcher or spacer for the front supports (cups) is a popular modification among tuning enthusiasts. This accessory is designed to strengthen the front part of the car body, which allows you to change the behavior of the car on the road. Let's look at this amplifier in more detail.
Front top and bottom
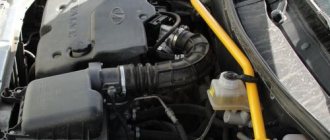
The upper and lower parts are reinforced at the front. The most popular amplifier is the upper extension of the cups of the front shock absorber elements on the Lada Priora. Firstly, they are easy to install, and secondly, they are clearly visible under the hood; their presence, in the opinion of many, gives the car a sporty look. Such designs are indeed widely used in professional motorsport. But a brace alone doesn't make a car a race car.
The part is attached to the front suspension strut cups from above, which creates a rigid connection between the right and left parts of the body. The cost of these parts is 700-1600 rubles. The original Lada Sport spare part is designated by number 21100-8403770-87. Price about 900 rub.
In the manufacturers' catalog there are amplifiers designated as two- or three-point amplifiers, but they are called four- or six-point amplifiers. They differ in the number of mounting holes:
- For two-point ones - 2 on each side, 4 in total.
- Three-pointers have 3 each, for a total of 6.
Expensive models are available with six mounting holes on each side:
- Adjustable - the length can be changed, providing ease of installation on an old car with broken body geometry.
- Non-adjustable - simpler in design, more rigid, but suitable only for machines with the correct distance between glasses.
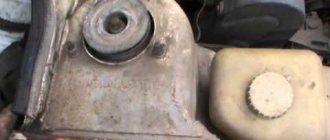
- A special type of strut is a stretching of the front struts for a Priora car, with an additional support attached to the engine (for a Priora with a 16 valve engine). The part allows you to increase the rigidity of the body and the mounting of the power unit. It has a complicated design and a price of 1600–2200 rubles.
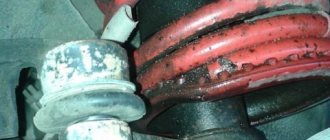
The lower brace strengthens the suspension arms. The price of the lower part is 500–1200 rubles. The number of the lower reinforcing element of Lada Sport is 21100-5301265-87. Costs approximately 750 rubles. Many car enthusiasts note that installing a lower brace creates a more noticeable effect than adding reinforcement to the cups.
Which front strut brace is better to choose?
It is recommended to choose body reinforcements that meet the technical specifications and have passed the test cycle. Try to buy such accessories from trusted manufacturers (for example, TechnoMaster or AvtoProdukt).
Types of front strut struts:
- without adjustment (check before purchasing that the spacer fits the mounting points);
- with adjustment (easier installation, since it is possible to adjust the mounting points);
- with a hood stop (when it is possible to additionally install a gas hood stop);
- with an additional engine mount (an additional engine mount to reduce shocks/vibrations/jerking when starting to move/braking or when you sharply press/release the gas pedal, as when installing the rear gearbox mount on a Priora).
Installation of the spacer is shown in the video:
Ass around the perimeter and only between the glasses
To strengthen the rear of the machine, three types of struts are used:
- Single strut brace attached to the top of the rear shock absorber cups.
- A rectangular “TV” located around the perimeter of the opening between the elements.
- A set forming a cross-shaped structure.
These amplifiers are either unregulated or adjustable. The original rear strut strut is designated by number 21100-5601265-87. Price – 1000–1100 rubles. The lower one, from Priora, costs about the same, similar to other manufacturers.
Its installation makes it impossible to transport large items inside the cabin; when sporting a car, its cargo characteristics do not matter.
The rectangular rear strut brace includes four components:
- 2 horizontal (top, bottom).
- 2 vertical.
The parts are connected to each other at their ends, forming a rectangular structure. The upper horizontal pipe is attached to the top of the rack glasses. Bottom - to the transverse floor panel. On some models of “TVs,” quick-release upper horizontal elements are installed between the rear pillars; this helps maintain a large volume of luggage compartment when the rear seats are folded. Cost – 3700-4500 rubles.
The rear cross-shaped amplifier is present in the Lada Sport range. Article – 21100-5601260-87. Price – from 3000 rubles. Stretches of similar design are produced by many companies.
Removal and installation of all types of spacers
Almost all amplifiers of AvtoVAZ cars are installed in standard places and do not require drilling, welding, or other changes to body parts. A standard set of wrenches is sufficient. Sometimes it is necessary to use other fasteners. For example, when installing the lower part, longer than standard bolts are used.
Most manufacturers include with their products the necessary components and installation instructions, which include the following steps:
- Removing standard fasteners.
- Installation in place of a new part.
- Fixing the structure using removed or special fasteners.
Adjustable amplifiers require pre-adjustment of the length in accordance with the actual dimensions of the car body by rotating the bushing. It is impossible to change the length of the reinforcing elements in order to influence the geometry after their installation.
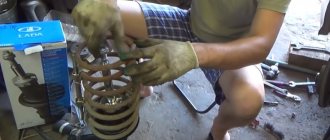
Making a spacer with your own hands
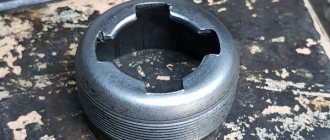
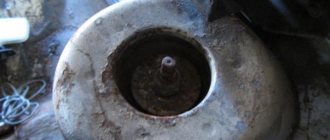
The first thing to do is to make flanges. To do this, unscrew the nuts securing the stands to the glasses and, placing cardboard on them, mark the future holes with a marker. Then cut them out in paper and put it on the pins. Now all that remains is to outline the outline of the flange according to the shape of the glass and trim off the excess cardboard. Inside the template, make a round opening corresponding to the protruding part of the support.
Ready cardboard template with holes
Perform further operations in this order:
- Attach the cardboard template to the sheet of metal, outline it with a marker and cut out the steel flange using a grinder. Round all edges and sand to ensure there are no burrs.
- Mark the centers of the holes and drill them according to the diameter of the studs. Use a small drill first and then a large one. Bevel both sides of the holes and try the part in place. If a discrepancy is found, widen each hole slightly with a round file.
- Cut a 4cm wide strip of steel and weld it at a 90° angle to the straight edge of the flange. To prevent the strip from bending back under pressure from the pipe, make triangular stiffening ribs and weld them along the edges.
- Place the flanges on the studs and check for distortions. Press them with two nuts and carefully measure the distance between the strips to cut the pipe as accurately as possible.
- Disconnect the battery and cover the engine compartment with a damp cloth. Attach a pipe cut to size to the flange brackets and securely weld it at both ends. Check the gap between the hood cover and your structure.
- Unscrew the nuts and remove the brace from the car. Boil all the seams thoroughly, remove the slag and try to put it back. If the structure has been welded so badly that the flanges do not fit on the studs, file the holes again.
- Remove the finished spacer again, clean it with a brush from rust, degrease it and paint it in 2 layers, after applying a primer. Place the jumper in place and finally tighten it with nuts.
The coupling for regulation is placed in the pipe gap
If you are a specialist in welding, then you can easily make the stretch adjustable. To do this, buy a ready-made threaded coupling of the required diameter and weld it in the middle of the cross member, having previously cut it into 2 parts. After welding, twist them together, secure the coupling with a locknut, and only then cut the pipe exactly to size between the flanges.
Successful design of the stretcher - it stands right behind the seats
Video about making a front brace
Judging by the practical experience of many drivers, installing the front strut struts is not a necessary step, but in many cases it is useful. Installation of the finished product is easy, so there is no need to go to a car service center. Since the design of the element is not complicated, skilled motorists can save money and do the stretching themselves, provided that the garage has the necessary tools.
Home →
Tuning →
Pros and cons of stretching the front struts
Strengthening the car's body, both front and rear, makes it stiffer. For example, the upper part of the struts reduces the movement of the suspension mounts, reduces stress at the mounting points, and increases rigidity. Thereby:
- The car becomes more composed when cornering.
- The maneuverability of the vehicle increases due to increased control accuracy.
- Improves stability during straight-line movement.
- Body deformation is reduced when driving on uneven roads.
- The likelihood of fatigue cracks in metal elements is reduced.
- The main disadvantage of installing reinforcement is that due to the rigid connection between the right and left parts of the car, elements on both sides are damaged in an accident.
In addition, boosters violate the vehicle's manufacturer-designed crumple zones, which impairs safety in serious accidents. Therefore, using the part for civilian use is inappropriate in most cases.
The purpose of the front, lower, rear, and other reinforcements is to increase body rigidity. This improves the driving characteristics valued in motorsports, but reduces the safety and practicality required for normal use of the car.
Feedback after installing the strut stretcher
Analyzing the reviews of car enthusiasts, we can conclude that the majority (about 85%) consider the front strut brace to be a useful accessory and recommend its installation, even during normal, everyday driving.
One of the video reviews that most viewers agreed with:
How do you feel about this type of car tuning? Is it worth installing a front-end amplifier or is it all at the level of self-hypnosis? Participate in the survey and leave your feedback on this improvement.
Where can I buy
: In our online store (for Vesta, for XRAY, for Granta/Kalina, for Priora, for Largus, for Lada 4×4)
Let us remind you that a more controversial issue arises after installing the reinforcement for the rear part of the body (trunk). By the way, have you heard about the bumper booster?
Keywords: body amplifiers Lada Granta | body amplifiers for Lada Priora | body reinforcements for Lada Kalina | body amplifiers for Lada Largus | Lada Vesta body reinforcements | body amplifiers lada xray | body reinforcements 4x4 | Niva body reinforcements | universal article
+11
Share on social networks:
Found an error? Select it and press Ctrl+Enter..