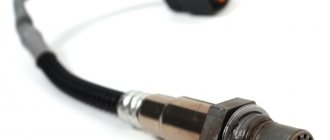
Symptoms of the P0500 error code
There are several typical symptoms that indicate to the driver that there is a problem with the speed sensor, and therefore a possible error P0500:
The car's anti-lock braking system does not work (if there are problems with receiving information from the speed sensor, the electronic control unit automatically turns off the ABS);
- The engine traction control system (TCS) does not work, which also turns off if there are problems with the speed sensor, the “brains” of the car;
- Brake-related icons light up on your car's dashboard: this could be a sign of ABS or a brake problem;
- Problems arise in shifting gears on cars equipped with an automatic transmission. This is due to the fact that the control unit does not understand when it needs to upshift and downshift, since it receives incorrect data from the speed sensor;
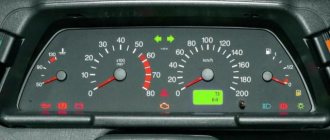
- Problems arise in the operation of the speedometer - it may display information incorrectly. If your car has an odometer, it may have similar problems;
- Depending on the software embedded in the electronic control unit, if error P0500 is present, the vehicle's maximum speed or maximum revolutions may be limited.
Please note: If the P0500 code is present, the vehicle's Check Engine Light will come on.
If one of the symptoms listed above occurs on a car, this does not mean that there is definitely a P0500 error. You need to check the car with a diagnostic scanner to make sure there is a problem with the speed sensor.
Reasons for the error
A P0500 code may mean that one or more of the following problems have occurred:
- The Vehicle Speed Sensor (VSS) "A" is not reading properly and therefore has insufficient readings.
- A broken or worn wire leading to the vehicle speed sensor.
- Poor connection in the Vehicle Speed Sensor (VSS) circuit.
- The vehicle's PCM is not correctly configured for the actual tire size being used.
- Damage to the speed sensor drive gear.
- The engine control module (ECM) may be faulty.
Under what conditions is error P0500 diagnosed?
In order for error P0500 to be generated in the memory of the electronic control unit, which is then transmitted to the diagnostic scanner, 4 conditions must be met, which together will last longer than 4 seconds:
If all of these factors are met for 4 seconds or more in an automatic transmission vehicle, the driver's Check Engine Light will illuminate. On a manual transmission, most often, the error is diagnosed the second time, that is, all of the above conditions must be met two times in a row.
Signs of an error
The main symptoms of a possible P0500 error:
- stopping the operation of the car's anti-lock braking system due to its automatic shutdown when a problem is detected;
- the same thing happens with the engine's traction control system;
- Icons indicating the operation of the brakes light up;
- it is difficult to change gears in a car with automatic transmission;
- speedometer malfunction;
- the maximum speed is limited on cars with separate programs “wired” into the ECU;
To make sure that these problems are caused by the speed sensor, diagnostics will be required.
Causes of error P0500
As noted above, the P0500 code indicates problems with the speed sensor. But the reason does not always lie in the sensor itself. There are several cases when error P0500 will light up on a car:
- Failure of the speed sensor on the drive wheel or several (2-4) drive wheels;
- Problems in the electrical circuit or signal circuit of the sensor (open, short circuit), which do not allow information to be transmitted from the sensor to the electronic control unit correctly;
- Problems with contacts in the electrical circuit or signal circuit of the sensor;
- Failure of the ABS unit.
It is worth noting that a malfunction of the speed sensor is a much rarer problem than problems with contacts or an electrical circuit.
How to fix P0500 code
Depending on what is causing the P0500 code, how to resolve it will vary.
If the diagnostics fail to identify the problem, it may be enough to simply reset the error and then check whether it occurs again. In some cases, the appearance of an error may be caused by a temporary problem or an error in the software.
When simply resetting the error does not help, and it is determined that the malfunction is not directly related to the sensor itself, you will have to check sequentially the entire circuit through which information is transmitted from the sensor to the ECU. This is quite a difficult task and can take a lot of time. You will need to get a multimeter and a diagram of the car's electrical circuit. Also, during this kind of diagnosis, you need to make sure that there are no problems with the contacts on the sensor (oxides).
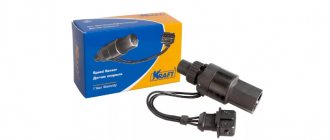
If the problem is related to the speed sensor, and this was found out during vehicle diagnostics, you should simply replace it with a new one, since this part is not suitable for repair.
It is worth noting that error P0500 is not critical, with rare exceptions when the activation of restrictions is programmed at the level of the electronic control unit when it occurs.
( 16 votes, average: 4.75 out of 5)
Error P0110 – Intake Air Temperature Sensor Malfunction
Error P0009 - Phase Synchronization Problem (Bank 2)
Related Posts
How to Determine the Cause of the P0500 Code
To determine which sensor has failed, or which part of the electrical circuit is problematic, you need to perform a step-by-step check algorithm. You will need to acquire a multimeter and a device for diagnosing the speed sensor. If there is no such device, you need to take a potentially working sensor from another car.
The step-by-step check looks like this:
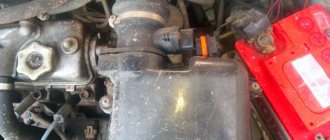
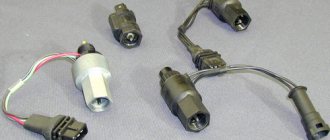
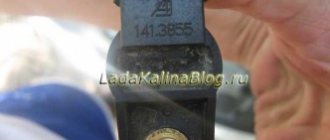
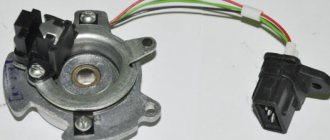
The first thing to check is the sensor itself. It is located on the hub bearing (if the car is front-wheel drive). It can also be located on the gearbox or on the differential (if the car is rear-wheel drive). As noted above, the sensor is checked by replacing it with a working one, or using special diagnostic equipment;
Important: Depending on the car model, the algorithm for checking the speed sensor may differ. It is recommended that you first read the maintenance instructions for your specific vehicle model to ensure reliable information.
How to Troubleshoot or Reset Trouble Code P0500
Some suggested steps to troubleshoot and fix the P0500 error code:
- First, read all stored data and error codes using an OBD-II scanner.
- Then clear the error codes and test drive the vehicle to see if there is a problem.
- Next, check the vehicle speed sensor and all related wires for wear or damage.
- Also check for the presence of a speed sensor signal while the car is moving using a scanner.
- If the above problems do not exist, check the vehicle speed sensor voltage using a multimeter.
Diagnosis and problem solving
The first step is to look for Technical Service Bulletins (TSBs) for your specific brand of P0500 vehicle. If the existing problem is not described, following the instructions can help you save time and money in diagnosing and fixing the problem.
Visually inspect all wiring and connectors leading to the speed sensor. Carefully inspect for any abrasions, exposed wires or breaks. Also look for melting or other damaged areas. Repair if necessary.
The location of the sensor depends on your car; it is not always installed in the box. It may be located on the transmission rear axle or wheel hub (brake) assembly.
If everything is in order with the wiring and connectors, then check the voltage at the speed sensor. Again, the exact procedure will depend on your car make and model. Most likely this is where the problem lies, so replace the sensor.
VAZ fault code P0500 fault finding.
If the VAZ P0500 fault code appears, then to check with the engine off, disconnect the harness contact block from the speed sensor, turn on the ignition and check the voltage at pin 2 of the harness block. The voltmeter reading should be around 9 V.
Voltage measurements should be performed only with a digital voltmeter or multimeter with an internal resistance of at least 10 mOhm. If the voltage is 0V, then there is a break or short to ground in the wires 19 degrees. C, 20 degrees C or the controller is faulty. If the voltage is 12V, then the controller or 19 degree wires may also be faulty. C or 20 gr. C are shorted to the power source.
If the voltage at terminal 2 of the block is about 9V, and there is an on-board computer showing the speed, start the engine and, with a test lamp connected to ground, briefly, repeatedly, several times per second, touch terminal 2 of the block. In this case, the speedometer speed needle should deviate, and if there is an on-board computer on it, the speed should be 0. If this does not happen, the controller is faulty.
Check using a test lamp.
If the car is not equipped with an on-board computer, check the voltage at terminal 1 of the block with a test lamp. If the lamp does not light, it is necessary to repair the break in the 55RF wire. Otherwise, touch pin 3 with a test lamp connected to the power source, checking for the presence of ground. If the lamp does not light, repair the open in the 13K or 70K wire. If the lamp burns, change the sensor.
Of course, this is not a happy situation for car owners if the check engine lights up on the car’s dashboard. In this case, you have to contact a specialized service station, where they will diagnose the engine, or if you have an on-board computer installed, identify the breakdown yourself by deciphering the VAZ error codes.
Error codes on the dashboard of Priora 2170, Kalina 1119:
- - turn off the ignition
- — press and hold the “Reset” button plus turn on the ignition, LCD control will start
- — press any LCD button and the program version will appear
- — press any of the control buttons again, error codes should be displayed on the positions of the first and second lines of the LCD
- — press and hold the “Reset” button for more than 3 seconds. to reset error codes
- — press any of the control buttons to control the LCD
Error codes:
- 2 - increased voltage of the on-board network
- 3 - fuel level sensor error
- 4 - coolant temperature sensor error
- 5 - outside temperature sensor error
- 6 - engine overheating
- 7 - emergency oil pressure
- 8 - brake system defect
- 9 - battery is discharged
- E - error detection in the data packet stored in the EEPROM.
Decoding error codes of the VAZ electronic control unit
- P0030-Oxygen sensor heater before the converter, control circuit open
- P0031-Oxygen sensor heater before the converter, control circuit short to ground
- P0032-Oxygen sensor heater before the converter, control circuit shorted to board. net
- P0036-Oxygen sensor heater after the converter, control circuit open
- P0037-Oxygen sensor heater after the converter, control circuit short to ground
- P0038-Oxygen sensor heater after the converter, control circuit shorted to board. net
- P0102-Mass Air Flow Sensor Circuit Low Signal
- P0103-Mass air flow sensor circuit, high signal level
- P0112-Air temperature sensor circuit low signal
- P0113-Air temperature sensor circuit, high signal level
- P0116-Coolant temperature sensor circuit, signal out of acceptable range
- P0117-Coolant temperature sensor circuit low signal
- P0118-Coolant temperature sensor circuit, high signal level
- P0122 - Throttle Position Sensor Circuit Low Signal
- P0123 - Throttle Position Sensor Circuit High Signal
- P0130-Oxygen sensor before the converter is faulty
- P0131-Oxygen sensor circuit to converter, low output level
- P0132-Oxygen sensor circuit to converter, high output level
- P0133-Oxygen sensor circuit to the converter, slow response to changes in mixture composition
- P0134 - The oxygen sensor circuit to the converter is inactive
- P0136-Oxygen sensor after the converter is faulty
- P0137 - Oxygen sensor circuit after the converter, low signal level
- P0138-Oxygen sensor circuit after the converter, high signal level
- P0140 - The oxygen sensor circuit after the converter is inactive
- P0141-Oxygen sensor after the converter, heater is faulty
- P0171 - Fuel supply system too lean
- P0172 - Fuel system too rich
- P0201-Injector cylinder 1, control circuit open
- P0202-Injector cylinder 2, control circuit open
- P0203-Injector cylinder 3, control circuit open
- P0204-Injector cylinder 4, control circuit open
- P0217-Engine temperature is higher than permissible
- P0230-Fuel pump relay circuit malfunction
- P0261-Injector cylinder 1, control circuit short to ground
- P0263-Injector driver fault 1
- P0264-Injector cylinder 2, control circuit short to ground
- P0266-Injector driver fault 2
- P0267-Injector cylinder 3, control circuit short to ground
- P0269-Injector 3 driver malfunction
- P0270-Injector cylinder 4, control circuit short to ground
- P0262-Injector cylinder 1, control circuit short to on-board network
- P0265-Injector cylinder 2, control circuit shorted to on-board network
- P0268-Injector cylinder 3, control circuit short to on-board network
- P0271-Injector cylinder 4, control circuit short to on-board network
- P0272-Injector 4 driver malfunction
- P0300 - Random/multiple misfires detected
- P0301-Cylinder 1, misfire detected
- P0302-Cylinder 2, misfire detected
- P0303-Cylinder 3, misfire detected
- P0304-Cylinder 4, misfire detected
- P0326-Knock sensor circuit, signal output out of acceptable range
- P0327 - Knock sensor circuit low signal
- P0328 - Knock sensor circuit, high signal level
- P0335 - Crankshaft position sensor circuit is faulty
- P0336-Crankshaft position sensor circuit, signal out of acceptable range
- P0337 - Crankshaft position sensor, short to ground
- P0338-Crankshaft position sensor, open circuit
- P0340 - Camshaft Position Sensor Malfunction
- P0342-Phase sensor circuit, low signal level
- P0343-Phase sensor circuit, high signal level
- P0346-Phase sensor circuit, signal out of acceptable range
- P0351-Ignition coil of cylinder 1 (1-4), control circuit open
- P0352-Ignition coil of cylinder 2 (2-3), control circuit open
- P0353-Ignition coil of cylinder 3, control circuit open
- P0354-Ignition coil of cylinder 4, control circuit open
- P0363-Misfire detected, fuel supply to idle cylinders is turned off
- P0422 - Neutralizer efficiency below threshold
- P0441-Gasoline vapor recovery system, incorrect air flow through the canister purge valve
- P0444-Canister purge valve, control circuit open
- P0445-Canister purge valve, control circuit short to ground or on-board network
- P0480-Fan relay, control circuit open
- P0481-Cooling fan 2 circuit malfunction
- P0500-Vehicle speed sensor is faulty
- P0506-Idle system, low engine speed
- P0507-Idle system, high engine speed
- P0511-Idle speed control, control circuit faulty
- P0560-On-board network voltage is below the system operability threshold
- P0562-On-board voltage, low level
- P0563-On-board voltage, high level
- P0601-Engine management system controller, ROM checksum error
- P0615-Additional starter relay, control circuit open
- P0616-Additional starter relay, control circuit short to ground
- P0617-Additional starter relay, control circuit shorted to on-board network
- P0627-Fuel pump relay, control circuit open
- P0628-Fuel pump relay, control circuit short to ground
- P0629-Fuel pump relay, control circuit shorted to on-board network
- P0645-A/C compressor clutch relay, control circuit open
- P0646-A/C compressor clutch relay, control circuit short to ground
- P0647-A/C compressor clutch relay, control circuit shorted to board. net
- P0650-Malfunction indicator lamp, control circuit faulty
- P0654-Instrument cluster tachometer, control circuit faulty
- P0685-Main relay, control circuit open
- P0686-Main relay, control circuit short to ground
- P0687-Main relay, control circuit shorted to on-board network
- P0691-Fan relay, control circuit short to ground
- P0692-Fan relay, control circuit shorted to on-board network
- P1102 - Oxygen Sensor Heater Resistance Low
- P1115 - Oxygen sensor heating circuit faulty
- P1123 - Rich mixture at idle
- P1124 - Lean mixture in idle mode
- P1127 - Rich mixture at Partial Load
- P1128-Lean mixture in Partial Load mode
- P1135 - Oxygen sensor heater circuit 1 open, short circuit
- P1136 - Rich mixture in Light Load mode
- P1137 - Lean mixture in Light Load mode
- P1140 - Measured load differs from calculation
- P1141 - Oxygen sensor 1 heater malfunction after converter
- P1171-Low level CO potentiometer
- P1172-High level CO potentiometer
- P1301-Cylinder 1, misfire detected, critical for the converter