How to replace a speedometer cable
It is impossible to find a modern car that does not have a speedometer. This is a very important device, the readings of which continuously indicate to the driver the instantaneous speed at which his vehicle is moving. If this device malfunctions, the lives of the driver and passengers may be in danger due to the fact that it will be difficult for the driver to comply with the established speed limits and traffic rules. Every car enthusiast should monitor the technical condition of the speedometer and, if necessary, be able to independently determine the cause of the breakdown and eliminate it. In particular, we will tell you how to replace the speedometer cable if it breaks without involving third-party specialists on VAZ cars.
Replacing the speedometer cable
- Signs of problems with the speedometer
- Removing the dashboard and speedometer
- Finding the cause of the breakdown
- Work related to cable replacement
- Photo
- Video
You don't have to be a driver to know that every modern car has a speedometer.
It is difficult to overestimate the role of the device, which is responsible for measuring the instantaneous speed of a vehicle. Over time, like any other mechanism, it can fail, so every vehicle owner must know what to do in this case. Most often, the reason for the incorrect operation of the device lies in a breakdown of its mechanism or a break in the speedometer cable. And if in the first case experts recommend replacing the damaged measuring device, then in the second case the way out is to replace the speedometer cable. Drivers of foreign cars, when identifying a particular malfunction, prefer to contact service centers, so we will look at information on how to change the speedometer cable using the example of cars from the Volzhsky Automobile Plant. In the vast majority of cases, their owners carry out minor repairs and maintenance work themselves.
Causes of speedometer malfunction
Arrows at zero
There are two reasons why the speedometer may fail:
- malfunction of the device mechanism;
- breakage of the speedometer drive cable.
Broken cable
We will dwell in more detail on the second option, because in the first case it is best not to repair the device yourself, but to purchase a new speedometer.
Identifying the cause of the breakdown
Removing the panel
Before you begin replacing the cable, you need to dismantle the speedometer to identify the cause of its failure. If a modern speed measuring device with a round shape is installed on the vehicle, then you need to start by removing the dashboard. To do this, unscrew the fasteners securing the steering column linings, after which these interior decorative elements are carefully removed. The rubber seal of the ignition switch must also be dismantled. Next, on the front panel you should find two holes in which the fastening brackets are recessed. Two slotted screwdrivers are inserted into these holes, after which the front panel is lifted and removed from its seat, allowing easy access to the speed measuring device.
Checking the serviceability of the cable
To dismantle the speedometer of an earlier version, you need to pull out the protective grille of the heater air ducts or windshield blower ducts. In the resulting opening, the latches holding the panel will be visible, which you need to press and pull the instrument panel towards you.
After removing the front panel, you can begin to inspect the speedometer. It is quite simple to establish the cause of its breakdown: to do this, you need to scroll the cable for a while and observe the behavior of the device needle. If its rotation occurs without jerking, directly proportional to the force applied to scroll the cable, then we can say with confidence that the cable needs to be replaced.
If the needle moves jerkily, or it does not react at all to the rotating cable, then most likely the speedometer mechanism is faulty and must be replaced.
Finding the cause of the breakdown
Cause of malfunction
Identifying the cause of a malfunction is not difficult. You need to twist the cable with your fingers, while observing the position of the speedometer needle. If it rotates smoothly and there are no jerks in its movement, then the problem is a broken cable. In this case, to fix the problem, it is necessary to replace the damaged cable.
The fact that the speedometer mechanism has deteriorated is indicated by jerky movement of the needle or a complete lack of response to the rotating cable of the device. In such a situation, you cannot do without a complete replacement of the device.
Replacement process
Disconnect from the gearbox
First of all, the old cable must be disconnected from the gearbox. To do this, you need to find the connection point, which is located under the vehicle body in the area of the gearbox, and unscrew the bolt securing the cable. Next, unscrew the clamping nut connecting the cable to the speedometer.
After completing these procedures, you can begin installing a new cable.
Before laying a new cable, experts recommend applying a layer of lubricant to the cable, which will protect it from premature wear.
New cable
The new cable should be carefully pulled into the cabin and connected to the speedometer, after which the dashboard is assembled in the reverse order.
When purchasing a new speedometer cable, be sure to pay attention to its length. You cannot install a cable whose length differs more or less from the length of the original cable.
The procedure for replacing the speedometer cable is described in detail below:
Daewoo Nexia “Desert Wolf ≧ᴥ≦” › Logbook › Replacing the speedometer cable!
Phew, I finally picked up the speedometer cable and immediately flew to change it.
Everything was according to the old scheme, I disassembled the dashboard, I wrote about this in overexposure, then I began to unscrew the end from the engine compartment, a couple of movements and a little effort and I unscrewed it.
Next came hardcore, this bastard didn’t want to give up, she sat tight, in one direction or the other...
After an hour of torment, I pushed her into the cabin and pulled out the cable
It immediately became noticeable that the original cable had worn out and was therefore spinning inside the dashboard.
Then in reverse order only with a new cable)
And oh MIRACLE, I can’t believe it, the speedometer started working! #SpeedometerLive
True, there is a slight rustling, the higher the speed the louder the sound, it’s a little annoying, well, I think it’s a matter of time, it will rub in and everything will be normal)
Replacing the speedometer cable on a VAZ 2101-VAZ 2107
Welcome! Speedometer cable - it is responsible for transmitting speed from the gearbox to the instrument panel of the car's speedometer. One end of this cable is connected to the drive gearbox, which is located on the gearbox, and the other end is connected to the speedometer mechanism itself, which in turn is located on the instrument panel.
Note! To replace the cable, you will need to stock up on the following set of tools: First, be sure to stock up on basic tools, such as a screwdriver and wrenches. Next, you will need to take pliers, and also a wire approximately 2 meters long and with a diameter of 0.2-0.5 mm to make it easier to replace the cable!
Summary:
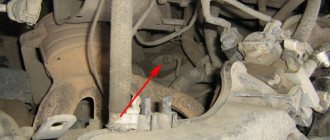
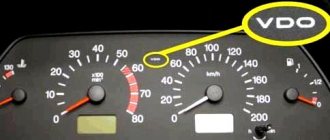
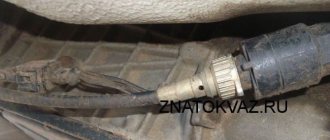
Where is the speedometer cable located? It is located near the bottom of the gearbox housing and is attached to the gearbox. For clarity, so that you have at least the slightest idea of where the cable is located, look at the photo below, where the arrow indicates the cable:
When should you change the speedometer cable? It must be replaced if:
- Failure, and therefore the speedometer will not show any values on the instrument panel.
- And also when it is deformed and when the nut that secures it to the gearbox or to the speedometer mechanism breaks.
Basic malfunctions of the speedometer drive mechanism
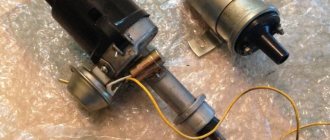
Structurally, the VAZ 2107 speedometer drive is a flexible steel cable, which is in an armored braid. This braid serves as a fixed base, since the main task of the cable is rotation. When it rotates inside the braid, torque is transmitted, which is removed from the gearbox and transmitted to the speedometer sensor. The braided cable design also uses connecting elements to transmit torque. One of these devices connects the drive to the gearbox gearbox, and the second to the speed indicator mechanism.
Knowing the structure of the drive mechanism, it is necessary to analyze its malfunctions. These malfunctions can be divided into two types:
- The main ones are when the speedometer completely stops functioning and displaying information about the current speed of the car.
- Secondary - when the speed indicator works, but at the same time makes extraneous noise.
The causes of the main types of breakdowns of the speedometer drive of the seven are as follows:
- Malfunction of the speed dial indicator. It happens rarely, but such a breakdown is not excluded.
- The flexible shaft has broken, which means the integrity of the steel cable is being compromised. To correct the situation, you need to change the cable.
- Self-unscrewing of the fastening nuts that secure the ends of the drive mechanism. This damage can be eliminated by tightening the fixing nuts.
- If the tips of the flexible drive are damaged - the driven and drive gears. When the speedometer on a VAZ-2107 does not work, the reasons for the breakdown may be hidden in a violation of the integrity of the tips, so in case of such a breakdown, you will need to replace the cable. If the speed indicator mechanism is damaged, the last part must be replaced, but the cable may still be in good condition.
- Flexible shaft drive malfunction. This is one of the most difficult breakdowns, when the breakdown concerns not the drive, but the gearbox. If the gearbox mating socket breaks down, the device will need to be repaired.
Also, during the operation of the seven, a type of breakdown may occur such as the occurrence of extraneous noise emanating from the speed indicator. The reasons for this phenomenon are:
- The bending radius of the cable is small, so it begins to rub strongly against the braid and creak. The damage can be corrected by leveling. If the device is not damaged, then it must be reinstalled.
- When the braid is damaged. The cause of damage is a violation of the integrity of the protective layer of the armored base. If the protective base is damaged, the drive must be replaced.
Only after a breakdown has been identified can a decision be made to fix it. Most often, the cause of speedometer malfunction is the cable, so let's look at the process of replacing it.
Tools for replacing the VAZ 2107 speedometer drive
To replace the speed indicator drive of the seven, you will need a minimum set of tools, as well as half an hour of time. The only tools you need are a screwdriver and pliers. To simplify the replacement work, it is recommended to use steel wire, the diameter of which should be in the range from 0.3 to 0.5 mm. A mandatory condition for the wire is its length, which is at least 2 meters.
It is better to carry out replacement work from the inspection hole, since the cable mount in the gearbox is located in the lower part of the car. The replacement process is not difficult, so it is enough to do everything once in accordance with the instructions in order to do the work yourself the next time you replace it.
This is interesting! The question often arises: how many teeth does the speedometer drive gear have? This is important to consider because if you install a gear with the wrong number of teeth, the indicator will display incorrect information about speed and mileage. The number of teeth on the drive gear of the flexible speedometer drive is 13. This must be taken into account if the tip in the gearbox is changed.
Removing the speed indicator cable on the seven
Step-by-step instructions on how to replace the speedometer cable on a VAZ 2107 are as follows:
- Place the vehicle on the inspection hole and remove the negative terminal from the battery.
- To get to the flexible drive mount where it connects to the speedometer, you will need to remove the instrument panel.
- Find the connection of the device to the speedometer, and unscrew the fastening nut of the element.
- After this, tie a steel wire to the device, which will tighten instead of the cable when it is pulled down.
- Move to the inspection hole and find the point of attachment of the device to the gearbox.
- Using pliers, unscrew the fastening nut and then slowly dismantle the flexible element.
- The cable must be pulled from below so that the steel wire is pulled into its place.
- Once the device is removed, you will have the end of the wire in your hands. It must be disconnected and then proceed to install a new device.
How to replace the speedometer cable on a VAZ 2101-VAZ 2107?
Note! The cable must be replaced on a lift or inspection pit!
Removal: 1) At the beginning of the operation, you will need to remove the instrument panel from the car. (How to remove the instrument panel from a VAZ 2106 car, see the article: “Replacing the instrument panel”) (How to remove the instrument panel on a VAZ 2104 and VAZ 2107, see the article: “Replacing the instrument panel”)
Note! Unfortunately, instructions for removing the instrument panel on other cars of the classic family cannot be found on the Internet, so remove the panel on your car following the example of removing the panel from a VAZ 2104, VAZ 2106, VAZ 2107!
2) Next, using pliers, completely unscrew the nut that secures the cable to the mechanism, and after unscrewing, disconnect the cable.
Note! After disconnecting the cable, tie a 2 meter long wire to the cable nut by the eyes!
3) Then move to the bottom of the car, and there, unscrew the nut that secures the cable to the gearbox (it is indicated by the arrow), and after unscrewing the nut, disconnect the cable.
4) Now take the cable in your hands and pull it out of the car.
Note! Pull out the cable carefully; the wire that is connected to the cable nut should not be completely stretched out and, as a result, removed from the car!
5) Finally, untie the wire from the nut.
Installation:
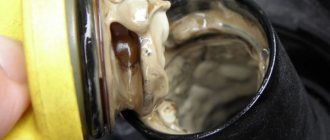
Note! To extend the life of the cable, you can lubricate its surface with a special lubricant called “Litol-24”; to do this, before installing a new cable, first pull it out of the sheath starting from the side that is connected to the gearbox gearbox, and then lubricate it for “2/3 of the length”. lubricate it!
Do the entire installation of the cable in the reverse order of removal, but for clarity we will show you a small part of the installation:
1) First, take the new cable in your hands and tie the wire previously untied from the old cable to its nut.
2) Then sit in the passenger compartment and, pulling the wire, extend one end of the cable into the vehicle interior.
Note! To prevent you from getting confused, remember one important thing: The end of the cable that is connected to the gearbox located on the box is equipped with a protective cover, so install the cable correctly!
3) And at the end of the operation, use a screwdriver to tuck the cover into place.
Note! After installing the cable, check it, make sure that it is not bent in any places, and only then start the engine and drive it to see how it works!
Question? Have you managed to replace the speedometer cable? If yes! What difficulties arose? (Write your answer in the comments)
Additional video clip: You can clearly see the second method of replacing the speedometer cable in a video clip prepared especially for you, in which everything is described and shown in detail.
How to replace it yourself
As already mentioned, replacing the speedometer drive also means replacing the drive gear of the secondary shaft - they are sold and installed only as a set. For the entire operation, you will only need a set of open-end wrenches of various diameters; the exact size of the keys may vary depending on the car model. The principle of dismantling the drive is the same for front-wheel drive and rear-wheel drive models, however, due to the different location of the part, the dismantling procedure differs. For rear-wheel drive models, the drive is replaced as follows.
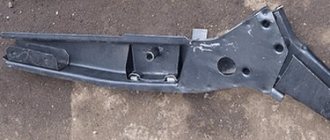
- To dismantle the drive you will need an overpass or inspection hole. On rear-wheel drive vehicles, the drive is located on the left side of the gearbox next to the cross member.
- It is necessary to unscrew the clamp securing the exhaust pipe of the muffler from the gearbox with a wrench.
- Then you need to unscrew the nut with which the flexible shaft (cable) is attached to the drive.
- Then you should unscrew the drive mount to the crankcase box.
- Next, you need to unscrew the nuts securing the cross member to the car body. Then you need to lower the rear of the gearbox so that the studs come out of their holes.
- Then you need to remove the drive from the hole in the crankcase cover; for this you may need to move the box from its place to the right or left.
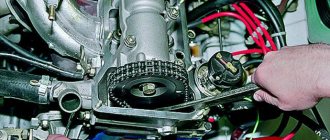
On front-wheel drive vehicles, access to the drive is possible from the engine compartment, since it is located on the side of the gearbox at the rear wall of the engine compartment. The sequence of actions for dismantling the drive is similar.
- It is necessary to disconnect the flexible drive cable, unscrew the nut securing it to the drive.
- Then you should remove the speed sensor.
- Next, you need to unscrew the bolt securing the drive to the gearbox and remove it from the gearbox.
On vehicles with four wheel drive, the speedometer drive is usually installed in the transfer case. Otherwise, the principles of dismantling the speedometer drive for 4x4 vehicles are no different from models with one drive axle.
Installation of the speedometer drive for all models is carried out in the reverse order. Replacing only the speedometer cable will require disconnecting the upper attachment to the speed indicator. Then, for rear-wheel drive and all-wheel drive vehicles, the cable must be pulled out through the technological hole in the front panel of the body. For models with front-wheel drive, the cable is simply removed after unscrewing the nut. Installing a new drive cable is done in the reverse order.
Design features of the speedometer drive on the VAZ 21099
The speed measuring mechanism on the VAZ 21099 consists of the following parts:
- gear drive;
- steel cable, supplemented with special tips;
- connecting elements.
The drive receives rotation from the gearbox. The torque is then transmitted via a cable to the internal speed indicator drive. The odometer or odometer receives information in the same way.
VAZ models of different years of production were additionally equipped with speed sensors, while retaining the cable drive of the speedometer. The length of the speedometer cable with a high instrument panel is 1000 millimeters. Machines with a low panel are equipped with a drive with a shorter casing, its length is 800 millimeters. Before replacing the speedometer cable, you must take this feature into account.
Dismantling the VAZ-2107 speedometer drive
The actions are performed in the following sequence:
- the car is installed on an inspection hole;
- the ground wire is disconnected from the battery;
- the instrument panel is removed;
- the nut securing the drive to the speedometer is unscrewed and it is disconnected;
- a wire is tied to the eye of the nut;
- the nut securing the flexible shaft to the gearbox is unscrewed;
- the speedometer cable is disconnected from the gearbox;
- the drive is pulled out so that the guide wire remains in it;
- the wire comes untied from the nut.
Signs of damage
The main symptoms of a speedometer malfunction are:
- lack of indications of current mileage and speed (the arrow does not change position);
- uneven (impulsive) speed values;
- discrepancy between the device readings and the actual speed of the car.
To fully diagnose the drive, remove the cable from the drive housing. Then, by rotating the tip, the presence of a mechanical connection between the speedometer and the gearbox is checked. Replacing the speedometer cable is required in the following cases:
- breakage of individual strands or the entire cable;
- difficult rotation of the drive;
- increased wear of the spline joint.
Work technology
Replacing the speedometer cable on a VAZ 21099 with a high and low instrument panel includes the following steps:
- the electrical system is de-energized, for which the battery is removed;
- then the instrument panel is dismantled;
- after ensuring access to the fastening elements, you need to unscrew the fastening nut and remove the slots from the device body;
- for ease of installation, the new cable is attached to the shell of the old one;
- the fastening nut of the drive installed on the gearbox is dismantled;
- the tip is removed from the spline connection;
- the old cable is pulled out of the engine compartment;
- after checking the correct position of the new cable, tighten the union nuts;
- the instrument panel is mounted in the reverse order;
- the battery is connected;
- The functionality of the device is checked.
It is important to consider some aspects when performing such work, for example:
- the cable should be lubricated using greases (Litol, CV joint, CIATIM);
- lubricant must also be applied to the spline joints;
- union nuts are mounted and dismantled using adjustable pliers;
- To prevent damage to the threads, screwing the nuts is done very smoothly, controlling the applied force.
Also, the cause of incorrect speed readings may be a failure of the gear drive. Its drive gear gradually wears down and loses connection with the gearbox. Therefore, before installing the speedometer cable, you should check the condition of this unit. When replacing this unit, you must ensure that the drive is applicable to this vehicle model.
Guys, help out! How to get the instrument panel into the speedometer cable?
was TD01W AT, 1996 was QASHQAI, 2010
Patriot, 2014, green like UAZ
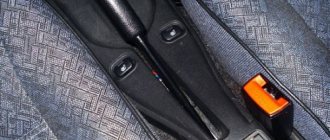
You must first insert the cable, and only then mount the tidy in place. I recently took everything apart myself, and when I installed it I had a lot of trouble with the cable. hands cannot fit between the visor and the tidy so that a person can reach the cable.
Try to slightly tighten it (the cable), since it runs more or less freely under the panel, and tighten the tendrils on the end of the cable so that it does not jump off later (you yourself stepped on this rake), but you don’t need to tighten it too much, because then you will put it in place (i.e. connecting to the device) will be even more problematic.
No matter how I tried to crawl up from below, from the pedal assembly, nothing worked, the air ducts were in the way.
Posts 1 page 21 of 21
Share118.06.2014 14:01
- Author: Tycoon
- Guest
Good afternoon Can you tell me how to remove the cable from the dash?
Share218.06.2014 14:36
- Author: volkin
- Newbie
- From: Peter
- Registered: 09.19.2013
- Posts: 40
- Respect: +1
- Gender: Male
- Age: 35 [1984-12-06]
- Time spent on the forum: 8 days 15 hours
- Last visit: 02/13/2019 23:28
- Car data: jn variant
Remove the tidy. And there’s a rope clip behind it.
Edited by volkin (06/18/2014 14:39)
Share318.06.2014 14:37
- Author: Tycoon
- Guest
Share418.06.2014 14:41
- Author: volkin
- Newbie
- From: Peter
- Registered: 09.19.2013
- Posts: 40
- Respect: +1
- Gender: Male
- Age: 35 [1984-12-06]
- Time spent on the forum: 8 days 15 hours
- Last visit: 02/13/2019 23:28
- Car data: jn variant
Not difficult. Just remember where the screws were and be careful with the plastic.
Share518.06.2014 23:56
- Author: PASSABEST
- Active participant
- From: Peter
- Registered: 02/19/2012
- Posts: 359
- Respect: +22
- Gender: Male
- Time spent on the forum: 9 days 14 hours
- Last visit: 05/14/2020 14:26
- Car data: 1987, 1.8, red edition