Device design
The design of the windshield washer on the VAZ 2101 consists of a gearmotor powered by an incoming current that drives the washers, a switch, a switch, a relay for switching on the intermittent mode, an additional relay, etc.
Glass cleaner device
The node consists of:
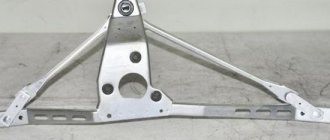
- Windshield wiper trapezoids: with its help, the motor transmits movement. It wears out quickly, so sometimes repairs to the trapezoid are necessary.
- An electric motor drives the wipers of the VAZ 2110. If the motor burns out, the entire unit will fail.
- The windshield wiper pump pumps cleaning fluid. If the electric pump breaks down, then, despite the operation of the wipers, the windshield will not be cleaned.
- The purpose of the tank is obvious - window cleaning liquid is poured into it.
For high-quality operation of the windshield wiper, the shape, material, size and design of the wipers are important.
Thanks to the electric motor, the wipers on the VAZ 2110 can operate in three modes:
- Intermittent. The switch lever is in positions II and III.
- Constant - with a low speed of movement of the brushes. The switch lever is in position IV.
- Constant - with fast movement of the wipers. In this case, the shift lever is in position V.
Diagram of the front windshield wiper VAZ-2110, 2111, 2112.
Diagram of the front windshield wiper and washer for VAZ-2110, 2111, 2112.
Wiring diagram for the windshield wiper and washer:
1 – windshield washer electric motor; 2 – windshield wiper electric motor; 3 – mounting block; 4 – ignition switch; 5 – ignition switch unloading relay; 6 – windshield wiper and washer switch; K3 – Windshield wiper relay; A - to power supplies; B - the order of conditional numbering of the plugs in the block of the wiper motor
Rear wiper and washer diagram for VAZ-2110, 2111, 2112.
Wiring diagram for the rear window cleaner and washer:
1 – washer motor; 2 – mounting block; 3 – ignition switch; 4 – rear window cleaner and washer switch; 5 – rear window wiper gear motor; K6 – additional relay; A – to power supplies; B – the order of conditional numbering of plugs in the gear motor block
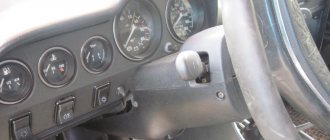
Positions of the steering column switch levers:
purple dotted lines indicate non-fixed switch positions, green and blue lines indicate fixed switch positions.
Contact closure at different positions of the windshield wiper and washer switch lever
Source
Possible causes of wiper malfunction
The causes of windshield wiper malfunction can be either mechanical or electrical. We start troubleshooting first with the fuse, and then we disassemble the rest.
Mechanical problems may include the following symptoms:
- When the windshield wiper is turned on, you can hear the wiper motor running, but the blades do not move. This may primarily be caused by a loose or loose nut that secures the crank to the gearbox axle.
- If the brushes do not work synchronously, the reason may be the driver - its fastening nut has become loose.
Windshield wiper diagram for VAZ 2110
Electrical faults have the following symptoms:
- The brushes do not occupy an extreme position, they stop anywhere and move slowly. The cause may be the ring switch. In this case, you need to bend the contacts. If this does not help, you need to replace the wiper motor assembly, as it is sold with a gearbox.
- The intermittent mode is turned on, and the brushes work continuously, then the problem is in the relay, it needs to be replaced. If the replacement does not help, then it is likely that the contacts on the limit switch have oxidized or burnt.
- If, when you turn on the windshield wiper, the windshield wipers and armature do not work, then the blades may have frozen. Another reason could be a burnt anchor.
- The electric motor does not work, but the fuses are good. In this case, it is necessary to check the contacts that the wiper drive has, as well as the motor. It is possible that the VAZ windshield wiper blades are stuck or the armature is burnt out.
Checking the operation of the windshield washer
Refinement of wipers of VAZ 2110
, or rather not the part itself, but some of its components. In particular, the bushings are made of plastic. Whether the design is to blame for this, or some other defects, they wear out much faster than other mechanisms.
Meanwhile, the performance of windshield wipers is a guarantee of safety in bad weather.
Replacing the windshield wiper trapezoid on a VAZ 2110 is a necessary measure that has to be taken to maintain the wipers in working condition. At the initial stage, this problem manifests itself in a weakening of pressure - in other words, the windshield wipers cannot cope with flows of water or heavy snowfall. Returning to the original position is difficult; you can actually feel the strain with which the wipers move across the glass.
The presence of such symptoms indicates wear and tear on the trapezoid mechanisms.
Windshield wiper repair
To repair the unit you will need the following materials and tools:
- set of sockets and keys;
- screwdrivers;
- WD-40 liquid;
- old rags;
- trapezoid repair kit in case of need for replacement or windshield wiper repair kit for VAZ 2110;
- other parts requiring replacement.
To repair the windshield wiper, you need to disassemble it:
- First you need to remove the instrument panel.
- Next, you should find the VAZ 2110 wiper relay, which is screwed to the body. If it doesn't work, it needs to be replaced.
- It is advisable to remove the frill so that it does not interfere with disassembling the unit.
- Now you need to check the fuse that is responsible for the operation of the VAZ 2110 wiper drive.
The next step is to disassemble the steering column to check the switch. If it has significant damage, it needs to be replaced (the author of the video is “In Sandro’s Garage”).
- Next, you need to dismantle the motor and check it. If replacement is necessary, replace the windshield wiper motor and gear motor assembly.
- If the windshield washer reservoir or pump is damaged, it must be replaced.
- Be sure to check the size and condition of the brushes: they must meet the standards specified in the manual. Their length is important as they must cover the entire surface of the windshield.
Replacing the trapezoid
The replacement process is simple, but it involves manipulations that require increased attention and accuracy - there is a danger of damage to neighboring components and mechanisms.
We de-energize the car by removing the “negative” terminal. We remove the special wind cover (the so-called “jabot”) and the expansion tank. The latter must be removed at an angle - there is a possibility that some of the coolant will spill out, so it is useful to first drain some of it into a previously prepared container.
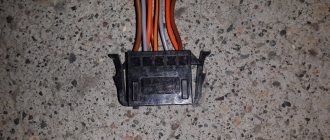
Then you need to turn off the gearmotor
. To do this, remove the corresponding connector. Carefully pull out the trapezoid (depending on the year of manufacture, it can be attached to two or four studs) and carefully remove it from the air supply box. That's it, the work is completed.
Installation of a new trapezoid is carried out in the reverse order.
Do-it-yourself modification and replacement of wipers
Which wipers are better is up to the car owner to decide. Those installed on the VAZ 2110, as well as on the UAZ, do their job well from the factory, but it can be modified with washers from other companies that are of higher quality. Many people are attracted to frameless brushes - this is a good option. They are compact in size and equipped with a special leash mechanism. True, they do not look very attractive on the VAZ 2110, since the fastener to the standard washer arm turns out to be massive. Therefore they need improvement.
How to determine that a trapezoid is “kirdyk”
Kirdyk is a slang word meaning an extremely bad situation.
It happens that the retaining ring of the bushing breaks and the rod simply flies out.
The slightest disturbance in the operation of the trapezoid can lead to incorrect operation of the wipers. Usually this part is replaced with a new one, although in some cases you can get by with installing a repair kit. Its cost is significantly lower than the price of the entire part, although repairs will take much more time. Here is a list of the main signs by which you can determine that a part will soon fail:
- Windshield wipers begin to do their immediate job poorly. This occurs due to the weakening of pressure.
- An unusual noise is heard during operation.
- A backlash appears, which can be determined even visually, since the glass will be difficult to clean.
- It happens that the brushes move in one direction easily, but back with difficulty, constantly slowing down.
All these problems lead to the fact that the windshield remains dirty, with streaks and smudges.
Repair kit for VAZ-2110
Most often, plastic parts are destroyed in the trapezoid. In this case, a repair kit can help.
When purchasing a repair kit, pay attention to the part number.
Device design
Wiper circuit
First, let's try to understand how the windshield wiper circuit on the VAZ 2110 works and what components form a solid unit called a windshield wiper.
| Device | Characteristic |
| Electric motor | It is responsible for rotating the wipers at different intensities. The electric motor contains a gearbox, and the motor itself operates due to the DC current supply. There are three built-in blades in the armature of the engine, providing three operating modes of the windshield wiper - fast, slow and with pauses. Although it is believed that the VAZ 2110 has only two brush rotation speeds |
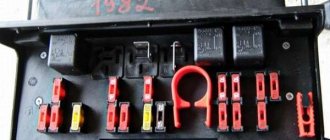
| Electrical components | This is a steering column switch, a wiper relay, which allows you to activate the intermittent movement of the brushes. Plus, don't forget about the switch. The entire electrical system is integrated into wires running through a bimetallic heat-resistant fuse. It is important to note that both relays and fuse F5 are located in the mounting block, and the bimetallic fuse and switch are in the motor gearbox |
| Windscreen wipers | At the same time, the size of the wipers on the VAZ 2110 may be different, which we will talk about later. They differ in shape, material of manufacture, device |
| Mechanical drive | An important component, which, alas, often breaks down at “ten” |
Scheme 2112
1 - block headlight
2 — front brake pad wear sensors 3 — reverse light switch 4 — engine cooling fan electric motor 5 — horn 6 — right front door locking motor 7 — power window relay 8 — 8 A fuse 9 — starter 10 — battery 11 — generator 12 — windshield washer electric motor 13 — washer fluid level sensor 14 — left front door lock motor gearbox 15 — left front door power window switch 16 — coolant level sensor 17 — windshield wiper gearmotor 18 — recirculation valve 19 — drive micromotor gearbox heater flaps 20 — heater electric motor 21 — trunk lock switch 22 — right front door power window switch 23 — right front door power window gear motor 24 — door lock system control unit 25 — additional heater motor resistor 26 — brake fluid level sensor 27 — left power window gear motor front door 28 — exterior lighting switch 29 — instrument cluster 30 — rear fog light switch 31 — fog light indicator light 32 — rear window heating indicator light 33 — rear window heating switch 34 — steering column switch 35 — instrument lighting switch 36 — ignition switch 37 - mounting block 38 - recirculation valve switch 39 - heater controller 40 - hazard warning switch 41 - heater control lever illumination lamp 42 - glove compartment lighting lamp 43 - glove compartment lighting lamp switch 44 - cigarette lighter 45 - on-board control system display unit 46 - lamp ashtray lighting 47 — brake light switch 48 — left rear door lock motor gear 49 — left rear door power window switch 50 — left rear door power window gear motor 51 — socket for a portable lamp 52 — clock 53 — right rear door power window gear motor 54 — right rear power window switch rear door 55 — right rear door locking motor 56 — side turn signal 57 — parking brake warning lamp switch 58 — driver’s seat belt sensor 59 — directional light 60 — interior light 61 — interior air temperature sensor 62 — switch in the pillar front door 63 — switch in the rear door pillar 64 — outer rear light 65 — inner rear light 66 — license plate lights 67 — trunk light
A — blocks for connecting the rear window washer electric motor B — blocks for connecting the injection system harness C — to the warning light harness block D — block for connecting to the on-board computer E — to the headlight cleaner harness block F — block for connecting to the fuel level sensor in the module electric fuel pump G - to the rear window heating element H - block for connecting an additional brake signal J - to the trunk lock motor
The diagram does not conventionally show that in the instrument panel wiring harness, the second ends of all wires of white, black, orange, white with a red stripe and yellow with a blue stripe are connected to each other at the same point.
Why the wipers don't work
At some point, the car owner may notice that his wipers are not working. This may manifest itself in their complete stop or creaking operation.
Trapezoid Compatibility
First of all, look for the reason in the electric motor. But remember that mechanical problems also happen.
The most popular mechanical breakdowns of wipers:
- When the cleaners turn on, the sound of the motor is heard, but the brushes do not move or twitch slightly. Most likely, the nut securing the crank to the gearbox axle has lost its grip or has become completely unscrewed.
- Non-synchronous operation of the windshield wipers indicates a problem with the drive. Again, check the locking nut. When tightening the nut, be sure to first place the brushes in the correct position.
As for problems with the electrical component, they manifest themselves as follows:
- The wiper moves very slowly, stops, then starts working again, does not stubbornly go to the lower position. Check the limit switch. By bending the contacts, it is adjusted in this way. If such a measure does not bear fruit, replace the entire VAZ 2110 wiper motor assembly, since the gearbox is built-in;
- You have turned on the intermittent mode, but the brushes work non-stop. Here the problem lies in the relay, which needs to be replaced. If when you turn on the device you do not hear a sound from the rotation of the motor armature, then the relay is 100% to blame. If not, then check for burns and oxidation on the contacts;
- When choosing any mode, you can only hear the clicking of the thermometallic fuse. At the same time, the anchor and brushes remain in place. Check to see if the brushes are frozen because of the frost and that’s why they don’t move. Either fuse F5 has blown, or the armature has burned out;
- The electric motor does not turn on, although the fuses are good. Check the quality of contacts. This often causes a stuck brush or a burnt armature.
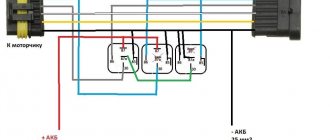
Connecting the relay to the rear wiper motor
Diagram of the front windshield wiper and washer for VAZ-2110, 2111, 2112.
Wiring diagram for the windshield wiper and washer:
1 – windshield washer electric motor; 2 – windshield wiper electric motor; 3 – mounting block; 4 – ignition switch; 5 – ignition switch unloading relay; 6 – windshield wiper and washer switch; K3 – Windshield wiper relay; A - to power supplies; B - the order of conditional numbering of the plugs in the block of the wiper motor
Rear wiper and washer diagram for VAZ-2110, 2111, 2112.
Wiring diagram for the rear window cleaner and washer:
1 – washer motor; 2 – mounting block; 3 – ignition switch; 4 – rear window cleaner and washer switch; 5 – rear window wiper gear motor; K6 – additional relay; A – to power supplies; B – the order of conditional numbering of plugs in the gear motor block
Positions of the steering column switch levers:
purple dotted lines indicate non-fixed switch positions, green and blue lines indicate fixed switch positions.
Contact closure at different positions of the windshield wiper and washer switch lever
The washer on the tailgate has not been working for a couple of months now, and recently the wiper also stopped working. I disassembled the upholstery, removed the gear motor, and began to check - the relay does not work (when turned on from the steering column, it clicks, but the engine does not turn). When 12 volts are supplied to the engine without a relay, the motor spins, the steering column is also fine.
The relay costs 35.3763, is soldered to the engine, and is not sold separately in the store (as Google and the collective wisdom of Drive2 claim
