Instructions
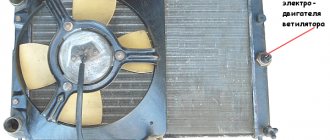
Cars use electric fans to blow air over the radiator of the cooling system. The fan is an impeller driven by a DC electric motor mounted in a round or square frame. The activation of the electric fan is fully automatic and depends on the temperature of the coolant in the radiator. Fluid temperature data is taken from a sensor installed in the side compartment of the radiator. The sensor is a simple microswitch whose contacts are normally open. They close when a certain temperature is reached.
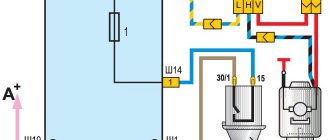
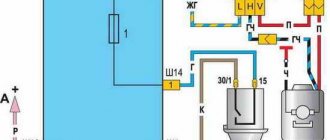
To connect an electric fan, you can use two circuits: relay and relayless. The difference between these schemes is clear from the name. The relayless circuit consists of a temperature sensor, fan, fuse, and connecting wires. The positive terminal of the electric fan is connected through a fuse to the positive terminal of the battery. The negative terminal of the fan is connected to any terminal of the temperature sensor; the polarity of the connection does not matter. The second terminal of the sensor must be connected to the car body. This is the simplest switching scheme and does not require much time to implement.
The relay circuit contains an electromechanical relay. The good thing is that the high current is removed from the sensor to the relay. The positive terminal of the fan is connected through a fuse to the battery, the negative terminal to the body. The negative wire must be cut and the resulting two wires connected to the normally open contacts of the relay. By default, our fan is turned off. One terminal of the relay coil must be powered from the battery positive through a fuse, or from the ignition switch. The second output of the coil should be applied to the first contact of the temperature sensor, and a wire connected to the body should be mounted from the second contact. Check in advance to see if the relay has a diode connected in parallel with the coil. If available, it is important to observe the polarity of the winding power supply.
Another useful modification for the fan switching circuit is a button installed in the car interior. The temperature sensor can fail at the most inopportune moment, so the button will be useful in emergency situations. Both when using the first scheme and when using the second, you need to connect the normally open contacts of the button to the temperature sensor. It’s easier this way, but if you use the first scheme, it turns out that there will be a large current on the button, and this can cause the button contacts to burn and the case to melt. Therefore, it is best to use the button in combination with an electromagnetic relay.
There are two ways to connect power supplies: series and parallel. With the first, the total voltage increases, and with the second, the capacitance increases. The increase occurs a number of times equal to the number of sources.
Instructions
Make sure both batteries are the same, equally worn, and charged to the same degree. If this is not the case, avoid connecting them in series or parallel.
To connect two batteries in series, connect the negative terminal of the first battery to the positive terminal of the second. Do not connect the terminals that remain free (the positive pole of the first and the negative pole of the second) to each other under any circumstances, otherwise a short circuit will occur. Remove the tension from them, which has doubled.
To connect two batteries in parallel, take two diodes that can withstand the load current for an unlimited period. Connect the negative poles of the batteries together. Connect the positive pole of one of the batteries to the anode of the first diode, the other - to the anode of the second diode. Connect the cathodes of the diodes together. Connect the load with the negative pole to the connection point of the batteries' minuses, and the positive pole to the connection point of the cathodes of the diodes. This design will deliver the same current twice as long as a single battery. But you cannot load it with twice the current, since only one of the diodes is always open.
It is not recommended to connect batteries in parallel without diodes, since they will discharge through each other. Do this only if you are absolutely sure that they are equally charged and worn out. But with such a design you can extract twice as much current.
Before charging batteries, disassemble the structure. Charge them separately. This will significantly slow down battery wear. If the batteries are connected in parallel using diodes, it will be completely impossible to charge them without disassembling the structure.
Sources:
- battery connection
Troubles in the cooling system are the most dangerous. Without monitoring the fluid temperature, you can leave the engine without cooling. The result is a major overhaul, since the engine will simply jam. Therefore, you need to detect the malfunction in time and try to eliminate it.
The cooling system on both the VAZ 2107 and the VAZ 2109 has the same design. The only significant difference is the type, since the nines use a sealed system. The expansion tank has a plug with two valves. The inlet is triggered when the pressure drops to 0.13 atmospheres, and the exhaust is triggered when it reaches 1.2-1.3 atmospheres. On early VAZ models, the coolant is not under such high pressure. Due to the increase in pressure in the cooling system, antifreeze (or antifreeze) has a higher boiling point.
Troubleshooting
The most common breakdown in all cars is the thermostat. A sign of thermostat failure is boiling of the coolant even when driving at high speed, when there seems to be good airflow to the radiator. The reason lies in the fact that a thermostat is necessary to switch the liquid circulation between large and small cooling circles. When VAZ thermostats fail, they leave a small circle on. And this is the entire system, except for the main radiator. Hence the excessive heating.
The second most popular failure is the failure of the pump (liquid pump). There is practically nothing to break in it, but often the oil seal through which the coolant leaks out is destroyed. Sometimes the bearing wears out and it begins to make a terrible whistling and grinding noise. These are the main malfunctions of the pump; they can be determined by hearing and sight. True, sometimes the bearing is destroyed so that it does not make sounds, but axial play appears.
The electric fan is the third most popular component in which a breakdown may occur. Sometimes it stops working due to the failure of the temperature sensor responsible for turning it on. But often the cause of the malfunction is electrical wiring. On nines, for example, a simple fan circuit is used. Fuse, sensor and fan itself. The sensor is connected to ground and to the fan. So the wire that goes to the body is quite long and runs throughout the entire engine compartment. The slightest break and the fan fails.
Cooling fan VAZ 2107
In the power plants of the first "sevens" the radiator fan was installed directly on the water pump shaft. Like the pump, it was driven by a belt drive from the crankshaft pulley. This design was also used on other cars at that time. It almost never failed, and it was impossible to overheat the engine with it. However, she had one drawback. The constantly cooled power unit warmed up very slowly. That is why AvtoVAZ designers changed the principle of forced airflow, replacing the mechanical fan with an electric one, and with automatic activation.
Why do you need an electric fan?
The fan is designed for forced airflow of the cooling radiator. During operation of the power plant, liquid coolant enters the radiator through the opened thermostat. Passing through its tubes equipped with thin plates (lamellas), the refrigerant cools due to the heat exchange process.
When a car moves at speed, heat transfer is facilitated by the oncoming air flow, but if the car sits for a long time or drives slowly, the coolant does not have time to cool. At such moments, it is the electric fan that saves the engine from overheating.
Device design
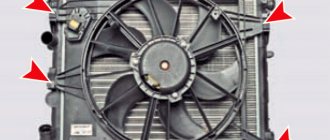
The radiator fan consists of three main elements:
- DC motor;
- impellers;
- framework.
The electric motor rotor is equipped with a plastic impeller. It is she who, rotating, creates a directed air flow. The engine of the device is installed in a metal frame, with which it is attached to the radiator housing.
How does an electric fan turn on and work?
The process of turning on the fan for carburetor and injection “sevens” is different. For the former, its activation is controlled by a mechanical temperature sensor mounted in the lower part of the right cooling radiator tank. When the engine is cold, the sensor contacts are open. When the temperature of the refrigerant rises to a certain level, its contacts close and voltage begins to be supplied to the brushes of the electric motor. The fan will continue to operate until the coolant cools down and the sensor contacts open.
In injection “sevens” the electric fan switching circuit is different. Everything here is controlled by an electronic control unit. The initial signal for the ECU is information coming from a sensor installed in the pipe leaving the engine (near the thermostat). Having received such a signal, the electronic unit processes it and sends a command to the relay responsible for turning on the fan motor. It completes the circuit and supplies electricity to the electric motor. The device will continue to operate until the refrigerant temperature drops.
In both carburetor and injection "sevens", the electric fan circuit is protected using a separate fuse.
Quick Repair Methods
If the thermostat has died for a long time on a long journey, then first try knocking on its body. Sometimes, after exposure, the valve opens, but expect it to jam again soon. The best option is to drain the fluid and try to break through the thermostat to turn on the big circle. And if suddenly there is a new one or a working one in the glove compartment, then install it.
It’s more difficult with a pump on the road; it will be easier to add water as needed. But this is only if the leak is not very large. Having reached the place where repairs can be carried out, it needs to be replaced. On sevens this is done quite quickly, you just need to drain the liquid, loosen the fan belt and remove the old pump. And on nines you will have to remove the casing that covers the timing block, loosen the belt, and only then use a 10mm wrench to unscrew the three bolts securing the pump.
But with a fan everything is simpler. If there is a breakdown in the sensor, then the easiest option is to short-circuit its contacts. In this case, the fan will work constantly, so after stopping the engine, be sure to turn it off, as the battery will run out. If the problem is in the wiring, then the best way to get out of this situation is to connect a fan to the battery. But if the electric motor winding burns out, then only a complete replacement will help.
Sources:
- Description of the VAZ 2107 cooling system
- Typical failures in the cooling system in 2017
The engine cooling system is one of the important parts of the car. It not only cools the engine, but also heats the car interior in winter. And to carry out maintenance and repair, you simply need to know the composition of the system and the general principle of its operation.
The first copies of VAZ 2110 cars were practically a copy of the nines. The only difference is in the body, but the engine and gearbox are similar. But carburetors were replaced by an injection system, and a lot has changed in the car, including the cooling system. Constant modernization makes itself felt, the car becomes more reliable, but more difficult to maintain. Of course, increasing engine power entails a lot of modifications. Changes occur in the braking system, lubrication and cooling systems. But the operating principle remains virtually unchanged.
Fan motor
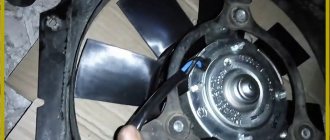
The electric motor is the main component of the device. The VAZ 2107 used two types of engines: ME-271 and ME-272. In terms of characteristics, they are almost identical, but as for the design, it is somewhat different. The ME-271 engine has a stamped housing, i.e., non-separable. It does not require periodic maintenance, but in case of malfunction, it can only be replaced.
Design and characteristics of the fan motor
Structurally, the motor consists of:
- housings;
- four permanent magnets glued around the circumference inside the case;
- armatures with winding and collector;
- brush holder with brushes;
- ball bearing;
- support sleeve;
- back cover.
The ME-272 electric motor also does not require maintenance, but unlike the previous model, if necessary, it can be partially disassembled and attempted to be restored. Disassembly is carried out by unscrewing the tightening bolts and removing the back cover.
In practice, repairing an electric fan is impractical. Firstly, you can only buy used spare parts for it, and secondly, a new device complete with impeller costs no more than 1,500 rubles.
Table: main technical characteristics of the ME-272 electric motor
| Characteristics | Indicators |
| Rated voltage, V | 12 |
| Rated rotation speed, rpm | 2500 |
| Maximum current, A | 14 |
Composition of the VAZ 2110 cooling system
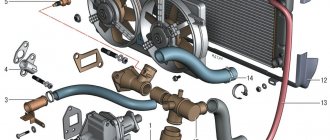
It is very difficult to single out the most important element, since all components play the main role in the cooling system. Let's start with the first thing that catches your eye. This is an expansion tank with a plug in which there are two valves (inlet and outlet). While the engine is running, the coolant heats up and expands. The tank is necessary to release excess fluid from the system.
The radiator, fan and temperature sensor are parts located at the front of the car. A radiator is necessary for effective cooling of the liquid in the system. The fan is triggered by a sensor and blows a strong air stream onto the radiator. Due to the blowing, significant heat is removed from the radiator. A sensor is a simple switch whose contacts close at a certain temperature.
A pump installed in the engine block, driven by the timing belt, is necessary to ensure the circulation of coolant in the system. And the thermostat simply switches the cooling circuits. There is also a radiator in the heating system; it is installed in the stove (snail). One pipe from the block (hot liquid) goes to it through a faucet installed on the body. And one pipe comes out of the stove and goes to the thermostat.
Pipes and clamps are secondary parts, but they affect the operation of the entire system, since it is through them that the coolant moves. The slightest crack in the pipe can cause a rapid decrease in the coolant level and an increase in its temperature. There are one or two temperature sensors in the engine block; they are necessary for the operation of the temperature gauge and the ECU.
How the cooling system works
When starting a cold engine, the coolant moves in a small circle. To put it simply, all components work except the radiator. The main task after starting the engine is to quickly reach operating temperature, which is about 90 degrees. When operating a system with a main radiator, this is quite difficult to do; warming up will take a longer period of time. Plus, the throttle valve heating is turned on in a small circle.
When the thermostat opens, it switches to a large circle in which the radiator participates. By turning it on, cooling is much more efficient. At high speed, when the oncoming air flow is very good, the temperature remains at the same level. And when driving through a traffic jam, when there is no this flow, the temperature of the coolant rises. The sensor installed in the radiator is responsible for triggering the fan. When a certain temperature is reached, the contacts close and the fan turns on, creating a powerful air flow.
Welcome, friends, to the DIY car repair website. It's no secret that engine overheating rarely ends in something good. Such a malfunction is fraught with a whole range of problems, which most often lead to the need for repairs and additional costs.
In such a situation, you can only rely on the cooling system, one of the main elements of which is the VAZ 2110 fan switch sensor (abbreviated as DVV).
Mechanical forced radiator cooling
Owners of some of the first sevens know how the mechanical cooling fan system works. The impeller of the device is driven by the rotating crankshaft rotor. The elements are connected using a belt drive, and the operation of the radiator cooling fan begins immediately after the engine starts.
This method of fan operation is called mechanical, and its main advantage is reliability. When the engine starts, the impeller of the device begins to rotate, thereby providing airflow to the radiator. Such a system is simple and therefore practically does not require repairs. The main disadvantage of this mechanism is that the rotation speed of the impeller directly depends on the engine speed. At idle, the impeller rotates at a lower speed than when moving at high speed.
If in the summer, when starting a VAZ 2107 with such an engine, the rotation of the fan does not negatively affect the warming up of the engine, then in winter it is the opposite. When starting the engine in winter, it is necessary to quickly warm up the engine, and the constant rotation of the fan complicates this task, even despite the cooling system, which consists of two fluid circulation circles - small and large.
The disadvantage of prolonged warm-up of the engine is eliminated by using a thermostat, which controls the circulation of coolant in a large and small circle. When the operating temperature is reached, when the engine warms up, the thermostat opens the valve and the liquid circulates in a large circle, that is, through the cooling radiator.
In winter, when the car is moving at high speed, the fan cools the liquid too quickly, so you will notice that on such sevens the temperature gauge needle often does not reach the operating value. This is why many car owners place cardboard or cloth on the radiator grille to prevent the flow of cold air.
Purpose of the fan switch sensor
As we have already mentioned, the DVV is part of the engine cooling system and duplicates the function of the thermostat. The main task of the sensor is to protect the vehicle’s power unit from overheating and promptly give a command to the ECU to turn on the fan. How does he work?
While the engine is running, the coolant temperature may rise. As soon as it reaches a certain level, the DVV gives a command to the electronic unit of the car.
The fan immediately starts and powerful air currents blow over the radiator. As a result, the coolant temperature decreases to the optimal level much faster.
Fan sensor location
Finding the sensor is not difficult - it is located directly in the radiator. A more precise location may vary (it all depends on the design features of the model of a particular year of manufacture).
For example, the DVV can be located in the right or left tank, in the lower or upper part of the radiator.
Finding the location of the sensor is not difficult. This is almost the only unit on the radiator from which wires extend. Another distinctive feature is the large nut head, which can be unscrewed with a “30” wrench.
Operating principle and triggering requirements
So, the main element of the DVV is the contact group inside the node. When the desired temperature is reached, the sensor contacts begin to expand and at a certain moment close. After this, the signal goes to the ECU, which, in turn, gives a command to the fan.
What should the switch-on temperature be? You must remember that DVVs are available with different temperature limits.
Most often, switching on occurs when 92 degrees Celsius is reached, and switching off occurs at 87. Sensors are also sold with other temperature ratings, but for the VAZ-2110 the 92/87 option is most suitable - so give preference to it.
Main causes of fan failure
If the fan does not turn on when critically high temperatures are reached, there may be several reasons:
- Malfunction of the fan switch sensor (in this case, it must be checked and, if it fails, replaced);
- Fan failure.
If this happens, replacement costs may be significantly higher. To check the fan, connect its contacts directly to the battery (observe the polarity). If the device starts normally, then there is a high probability of failure of the internal combustion engine.
Main types of faults
The fan is necessary to cool the radiator at times when there is no oncoming air flow, that is, during slow movement or parking. With its help, a warm air flow from the radiator flows to the engine, which is important during winter warm-up.
There are several options for incorrect operation of the VAZ-2107 electric fan:
- The device does not start under any conditions. In this case, the engine overheats. With this malfunction, it is important to look at the arrow indicating the temperature. If it reaches the red zone and the fan motor does not turn on, then the fault must be found in the power circuit or in the device itself. Most often the fan does not turn on due to:
- wear of brushes, commutator or armature winding of the electric motor;
- electrical circuit break;
- sensor malfunction;
- fuse blown;
- relay failure.
- Full time job. With this failure, the fan does not stop and spins up at any temperature. The following may cause a malfunction:
- sensor failure;
- stuck relay;
- short circuit of the power supply.
- Untimely switching on. This problem occurs when the temperature sensor readings are faulty. It transmits incorrect information to the relay, so it does not activate the device in time.
- Extraneous noise during operation. In the interior of the VAZ-2107, the moment the fan turns on is clearly audible. If this noise is accompanied by a creaking, hum or whistle, then you need to check the bearing or support sleeve of the cover. The appearance of a crackling or knocking sound is characteristic of contact of the impeller with the inner edge of the electric motor frame; this happens when the blades are deformed or misaligned.
If the fan is said to be not working, then most likely it does not start or does not work in a timely manner. Let's look at how to check the devices responsible for running it.
Features of checking the fan switch sensor
Let's look at how to check the fan switch sensor. Everything is simple here:
- Force the sensor to trigger. If the fan starts to rotate, then the air blower will need to be replaced.
- Check the integrity of the fuse that powers the fan. Believe me, it is very disappointing to take your car to a service station, spend a lot of money on repairs and find out that the cause of the malfunction was a blown fuse.
- Inspect the wiring for possible damage.
There is another, more accurate method for checking the sensor. To complete the work you will need a multimeter, an electric or gas stove, an empty container, and a thermometer.
Proceed in the following sequence:
- Pour some water into the container and lower the sensor into it (immerse only the part with the thread).
- Set the switch on the multimeter to the resistance measurement position and connect the probes of the device to the DVV contacts.
- Start heating the water.
- As soon as the temperature reaches 92 degrees Celsius, the sensor should operate and the contacts should close.
In this case, the device will show a certain resistance parameter (if you set the switch to “continuity”, the device will make a squeak). If the sensor does not work, then the only way out is to replace it.
Checking at home
Sometimes the electric motor turns on too late, when the antifreeze temperature is already high. This may be caused by a malfunction of the valve in the radiator cap or abnormal parameters of the switch on sensor. You can check the device’s response temperature at home using a multimeter and thermometer.
After disconnecting the electrical connector, the sensor is unscrewed with a key. To avoid burns, remove the device only from a cold engine, after draining the antifreeze. When reinstalling, it is advisable to use a new sealing copper washer and not apply too much force when tightening.
The switching temperature is engraved on the end; it can be from 92 to 95 degrees. To check, you need to connect the multimeter in resistance measurement mode and immerse the threaded part in a container of water.
While heating the water and monitoring the readings of the multimeter, we use a thermometer to record the moment it turns on, and when it cools down, the temperature it turns off. Standardly, these are 92 and 87 degrees; with significant deviations, late operation is especially critical, the device requires replacement.
To improve cooling, it is possible to install a double fan from Niva. There are two modifications for placement: after the radiator or in front of it.
Nivovsky injection radiator 21214-1300024-43 (placed in front of the radiator)
On the VAZ 2110, any of the options can be installed with minimal modifications to the fasteners on site. When electric motors are connected in parallel, the current consumption increases to 40 amperes, which requires replacement of the wiring.
Nivovsky suction radiator (placed after the radiator)
Monitor the engine temperature. If you notice overheating too late, then in addition to boiling of the antifreeze and a forced stop, more serious consequences are possible: deformation of the cylinder head, jamming of the camshaft. If there are defects in the operation of the cooling system fan of the VAZ 2110, the faults can be diagnosed independently by checking the thermostat, electric motor, relay, and switch sensor.
Features of replacing the fan switch sensor
As practice shows, replacing the fan switch sensor takes a few minutes, so there is no need to contact a service station. Proceed in the following sequence:
- Remove the negative voltage from the battery;
- drain the coolant from the radiator;
- discard the supply wire from the DVV;
- remove the fan switch sensor and replace it with a new one;
- return the supply wire and the battery negative to their place;
- check the operation of the node.
Carrying out diagnostics and replacing the internal combustion engine with your own hands is not a problem even for a beginner. The main thing is to find a few minutes of free time and do a few simple manipulations.
Domestic “tens” are equipped to ensure proper operation of the motor, based on the readings of various controllers. One of these is considered to be a temperature sensor in the VAZ 2110. You can learn more about this device, its operating principle, as well as diagnostics and replacement from this article.
How to check a fuse
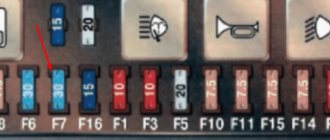
In the mounting block of the engine compartment there is a fuse responsible for the operation of the fan. Its designation on the power supply diagram is F-7, nominal value is 16A. Checking and replacing the fuse is carried out according to the instructions:
- Remove the negative terminal from the battery. Remove the mounting block cover.
- Pull the F-7 fuse out of its seat. Using a multitester, check it by connecting the probes to the contacts.
- If the device is blown, buy a new fuse and replace it with a new one.
This is the simplest repair option, which is carried out when the cooling fan does not work.
Characteristics of DTOZH
In order for the injectors, as well as other elements of the injector 16 or 8 valves, to operate in normal mode, the ECM reads readings from many devices. At first glance it may seem that this is not a particularly important device for the “tens” engine, but this is not so. How the devices are turned on, where the indicators are located and what functions they perform - first, we suggest you familiarize yourself with the answers to these questions.
Location, functions and operating principle
The coolant temperature sensor is an electronic device, essentially a semiconductor resistor with a negative coefficient. The controller resistance changes according to the environment. The device is designed to control the temperature during the circulation of consumables in the cooling system of the VAZ 2110 with further transmission of the received data to the dashboard. In addition, this device is also responsible for emergency fan start. In the VAZ 2110, the DTOZH is located in the head of the engine BC. Many car enthusiasts confuse the DTOZH, calling it the VAZ 2110 fan switch sensor, but this is incorrect.
The design of the coolant controller on the VAZ 2110 is quite simple. The greater the temperature effect exerted on the device, the lower its resistance will be. The principle of operation is to transmit a signal from the device to the ECM unit, which, based on this data, regulates the supply of the combustible mixture to the cylinders of the power unit. Until the engine warms up normally, a richer fuel mixture will enter the cylinders.
When cold, the VAZ 2110 fan turns on
The car sits overnight in winter, in the morning I turn on the ignition and the cooling fan immediately turns on. I wait for about 3-5 minutes and it doesn’t turn off, I start the engine, the fan works. Sometimes it turns off after a couple of minutes, sometimes it takes longer, but after turning off the speed rises sharply to about 1500. But if the fan turns on again, the speed drops to 700, as if there is some kind of load.
And so it can go back and forth, then the fan, then the speed. But when everything returns to normal, I drive, the car warms up, then there are no problems, even the check goes out. Well, as soon as it stands and cools down well, then everything will be all over again. And even when it revs, if I turn it off, it won’t start, it immediately throws the spark plugs. VAZ 2110, 8 valves, injector, 2003
- Failures during acceleration of VAZ 21103 - 1 answer
- Engine speed does not rise above 3500 VAZ 2110 – 4 answers
- VAZ 2110 jerks at low speeds - 3 answers
- Why can there be a dip in the VAZ 110 engine speed? – 3 answers
- The speed jumps on the VAZ 2110 - 3 answers
Open circuit of the coolant temperature sensor, or the sensor itself. In general, if the engine cooling fan is constantly running, then you need to perform a comprehensive check.
There is a problem with the coolant temperature sensor. Or with its connector.
Try changing the fan switch sensor. And look at the throttle sensor.
They wrote that: “the check sometimes goes out.” This means there is already an error (or errors), it needs to be diagnosed, and it will be more clear - without guessing.
Thank you guys. In general, the temperature sensor has already been changed 2 times. During the diagnostics they said my fan sensor connector was loose. They sort of eliminated it.
I picked up the car, everything is fine. I went out of town, everything was new. Once it happened that I turned on the ignition and some relay in the legs on the passenger side clicked 5-6 times. Looks like it's the fan relay. Well, what is the connection between the fan and speed after it is turned off? They also said that the DMRV will fly soon.
I looked at the connectors and found them. I looked at the block with fuses and relays. Everything seems to be normal. Then I moved the wires that come from the fan relay (they are in a pile with others), somewhere up, under the panel, towards the instrument panel, the fan turned off and on. I understand that it was because I moved the wires. And does anyone know where they are going?
Methods of testing for functionality
There are several ways to diagnose the antifreeze temperature controller - visually and using a tester. Before arming yourself with a multimeter, you should carefully inspect the device’s case. If it shows signs of corrosion, deposits or damage, this indicates that the regulator needs to be replaced.
As for checking with a multimeter, the procedure is as follows:
- First, the device should be removed; to do this, you just need to find its installation location, turn off the power and unscrew the device. Next, you will need a container to fill with refrigerant.
- The next step is to heat the container after you put the DTOZH in it. But before that, it should be connected to the tester probes. Please note that when diagnosing, you must know exactly the heating temperature level of the liquid; this is what will allow you to determine the performance of the controller. The container heats up, and you will need to compare the results obtained with those indicated in the table. The table itself is shown below.
- If the temperature level does not correspond to the nominal resistance value or vice versa, this indicates a malfunction of the device. Too high a signal level from the coolant temperature sensor also indicates its failure. There are cases when the problem, when the values are higher than optimal, can be solved by cleaning the surface of the device, but such measures, as a rule, help if the deviation of the indicators is insignificant (author of a video about self-diagnosis of DTOZH - channel Device and car repair).
Possible malfunctions and ways to eliminate them
The following symptoms may inform the car owner about the failure of the DVT:
- The quality of the exhaust gases is too low, which is associated with a violation of the combustible mixture in the cylinders.
- Fuel consumption has increased, and noticeably.
- Problems have arisen in the operation of the power unit. The dynamics of the vehicle may decrease, and the engine power as a whole will also deteriorate.
- Combinations of errors may appear on the dashboard, and the ECU may also send a signal to the dashboard about the need to check the performance of the motor.
- The power unit has become more difficult to start.
When they detect the first signs of problems, many motorists immediately drive their car into a garage or service station to change the controller. In practice, symptoms of DTOZ malfunctions are often associated with damage to the electrical circuit and poor contact of the device with the vehicle’s on-board network. Therefore, if you encounter a similar problem, we first recommend checking the condition of the wiring.
Photo gallery “Diagnostics of DTOZH”
1. DTOZH connected to a multimeter in a container with antifreeze
2. Dependence of temperature (left), resistance (right)
Instructions for replacing the controller
Replacing the regulator looks like this:
- First, the battery terminals are disconnected. All coolant should be drained from the radiator unit.
- Next, you need to disconnect the wiring from the device; to do this, you just need to disconnect the plug. For greater ease of removal, you can remove the air filter.
- After this, the controller is dismantled; to do this, it must be unscrewed. The unscrewing procedure is performed using a wrench. The failed device is removed from the outlet hose hole.
- As for installation, in this case the procedure will look similar, only in reverse order. When installing a new device, do not forget to change the O-ring. When installing the controller, tighten it as much as possible and connect the wiring to it. Now all you have to do is refill the antifreeze and connect the battery, after which you can check the performance of the DTOZH.
Replacing diesel fuel assemblies
Removal of diesel fuel assemblies in VAZ 2110
The VAZ 2110 interior temperature sensor is used to monitor temperature parameters in the car. This controller is also a transmitter connected to the ECM. In cold weather, the VAZ air controller transmits information to the ECU, which promotes optimal air flow throughout the car interior. As in the previous case, the malfunction of the device may be due to problems in the operation of the electrical circuit, so it would be a good idea to check the wiring if the controller does not turn on.
To replace the interior, you need to perform the following steps:
- The car must be set to the parking brake. Disconnect the battery.
- Using a flat-tip screwdriver, you need to move the device body away from the installation site.
- First, the upper part of the diesel fuel assembly is removed, this will allow for more convenient dismantling of the controller. When the device is removed from the latches, proceed carefully, since you will still need to disconnect it from the wiring (two connectors). First, the wiring is disconnected, then the combustion engine itself is removed.
- As for installation, the procedure looks similar, but is done in reverse order. After installation, it is necessary to diagnose the functionality of the device.

