System design
Before we begin to consider the adjustment process, we consider it necessary to understand the diagram and principle of operation of the system. Vehicles of the VAZ 2109 model range are equipped with a non-contact ignition system. The connection diagram of all elements is as follows:
The operating principle of the system is not complicated. In order for a spark to begin to be produced, the motor shaft must turn. Simultaneously with its rotation, the camshaft will also turn. As a result of this, the sensor generates a signal that will be sent to the switch. The “K” terminal of the coil will connect to the common wire (to “ground”), as a result of which a spark will occur on the main wire. At the moment when the working distributor slider connects the main wire with one or another high-voltage wire on the corresponding spark plug, a spark will appear and the car engine will start.
If the setting is made incorrectly, the candles work in the wrong time modes. Consequently, such a violation becomes the cause of unstable operation of the entire power unit.
Preparatory activities and necessary tools
Installing the ignition of a VAZ 2109 carburetor begins with preparatory activities. In particular, you need:
- Warm up the car engine;
- Set the parking brake and install wheel chocks under the rear wheels.
Remember that you cannot ignore safety rules, because a car is a highly dangerous vehicle, and failure to comply with safety rules when driving, servicing and repairing it can cost you dearly.
An important point: before you start work, you should make sure that the carburetor is correctly configured on the car. It would not be superfluous to carry out a visual inspection of all elements of the system. If we are talking about a carburetor car, special attention should be paid to inspecting the condition of the distributor.
If you have a car with an injection engine, it is worth checking the ignition module for serviceability. The thing is that, as practice shows, it is this module that fails most often and is the reason for the inoperability of the entire system.
To complete the work we need:
- strobe;
- a set of keys.
How to check the ignition module of an injector with 8 valves?
Before setting up the ignition of an injection engine, you will need to prepare:
- laptop with ID diagnostic program;
- tester;
- keys, screwdriver.
Before checking the VAZ 21099 ignition module, it is necessary to monitor the components of the control system. Everything must be connected and working properly; if necessary, the required parameters must be adjusted. Turn on the ground and ignition, while gasoline is pumped. When a red light appears, diagnose problems on the car’s on-board computer and the PC connected to it.
Check the throttle device: turn on the ignition, use a tester to check the voltage values for the on-board network and the sensor. Reference diagram of indications: BS voltage - more than 12 volts, sensor voltage - approximately 0.5 volts, opening degree - up to 1%.
Before removing the module, monitor all system components
When the gas pedal is pressed, the sensor voltage readings and the throttle opening degree will change: approximately 4.5 volts and at least 90%, respectively. It is best to achieve 100% throttle opening.
Next, you should turn off the additional air flow regulator, achieve 50% opening of the throttle for air flow when starting the engine easily in a warm state. Then adjust the throttle so that it is completely closed.
How to correctly set the ignition on a VAZ 2109 carburetor - detailed instructions
The setup process is as follows:
1. Start the car engine and ensure that the engine speed is approximately 800 rpm. To set the idle speed within such limits, it is enough to use a slotted screwdriver to adjust the screw responsible for the amount of fuel mixture in the carburetor.
2. After setting the idle speed to the above value, turn off the car engine.
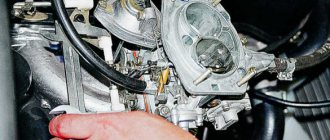
3. Disconnect the rubber hose from the vacuum corrector. Carefully bend the hose approximately in the middle or plug it with a screw of a suitable diameter.
4. Connect the positive terminal of the strobe to the “+” terminal of the battery;
5. Connect the negative wire of the strobe to the “-” terminal of the battery;
6. Disconnect the spark plug wire from the socket of the first cylinder as shown in the image:
Disconnect the spark plug wire
7. Install the strobe sensor into the socket and connect the high-voltage wire to it;
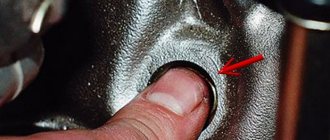
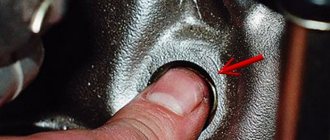
8. Remove the plug from the clutch housing hatch:
Removing the stub
9. Turn on the ignition and start the engine. We direct the actively changing luminous flux generated by the strobe into the clutch housing hatch:
We direct the strobe into the clutch housing hatch
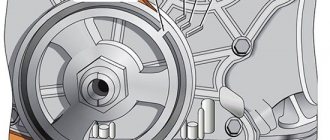
10. When the light is flashing, it seems that the mark located on the flywheel is stationary. If the ignition is installed correctly, the first mark should be between the technological notch and the previous mark on the scale.
Tags
11. If after the described operations it was discovered that the ignition adjustment of the VAZ 2109 is incorrect, we continue to work.
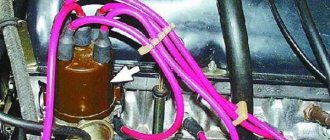
12. Using an open-end wrench, slightly loosen the fastening nuts of the ignition system distributor:
Mounting nuts
13. After loosening the fastening nuts, turn the distributor body to the right side - if it is necessary to increase the ignition angle, and to the left side, if it is necessary to decrease the angle.
14. Connect a rubber tube to the vacuum corrector and check that the ignition is installed correctly. If the normal result is not achieved, we make repeated adjustments. How to check the correct operation of the system will be described below.
How to adjust the ignition timing of a VAZ 21099
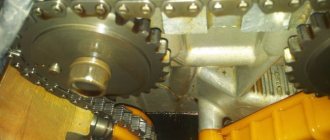
We turn off the engine and remove the protective plug located on the clutch housing. It will give access to the flywheel with marks that should match the mark on the crankcase. Let's clean this place thoroughly if it's dirty, otherwise we won't see the marks. Now we connect the strobe. It couldn't be easier to do this. Using the clamps on the strobe wires, we connect to the corresponding battery terminals. We only observe the polarity. After this, we remove the central wire from the distributor, install a tee from the strobe light in its place, and insert the central high-voltage wire into the hole of the tee. We check the contacts thoroughly.
Everything is ready for testing, and now you can start the engine and shine a strobe light on the hatch. Ideally, the marks on the crankshaft flywheel and on the crankcase housing should coincide at idle speed, but you need to take into account the brand of gasoline that is poured into the tank. The center of the triangular mark on the crankcase corresponds to the zero advance angle, and the following notches add or subtract 1 degree each. So, when filled with 98 and 92 gasoline, the advance angles should, in theory, be different. But if we go down to earth and really evaluate the quality of gasoline, then in order not to get upset again, we will set the ignition optimally for both gasolines - at 4-5 degrees. If necessary, we will adjust it later.
Having loosened the distributor fastening, we rotate it so that the +5 degree marks coincide, taking into account the gradation of one division on the distributor scale - 8 degrees. We turn off the engine, put everything back in place and turn off the strobe light.
Incandescent lamp instead of strobe light
Many car owners will ask a completely fair question: how to adjust the ignition of a VAZ 2109 in the absence of a strobe light. Of course, it is more correct to work with a strobe, especially since in this case it is possible to carry out adjustment and adjustment work as accurately as possible. However, there is another method that is useful for those who, for one reason or another, do not want to purchase a strobe.
To work, we need an ordinary incandescent lamp designed for an operating voltage of 12V. The entire algorithm of actions is as follows:
- Disconnect the wire from the distributor that goes to the ignition coil
- We connect one terminal of an incandescent light bulb to the wire. We connect the second wire from the lamp to ground.
- As in the case when setting the ignition of a VAZ 2109 using a strobe light, use a spanner to loosen the distributor fastening nuts.
- Turn on the ignition. The incandescent lamp should light up.
- Gradually turn the distributor until the lamp stops glowing. After this, turn the distributor slightly in the other direction. As soon as the lamp starts to glow again, you can tighten the fastening nuts.
Of course, the method described above cannot provide the highest possible adjustment accuracy. However, with its help it is quite possible to achieve more or less correct and stable operation of the power unit.
Adjustment with strobe light
How to configure and adjust the OZ on a VAZ 2109 or 21099 using a strobe? Anyone can cope with this task, but you need to take into account that if there are malfunctions in the operation of the module, then most likely the adjustment will not solve the problem. When adjusting, engine speed should be in the region of 820-900 rpm. The method of adjusting the SOP using a strobe is considered one of the most accurate.
How to perform this procedure:
- First you need to start the power unit and set the appropriate number of revolutions for its operation. If this value on a carburetor engine is outside the limits, then you need to adjust the air-fuel ratio to form a combustible mixture.
- Next, you need to disconnect the vacuum line from the fitting. Having done this, the car engine should be turned off, after which the gap in the vacuum hose will need to be removed. If there is no clearance, you will need to unscrew the three nuts that secure the distributor or switchgear housing.
- Once these steps are completed, you will need to remove the rubberized plug from the transmission housing; directly behind it is the flywheel inspection hole. In addition, you will need to disconnect the high-voltage wire from cylinder number 1 from the distribution unit cover.
- After this, you should activate the strobe itself. This device is connected instead of the disconnected wire, as well as to the battery. After starting the power unit, the device will transmit impulses in time with the flywheel. In this case, the distributor body will rotate until the mark on it coincides with the one marked on the flywheel itself. Once the marking is complete, you will need to secure it in place. For diagnostics, make sure that the marks on the flywheel and crankshaft match; if this is the case, then the installation of the OZ was carried out correctly (the author of the video is Nail Poroshin).
How to adjust the ignition on a VAZ 2109 - an alternative method
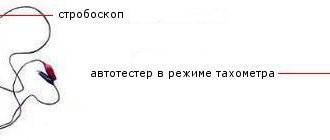
In addition to the adjustment methods described above using a strobe and a light bulb, you should remember one more method - adjustment using a standard tachometer. We emphasize that this method, like the method using a light bulb, cannot provide high accuracy of adjustment. Moreover, it is characterized by one significant drawback - it is impossible to carry out the adjustment yourself; you will need to hire an assistant. So:
- Your assistant is located behind the wheel of the car. He turns on the ignition and monitors the readings of the standard tachometer on the instrument panel.
- You loosen the nuts securing the distributor and turn it a little.
- Your assistant turns the ignition key. The tachometer needle should quickly deflect and return to zero.
- You need to ensure that the distributor remains in a position in which the tachometer needle deflects.
You may notice that this method requires patience and quite a lot of time. As practice shows, it is not possible to adjust the ignition quickly and the first time using this method . Therefore, we recommend using it only in extreme cases.
Adjusting the ignition using the tachometer
To carry out this type of economical ignition adjustment of the Zhiguli 2109, two people will be needed. One should be in the interior of the Nine, the second should rotate the distributor.
Step-by-step adjustment using the tachometer
- Turn on the ignition and watch the tachometer needle.
- A second person must loosen the bolts securing the distributor and turn it.
- When you turn the key in the ignition, the tachometer needle sharply deviates and returns to zero.
- The distributor should remain in the position when the tachometer needle deviates.
- This method of adjusting the ignition timing requires patience, as it is very difficult to adjust the first time.
How to set the ignition on a VAZ 2109 injector
Above we described the process of adjusting carburetor engines. However, there are VAZ modifications equipped with injection power units. How to set the ignition on a VAZ 2109 with such an engine?
First of all, you should pay attention that in the case of injection engines, they do not have a distributor and a Hall sensor. At the same time, the system provides two ignition coils at once, and, accordingly, two switches. The main difference between the injection system and the classic one is that the control signals are generated by a special electronic unit. The operating principle is as follows:
Operating principle of the injection system
Thus, there is simply no need for a distributor, because it is the electronic control unit that determines in which cylinder and at what point in time there should be a spark. Signals from the control unit are supplied to the inputs of the switches, and from them to the ignition coils. One switch is responsible for sparking in the first and third cylinders, and the second - in the second and fourth.
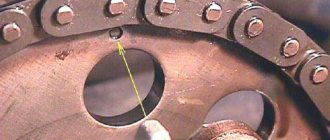
As in the case of engines with a carburetor fuel system, adjustment is carried out according to special technological risks. The ignition marks of the VAZ 2109 injector are shown in the photo below:
Ignition marks VAZ 2109 injector
Please note that it is not possible to configure the injection engine system yourself. The thing is that this operation involves making changes to the software of the microcontroller of the electronic control unit. Of course, each specific microcontroller has its own specific firmware. Moreover, there are also non-standard firmwares, for example, with settings for a sporty driving style.
Only an experienced specialist with certain knowledge can flash an electronic control unit. Therefore, if malfunctions occur in the ignition system of an injection engine, you should seek help from a trusted car service center.
Checking the ignition distributor
By setting the ignition timing during the adjustment process, you make a fixed setting. But the distributor also has the function of adjusting the angle depending on the engine speed. This is done by taking vacuum from the carburetor.
The rod of the distributor vacuum regulator rotates the plate with the Hall sensor mounted on the bearing. At high speeds, the advance angle thus increases. Therefore, you should check the bearing itself for jamming, the vacuum regulator and the hose.
A quick test of functionality involves creating a vacuum with your mouth. In this case, the idle speed should change noticeably.
Verifying that the settings are correct
After we have dealt with the question of how to install the ignition on a VAZ 2109, we will consider the process of checking whether the adjustment work has been carried out correctly.
So, if configured correctly:
- during the process of rapid acceleration of the power plant (when the car is warm), there is no violation of the stability of its operation;
- When the car is moving at a speed of about 50 km/h in fourth speed and during sharp acceleration, there should be a short detonation of the engine. If there is no detonation, ignition is later; if it is present, but does not go through, it is earlier. We make the adjustment by turning the distributor in one direction or another.
Remember that it is often impossible to achieve stable operation of the power unit due to improper operation of the fuel system or even due to low quality gasoline. In this kind of situation, the best way out of it would be to set the carburetor to the most optimal operating mode and then adjust the ignition timing.
Very often, these ignition system malfunctions are caused by a trivial reason - an incorrectly set ignition.
Setting with a light bulb
If you do not have a strobe, then the torque can be adjusted using a conventional control lamp; in particular, you will need a 12-volt lighting source.
How to set the SOP torque using a control light:
- To correctly adjust the torque of the RCD in the Nine with a carburetor engine, you will need to crank the crankshaft until the marks coincide. To turn the crankshaft you will need a special wrench. If the key is missing, you can set the lever on the gearbox to fourth speed, and then manually turn the shaft until the marks match.
- To make the adjustment, you will need to connect the test light to the wire and switchgear with the coil. The second contact from the light source is connected to ground, that is, the vehicle body.
- Next, on the switchgear housing you will need to slightly loosen the bolts that secure it. Then you will need to turn the key in the ignition. If everything is working correctly, the light should light up.
- After completing these steps, you will need to turn the housing of the distribution mechanism; it turns until the light stops burning. After this happens, the distributor housing will need to be turned in the opposite direction. The adjustment procedure stops the moment the lamp starts to light again. When this happens, the distributor no longer needs to be touched; it will be necessary to tighten the bolts that secure it (the author of the video about the implementation of this method is Nail Poroshin).
