- No spark on cylinders 1 and 4 of the VAZ 2114: troubleshooting
- Checking the control unit
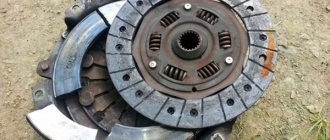
The situation when there is no spark on cylinders 1 and 4 of a VAZ 2114 is not such a rare phenomenon for cars with an injector. The reasons for this phenomenon can be very different, and to find them, you should study the entire electrical ignition circuit.
But first, as in general with ignition problems, you should inspect the spark plugs. Of course, a situation in which two spark plugs fail at the same time is quite unlikely, but it’s worth checking.
No spark VAZ 2114
You should absolutely not check the spark plugs in the “classical” way - for breakdown to the body, as many do on carburetor cars - this way you can damage the electronic control unit.
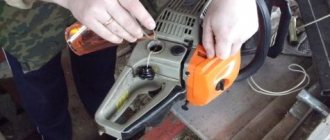
In order to carry out the test, you should use a special spark gap. You can buy it at an auto store (often called a “spark plug tester”) or make it yourself. There are a large number of schemes for this device on the Internet, and the manufacturing process itself will take very little time. There are even spark gaps for testing all four spark plugs at the same time.
Spark plug tester
If the spark plugs turn out to be serviceable, you should proceed to further search for the problem.
Frequent malfunctions of the “fourteenth” and ways to solve them
Every owner of Samara 2 has sooner or later encountered such an unpleasant situation when the car starts poorly or does not start at all. This is a common occurrence for domestic cars; moreover, experts say that the norm is when the car starts the second or third time. If you need to start it 5-6 times, then this is already a problem.
So, if the VAZ 2114 does not start, you need to check several systems that may affect the operation of the engine. The most common reason is a dead battery. In this case, the starter does not work at all. To solve the problem, you just need to charge the battery and check all the terminals.
If the sensor lights up green, it means everything is back to normal. It happens that it is not possible to charge the battery. What to do then? As a rule, in such situations, drivers, if this does not help, then they need to “light up” a random hitchhiker.
If the starter works, but the engine still does not start, then the problem may lie in the temperature of the power unit. It is known from auto mechanics lessons that an internal combustion engine consists of four strokes of the working cycle and two rotations of the crankshaft. At the first stage, the mixture is started, at the second - compression, and at the third - the appearance of a spark.
The last stage is release. If the crankshaft is in working condition and the engine itself has not received serious defects, it does not jam when starting, which means that two problems remain: the condition of the mixture and the spark. That is, spark plugs and carburetor are subject to diagnosis.
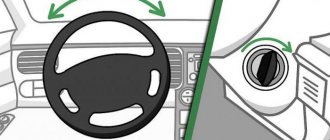
By the way, if there is no spark, then you are faced with one of the most common problems for the “fourteenth”, as for all VAZ cars. To try to start a cooled engine, you need to pull out the tray a little and turn the key. Now you can press the gas pedal, just not too hard. As a rule, after such simple manipulations the motor “comes to life”.
Now you can safely drive to your home or garage, where you can once again carefully check the working condition of the vehicle control system. But it happens that this procedure does not help, in which case there is no doubt: something is wrong with the candles. To check the spark, you need to remove one spark plug and run the starter. Spark plugs do not produce a spark for several reasons:
- a gap has formed between the contacts;
- the capacitor has failed;
- the coil is faulty;
- problems with the distributor.
https://youtube.com/watch?v=-kE3OCc7J7w
Among other things, if there is no spark, you should check the condition of the fuel in the carburetor. It's not difficult to do. You just need to tap the carburetor a little with a wrench, but not over its entire surface, but only at the filler hole.
In addition to the needle, the condition of the fuel pump plays a significant role. Also, sometimes you have to clean clogged injectors, which are especially often clogged due to the fact that the car owner fills the car with low-quality fuel or oil. We answered the question of how to start a cold engine.
When hot, as a rule, the engine starts immediately, but there are always exceptions to the rule. If the power unit does not start when hot, this may indicate that the engine cylinders have a rich mixture. The problem is solved by unscrewing all existing spark plugs and cranking the engine. After removing the spark plugs, you can simply leave the car for half an hour to dry.
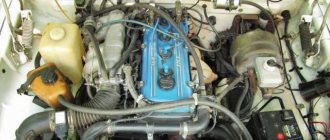
Basic information about the ignition system of a VAZ 2114 car
An injector is a method of guiding a car's engine system. In addition, it is a method of supplying the fuel mixture.
On cars with an injection engine, the fuel mixture is supplied using a computer through special nozzles. Most likely, every car owner has ever encountered a problem when there is no spark on the high voltage wires, but the driver can hear how the fuel pump functions, then pay attention to the ignition system of your vehicle. One of the most common problems with a car's ignition system is that there is simply no spark at high voltage wiring.
During operation of the machine, some malfunctions of electrical components may occur and this may affect the functioning of:
- Instruments, and this does not make it possible to control the ignition system and other components;
- power unit, thereby making it impossible to develop standard power;
- Light fixtures and convenience mechanisms, which include lighting, heating and power windows.
The main breakdowns encountered by the ignition system of a VAZ 2114 car:
- Reduced vehicle power;
- Failure during the development of vehicle engine power;
- Idle speed instability;
- Violation of the normal functioning of the cylinder.
You need to start looking for the cause of malfunctions in the ignition system with the formation of sparks on high voltage wiring.
Sparking process
If you hear the fuel pump operating, but there are no sparks on the high-voltage wiring, then check the functioning of the ignition system. The system is checked for the presence of sparks on high voltage wiring, and for this a special device called a spark gap is used. The use of this device is considered more comfortable, because most injector-type engines use static ignition distribution with simultaneous transmission of high voltage to two spark plugs.
To carry out such a test, you need to connect the spark gap and crank the engine using the starter. If sparks appear only on one of the wires, then the reason is a breakdown at the wire ground or at the coil terminal. Sometimes the reason may be a broken wiring or winding that relates to the car's ignition system module.
If there are no sparks on several wires at the same time in any sequence, then the cause of the malfunction lies in the coil, module or vehicle controller.
Please note that damage may occur due to the fact that the high voltage wiring line is broken. In this case, it is necessary to check the high voltage wiring for integrity, and this can be done by taking measurements of the resistance level of the wiring itself. The standard resistance value on the wiring should be no more than 200 kilo-ohms. It is also worth paying your attention to the fact that there should not be a large difference between the resistance levels of the wiring.
Ignition module on a VAZ 2114 car
If the discharge of sparks from high-voltage wiring has always been stable, this indicates that the cause of malfunctions in the injection engine lies in the spark plugs.
If there are no sparks, then the cause of the malfunction may lie in the primary circuit that runs from the generator to the ignition coil. Most often, the cause is a malfunction of the ignition module, and the easiest way to determine whether this is the cause or not is to establish a properly functioning device. That is, if sparks appeared after replacement, then the problem was in the ignition module, and the instructions for use do not provide for its repair.
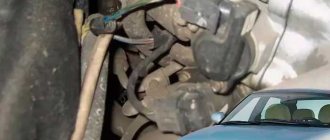
Algorithm for removing and installing the VAZ 2114 injector ignition module:
- Disconnect the negative terminal on the battery or using the ground disconnect button;
- Remove the tip from all candles;
- We bend the clamp, disconnecting the low voltage wiring block of the module;
- Disconnect the high voltage wiring from the module connectors;
- We unscrew the 2 bolts securing the crankcase to the engine using a 13mm wrench;
- We loosen the 3rd bolt together with the head using a 17 wrench;
- Remove the module together with the bracket;
- Unscrew the bolts securing the module to the bracket. They are located under the hexagon;
- Installation occurs in reverse order.
If sparks still do not begin to form, then it is very likely that the reason lies in the controller or the wiring connecting the module and the ignition coil. In this case, you need to check for the presence of sparks on all cylinders one by one, and if there is no spark on one coil, then replace it with the one next to it. If after replacing one coil with another a spark appears, then the reason is a broken coil, otherwise the controller or wiring is broken.
What to do if the engine does not hold speed?
Another problem that often occurs in the VAZ 2114 is that the engine starts, but stalls at speed. The cause is most likely to be found in the battery. Maybe the spark plug is faulty. To check this, you need to remove the spark plug and carefully examine it for damage. Even if there are no visible defects, but there is scale and carbon deposits, the spark plug still needs to be replaced with a new one. This is a part that cannot be repaired, it can only be replaced.
1. Oil pan drain plug. 2. Engine oil pan. 3. Crankshaft. 4. Oil filter. 5. Coolant pump. 6. Exhaust manifold. 7. Piston. 8. Intake pipeline fastening rod. 9. Laying the intake pipe and exhaust manifold. 10. Inlet pipe. 11. Nozzle. 12. Fuel rail. 13. Receiver. 14. Bracket. 15. Cylinder head cover. 16. Camshaft bearing housing. 17. Camshaft. 18. Crankcase ventilation system hose. 19. Valve pusher. 20. Cylinder head. 21. Bolt securing the head to the cylinder block. 22. Valve. 23. Spark plug. 24. Cylinder head gasket. 25. Upper compression ring. 26. Lower compression ring. 27. Oil scraper ring. 28. Piston pin. 29. Fitting for installing the oil dipstick. 30. Connecting rod. 31. Flywheel. 32. Cylinder block. 33. Oil pan gasket. 34. Oil dipstick. 35. Oil intake
It is inexpensive; for the fourteenth model, the price of a set of candles is about 500 rubles. But how do you know if the spark plug is working? A good candle always has a slight brick tint. It must be dry. If the spark plug darkens, it means it has burned out and must be replaced. If it's wet, it means it's flooded. There is no need for replacement, just dry and blow out the part.
Purge occurs when the engine is idling with the spark plugs removed. If the Lada has an injector, then you will have to work longer, also inspecting the fuel system, which is directly related to the operation of the power unit. The injectors are also subject to careful inspection. In winter, there are times when the candle just freezes.
This is not scary, it can be warmed up, cleaned and put back in place, then the engine will start working again. In this matter, such a point as normal fuel supply is also important. If the fuel mixture becomes depleted or, conversely, enriched, this, in turn, causes a serious malfunction, which ultimately affects the operation of the engine.
Pressure also plays an important role. A faulty pressure sensor is involved here too. If its readings are incorrect, it transmits erroneous information to the fuel system, which, in turn, does not supply the required amount of fuel. This creates the problem of a “lean” or “rich” mixture.
https://youtube.com/watch?v=KaBtmIu9P9o
Sources
- https://zapchasti.expert/reshenie-problem/ne-zavoditsya/ne-zavoditsya-vaz-2114.html
- https://remontvazov.com/ne-zavoditsya-vaz-2114
- https://NaDomkrat.ru/ustroistvo-avtomobiley/dvigatel/ne-zavoditsya-vaz-2114
- https://fastmb.ru/autoremont/2257-pochemu-ne-zavoditsya-vaz-2114.html
- https://ladaautos.ru/vaz-2114/pochemu-vaz-2114-ne-zavoditsya-starter-krutit-i-chto-delat.html
- https://expertVAZ.ru/2114/zavoditsya-prichina.html
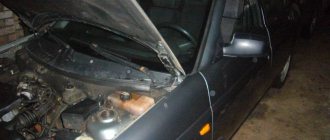
VAZ 2114 does not start reasons
Factors that influence indirectly or directly on the formation of causes are varied and are expressed mainly by signs of malfunctions of two machine systems:
- fuel (manifests itself in the fact that 2114 does not start, stalls while driving and does not start);
- ignition system electrician.
In addition to common reasons, there are those that require expensive repairs, these include:
- engine malfunction;
- broken timing belt.
Repairing a carburetor type is cheaper and easier than an injection type.
VAZ 2114 injection type 8 valves does not start due to:
- clogged injectors;
- refueling with low-quality gasoline;
- decreasing the pressure level in the ramp.
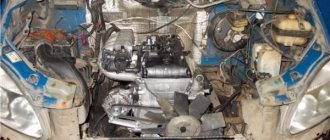
Why doesn't the engine start?
Difficulties with starting or its impossibility can arise for a variety of reasons. The culprits should be looked for in the following devices:
- Fuel system malfunctions for all types of engines;
- Problems in the electrical equipment of the machine.
It should also be taken into account that starting the engine in cold weather is significantly different from carrying out this operation at above-zero temperatures. We will not touch upon problems with the battery and starter; we will assume that everything is in order with them, so we will focus only on the problems of the power unit.
Why there is no spark on the VAZ-2110 injector 8 valves: reasons
All possible malfunctions can be divided into three large groups: fuel system breakdowns, electrical malfunctions and global malfunctions. An inexperienced car enthusiast with any problem with ignition makes a verdict: “No spark.” On the VAZ-2110 car, different engines are installed, for example, an 8-valve injector. Let's talk about the problems that are inherent in such a system.
Possible breakdowns by group
Modern cars are equipped with a large number of auxiliary components and sensors that make the driver’s life easier and at the same time make repair work more complex. The electronic injector uses several sensors at once, which can cause a lack of spark in the ignition. But the matter is not limited to them; there are several groups of breakdowns:
- Problems with the fuel system. This group includes malfunctions in which fuel does not enter the engine, its supply occurs with malfunctions, or other errors occur.
- Malfunctions in the electrical part are among the most common on the VAZ-2110 injector. In the event of such breakdowns, an electrical signal is not supplied to the spark plugs and, accordingly, the fuel mixture does not ignite.
- Global breakdowns include engine failure, bent valves, and broken timing belts. We will not dwell on such cases in detail, since they require more complex repairs.
No spark on cylinders 1 and 4 of the VAZ 2114: troubleshooting
The situation when there is no spark on cylinders 1 and 4 of a VAZ 2114 is not such a rare phenomenon for cars with an injector. The reasons for this phenomenon can be very different, and to find them, you should study the entire electrical ignition circuit.
But first, as in general with ignition problems, you should inspect the spark plugs. Of course, a situation in which two spark plugs fail at the same time is quite unlikely, but it’s worth checking.
You should absolutely not check the spark plugs in the “classical” way - for breakdown to the body, as many do on carburetor cars - this way you can damage the electronic control unit.
In order to carry out the test, you should use a special spark gap. You can buy it at an auto store (often called a “spark plug tester”) or make it yourself. There are a large number of schemes for this device on the Internet, and the manufacturing process itself will take very little time. There are even spark gaps for testing all four spark plugs at the same time.
If the spark plugs turn out to be serviceable, you should proceed to further search for the problem.
The main reasons why there may be no spark
- First of all, make sure that there is no dust, dirt, oil stains, etc. on the ignition system elements. If any of the above is present, take a rag and wipe everything thoroughly, or blow it out with compressed air, and then try to check the spark again and start the engine.
- The spark plugs are faulty (“flooded”, insulator burst, breakdown, etc.). Check the spark plugs individually and make sure there really is no spark. If there is no spark on all the spark plugs, then the reason is most likely not in the spark plugs, but in the coil or, for example, the starter. Read: how to check the starter here. If there is a spark, but it is weak or yellow, check the coil or BB wires.
- The problem is in high voltage wires (HV wires). This could be a break, a ground fault, or poor contact. Carry out a detailed inspection of the explosive wires, make sure that there are no cracks or fractures on their surface. Move the wires and try to start the engine, if the engine starts or at least tries, most likely the reason lies in the wires. Details on how to check BB wires.
- Malfunction of the ignition module or ignition coil. How to check the ignition coil read here.
- The crankshaft sensor has failed, read here how to check.
- The problem is in the switch, distributor, incorrect clearance, burnt contacts.
- There is no contact on the ground wire or it is very bad.
- ECU malfunctions.
Causes of spark loss
Before checking the spark on your injection or carburetor engine, you need to figure out why this spark may disappear and where you should look first, trying not to damage the engine itself.
Depending on the specific type of internal combustion engine used in a car, there are several main factors that cause the lack of a high-quality working spark in the spark plugs. But often this is directly related to:
- discharged battery;
- damaged or failed spark plugs;
- filling spark plugs with fuel or oil;
- faulty module, coil or switch;
- poor contact of the insulation itself or damage to some high-voltage wires;
- faulty crankshaft position sensor;
- a failed distributor;
- poor quality of contact with ground;
- problems directly in the low voltage circuit itself;
- faulty control electronic unit.
Experienced motorists advise starting the check with the most banal, but at the same time quite common reason. Namely from the battery. The battery could simply be discharged, making it impossible to start the engine.
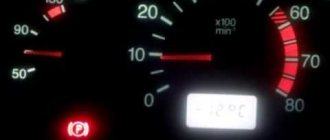
If, when you turn the key in the ignition, you see the icons on the dashboard shining very dimly, then the battery is probably dead. Solving such a problem is not difficult. If the battery is drained, it will need to be charged or completely replaced with a new battery.
Also, a problem with the operation of the system may lie in terminals that are oxidized or corroded. It is necessary to clean them, tighten them tightly and treat them with high-quality graphite lubricant. This treatment will prevent re-oxidation.
Checking the control unit
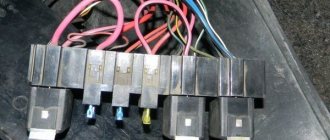
If the VAZ 2114 does not have a spark in cylinders 1 and 4, and the spark plugs, armored wires and ignition module are working properly, then the last reason remains - a breakdown in the electronic control unit. This is easy to check - just connect to the unit using a light bulb with two wires. If the light blinks periodically, then the unit is working; if not, then the problem lies with it.
In this case, you should disconnect the unit, open its case and remove the board, then carefully inspect it. Very often the breakdown of this device is the burnout of the transistors (they look like the largest electronic components with three legs). If one of them looks burnt, it should be replaced.
For this you will need:
- tester;
- soldering station or hair dryer;
- tweezers (preferably with ceramic tips);
- low-melting solder.
First you need to check the transistor using a multimeter. If it shows no signal, then the element will need to be unsoldered, and in its place soldered a new one - similar or similar in its properties (transistors can be purchased in stores for radio amateurs or ordered from China, for example, from Ali. In the latter case, they will cost less than 15 rubles).
Transistors should be desoldered and soldered using a soldering station or a single hair dryer, since they are made in chip design
If soldering is carried out with a soldering iron, then it should be done extremely carefully and using low-melting solders
After the transistor is replaced, the electronic unit will need to be assembled and installed in place, and then try to start the car. If all 4 cylinders work properly, then the problem has been resolved; if not, then you should continue your search and check all other electronic components of the device with a tester. If additional parts are found to be faulty, they should also be re-soldered.
If such a check does not show results or the task of finding burnt elements turns out to be too difficult, you will need to replace the unit with a new one - similar or similar in characteristics.
True, if an immobilizer is installed on the car, then the burnt-out unit should be replaced exclusively with exactly the same one (installing even a close analogue will lead to the fact that the car simply will not start).
Main reasons and methods for solving them
Healthy! Maybe you are lucky and resetting the injector errors will help. To do this, you first need to remove the negative terminal from the battery. If after 5-10 minutes the car starts as well, then this is not the problem.
Difficulty starting the engine is influenced by a number of simple reasons, which you can eliminate yourself in the garage, having a standard set of tools with you.
Starter mechanisms (brushes, bendix)
In the process of rebuilding the starter. The arrow indicates worn brushes.
- On used cars, the brushes on the starter wear out. In this case, you need to remove the cover and replace them with new ones;
- A starter that has been in use for a long time can be sorted out, cleaned all the mechanisms, washed with WD-40 and filled with new lithol, since the old one is most likely coked and formed into balls;
Fuel problems
In the process of replacing the fuel pump grid. On the right is the old one, and on the left is the new coarse mesh
Small particles of debris getting into the gas tank. This problem is treated by cleaning the fuel system and replacing the filter.
Incorrect sensor readings
Failure or incorrect signal supply from the sensors to the ECU (their diagnostics are required, and if a malfunction is detected, replacement with new ones):
- Speed sensor.
- Crankshaft position sensor.
- Idle speed sensor.
- Phase sensor.
Wires, filter and spark plugs
Clogged air filter
- High-voltage wires are broken, poor contact on the tips (oxidation). During a visual inspection, it is rarely determined whether the best option is to replace it with new or known good ones. Before replacing, you can clean (blow out) the contacts on the old wires.
- The spark plugs are flooded, mechanically damaged, or the gap is set incorrectly. If necessary, the following is done: new ones are screwed in, the required gap is set, or the old ones are returned to their place.
- The air filter is clogged, causing the air supply to the engine combustion chamber to deteriorate. It is recommended to replace with a new one.
Gasoline pump
The fuel pump does not provide the required pressure, which is why the injectors do not spray fuel, but simply splash it. In order to discard this option, you need to measure the fuel pressure with a pressure gauge (the nominal one should correspond to the norm of 3.2 bar).
If the result is different, the situation requires replacing the fuel pump.
Engine failure
Reduced compression in the cylinders is one of the most terrible situations for a car owner. In this case, flammable gases enter the crankcase, and new vapors do not ignite.
In this situation, replacement of the piston rings is required, and perhaps a major overhaul of the engine.
Sources
How to save 20% fuel?
This thing really saves 10-30% on gasoline. You simply install this device on the fuel supply hose and...
My homemade adapter is used. Let's connect to the brains...* The loader used is this one - CombiLoader, this version is like this. I downloaded the firmware for myself, I’ll read why this firmware is cool. Maybe people saw it that way according to the version, I don’t know. Usually, when I repair a car, I use standard water and there are no more problems. And then all sorts of Sports, Economy and others - you won’t understand later that it* works so poorly. I'll show you the results.
I deceived you, unfortunately, I won’t show you how the problem was solved. And the problem was quite interesting. It seems that, based on the first signs, the crankshaft sensor was alive, one might say “conditionally alive”, because when the crankshaft rotated, the fuel pump turned on again and I, as it were, temporarily got rid of this problem. But, as it turned out later, the car had recently been repaired, the head was removed, and inexperienced mechanics laid a wire leading to the crankshaft position sensor near the exhaust manifold.
The wire melted and one of the wires shorted to the braid. For those who don’t know, there is a shielded cable in which two wires are laid. Surprisingly, the brain recognized the pulse in this position and turned on the actuator, that is, the fuel pump relay was turned on, but, accordingly, the engine control unit* was unable to calculate the position of the top dead center, or calculate the position of the pulses. I noticed it purely by chance (I was already freezing, I had no time for filming), just moving the wire near the crankshaft position sensor.
I took it off, checked the sensor - the sensor seemed to start* correctly. Pulling the wire, rotating the starter, the engine began to seize. At this point it became clear that the problem was with the wiring, and after looking carefully at the wire, I saw that it was burnt out. I cut out the damaged area, connected it - and the car started up perfectly and drove away*. It was already dark, I wanted to go home, so there was no time for filming. Nevertheless, I am reporting on the results and a little bit (about) my technique, which I talked about a little earlier in the video, about how to find a spark - the sensor can turn on the pump and at the same time not give a spark - a very interesting case came across. I think you'll take note.
There is no spark, but the starter turns
In the VAZ 2110, the ignition module is considered a problem area. You can check it if you find a working device from friends and install it on your car. If the problem is with the module, then after the steps described earlier, the engine should start without problems.
Power may not be supplied to the chip connected to the module. If this is present, it is worth checking the entire power supply system.
DPCV may be the cause of the loss of spark. This sensor is considered the main one in the entire ignition system and helps monitor the operation of the cylinders. You can check the operating status of this unit with an oscilloscope.
It is impossible to independently determine whether this module is in working condition. Perhaps the best solution is to replace the sensor.
The ECU may also be to blame for failures, which leads to the fact that there is no spark in the injector of 8 valves of the VAZ-2110. If this module does not work correctly, then the spark may not flow to all cylinders. Repairing this device is simple.
There may be no spark due to oxide on the contacts. It should be removed.
Causes
Why doesn't the VAZ 2110 start? This may be due to a malfunction:
- Fuel pump
- Crankshaft and camshaft sensors
- Spark plugs
- Ignition coils.
The reasons have been discussed, but how to eliminate them? More on this below.
Fuel pump
If the battery is charged and in good condition, but the engine is difficult to start, then you should start checking with the fuel pump. If it stops working, then the engine does not receive gasoline in the required quantity, so starting is impossible.
To make sure of this, you need to check the spark at the spark plugs. If there is a spark, then the problem should be resolved after replacing the fuel pump.
The fuel pump is replaced as follows:
You need to disconnect the negative terminal of the battery.
2. Then unscrew the fuel pump cap.
3. The next step is to remove the connectors from the pump.
4. Now there is free access to the device. It is necessary to loosen the fuel line clamp.
5. At this stage you will need a key. Here you need to unscrew the lines, but before doing this, release the pressure. After dismantling, it is also recommended to replace the O-rings on the fuel lines
6. Unscrew the 8 screws of the sealing cover and then remove it.
7. Now you need to remove the faulty fuel pump and install a new one in the reverse order.
Doesn't start when the engine is warm
If the VAZ 2110 doesn’t start well when it’s hot, then the problem is most likely related to the injectors. To check, you must try to start the engine. If the starter turns, the fuel pump is working properly, and the spark plugs are flooded, then the injectors are clogged. They need to be washed. However, you need to remove the injectors first. Here are the instructions:
- First you need to remove the injectors. To do this, wait until the engine cools down, then disconnect the fuel pump connectors;
- Start the engine and repeat until there is no reaction to turning the key. This way you can reduce the pressure in the power system;
- Remove the negative terminal from the battery, and you also need to disconnect the pipes and connectors from the ramp;
- Remove the intake manifold along with the throttle valve and pipe;
- Now you can begin to remove the fuel rail along with the injectors;
- You need to disconnect the mounting brackets from it and remove the injectors.
- The first step is to remove the rubber rings. Then it is best to install new ones in their place;
- Now you need to clean the nozzles, as well as the funnel-shaped surfaces;
- Next, you need to simulate the operation of the injectors in the engine by connecting 2 wires from the battery to them, as well as a button;
- To wash the injectors, you need to prepare a cleaning liquid that can be poured into a carburetor cleaning bottle. It must be connected to the nozzles as tightly and hermetically as possible;
- Now you need to apply the cleaning agent and at the same time press the button. This should be continued until the liquid comes out evenly from the sprayer. After this, the process can be considered complete.
A cold engine will not start
What to do if a cold VAZ 2110 has trouble starting? If at the same time the starter turns, the battery is in good condition, but starting still does not occur, then you need to pay attention to the spark plugs. What to do? The spark plugs need to be unscrewed, and then the new ones need to be heated and installed.
After this, start the engine. If it starts, the problem was faulty spark plugs. If the problem does not go away, then you need to contact a service station, since such a malfunction cannot be eliminated on your own. Need diagnostics
What to do? The spark plugs need to be unscrewed, and then new ones need to be heated and installed. After this, start the engine. If it starts, the problem was faulty spark plugs. If the problem does not go away, then you need to contact a service station, since such a malfunction cannot be eliminated on your own. Need diagnostics.
The engine starts and stalls
Some owners of the VAZ 2110 8-valve injector also encounter such a problem that the engine starts and immediately stalls. In this case, as a rule, a light on the instrument panel with an exclamation mark lights up. This indicates that the starter needs to be replaced as it has become unusable.
- For ease of dismantling, it is best to remove the air filter housing, and you must also disconnect the negative terminal from the battery;
- Now there is free access to the starter. On it you need to disconnect the traction relay connector
- Using a 13mm wrench, you need to unscrew the wire from the positive terminal of the starter, and then disconnect the wire
Source
No spark? We are looking for reasons!
In personal practice, I had several cases that were accompanied by a loss of spark, and below I will cite them and talk about each in more detail.
Again, I will make a reservation that this is not a complete list of all the problems that can cause it, but I will try to list most of them. For experienced owners, you can supplement your thoughts by
One of the spark plugs is faulty
If, when checking a spark plug, a spark does not appear between the electrodes, then the first thing to do is check the spark plug itself. It is possible that this was the cause of this problem.
Take a working spark plug (it’s better to always carry a spare one with you) and crank it a little with the starter, looking at the performance of the spark plug. If a spark appears, great; if not, you should look for the cause further.
Also, you can see the problems that cause the spark to disappear here: https://atlib.ru/blog/164-net-iskry
Failure of high-voltage spark plug wires or the central wire of the ignition coil
If there is no spark on any one cylinder, then try swapping the high-voltage wires. If after this the operation of the previous cylinder was restored, but the other cylinder, on the contrary, stopped working, this indicates a failure of the spark plug wire.
If a spark does not reach any of the VAZ 2106 spark plugs, then you should check the integrity and functionality of the central wire, in a similar way as in the last paragraph. Also, you should just try to stick the wire harder into the coil and the distributor cover, maybe the wire has just jumped out a little in one of these places and there is no necessary contact.
The contacts in the distributor are burnt or completely out of order
Open the distributor cover and carefully inspect the contacts. They could burn out and cause the spark to disappear. Also, check them for integrity.
And one more important point: with the distributor cover open, turn the starter and see if the contacts open? If not, you need to adjust the gap between the contacts.
If you are convinced that everything is fine at this stage, then you should pay attention to the next element
Malfunction of the ignition coil of VAZ 2106
If there is no spark even at the contacts, then there is a high probability that it is the ignition coil that has burned out. You can check it either with an ohmmeter, measuring the resistance, or by installing a new one and see if that fixes the problem!
Failure of the switch or hall sensor
This item applies to owners of a VAZ 2106 with electronic ignition. If there is no spark, then these two elements can cause this disaster. It is necessary to diagnose the malfunction of these parts and replace them with new ones if necessary.
If you have a BSC installed on your VAZ 2106, then you can carry a hall sensor with you in reserve, which is the most common cause of malfunction. Or, as a last resort, do as I did, carefully fold the old contact ignition kit and let it lie in the trunk. It doesn’t take up much space, but somewhere on the road it can really help you out if one of the BSZ elements burns out!
The first problem is that the starter turns, but does not engage
Let's consider the following situation when the VAZ-2114 does not start, but the starter continues to turn. You should also take into account the nuance that the starter still does not engage. The mechanism of the problem is as follows:
- the key is inserted into the ignition;
- the fuel pump pumped up the fuel mixture;
- during the ignition startup process, the starter turns in idle mode (experts call this process “the starter does not catch”).
Experienced motorists note that a similar situation occurs in VAZs with high mileage, so we can talk about wear of either the starter itself or its parts. So, most often the overrunning clutch or “Bendix” suffers; the main element here is the gear. It is this overrunning clutch gear that causes a lot of trouble, because its teeth are often subject to wear. The mechanism of the malfunction appears as follows:
- the driver turns the key;
- the starter starts to spin;
- The overrunning clutch gear cannot engage the engine due to tooth wear.
Even in the starter, its gearbox may fail. This problem is less common than the previous one. This gearbox includes several types of gears, which are also subject to wear due to the long life of the vehicle. There are five gears in total:
- one small;
- three satellite gears;
- one large one, attached directly to the gearbox housing and engaged with the satellites.
Even an experienced specialist will not immediately say in which of the named parts the gear teeth have worn out. To do this, you will have to remove the starter and disassemble it to inspect all the components.
No spark VAZ (injector, 8 valves)
The other day, out of the blue, the car (Kalina 1.6, 8 valves) began to shake terribly. Diagnostics showed misfires in cylinders 1 and 4. After a little checking (see how to check correctly here), I came to the conclusion that there was no spark. And only in cylinders 1-4.
Next, in order to find out the reason for the loss of spark, I will go in order.
The first thing to check is the spark plugs. The spark plug looked normal, so I didn’t have much hope that replacing it would fix the situation. And so it happened - the new spark plug still refused to produce a spark.
The second is checking high-voltage wires. They are checked with a conventional multimeter in resistance measurement mode. The resistance should be within 15 kOhm. The wires also turned out to be fine.
Third, and probably most important, is the ignition coil. She, like no one else, is responsible for the spark. Its operability is also checked with a multimeter in continuity and resistance measurement mode. First you need to check the resistance between pins 1-4 and 2-3. It should be about 4 kOhm. If the tester shows infinity, then the coil is broken and must be completely replaced. Next, check the resistance between pins 1a and 1b. There shouldn't be a break here. And the last thing is to check the central contact for breakdown to the housing. The tester should show infinity.
My reel passed the test perfectly. It seems that all the main parts are working properly, so why is there no spark? After digging a little on the Internet, I realized that I still need to check the circuit from the ECU to the coil itself.
A 3-pin chip is placed on the ignition coil, therefore you need to check these 3 wires. The central contact is +12V, which is constantly supplied when the ignition is on. The extreme contacts - 1a and 1b - provide a control signal (negative) at the moment when a spark is needed. How can all this be checked? Very simple - using a regular light bulb.
You need a lamp with a power of 1-2 W or an LED with an additional resistance of 500-700 Ohms.
We connect the lamp to the central terminal and contact 1a and ask a partner to crank the engine a little (first remove the fuel pump fuse and relieve the pressure in the rail). When cranking the starter, the lamp should flash. The same procedure must be done with pin 1b - the lamp should also blink.
When I turned on the ignition, the lamp started to light up, just constantly on (pin 1b and central). This means that the control wire has a short to ground somewhere or that the transistor (VT1) in the ECU is broken. To find out, we need to find the ECU, disconnect the wiring harness from it, find the wires we need (1b) and test them for integrity.
Having found the contact diagram, I found out that contact 1b goes to pin 5 of the ECU, 1a goes to pin 2, 3 goes to ground of the ignition circuit. I rang them for integrity - they were all intact. I called ground and everything is fine too. Therefore, you need to check the transistor in the controller itself.
My car has a January 7.2 controller. Inside there are 2 transistors that pass control signals to pins 1a and 1b of the ignition coil. So one of these transistors was broken, i.e. was constantly in the open position.
How to check the transistor for serviceability? It has 3 pins - 2 of which are soldered. It is necessary to ring each outer terminal with the central one. In both cases, the tester should not beep. The contacts must not be closed.
Now all that’s left to do is to unsolder the broken transistor (its marking is gb10nb37lz), solder a new one in its place and rejoice at the spark that appears.
What to do if there is no spark?
If there is no spark, check for the presence of a “plus” terminal of the coil when the ignition key is turned on. This can be done using a multimeter, setting it to measure direct voltage (DC).
If there is voltage, the problem is related to the coil trigger circuit (crankshaft position sensor, ignition module, wires, etc.).
If there is no voltage on the coil, there is a problem in the power circuit (ignition key, wires, connections).
If voltage is being applied to the coil, the problem could be a bad high voltage output wire from the coil to the distributor, hairline cracks in the coil cap, or cracks or carbon tracks inside the distributor cap or on the runner.
Using the Scanner
If you have a scan tool, connect it to the vehicle's diagnostic connector and watch the RPM signal when you start the engine. No signal? The problem is poor operation of the ignition distributor signal sensor (on engines with a distributor), a malfunction of the distributor drive mechanism (usually for plastic gears), a malfunction of the ignition distributor (on engines without a distributor), a wiring malfunction (break, short circuit, oxidation of contacts).
If the Check Engine Light comes on, use a scan tool to read ignition-related trouble codes. Any codes related to the coil (P0351 − P0358) will require a coil test. Misfire codes indicate that the spark plugs and/or spark plug wires need to be checked.
Checking the ignition coil
The ignition coils in DIS (Distributorless Ignition System) ignition systems function in the same way as in conventional ignition systems, so the tests are essentially the same.
But symptoms caused by a weak or faulty coil will be limited to one or two cylinders in a DIS ignition system, rather than all cylinders in an engine with a distributor and one coil.
Most DIS starting problems are caused by a bad crankshaft position sensor. Many DIS systems use "idle spark", where one coil ignites two spark plugs that are placed opposite each other in firing order. Others, including newer coil-on-wire systems, have a separate coil for each spark plug.
Individual DIS coils are tested essentially the same as epoxy filled (square type). First disconnect all wires. Set the multimeter to resistance measurement mode in the lowest range. Connect the device to the primary terminals of the ignition coil and compare the resistance of the primary winding with the data in the specification (usually less than 2 ohms).
Then connect the multimeter to the secondary winding and compare the readings with the rating data (usually 6000–30,000 Ohms). If the readings are outside the specified range, the coil is faulty and needs to be replaced.
If measuring the DIS coil secondary resistance is difficult due to location, try disconnecting the spark plug wires and measuring the secondary resistance through the wire plugs rather than the coil terminals. Just remember to add a maximum of 8000 ohms of wire resistance to your readings.
Troubleshooting
The reasons why cylinders 1 and 4 of the VAZ 2114 do not work may be:
- Candles.
- Wires.
- Ignition module.
- Control block.
We talked about how to check the spark plugs above, so let's move on to the wires. To check, you will need a tester (multimeter), with which you should check all high-voltage wires (you should measure in ohmmeter mode).
The resistance of all four wires should be approximately the same and not exceed 200 kOhm. If the resistance is significantly higher than specified or the resistance of some wires is very different from the resistance of others, then they should be replaced with similar ones.
If the wires are in good condition, we proceed to checking the module.
To check it, you should use a self-diagnostic scanner connected to a laptop or smartphone (the connection can be via Bluetooth, Wi-Fi, or a USB cable).
The scanner displays the test results on the screen of the mobile device using standardized codes.
The most common of them (indicating that the ignition module is damaged) are the following:
- P3000, P3001, P3002, P3003, P3004 - no spark in the cylinders (the last digit is equal to the cylinder number). In our case there should be signals P3001 and P3004;
- P0351 - a rupture occurred inside the ignition module on the windings responsible for cylinders 1 and 4;
- P0352 - the same thing, but the break occurred on the windings of cylinders 2 and 3.
If the above errors are detected as a result of the scan, then the module is burnt out and should be replaced with a new one (since it is not a repairable component).
Troubleshooting
Since trouble has affected you, you don’t need to rush headlong to the service center and pay unknown amounts of money for diagnostics and repairs. You can repair your car yourself and save a lot of money. Let's figure out why there is no spark from the ignition coil, and find out why it could disappear and how to solve this problem.
The first step is to inspect the coil very carefully for any mechanical damage, as well as various stains that could cause a loss of high voltage.
If there are stains, they should be wiped off with a dry cloth. Inspect all contacts and wires; they should not be wet or have any damage. After this, try to move the high-voltage wires and then start the car. If after such manipulations the car does not start, then you need to carry out more in-depth diagnostics.
You need to check the performance of the spark plugs. To make sure that the spark plugs are working correctly, you can do the following: you need to remove two high-voltage wires from the distributor cap and place them near the car engine at a distance of seven millimeters. So, if, when starting the starter, a blue spark appears at this distance, this means that the system is working, and if its color is not blue or is not there at all, then you need to repair it or replace it with a new one.
The coil is checked using the same method as spark plugs. We take the wire going from it to the distributor and bring it to the engine ground, after which we start the car’s ignition. If you don't see a spark, the real reason the car is stopping is the inductor. Next you need to check it with an ohmmeter. In this way we will check for an open circuit on the primary and secondary windings. If there is no gap, then the ohmmeter will show three Ohms on the primary and seven thousand Ohms on the secondary windings. If the data is less, you should replace the ignition coil with a new one.
When diagnosing, it is also advisable to check each wiring and contact. It is necessary to inspect both the wires and their insulation; perhaps it is in these areas that the fault is “settled”. You need to untangle the wires if they are tangled by laying them out correctly. Using an ammeter, you need to check the presence of current in the circuit and its strength. To do this, you need to connect the distributor wires and start the car ignition.
In the case when the current strength is much less than the standard (it is indicated for each car separately in the PTS), it means there is a break in the coil, which could appear as a result of a short circuit. Very often the ignition coil sparks and thus breaks down when the ignition is on and the engine is off. As a result, the insulation on the wires begins to heat up, which eventually cracks and crumbles. The moment the bare wires come into contact, a short circuit occurs.
So, when the true problem of breakdown is identified, it needs to be reinstalled or purchased a new one and replaced. Those mechanisms that have minor cracks and scratches are subject to repair. Such damage can be removed by stripping or gluing with a special substance. The coil is replaced only with the same one, with the same characteristics.
When connecting a new coil you need to be very careful and careful
It is very important not to mix up the wires. Otherwise, the wires will be connected incorrectly, which will cause them to heat up and cause a short circuit.
To prevent premature breakdowns from happening to your car, monitor its operation and its component mechanisms. Otherwise, you may pay for your negligence. Good luck with your car repair.
Fuel pressure control
The regulator consists of a membrane and a spring. During a malfunction, it may hang open and because of this, the fuel pressure in the system will not be enough for the engine to operate correctly and to start it, so the engine stalls when cold.
To check the functionality of the valve, it is not enough to simply remove the hose from the pump and see how strong the gasoline pressure is. Diagnostics must be carried out with a pressure gauge. There is a special connector for it on the fuel rail. We connect the device and try to start the engine. If the pressure in the system is below 3.6-4.0 atm, this is an indicator of a problem in the fuel supply system.
It is better to replace the pressure regulator in a special service, but if you want to do this process yourself, then follow the instructions:
- Disconnect the battery terminal;
- Remove the hose from the vacuum brake booster;
- Drain gasoline from the system;
- After this, start disconnecting the fuel rail from the pressure regulator.
- Replace and install everything in place.
If all work is performed correctly, the fault in this part of the system will be eliminated.