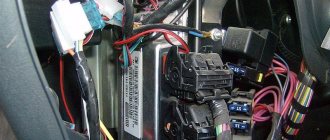
Engine sensors on the Lada Granta help ensure the functioning of each of the systems; they are responsible for monitoring, retrieving and transmitting data to the engine control system (ECU). The failure of any sensor causes the system to store an error code, and the Check Engine lights up on the dashboard.
Photo: AVTOVAZ
Each Granta is equipped with an engine produced at the Volzhsky Automobile Plant. In addition, each car is equipped with an ECU; it includes a large number of sensors, the data from which comes to the controller. Based on the information received, the system makes a decision on further control of the actuators. Consequently, the operation of the motor is directly dependent on the operation of the sensors, and the breakdown of at least one of them will inevitably lead to a drop in the efficiency of the motor, entailing a whole list of negative consequences. Let's talk about each of them in more detail.
Coolant temperature sensor
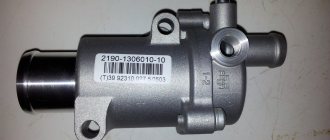
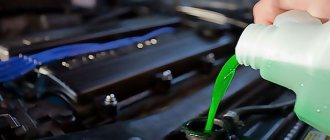
The main functions of this part include measuring and monitoring the temperature of the coolant in the engine cooling system. Based on the data provided by the DTOZH, the ECU corrects the frequency at which the crankshaft rotates, and the system also corrects the ignition timing and the composition of the air-fuel mixture. Thus, this element must ensure rapid heating of the motor when it starts, and it is also responsible for maintaining the temperature required for each operating mode.
In general, the DTOZH is not prone to breakdowns, but sometimes it can provide incorrect information. Install them on the thermostat covers.
DTOZH are thermistors that have negative temperature coefficients; their resistance level becomes lower as the temperature increases. Thanks to the controller, the DTOZH receives a stabilized voltage; after it drops, the element calculates the coolant temperature. The ECU will alert the car owner if any of its circuits are broken, then the controller will activate the cooling system fan. Temperature readings in such cases are calculated using a workaround algorithm.
The sensor influences the starting of the motor and its subsequent operation. The car owner will learn about its possible breakdown by noting the presence of the following symptoms:
- problems when starting the engine in cold weather;
- exceeding fuel consumption standards;
- poor exhaust from a still unheated engine;
- periodic malfunctions in the functioning of the cooling system, in particular during fan operation.
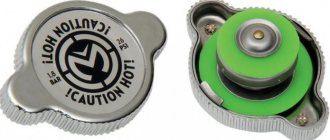
Why does coolant boil?
Sometimes you can see a car standing on the side of the road with the hood raised, from under which steam is pouring out. This is the result of a failure of the Lada Granta temperature sensor. The device provided incorrect information to the electronic control unit (ECU), and the ventilation system was unable to operate in time, which is why the antifreeze began to boil.
If the coolant temperature sensor (DTOZh) on the Lada Granta is faulty, the antifreeze may boil for several reasons:
- Loose timing belt.
- Destruction of the pump bearing.
- Thermostat failure.
- Antifreeze leak.
Loose timing belt
The belt tension may become weak due to the exhaustion of its running life or poor manufacturing quality. The belt begins to slide along the teeth of the pump drive gear. The speed of movement of antifreeze in the radiator drops, and the temperature sharply “flies” upward. The belt is tightened or replaced with a new product.
Timing belt:
Pump bearing failure
The consequence of a failure of the coolant pump bearing is that the pump begins to jam. Antifreeze stops moving inside the large cooling system circuit on the Grant, and the liquid, quickly heating up, reaches the boiling point of 100 ° C. The pump is urgently dismantled and replaced with a new pump.
Water pump:
Thermostat failure
Over time, the device may exhaust its resource, and the valve stops working when the antifreeze heats up. As a result, antifreeze cannot circulate in a large circuit and pass through the radiator. The liquid, remaining in the engine jacket, quickly heats up and boils. The thermostat needs urgent replacement.
Thermostat:
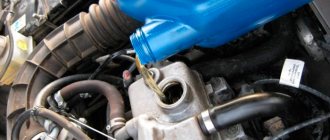
Antifreeze leak
This can happen due to leakage in the connections of the cooling system pipes, damage to the radiator, expansion tank and pump. A low antifreeze level can be seen by the marks on the expansion tank. This will also be noticeable by how quickly the needle moves or the temperature values change on the instrument panel interface. You need to add fluid to the required level and go to the garage or service station.
Expansion tank:
Knock sensor
The main tasks of this element include the determination of high-frequency oscillations resulting from fuel combustion in the cylinder block.
Based on the DD signal, the control system selects the most suitable ignition timing angle, thanks to which efficient and complete combustion of fuel is achieved in the cylinder block of the car engine. In addition, the ignition timing is also regulated, which is important when using fuel with different octane numbers. This element is located directly on the cylinder block (more precisely, between the second and third cylinders).
Operating a vehicle may lead to malfunctions, for example, the engine may lose power. This symptom indicates that there are obvious problems with the knock sensor. The presence of a malfunction is indicated by the illuminated “Check Engine” lamp, and diagnostics almost always reveal one of the following errors:
- P0325 – signals that the DD circuit has broken;
- P0327 – the level of the signal received from the device is very low;
- P0328 – the signal supplied by the element is too high.
Crankshaft position sensor
DPKV is responsible for providing the control system with information about the frequency with which the crankshaft rotates and its angular position. Based on this data, the ECU calculates the phase and duration of the pulses responsible for controlling the injectors and controlling the ignition coil. When reading information, the element sends the received data to the controller, whose task is to process it and issue the necessary pulses to the injectors.
The crankshaft position sensor is located near the oil filter.
The unit is highly reliable in operation and durable, and therefore its breakdowns occur infrequently. This is also due to the fact that the DPKV contains no mechanical moving parts.
The most common cause of its malfunction is corroded wiring. Failure of a part entails significant problems for the normal functioning of the engine; if repairs cannot be made, the unit will need to be replaced.
A breakdown of the crankshaft position sensor prevents the engine from starting. We list the main signs of its malfunction:
- problems starting the engine;
- unstable operation of the engine;
- loss of power, etc.
Camshaft position sensor (phase sensor)
This element is responsible for generating a signal, based on which the ECU is able to determine the angular position of the camshaft at any time period. On eight-valve AvtoVAZ engines, these devices are located at the cylinder head on the left, on sixteen-valve engines - in front and on the right of the engine.
If they break down, the system switches to operating in backup mode, which affects the stability of the engine. Repair of this sensor is impossible; any failure will require replacing the sensor with a new one.
The most common signs of DPRV failure include:
- unstable operation of the motor;
- problems starting the engine;
- the engine often stalls when the gas pedal is released;
- exceeding fuel consumption standards.
When diagnosing the device, the following errors are detected:
- P0340 – element is faulty;
- P0342 – low signal level;
- P0343 – the signal level supplied by the element is too high.
Absolute pressure and air temperature sensors
These sensors are combined into one housing and installed on the receivers of the intake module; the most modern AvtoVAZ engines are equipped with them.
DBP differs in the output signal voltage in the range of 0.15..4.6 V, this voltage depends on the pressure level inside the intake pipe. The information it sends helps the ECU calculate the amount of air received by the intake pipe during one cycle.
A breakdown of the device circuit leads to an error code being entered into the system memory, and then the alarm turns on. After this, the control system calculates the air received based on the crankshaft speed, as well as based on the throttle valve opening angle.
The sensitive component of the DTV is the inlet pipe thermistor. The output signal voltage of the device connected to the computer will be approximately 0.3..4.9 V, it depends on the temperature of the air passing through the specified element. When a DTV failure is detected, the control system performs actions similar to its actions in the event of a DBP failure, replacing the readings of the described device with fixed temperature values.
Technical reasons for increased fuel consumption
Despite the fact that VAZ has stepped far forward in improving its products, many unresolved problems remain. And some of them have a direct impact on the amount of gasoline consumed.
Injector diagram (fuel supply to combustion chambers)
All influencing factors can be divided into “hardware” and “software”. This classification was the result of the use of an injection engine, as well as the abundance of sensors in the car’s design.
Incorrectly selected fuel
It is recommended to fill AvtoVAZ engines with 95-grade gasoline only. Only then will the engine control system begin to correctly calculate the parameters for preparing the fuel mixture. Therefore, when using gasoline with an octane number below 95, fuel consumption will increase and foreign vibrations may appear in its operation.
Electronic system errors
Main article: “Main malfunctions of the engine management system.”
They can be considered one of the simplest situations, since they can be corrected by simply contacting a specialized service center. Problems of this kind arise for the simple reason that some sensors that are used to prepare the working mixture begin to function incorrectly.
Typically, the “Check Engine” icon will light up on your car’s dashboard (main article: Why does the check engine light come on).
Diagnosis of car electronic systems
In particular, we are talking about
- temperature sensors,
- throttle position sensors,
- as well as mass air flow.
In the latter case, its breakdown may be due to the fact that the air filter has not been changed for a long time. And, of course, incorrect readings can result from false information from the oxygen sensor, which is also simply called a lambda probe.
All this can lead to both the preparation of a “lean” and “rich” mixture. As a result, power may be lost or fuel consumption may increase. A malfunction can be detected by diagnosing each sensor separately.
Fuel system pressure
In Fig. car fuel frame and receiver
This is another common breakdown. The fact is that the pressure level can be too high or low, although the second option is much more common. This can be determined when the engine loses power and you have to drive at higher speeds to maintain the desired dynamics. This all significantly increases fuel consumption.
If you have problems with the fuel rail, the car may not start.
Injector problem
If you do not monitor the condition of the power unit, this will lead to shortcomings in its operation. Most often, this concerns contamination of the injectors, which is followed by poor supply of the working mixture, so that the engine begins to “triple”, and you try to compensate for this by increasing the speed.
Catalyst destruction
Similar results occur when the catalyst burns out or even breaks down. Without going into detail about the specifics of this situation, we can simply conclude that if the catalyst is contaminated, a “rich” mixture will form. After this, additional heating of the catalyst occurs, reducing its service life and reducing engine power. Fuel consumption will be maximum.
Read more about fuel consumption standards for the Lada Granta Liftback here!
Motor temperature
In addition to all of the above, it would be a good idea to constantly monitor the engine temperature. If it is above 103 degrees, then the mixture will not be of sufficient quality. The engine will begin to operate on a “lean” mixture, reducing its power and increasing gasoline consumption.
Read more about the operating temperature of the Lada Granta engine here.
The main drawback is that the instrument panel on the Lada Granta does not have a real-time indication of the engine temperature, read how this can be fixed here.
If the engine has not yet warmed up, this leads to an increase in consumption due to the “enrichment” of the mixture. The level of overspending reaches 20 percent. In most cases, the cause must be found in the thermostat.
Main article: “Do you need to warm up the Lada Grant engine before driving?”
Incorrect engine operation
Increased fuel consumption may be due to a “broken” engine. That is, the engine is worn out. The main symptoms of engine wear will be:
- There is no compression.
- Maslozhor.
- Other.
- bad dynamics
- erratic engine operation
Engine life can be significantly reduced due to:
- incorrectly selected oil (choice of oil for an 8-valve valve, choice of oil for a 16-valve valve)
- insufficient running-in of components on a new car (read the material: “How to properly break-in an engine on a Grant)
- engine underheating to operating temperature
Air filter dirty
Old filter
And, of course, we must not forget that if air flows poorly through this filter, the effect of “oxygen starvation” will begin. This will entail a significant excess of gasoline consumption.
How to reduce consumption using “economical firmware”?
Considering that the Lada Granta has an on-board computer and a full set of electronic systems, you can flash this system yourself. That is, you replace the standard settings that were made at the factory with those that you consider necessary.
Of course, this can be considered a dangerous procedure, but it is worth remembering that the manufacturer may not have counted on the conditions under which a particular machine is operated. So, with such simple manipulations, fuel consumption can be reduced by up to 20 percent. If the result does not suit you, you can always return the original firmware.
The only advice would be not to perform these procedures if you have a valid car warranty. In addition, only professionals should do this. If you do this yourself, then you need to first study this topic in detail.
Mass air flow sensor
This element is located near the air filter; its main task is to estimate the amount of air entering the engine. Based on the information received from the mass air flow sensor, the ECU determines the fuel volume that is necessary to maintain the stoichiometric ratio between fuel and air for the engine to operate within the specified parameters.
It is located next to the air filter, right between it and the air-fall sleeve. It should also be noted that this sensor is no longer installed on modern VAZ engines. The catalog number of the described element on Grants is 11180-1130010-00.
If the mass air flow sensor breaks down, the system stores the error code in its memory, after which the “Check Engine” lights up. Then the controller replaces the readings of the broken device with fixed temperature values. Signs of failure of this element are different, the most common include:
- increased fuel consumption;
- problems when starting the engine;
- disappearance of cravings;
- instability of speed.
Speed sensor
The DS is intended to measure the speed of a vehicle, with subsequent transmission of the received data to the ECU. The speed sensor is a small part; it is located in the upper part of the clutch housing, near the front wheel on the right. Its malfunction is usually directly related to a breakdown of the speedometer. However, the sensors installed on Grants are distinguished by fairly high quality and durability.
By the way, initially three types of speed sensors were installed on Grants: VAZ-2170 PEGAS, 2190 AVAR Russia and 21700-3843010-02.
If the DS malfunctions, the electric power steering most often stops functioning, and at the same time the instrument panel begins to display error P-0501. As a rule, the steering wheel fails precisely because the car detects a breakdown of the speed sensor; the DS itself may show zero speed.
If the sensor fails, the following symptoms of failure are noted:
- the speedometer needle stops at the zero mark; often the speedometer operates only periodically;
- when the engine is running idle, interruptions are observed;
- the speedometer readings diverge from the actual speed of movement;
- fuel consumption standards are increasing;
- craving worsens.
These parts have their own markings, their price ranges from 300 to 600 rubles.
Replacing the Lada Granta oxygen sensor - detailed instructions with photos and videos
The Lada Granta has two oxygen sensors - control and diagnostic.
The first sensor is responsible for the quality and quantity of the mixture in the combustion chamber, the second monitors the catalytic converter. The control oxygen sensor on Grant is located in the upper part of the manifold, diagnostic behind the catalyst.
- Description of the diagnostic and control oxygen sensor
- Control oxygen sensor Lada Granta operating principle
- Diagnostic oxygen sensor Grant operating principle
- Signs and malfunctions of oxygen sensors on Grant
- Signs of malfunctioning oxygen sensors
- How to check the oxygen sensor yourself
- Checking the health of the power supply circuit of the sensor and the ECU
- Self-replacement of the sensor
Oil pressure sensor
The oil pressure sensor should indicate the level of oil pressure in the engine. In the event of a drop in oil pressure, the sensor reports the incident to the BC, after which this data will be reflected on the BC or on the dashboard screen.
The principle of operation of this part is simple - the measuring membrane located inside it bends depending on the oil pressure, thereby closing or opening the contacts. A drop in the oil level in the engine causes the contacts to open, after which the warning lamp lights up.
The DDM includes three components: a housing, a measuring membrane and a transmitting element. The sensor is located behind the cylinder head, next to the timing belt guard.
If you suspect a malfunction of the DDM, you must check the circuit going from it to the warning lamp. The test involves disconnecting the sensor terminal, which must then be placed against the engine. If everything is normal with the circuit, the lamp will stop lighting; if this does not happen, it means there has been a break or the circuit has been damaged. Much can be said about the sensor based on its condition during visual inspection, for example, if the element is oily, it means it is faulty and requires immediate replacement.
Displaying temperature data on the instrument panel
AvtoVAZ manufacturers answered the question of experienced mechanics: why there are no heating degrees on the instrument panels of vehicles from the Russian manufacturer. They claim that this was done because it was unnecessary to display these numbers. Because the engine is configured in such a way that the temperature in it is always maintained at an optimal temperature. There were no cases of overheating.
Attention! AvtoVAZ manufacturers allow car owners not to warm up the car. They refer to European environmental standards. Allegedly, by not warming up the engine, the car owner does not destroy nature and saves fuel.
However, experienced mechanics and car owners managed to display information on the dashboard screen. Some even buy special devices to determine engine temperature.
Now we’ll find out how to check the engine temperature on a Lada Granta car.
On ordinary Russian-made cars, although there is no engine temperature scale, in top trim levels, or as they are also called “Lux”, this scale remains. It is called the coolant or antifreeze temperature scale.
On other machines, only places for installing additional devices for determining this data are provided. Now, you need to find out whether the ECU firmware will show the temperature if the car owner installs additional devices.
The procedure is:
- Turn off the ignition.
- Press the daily mileage reset button and turn the ignition key to the “Start” position.
- Now notice that all the indicators turn on and the arrows on the panel move. This means that the system has entered service mode.
- You need to release the reset key.
- Press it again.
- The numbers that appear on the scale indicate the firmware version.
Similar article Installing a VAZ engine on a LUAZ
Let's see if we can flash the equipment so that it shows the engine temperature.
For Grant Standard:
- 015 – not possible due to the old modification of the motherboard;
- 029 – 040 – not possible due to the old modification of the board;
- 053, 060, 076, 087 - you will have to work with a soldering tool. Experienced mechanics reflash the device to the new 2190-20 092 For 076.
For Grant Norm:
- 090, 091 – it is allowed to change the air heating sensor on the street, you cannot install DTOZH;
- 092-095 – it is allowed to change the air heating sensor, you can also change the TOZh sensor;
- 032, 038, 042 – it is possible to change the outside air heating sensor, you cannot install DTOZH.
For Grant Lux:
- 046 – allowed;
- 047 – allowed;
- 007 – it is allowed to replace the system with 046.
For Kalina Norma:
- 014 – possible;
- 009 – you can.
For Kalina Lux:
- 012 – possible;
- 014 – it’s possible.
Now you will need to flash the ECU with a new program. They do this as follows:
- Pull out the panel and connect the programmer device to it.
- Upload new firmware.
- Turn on the ignition and poke the buttons with your finger, watching how the icons switch on the screen.
- Switch until the screen displays the motor temperature.
This completes the display of motor heating on the toolbar screen.
Clutch and brake sensors
Thanks to the signals sent by these sensors, the controller receives information about whether the corresponding pedals (clutch and brake) are pressed or not pressed. Both elements are located in the area of the pedal assembly.
The clutch sensor is a stabilizer, which from a design point of view is a limit switch. Its failure will lead to surges in speed and unstable operation of the engine. The car owner will be informed about the breakdown by the illuminated Check Engine; in addition, problems will appear with sudden jumps in speed during gear shifts.
The above is evidence of the following malfunctions:
- the height of the pedal is incorrectly positioned relative to the floor;
- clutch sensor is faulty;
- there are disturbances in the circuit.
They also began installing brake pedal sensors on Grants. However, many owners of this car, after only using it for a short time, notice error P0504, indicating a breakdown of this sensor. In most of these cases, the above error occurs due to incorrect adjustment of the element. For this reason, car owners report symptoms such as:
- unstable engine operation;
- instability of speed.
Functionally, the brake pedal sensor is responsible for the position of the pedal itself and turning off the brake lights. In addition to its misalignment, problems with this part can be caused by a breakdown of the spring located inside the sensor.
The presence of a malfunction will be confirmed to the owner by the illuminated Check Engine and the already mentioned error P0504. This error is a consequence of a breakdown of either the sensor itself or its wiring. In addition, the cause of the error is often the misalignment already mentioned above. The new element will cost the car enthusiast approximately 180 rubles.
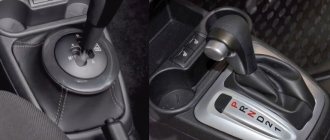
Gas pedal position sensor
Granta's fully electrified engine control implies the presence of an electronic gas pedal, thanks to which the owner of the car can indicate the desired acceleration or deceleration of its speed by pressing this pedal, or by weakening the pressure. Such systems are known as “E-gas”.
This system includes a lever made of plastic and two built-in sensors. By their design essence, they are potentiometers, and the information they transmit helps the ECU track the position of the pedal, with its possible changes, which the system controls using information about changes in the resistance level at the device terminals.
When the electrically conductive tracks and moving contacts wear out, the devices begin to provide incorrect information. Their breakdown will lead to instability in the functioning of the engine and a spontaneous change in the frequency at which the crankshaft rotates at idle.
A breakdown of one of the elements or a malfunction of its circuit will be indicated by the illuminated Check Engine. When the time given by the ECU to restore the signal expires, the system will transfer the engine operation to the reserve operating mode. Activating this mode will lead to a slow increase in speed, which will follow after a sharp press on the gas pedal, which will preserve the vehicle’s ability to move independently. Its operation in this mode can provoke a sharp increase in fuel consumption standards; in addition, other engine performance indicators often change.
If two sensors break down at once, the engine will be put into emergency mode, during which it will begin to function only at speeds slightly higher than its idle speed. This will allow you to maintain the minimum ability of the car to move (since its speed will be quite slow).
Throttle position sensor
Throttle assemblies are equipped with these elements; the DPTZ are structurally potentiometers. During throttle movements, the output voltage level changes. Monitoring the voltage at the output of the device helps the controller adjust the fuel supply, based directly on the driver’s wishes. In addition, this element does not require special adjustment, since idle speed is perceived by the controller as the zero mark.
This device plays an important role in the entire fuel system of the vehicle. As a rule, a car with a working TPS moves smoothly, always promptly responding to the gas pedal pressed by the driver. Failures of the TPS are most often associated with natural mechanical wear of the part, which leads to the sensor providing incorrect information. If the described element malfunctions, car owners note the following symptoms:
- the engine begins to start poorly;
- fuel consumption rates are significantly increasing;
- when the vehicle moves, jerks begin to be observed;
- the engine speed at idle increases;
- acceleration of the car does not occur immediately, but with a certain time delay;
- Popping noises from the intake manifold are clearly audible;
- the engine may stall even at idle;
- Periodically or all the time, the Check Engine indicator light is on.
We hope that this material helped you in operating the Lada Granta car.
The Lada Granta Liftback model is equipped with a number of digital and mechanical sensors for transmitting data to the electronic engine control unit (ECU).
During engine operation, information is summarized at the digital level, the ECU “makes” a decision on each indicator, adjusting the system for maximum performance.
The total number of sensors is over ten. They are installed around the entire perimeter of the car. The lion's share falls on the engine compartment, the front part of the car's interior.
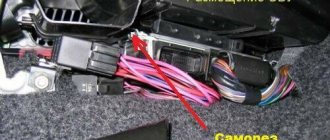
If you have experience, the car owner can replace most scanners himself. Contacting service is necessary in the event of a critical breakdown.
“Check Engine” is the first signal about a malfunction in the car, a breakdown of the scanner. In the article we will look at the purpose and methods of replacing sensors on the Lada Grante Liftback.
Removing oxygen concentration sensors
We remove the sensors for replacement and when dismantling the exhaust gas exhaust system collector. We carry out the work on a cold engine. The sensor located in the upper part of the collector is covered by the receiver and the engine intake pipe, but it can be removed from above from the engine compartment. For clarity, we show the operation with the receiver and inlet pipe removed.
Location of the oxygen concentration control sensor
: 1 – junction of the sensor wiring harness block with the engine control system wiring harness block; 2 – plastic holder for the sensor wiring harness; 3 – control oxygen concentration sensor. Squeeze the antennae of the plastic holder of the sensor wiring harness and remove the holder from the hole in the heat shield of the steering mechanism. With the ignition off, press the lock of the engine control system wiring harness block...
...and disconnect the block from the sensor wiring harness block.
Using a 22mm open-end wrench, unscrew the sensor from the threaded hole in the catenary collector. During operation, the sensor may “stick” to the catalytic collector and then, as a rule, it will not be possible to unscrew the sensor with an open-end wrench - the edges of the sensor will be torn off. In this case, you can unscrew the sensor using a 22mm spanner. To put the spanner ring on the sensor hexagon, you can disassemble the sensor wiring harness block by removing the wire tips from it, or cut the wiring harness with side cutters if the sensor is to be replaced.
We take out the control oxygen concentration sensor. We carry out operations to dismantle the diagnostic oxygen concentration sensor on an inspection ditch or overpass. Remove the middle mudguard of the engine compartment (see “Removing the mudguards of the engine compartment”). The connection between the diagnostic oxygen concentration sensor wiring harness block and the engine management system wiring harness block is located in the engine compartment, next to the bulkhead (above the central part of the steering gear). Having released the clamp of the engine control system wiring harness...
...disconnect the block from the wiring harness block of the diagnostic oxygen concentration sensor.
Using a 22mm open-end wrench, unscrew the sensor from the threaded hole in the catenary collector. Considering the location of the sensor in a hard-to-reach place, it is better to unscrew the sensor using a Z‑shaped socket wrench “22” (see above).
Having removed the rubber holder 3 of the sensor wiring harness from hole 2 in the heat shield of the steering mechanism, we thread block 1 of the wiring harness through the hole.
We remove the diagnostic oxygen concentration sensor. We install the control and diagnostic oxygen concentration sensors in the reverse order. So that during operation the sensor does not “stick” to the catalytic collector...
...before installing the sensor, we apply a thin layer of a graphite-based non-stick high-temperature additive to its threaded part.
Do not allow additive or dirt to get onto the sensor wiring harness or into the sensor through the holes in the sensor tip. We tighten the sensors to the prescribed torque (see “Appendices”).
Having driven more than 13,000 km with the error still on, I finally decided to replace the DK2 (oxygen sensor), I went to the iron market to a very good friend, knowing that he had such a sensor, I could buy it for only 700 rubles. in the store these cost from 1200 to 1600. The market is located outside the city, on the bypass highway, after driving a few km along the highway I had to stop, because... everything was melting and the water in the tank ran out, I added water and then a surprise, someone chewed off a piece of the lid from the tank))))
Well, okay, I bought a new lid at the market for 15 rubles.
I came to my friend’s point, and he had problems with his work computer, because... I use computers at YOU for my work, I quickly restored everything to him, for which he simply gave me the oxygen sensor.
The sensor is original, Delphi brand, the quality of the photos on my phone sucks, so what are there?
Because I was going to replace the sensor myself, I went looking for a special wrench for unscrewing the lower control valve
But after looking all around, I still couldn’t find him. Everywhere they came across only in the form of a split head, costing from 400 to 700 rubles
And then I decided, why the hell do I need a key when at a hundred near my house they will change the sensor for 300 rubles. And so I arrived there, it had just opened, the lift had not yet been installed, so they did everything on the floor, so to speak.
They didn't find the special key either. As a result, the pipe from the throttle to the air filter is unscrewed, and the sensor is pulled out of place from above using a regular 22 wrench, then we unscrew it from below. Many manuals say that you need to unscrew the thermal shield through which the cable from the sensor passes, but in reality this is not necessary, you need to pull the cable together with the sealing rubber band out of the screen, then put this rubber band on the new sensor and push it back into the screen. That's all in principle))) The price is 300 rubles for replacing the sensor, 15 rubles for the tank cap. No more errors
Well, at the same time, the car is having a mini holiday, it is now healthy, I stopped by and poured a bunch of gasoline, let it rejoice)))) Because Today we have to run 300 km to the village and back
What is each Lada Granta Liftback sensor responsible for?
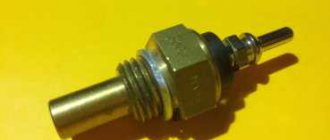
Coolant temperature sensor (DTOZH)
Used to monitor the temperature of the liquid (antifreeze) in the cooling system of the power unit. Based on the data received from the scanner, the ECU increases (lowers) the crankshaft rotation speed in order to maintain the optimal degree.
The qualitative and quantitative composition of the fuel mixture depends on the correctness of the DTOZ readings. DTOZH has a long service life and fails extremely rarely, only in the event of mechanical damage from the outside.
The standard installation location is the thermostat cover.
Knock sensor (DS)
The DD is installed to record high-frequency vibrations inside the cylinder and engine block. The cause of detonation is poor quality fuel and incomplete combustion in the chamber.
In order to set the maximum ignition timing, the DD scans the sequence (moment) of ignition of the combustible mixture. In the Lada Grant, the DD liftback is installed between the second and third cylinders.
Cannot be repaired or prevented.
Crankshaft position sensor (CPS)
The ECU calculates the number of pulses to control the fuel injectors and ignition coil.
If there is a malfunction or unstable operation, the power unit will not start. Standard installation location: surface of the oil pump cover.
Camshaft position sensor (DF phase sensor)
The DF is installed to transmit a signal to the ECU about the position of the cylinder at the top (bottom) dead center. This allows you to quickly respond and correct the enrichment (leanness) of the fuel mixture.
If the DF is faulty, the ECU automatically goes into emergency mode, which negatively affects engine performance. There are difficulties with starting, detonation at idle, a drop in acceleration dynamics, and increased fuel consumption.
The DF cannot be repaired, only replaced with a new one.
DBP and DTV
The absolute pressure sensor and temperature sensor Grant Liftback are installed in one housing - a block. The standard location is the reverse line of the modular inlet.
DBP and DTV are not subject to partial repair and prevention; only replacement with a new one is possible.
Oxygen sensor (OS). Lambda probe
The scanner evaluates the amount of unburned fuel and the concentration of exhaust gases. The data is transmitted in the form of a signal from the ECU, where the percentage ratio of fuel and oxygen is adjusted.
Dislocation: the outer surface of the Lada Granta Liftback catalyst, which is installed on the rear side of the engine, in its lower part.
Mass air flow sensor (MAF)
The importance of the functioning of this meter is underestimated by many, but in vain.
Correct and accurate calculation of the supplied amount of oxygen will ensure maximum performance of the power unit.
The air flow sensor cannot be repaired, only replaced with a new one.
Speed sensor Lada Granta Liftback (DS)
Its main purpose in the Lada Granta Liftback is to measure speed online and transmit data to the dashboard.
Incorrect operation or failure makes it difficult to determine the speed at which the driver is moving at a particular moment in time. This is unsafe, since failure to comply with the speed limit increases the emergency situation on the road.
The standard location of the Lada Granta Liftback speed sensor is: the upper contour of the crankcase, above the drive housing on the right side. Despite the fact that the design of the scanner is quite simple, it cannot be repaired.
Oil pressure sensor (OPS)
The DDM is located on the rear side of the cylinder head, near the timing belt.
The purpose of the meter is to monitor the level of engine oil in the cylinders and crankcase of the power unit. And also, timely notification of the ECU about a low (critical) indicator. In turn, the ECU informs the driver through an indication on the dashboard.
A malfunction of the DDM leads to catastrophic consequences, including a major overhaul of the engine. Due to the lack of indication on the dashboard, the driver is not able to quickly respond to possible breakdowns.
Valve length adjustment sensor in the intake system (VNDK)
Automatic adjustment of valve length on the intake stroke will allow you to achieve maximum engine power. Malfunction or unstable operation of the DNDC leads to a decrease in power, increased fuel consumption, and detonation during idling.
Despite the simplicity of the design, DNDK cannot be prevented; only replacement with a new one will help.
Clutch and brake sensors (CLS)
Based on the strength of the DST pulse signals, the controller distinguishes the position of the pedal at each specific moment. Regulates the load on the power unit.
When the pedal is pressed, the load is reduced and vice versa. DST cannot be repaired. The standard location is the pedal assembly of the Lada Granta Liftback car.
How to independently replace temperature sensors on a Lada Granta car
- Set of automotive tools, key set to “19”;
- Rags;
- Additional lighting as needed;
- New measuring device.
- We install the technical equipment within the perimeter of the repair area;
- We turn off the engine, open the hood;
- We provide priority safety measures: block the rear row of wheels with wheel chocks, squeeze the parking brake;
- Remove two terminals from the DTOZH
- Use the key to “19” to unscrew the DTOZH;
- We insert a new sensor in place of the faulty one and put on two terminals.
New Lada: Release bearing Lada Kalina 1st generation
We start the engine and check the operation of the equipment. We replenish the missing amount of antifreeze (optional).
- Automotive tool set;
- Rags;
- Additional lighting as needed;
- New DTOS.
- We install the machine on a level platform, provide priority safety measures, secure the rear row of wheels with wheel chocks;
- We hang the front part of the car with jacks. We use a hydraulic lift if available;
- Unscrew the six screws along the lower perimeter of the front bumper;
- We remove the wheels, unscrew three screws on each side in the wheel arches;
- We also unscrew the five fasteners in the center of the front bumper;
- Remove the bumper;
- Carefully disconnect the contacts, limit switches from the dimensions, lighting, turn signals;
- Lower the front bumper to the floor;
- To the left of the center of the cooling system radiator, a DTOS is installed on a torsion beam;
- Carefully disconnect the power terminals;
- We snap off the sensor at the base;
- We are removing the fastening. Replace with a new one as needed;
- We install a new measuring device;
- We put on terminals and limit switches;
- We assemble the front bumper, screw the fasteners, put on the lighting system terminals;
- We start the engine, although you can limit yourself to activating the ignition to test the DTOS functionality. DIY replacement completed.
The Lada Granta is equipped with an electronic engine control system (ECM) based on the M74CAN controller. This ECM includes many sensors from which the controller receives information. Based on this information, further control of the actuators occurs.
Catalog numbers and cost of sensors on Lada Granta Liftback
| № | Name | vendor code | Price, rub.) |
| 1. | DTOZH | 21911-3858452-05 | from 250 |
| 2. | DD | 21911-385506981 | from 350 |
| 3. | DPKV | 21911-169834-00 | from 600 |
| 4. | DF | 21911-1164010-00 | from 400 |
| 5. | Lambda probe | 28165997 | from 1000 |
| 6. | Mass air flow sensor | 280216349 | —/— |
| 7. | DS | 21911-3846491 | from 300 |
| 8. | DDM | 21911-1165402-00 | from 550 |
| 9. | DNDC | 21911-1196715-00 | from 650 |
| 10. | DST | 21911-1168234-11 | from 350 |
*prices are current as of October 10, 2018.
Reviews
| № | Positive |
| 1. | Vladimir: for a year and a half of Grant’s operation, there were no problems with the performance of the sensors. Everything is in good condition. |
| 2. | Kirill: I corrected the contact on the mass air flow sensor once. The reason is not the meter, I just caught the block with the wires with my hand while replacing the air filter. No complaints, the quality is good. |
| 3. | Vasily: in two years of using Granta, I replaced the antifreeze temperature meter once. In all other respects, no comments, satisfied with the quality. |
| 4. | Gregory: after buying the car from the dealership, I checked all the terminals and wires myself. Some tightened up, now the machine works like a watch. |
| 5. | Vyacheslav: I have no complaints, the car is three years old, I haven’t made any investments. I believe that systematic inspection helps prevent large-scale breakdowns. |
| 6. | Vladimir: The electronic control unit is working properly, there are no comments. Digital sensors transmit information in a timely and complete manner. |
| Negative | |
| 1. | Alexander: I can’t speak positively about the factory devices, since I replaced three of them in two years. They fly like air. |
| 2. | Ignat: no matter what I do, the fuel sensor incorrectly displays information about the amount of gasoline. I'll buy another one. |
| 3. | Ivan: the manufacturing quality of digital equipment is poor, it breaks down every six months. |
Conclusion Despite the negative reviews about the digital sensors on the Lada Granta Liftback, their manufacturing quality is decent. Subject to systematic technical inspection and careful handling of the machine, the service life exceeds the warranty period.
Premature wear of digital equipment can be caused by a short circuit in the circuit, damage to the cable insulation layer and other factors. However, this does not indicate defectiveness and poor manufacturing quality of the scanners.
To ensure the normal operation of all vehicle components, modern cars use many different regulators. In this article we will talk in more detail about domestic Lada cars. Where is the speed sensor, coolant and other controllers on the Lada Granta and what functions do they perform - read below.
Characteristics of sensors
Speeds
The Lada Granta speed sensor is located on the gearbox housing. This regulator is directly related to the transmission of data about how fast the vehicle is moving, how the car is idling, and what kind of gas mileage it is driving at.
To find this controller on a Priora or Grant, you need to open the hood and remove the air supply hose that goes from the air filter element to the throttle. Having done this, at the bottom of the gearbox housing you can see the controller with a wire connected to it. To replace the device, you simply need to disconnect the wiring and remove it from the installation location, and then replace it with a new one.
Removing DTOZH from a car
A coolant temperature sensor is necessary to measure the temperature of antifreeze in the cooling system. In accordance with the data from the temperature regulator on the Grant, the control unit adjusts the crankshaft speed, adjusts the composition of the combustible mixture, as well as the ignition timing.
As practice shows, such a device rarely fails, but in some cases it can give incorrect readings. Located in the engine compartment, in particular, in the thermostat cover, the controller has its own “diseases”. The wiring at the base of the connector may fray, resulting in the need to replace the DTOZH.
The mass air flow controller is located behind the air filter element of the power unit, it is also often called a flow meter. The main purpose of the device is to monitor the volume of air flow that enters the vehicle engine. In accordance with the data received, the on-board computer determines the required volume of gasoline, which is necessary to maintain a normal air-fuel ratio.
The idle speed sensor is one of the regulators designed to monitor and control the operation of the power unit. If the device breaks down, the motor immediately begins to work incorrectly - it will trip and the power will decrease. In turn, the needle on the tachometer will jump sharply from one value to another. The element itself is located on the throttle, in particular on its lower part. To get to it, you need to free the throttle valve from the pipes, there are four in total.
To replace and install a new IAC, you will need to disconnect the wiring from the regulator itself, as well as the throttle position controller. More detailed instructions for replacing the controller yourself are given in the video below (the author of the video is the channel In Sandro's Garage).
Sveta
As for the light sensor, it is installed in the same housing with the rain regulator. Its purpose is to activate and deactivate lighting based on the current state. For example, if it gets dark outside or you enter a garage or poorly lit tunnel, the device should automatically turn on the headlights along with the side lights. The controller itself is not repairable, so if it fails, the only option is to replace it.
Clutches and brakes
The clutch sensor allows you to determine the position of the pedal. When the pedal is not depressed, the regulator turns off the load adjustment on the power unit. The device is located in the pedal assembly, in the same place where the brake sensor is located.
The operating principle of the latter is quite simple:
- when the pedal is released, the rod is located inside and clamps the floating contact to the top;
- when the pedal is depressed, the rod clamps the contact to the bottom of the group.
As practice shows, one of the main problems of this controller is the poor quality of the contact itself. It can simply catch on the spring, and ultimately the control unit will receive an impulse to apply the brake.
Sorry, there are no surveys available at this time.
Old dashboard
On vehicle models before 2014, it will not be possible to view the temperature on the dashboard in any case. And, if you pay attention only to the overheating light, then when it lights up, it may be too late to save the engine.
In this case, installing a special engine temperature indicator will help. However, you first need to understand what the on-board computer values on the panel mean in order to understand the problem.
On-board computer values on the panel
The manufacturer says that you can drive with an engine that is not warmed up. Although this is fraught with major overhauls not only for the engine, but also for the automatic transmission. If you warm up the engine, then in hot regions you may not understand when the engine warms up to 80 degrees, and the temperature jumps above the set point. And when the engine starts to boil, it will be too late to wave your hands.
So how do you know that the heating levels in the engine have reached their climax? In this case, experienced mechanics suggest installing a special engine temperature indicator.
Similar article Why the check light is on on a Priora
Installing a separate engine temperature indicator
A similar engine temperature indicator is installed in any free hole in the car interior. The installation procedure itself does not take much time.
Attention! First you need to turn off all power in the car. It is best to remove the terminals from the battery.
Now you can begin the procedure:
- Remove the panel trim.
- Since the battery mass has already been disconnected, we proceed to the procedure for opening the glove compartment lid.
- Find the diagnostic connector and pull it out.
- Then a temperature indicator is placed in place of the plug and the wires are connected.
- The other end of the wires is connected to the diagnostic connector and clamped.
Now you can turn on the power to the car using the battery and start the car. The engine temperature indicator should turn on and indicate a combination of numbers indicating degrees Celsius.
View the temperature using a smartphone or tablet
On modern Lada Granta or Kalina, you can view the temperature using a smartphone or tablet. Only to perform this procedure, the car owner will need to buy a special cable.
This cable works via Bluetooth. You will also need to download a special program to your phone with the Android operating system. Using it, it will be possible to view the engine heating degrees.
The connection process is as follows:
- Turn off power.
- Pull out the diagnostic connector.
- Insert the diagnostic cable into it and secure it.
- The program you need to download is called “Torque”.
- Now you should start the engine and turn on the utility on your phone.
- A message will appear on the monitor informing you of the current engine temperature.
Now you know how to view how many degrees on your engine on old Lada Granta panels produced before 2014. Let's see what can be done with the new Lada Granta or Kalina.